#Introduction
Actions combine a trigger button with the code to run when it is clicked. They can also open a modal to collect input or request confirmation. For example, this action confirms before deleting a client:
use Filament\Actions\Action;

Action::make('delete')
    ->requiresConfirmation()
    ->action(fn () => $this->client->delete())
To collect input before running an action, define its modal's schema. The submitted data is available in the action() function:
use Filament\Actions\Action;
use Filament\Forms\Components\RichEditor;
use Filament\Forms\Components\TextInput;
use Illuminate\Support\Facades\Mail;

Action::make('sendEmail')
    ->schema([
        TextInput::make('subject')->required(),
        RichEditor::make('body')->required(),
    ])
    ->action(function (array $data) {
        Mail::to($this->client)
            ->send(new GenericEmail(
                subject: $data['subject'],
                body: $data['body'],
            ));
    })
As well as $data, the action() function can inject various utilities as parameters.
$data, the action() function can inject various utilities as parameters.-
Action
$actionFilament\Actions\ Action The current action instance.
-
Arguments
$argumentsarray<string, mixed> The array of arguments passed to the action when it was triggered.
-
Data
$dataarray<string, mixed> The array of data submitted from form fields in the action's modal. It will be empty before the modal form is submitted.
-
Livewire
$livewireLivewire\Component The Livewire component instance.
-
Eloquent model FQN
$model?string<Illuminate\Database\ Eloquent\ Model> The Eloquent model FQN for the current action, if one is attached.
-
Mounted actions
$mountedActionsarray<Filament\Actions\ Action> The array of actions that are currently mounted in the Livewire component. This is useful for accessing data from parent actions.
-
Parent action
$parentAction?Filament\Actions\ Action The mounted parent action, or the containing parent action if one exists.
-
Eloquent record
$record?Illuminate\Database\ Eloquent\ Model The Eloquent record for the current action, if one is attached.
-
Schema
$schemaFilament\Schemas\ Schema [Actions in schemas only] The schema object that this action belongs to.
-
Schema component
$schemaComponentFilament\Schemas\ Components\ Component [Actions in schemas only] The schema component that this action belongs to.
-
Schema component state
$schemaComponentStatemixed [Actions in schemas only] The current value of the schema component.
-
Schema get function
$schemaGetFilament\Schemas\ Components\ Utilities\ Get [Actions in schemas only] A function for retrieving values from the schema data. Validation is not run on form fields.
-
Schema operation
$schemaOperationstring [Actions in schemas only] The current operation being performed by the schema. Usually
create,edit, orview.-
Schema set function
$schemaSetFilament\Schemas\ Components\ Utilities\ Set [Actions in schemas only] A function for setting values in the schema data.
-
Schema state
$schemaStatemixed [Actions in schemas only] The current value of the schema that this action belongs to, like the current repeater item.
-
Selected Eloquent records
$selectedRecordsIlluminate\Support\ Collection|Illuminate\ Support\ LazyCollection [Actions in tables only] The selected records, filtered by individual record authorization when it is enabled. Requires
accessSelectedRecords().-
Selected Eloquent records query
$selectedRecordsQueryIlluminate\Database\ Eloquent\ Builder [Actions in Eloquent-query-backed tables only] The query for the selected records. Requires
accessSelectedRecords(). Individual record authorization has not been applied to this query.-
Table
$tableFilament\Tables\ Table [Actions in tables only] The table object that this action belongs to.
Actions usually run without navigating away from the page. To make a trigger link to another page instead, use url():
use Filament\Actions\Action;

Action::make('edit')
    ->url(fn (): string => route('posts.edit', ['post' => $this->post]))
As well as allowing a static value, the url() method also accepts a function to dynamically calculate it. You can inject various utilities into the function as parameters.
url() method also accepts a function to dynamically calculate it. You can inject various utilities into the function as parameters.-
Action
$actionFilament\Actions\ Action The current action instance.
-
Arguments
$argumentsarray<string, mixed> The array of arguments passed to the action when it was triggered.
-
Data
$dataarray<string, mixed> The array of data submitted from form fields in the action's modal. It will be empty before the modal form is submitted.
-
Livewire
$livewireLivewire\Component The Livewire component instance.
-
Eloquent model FQN
$model?string<Illuminate\Database\ Eloquent\ Model> The Eloquent model FQN for the current action, if one is attached.
-
Mounted actions
$mountedActionsarray<Filament\Actions\ Action> The array of actions that are currently mounted in the Livewire component. This is useful for accessing data from parent actions.
-
Parent action
$parentAction?Filament\Actions\ Action The mounted parent action, or the containing parent action if one exists.
-
Eloquent record
$record?Illuminate\Database\ Eloquent\ Model The Eloquent record for the current action, if one is attached.
-
Schema
$schemaFilament\Schemas\ Schema [Actions in schemas only] The schema object that this action belongs to.
-
Schema component
$schemaComponentFilament\Schemas\ Components\ Component [Actions in schemas only] The schema component that this action belongs to.
-
Schema component state
$schemaComponentStatemixed [Actions in schemas only] The current value of the schema component.
-
Schema get function
$schemaGetFilament\Schemas\ Components\ Utilities\ Get [Actions in schemas only] A function for retrieving values from the schema data. Validation is not run on form fields.
-
Schema operation
$schemaOperationstring [Actions in schemas only] The current operation being performed by the schema. Usually
create,edit, orview.-
Schema set function
$schemaSetFilament\Schemas\ Components\ Utilities\ Set [Actions in schemas only] A function for setting values in the schema data.
-
Schema state
$schemaStatemixed [Actions in schemas only] The current value of the schema that this action belongs to, like the current repeater item.
-
Selected Eloquent records
$selectedRecordsIlluminate\Support\ Collection|Illuminate\ Support\ LazyCollection [Actions in tables only] The selected records, filtered by individual record authorization when it is enabled. Requires
accessSelectedRecords().-
Selected Eloquent records query
$selectedRecordsQueryIlluminate\Database\ Eloquent\ Builder [Actions in Eloquent-query-backed tables only] The query for the selected records. Requires
accessSelectedRecords(). Individual record authorization has not been applied to this query.-
Table
$tableFilament\Tables\ Table [Actions in tables only] The table object that this action belongs to.
The entire look of the action's trigger button and the modal is customizable using fluent PHP methods. We provide a sensible and consistent styling for the UI, but all of this is customizable with CSS.
#Available actions
Filament includes several actions that you can add to your app. Their aim is to simplify the most common Eloquent-related actions:
You can also create your own actions to do anything, these are just common ones that we include out of the box.
#Choosing a trigger style
Out of the box, action triggers have 4 styles - "button", "link", "icon button", and "badge".
"Button" triggers have a background color, label, and optionally an icon. Usually, this is the default button style, but you can use it manually with the button() method:
use Filament\Actions\Action;

Action::make('edit')
    ->button()

"Link" triggers have no background color. They must have a label and optionally an icon. They look like a link that you might find embedded within text. You can switch to that style with the link() method:
use Filament\Actions\Action;

Action::make('edit')
    ->link()

"Icon button" triggers are circular buttons with an icon and no label. You can switch to that style with the iconButton() method:
use Filament\Actions\Action;

Action::make('edit')
    ->icon('heroicon-m-pencil-square')
    ->iconButton()

"Badge" triggers have a background color, label, and optionally an icon. You can use a badge as trigger using the badge() method:
use Filament\Actions\Action;

Action::make('edit')
    ->badge()

#Using an icon button on mobile devices only
You may want to use a button style with a label on desktop, but remove the label on mobile. This will transform it into an icon button. You can do this with the labeledFrom() method, passing in the responsive breakpoint at which you want the label to be added to the button:
use Filament\Actions\Action;

Action::make('edit')
    ->icon('heroicon-m-pencil-square')
    ->button()
    ->labeledFrom('md')
#Setting a label
By default, the label of the trigger button is generated from its name. You may customize this using the label() method:
use Filament\Actions\Action;

Action::make('edit')
    ->label('Edit post')
    ->url(fn (): string => route('posts.edit', ['post' => $this->post]))
As well as allowing a static value, the label() method also accepts a function to dynamically calculate it. You can inject various utilities into the function as parameters.
label() method also accepts a function to dynamically calculate it. You can inject various utilities into the function as parameters.-
Action
$actionFilament\Actions\ Action The current action instance.
-
Arguments
$argumentsarray<string, mixed> The array of arguments passed to the action when it was triggered.
-
Data
$dataarray<string, mixed> The array of data submitted from form fields in the action's modal. It will be empty before the modal form is submitted.
-
Livewire
$livewireLivewire\Component The Livewire component instance.
-
Eloquent model FQN
$model?string<Illuminate\Database\ Eloquent\ Model> The Eloquent model FQN for the current action, if one is attached.
-
Mounted actions
$mountedActionsarray<Filament\Actions\ Action> The array of actions that are currently mounted in the Livewire component. This is useful for accessing data from parent actions.
-
Parent action
$parentAction?Filament\Actions\ Action The mounted parent action, or the containing parent action if one exists.
-
Eloquent record
$record?Illuminate\Database\ Eloquent\ Model The Eloquent record for the current action, if one is attached.
-
Schema
$schemaFilament\Schemas\ Schema [Actions in schemas only] The schema object that this action belongs to.
-
Schema component
$schemaComponentFilament\Schemas\ Components\ Component [Actions in schemas only] The schema component that this action belongs to.
-
Schema component state
$schemaComponentStatemixed [Actions in schemas only] The current value of the schema component.
-
Schema get function
$schemaGetFilament\Schemas\ Components\ Utilities\ Get [Actions in schemas only] A function for retrieving values from the schema data. Validation is not run on form fields.
-
Schema operation
$schemaOperationstring [Actions in schemas only] The current operation being performed by the schema. Usually
create,edit, orview.-
Schema set function
$schemaSetFilament\Schemas\ Components\ Utilities\ Set [Actions in schemas only] A function for setting values in the schema data.
-
Schema state
$schemaStatemixed [Actions in schemas only] The current value of the schema that this action belongs to, like the current repeater item.
-
Selected Eloquent records
$selectedRecordsIlluminate\Support\ Collection|Illuminate\ Support\ LazyCollection [Actions in tables only] The selected records, filtered by individual record authorization when it is enabled. Requires
accessSelectedRecords().-
Selected Eloquent records query
$selectedRecordsQueryIlluminate\Database\ Eloquent\ Builder [Actions in Eloquent-query-backed tables only] The query for the selected records. Requires
accessSelectedRecords(). Individual record authorization has not been applied to this query.-
Table
$tableFilament\Tables\ Table [Actions in tables only] The table object that this action belongs to.
#Setting a color
Buttons may have a color to indicate their significance:
use Filament\Actions\Action;

Action::make('delete')
    ->color('danger')
As well as allowing a static value, the color() method also accepts a function to dynamically calculate it. You can inject various utilities into the function as parameters.
color() method also accepts a function to dynamically calculate it. You can inject various utilities into the function as parameters.-
Action
$actionFilament\Actions\ Action The current action instance.
-
Arguments
$argumentsarray<string, mixed> The array of arguments passed to the action when it was triggered.
-
Data
$dataarray<string, mixed> The array of data submitted from form fields in the action's modal. It will be empty before the modal form is submitted.
-
Livewire
$livewireLivewire\Component The Livewire component instance.
-
Eloquent model FQN
$model?string<Illuminate\Database\ Eloquent\ Model> The Eloquent model FQN for the current action, if one is attached.
-
Mounted actions
$mountedActionsarray<Filament\Actions\ Action> The array of actions that are currently mounted in the Livewire component. This is useful for accessing data from parent actions.
-
Parent action
$parentAction?Filament\Actions\ Action The mounted parent action, or the containing parent action if one exists.
-
Eloquent record
$record?Illuminate\Database\ Eloquent\ Model The Eloquent record for the current action, if one is attached.
-
Schema
$schemaFilament\Schemas\ Schema [Actions in schemas only] The schema object that this action belongs to.
-
Schema component
$schemaComponentFilament\Schemas\ Components\ Component [Actions in schemas only] The schema component that this action belongs to.
-
Schema component state
$schemaComponentStatemixed [Actions in schemas only] The current value of the schema component.
-
Schema get function
$schemaGetFilament\Schemas\ Components\ Utilities\ Get [Actions in schemas only] A function for retrieving values from the schema data. Validation is not run on form fields.
-
Schema operation
$schemaOperationstring [Actions in schemas only] The current operation being performed by the schema. Usually
create,edit, orview.-
Schema set function
$schemaSetFilament\Schemas\ Components\ Utilities\ Set [Actions in schemas only] A function for setting values in the schema data.
-
Schema state
$schemaStatemixed [Actions in schemas only] The current value of the schema that this action belongs to, like the current repeater item.
-
Selected Eloquent records
$selectedRecordsIlluminate\Support\ Collection|Illuminate\ Support\ LazyCollection [Actions in tables only] The selected records, filtered by individual record authorization when it is enabled. Requires
accessSelectedRecords().-
Selected Eloquent records query
$selectedRecordsQueryIlluminate\Database\ Eloquent\ Builder [Actions in Eloquent-query-backed tables only] The query for the selected records. Requires
accessSelectedRecords(). Individual record authorization has not been applied to this query.-
Table
$tableFilament\Tables\ Table [Actions in tables only] The table object that this action belongs to.

#Setting a size
Buttons come in 3 sizes - Size::Small, Size::Medium or Size::Large. You can change the size of the action's trigger using the size() method:
use Filament\Actions\Action;
use Filament\Support\Enums\Size;

Action::make('create')
    ->size(Size::Large)
As well as allowing a static value, the size() method also accepts a function to dynamically calculate it. You can inject various utilities into the function as parameters.
size() method also accepts a function to dynamically calculate it. You can inject various utilities into the function as parameters.-
Action
$actionFilament\Actions\ Action The current action instance.
-
Arguments
$argumentsarray<string, mixed> The array of arguments passed to the action when it was triggered.
-
Data
$dataarray<string, mixed> The array of data submitted from form fields in the action's modal. It will be empty before the modal form is submitted.
-
Livewire
$livewireLivewire\Component The Livewire component instance.
-
Eloquent model FQN
$model?string<Illuminate\Database\ Eloquent\ Model> The Eloquent model FQN for the current action, if one is attached.
-
Mounted actions
$mountedActionsarray<Filament\Actions\ Action> The array of actions that are currently mounted in the Livewire component. This is useful for accessing data from parent actions.
-
Parent action
$parentAction?Filament\Actions\ Action The mounted parent action, or the containing parent action if one exists.
-
Eloquent record
$record?Illuminate\Database\ Eloquent\ Model The Eloquent record for the current action, if one is attached.
-
Schema
$schemaFilament\Schemas\ Schema [Actions in schemas only] The schema object that this action belongs to.
-
Schema component
$schemaComponentFilament\Schemas\ Components\ Component [Actions in schemas only] The schema component that this action belongs to.
-
Schema component state
$schemaComponentStatemixed [Actions in schemas only] The current value of the schema component.
-
Schema get function
$schemaGetFilament\Schemas\ Components\ Utilities\ Get [Actions in schemas only] A function for retrieving values from the schema data. Validation is not run on form fields.
-
Schema operation
$schemaOperationstring [Actions in schemas only] The current operation being performed by the schema. Usually
create,edit, orview.-
Schema set function
$schemaSetFilament\Schemas\ Components\ Utilities\ Set [Actions in schemas only] A function for setting values in the schema data.
-
Schema state
$schemaStatemixed [Actions in schemas only] The current value of the schema that this action belongs to, like the current repeater item.
-
Selected Eloquent records
$selectedRecordsIlluminate\Support\ Collection|Illuminate\ Support\ LazyCollection [Actions in tables only] The selected records, filtered by individual record authorization when it is enabled. Requires
accessSelectedRecords().-
Selected Eloquent records query
$selectedRecordsQueryIlluminate\Database\ Eloquent\ Builder [Actions in Eloquent-query-backed tables only] The query for the selected records. Requires
accessSelectedRecords(). Individual record authorization has not been applied to this query.-
Table
$tableFilament\Tables\ Table [Actions in tables only] The table object that this action belongs to.

#Setting an icon
Buttons may have an icon to add more detail to the UI. You can set the icon using the icon() method:
use Filament\Actions\Action;

Action::make('edit')
    ->url(fn (): string => route('posts.edit', ['post' => $this->post]))
    ->icon('heroicon-m-pencil-square')
As well as allowing a static value, the icon() method also accepts a function to dynamically calculate it. You can inject various utilities into the function as parameters.
icon() method also accepts a function to dynamically calculate it. You can inject various utilities into the function as parameters.-
Action
$actionFilament\Actions\ Action The current action instance.
-
Arguments
$argumentsarray<string, mixed> The array of arguments passed to the action when it was triggered.
-
Data
$dataarray<string, mixed> The array of data submitted from form fields in the action's modal. It will be empty before the modal form is submitted.
-
Livewire
$livewireLivewire\Component The Livewire component instance.
-
Eloquent model FQN
$model?string<Illuminate\Database\ Eloquent\ Model> The Eloquent model FQN for the current action, if one is attached.
-
Mounted actions
$mountedActionsarray<Filament\Actions\ Action> The array of actions that are currently mounted in the Livewire component. This is useful for accessing data from parent actions.
-
Parent action
$parentAction?Filament\Actions\ Action The mounted parent action, or the containing parent action if one exists.
-
Eloquent record
$record?Illuminate\Database\ Eloquent\ Model The Eloquent record for the current action, if one is attached.
-
Schema
$schemaFilament\Schemas\ Schema [Actions in schemas only] The schema object that this action belongs to.
-
Schema component
$schemaComponentFilament\Schemas\ Components\ Component [Actions in schemas only] The schema component that this action belongs to.
-
Schema component state
$schemaComponentStatemixed [Actions in schemas only] The current value of the schema component.
-
Schema get function
$schemaGetFilament\Schemas\ Components\ Utilities\ Get [Actions in schemas only] A function for retrieving values from the schema data. Validation is not run on form fields.
-
Schema operation
$schemaOperationstring [Actions in schemas only] The current operation being performed by the schema. Usually
create,edit, orview.-
Schema set function
$schemaSetFilament\Schemas\ Components\ Utilities\ Set [Actions in schemas only] A function for setting values in the schema data.
-
Schema state
$schemaStatemixed [Actions in schemas only] The current value of the schema that this action belongs to, like the current repeater item.
-
Selected Eloquent records
$selectedRecordsIlluminate\Support\ Collection|Illuminate\ Support\ LazyCollection [Actions in tables only] The selected records, filtered by individual record authorization when it is enabled. Requires
accessSelectedRecords().-
Selected Eloquent records query
$selectedRecordsQueryIlluminate\Database\ Eloquent\ Builder [Actions in Eloquent-query-backed tables only] The query for the selected records. Requires
accessSelectedRecords(). Individual record authorization has not been applied to this query.-
Table
$tableFilament\Tables\ Table [Actions in tables only] The table object that this action belongs to.

You can also change the icon's position to be after the label instead of before it, using the iconPosition() method:
use Filament\Actions\Action;
use Filament\Support\Enums\IconPosition;

Action::make('edit')
    ->url(fn (): string => route('posts.edit', ['post' => $this->post]))
    ->icon('heroicon-m-pencil-square')
    ->iconPosition(IconPosition::After)
As well as allowing a static value, the iconPosition() method also accepts a function to dynamically calculate it. You can inject various utilities into the function as parameters.
iconPosition() method also accepts a function to dynamically calculate it. You can inject various utilities into the function as parameters.-
Action
$actionFilament\Actions\ Action The current action instance.
-
Arguments
$argumentsarray<string, mixed> The array of arguments passed to the action when it was triggered.
-
Data
$dataarray<string, mixed> The array of data submitted from form fields in the action's modal. It will be empty before the modal form is submitted.
-
Livewire
$livewireLivewire\Component The Livewire component instance.
-
Eloquent model FQN
$model?string<Illuminate\Database\ Eloquent\ Model> The Eloquent model FQN for the current action, if one is attached.
-
Mounted actions
$mountedActionsarray<Filament\Actions\ Action> The array of actions that are currently mounted in the Livewire component. This is useful for accessing data from parent actions.
-
Parent action
$parentAction?Filament\Actions\ Action The mounted parent action, or the containing parent action if one exists.
-
Eloquent record
$record?Illuminate\Database\ Eloquent\ Model The Eloquent record for the current action, if one is attached.
-
Schema
$schemaFilament\Schemas\ Schema [Actions in schemas only] The schema object that this action belongs to.
-
Schema component
$schemaComponentFilament\Schemas\ Components\ Component [Actions in schemas only] The schema component that this action belongs to.
-
Schema component state
$schemaComponentStatemixed [Actions in schemas only] The current value of the schema component.
-
Schema get function
$schemaGetFilament\Schemas\ Components\ Utilities\ Get [Actions in schemas only] A function for retrieving values from the schema data. Validation is not run on form fields.
-
Schema operation
$schemaOperationstring [Actions in schemas only] The current operation being performed by the schema. Usually
create,edit, orview.-
Schema set function
$schemaSetFilament\Schemas\ Components\ Utilities\ Set [Actions in schemas only] A function for setting values in the schema data.
-
Schema state
$schemaStatemixed [Actions in schemas only] The current value of the schema that this action belongs to, like the current repeater item.
-
Selected Eloquent records
$selectedRecordsIlluminate\Support\ Collection|Illuminate\ Support\ LazyCollection [Actions in tables only] The selected records, filtered by individual record authorization when it is enabled. Requires
accessSelectedRecords().-
Selected Eloquent records query
$selectedRecordsQueryIlluminate\Database\ Eloquent\ Builder [Actions in Eloquent-query-backed tables only] The query for the selected records. Requires
accessSelectedRecords(). Individual record authorization has not been applied to this query.-
Table
$tableFilament\Tables\ Table [Actions in tables only] The table object that this action belongs to.

#Authorization
You may conditionally show or hide actions for certain users. To do this, you can use either the visible() or hidden() methods:
use Filament\Actions\Action;

Action::make('edit')
    ->url(fn (): string => route('posts.edit', ['post' => $this->post]))
    ->visible(auth()->user()->can('update', $this->post))

Action::make('edit')
    ->url(fn (): string => route('posts.edit', ['post' => $this->post]))
    ->hidden(! auth()->user()->can('update', $this->post))
This is useful for authorization of certain actions to only users who have permission.
As well as allowing static values, the visible() and hidden() methods also accept functions to dynamically calculate them. You can inject various utilities into the functions as parameters.
visible() and hidden() methods also accept functions to dynamically calculate them. You can inject various utilities into the functions as parameters.-
Action
$actionFilament\Actions\ Action The current action instance.
-
Arguments
$argumentsarray<string, mixed> The array of arguments passed to the action when it was triggered.
-
Data
$dataarray<string, mixed> The array of data submitted from form fields in the action's modal. It will be empty before the modal form is submitted.
-
Livewire
$livewireLivewire\Component The Livewire component instance.
-
Eloquent model FQN
$model?string<Illuminate\Database\ Eloquent\ Model> The Eloquent model FQN for the current action, if one is attached.
-
Mounted actions
$mountedActionsarray<Filament\Actions\ Action> The array of actions that are currently mounted in the Livewire component. This is useful for accessing data from parent actions.
-
Parent action
$parentAction?Filament\Actions\ Action The mounted parent action, or the containing parent action if one exists.
-
Eloquent record
$record?Illuminate\Database\ Eloquent\ Model The Eloquent record for the current action, if one is attached.
-
Schema
$schemaFilament\Schemas\ Schema [Actions in schemas only] The schema object that this action belongs to.
-
Schema component
$schemaComponentFilament\Schemas\ Components\ Component [Actions in schemas only] The schema component that this action belongs to.
-
Schema component state
$schemaComponentStatemixed [Actions in schemas only] The current value of the schema component.
-
Schema get function
$schemaGetFilament\Schemas\ Components\ Utilities\ Get [Actions in schemas only] A function for retrieving values from the schema data. Validation is not run on form fields.
-
Schema operation
$schemaOperationstring [Actions in schemas only] The current operation being performed by the schema. Usually
create,edit, orview.-
Schema set function
$schemaSetFilament\Schemas\ Components\ Utilities\ Set [Actions in schemas only] A function for setting values in the schema data.
-
Schema state
$schemaStatemixed [Actions in schemas only] The current value of the schema that this action belongs to, like the current repeater item.
-
Selected Eloquent records
$selectedRecordsIlluminate\Support\ Collection|Illuminate\ Support\ LazyCollection [Actions in tables only] The selected records, filtered by individual record authorization when it is enabled. Requires
accessSelectedRecords().-
Selected Eloquent records query
$selectedRecordsQueryIlluminate\Database\ Eloquent\ Builder [Actions in Eloquent-query-backed tables only] The query for the selected records. Requires
accessSelectedRecords(). Individual record authorization has not been applied to this query.-
Table
$tableFilament\Tables\ Table [Actions in tables only] The table object that this action belongs to.
#Authorization using a policy
You can use a policy to authorize an action. To do this, pass the name of the policy method to the authorize() method, and Filament will use the current Eloquent model for that action to find the correct policy:
use Filament\Actions\Action;

Action::make('edit')
    ->url(fn (): string => route('posts.edit', ['post' => $this->post]))
    ->authorize('update')
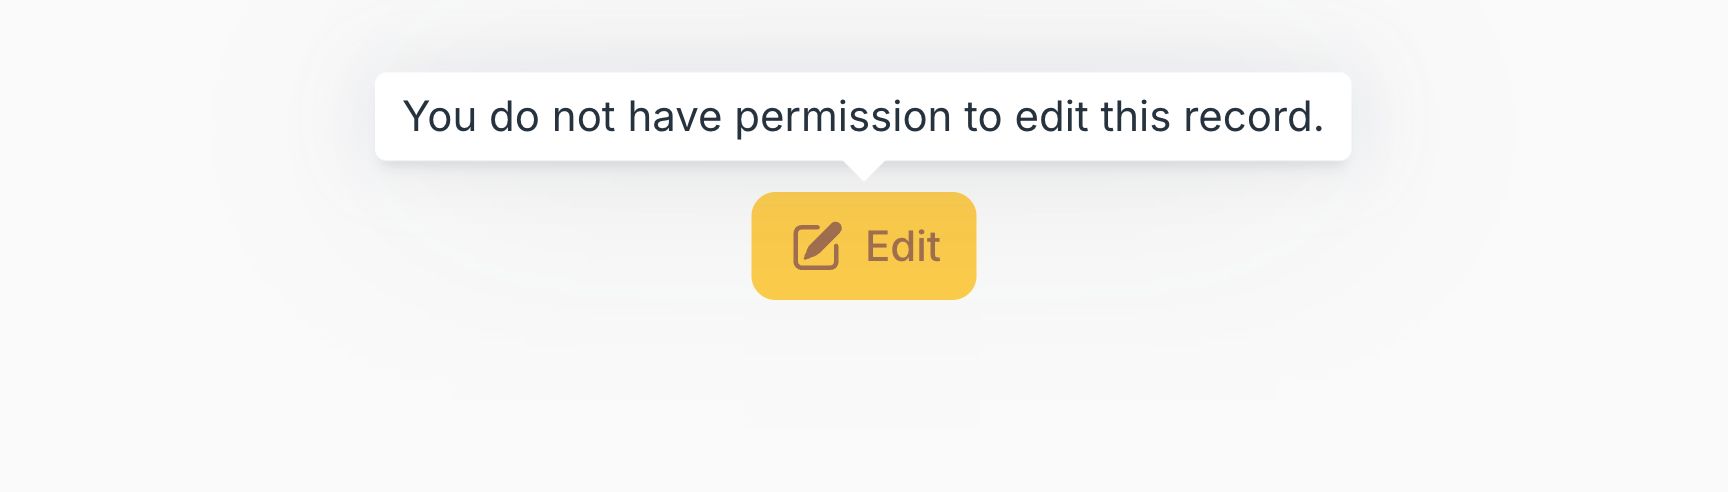
If your policy method returns a response message, you can disable the action instead of hiding it, and add a tooltip containing the message, using the authorizationTooltip() method:
use Filament\Actions\Action;

Action::make('edit')
    ->url(fn (): string => route('posts.edit', ['post' => $this->post]))
    ->authorize('update')
    ->authorizationTooltip()
If the denial does not provide a message (for example, your policy returns plain false, or a Gate::before() hook short-circuits the check), the action is hidden instead. You can supply a fallback message with authorizationMessage() to keep the action visible in that case.
You may instead allow the action to still be clickable even if the user is not authorized, but send a notification containing the response message, using the authorizationNotification() method:
use Filament\Actions\Action;

Action::make('edit')
    ->url(fn (): string => route('posts.edit', ['post' => $this->post]))
    ->authorize('update')
    ->authorizationNotification()
As with authorizationTooltip(), the action is hidden if the denial does not provide a message, unless you supply a fallback with authorizationMessage().
#Disabling a button
If you want to disable a button instead of hiding it, you can use the disabled() method:
use Filament\Actions\Action;

Action::make('delete')
    ->disabled()
You can conditionally disable a button by passing a boolean to it:
use Filament\Actions\Action;

Action::make('delete')
    ->disabled(! auth()->user()->can('delete', $this->post))
As well as allowing a static value, the disabled() method also accepts a function to dynamically calculate it. You can inject various utilities into the function as parameters.
disabled() method also accepts a function to dynamically calculate it. You can inject various utilities into the function as parameters.-
Action
$actionFilament\Actions\ Action The current action instance.
-
Arguments
$argumentsarray<string, mixed> The array of arguments passed to the action when it was triggered.
-
Data
$dataarray<string, mixed> The array of data submitted from form fields in the action's modal. It will be empty before the modal form is submitted.
-
Livewire
$livewireLivewire\Component The Livewire component instance.
-
Eloquent model FQN
$model?string<Illuminate\Database\ Eloquent\ Model> The Eloquent model FQN for the current action, if one is attached.
-
Mounted actions
$mountedActionsarray<Filament\Actions\ Action> The array of actions that are currently mounted in the Livewire component. This is useful for accessing data from parent actions.
-
Parent action
$parentAction?Filament\Actions\ Action The mounted parent action, or the containing parent action if one exists.
-
Eloquent record
$record?Illuminate\Database\ Eloquent\ Model The Eloquent record for the current action, if one is attached.
-
Schema
$schemaFilament\Schemas\ Schema [Actions in schemas only] The schema object that this action belongs to.
-
Schema component
$schemaComponentFilament\Schemas\ Components\ Component [Actions in schemas only] The schema component that this action belongs to.
-
Schema component state
$schemaComponentStatemixed [Actions in schemas only] The current value of the schema component.
-
Schema get function
$schemaGetFilament\Schemas\ Components\ Utilities\ Get [Actions in schemas only] A function for retrieving values from the schema data. Validation is not run on form fields.
-
Schema operation
$schemaOperationstring [Actions in schemas only] The current operation being performed by the schema. Usually
create,edit, orview.-
Schema set function
$schemaSetFilament\Schemas\ Components\ Utilities\ Set [Actions in schemas only] A function for setting values in the schema data.
-
Schema state
$schemaStatemixed [Actions in schemas only] The current value of the schema that this action belongs to, like the current repeater item.
-
Selected Eloquent records
$selectedRecordsIlluminate\Support\ Collection|Illuminate\ Support\ LazyCollection [Actions in tables only] The selected records, filtered by individual record authorization when it is enabled. Requires
accessSelectedRecords().-
Selected Eloquent records query
$selectedRecordsQueryIlluminate\Database\ Eloquent\ Builder [Actions in Eloquent-query-backed tables only] The query for the selected records. Requires
accessSelectedRecords(). Individual record authorization has not been applied to this query.-
Table
$tableFilament\Tables\ Table [Actions in tables only] The table object that this action belongs to.

#Registering keybindings
You can attach keyboard shortcuts to trigger buttons. These use the same key codes as Mousetrap:
use Filament\Actions\Action;

Action::make('save')
    ->action(fn () => $this->save())
    ->keyBindings(['command+s', 'ctrl+s'])
As well as allowing a static value, the keyBindings() method also accepts a function to dynamically calculate it. You can inject various utilities into the function as parameters.
keyBindings() method also accepts a function to dynamically calculate it. You can inject various utilities into the function as parameters.-
Action
$actionFilament\Actions\ Action The current action instance.
-
Arguments
$argumentsarray<string, mixed> The array of arguments passed to the action when it was triggered.
-
Data
$dataarray<string, mixed> The array of data submitted from form fields in the action's modal. It will be empty before the modal form is submitted.
-
Livewire
$livewireLivewire\Component The Livewire component instance.
-
Eloquent model FQN
$model?string<Illuminate\Database\ Eloquent\ Model> The Eloquent model FQN for the current action, if one is attached.
-
Mounted actions
$mountedActionsarray<Filament\Actions\ Action> The array of actions that are currently mounted in the Livewire component. This is useful for accessing data from parent actions.
-
Parent action
$parentAction?Filament\Actions\ Action The mounted parent action, or the containing parent action if one exists.
-
Eloquent record
$record?Illuminate\Database\ Eloquent\ Model The Eloquent record for the current action, if one is attached.
-
Schema
$schemaFilament\Schemas\ Schema [Actions in schemas only] The schema object that this action belongs to.
-
Schema component
$schemaComponentFilament\Schemas\ Components\ Component [Actions in schemas only] The schema component that this action belongs to.
-
Schema component state
$schemaComponentStatemixed [Actions in schemas only] The current value of the schema component.
-
Schema get function
$schemaGetFilament\Schemas\ Components\ Utilities\ Get [Actions in schemas only] A function for retrieving values from the schema data. Validation is not run on form fields.
-
Schema operation
$schemaOperationstring [Actions in schemas only] The current operation being performed by the schema. Usually
create,edit, orview.-
Schema set function
$schemaSetFilament\Schemas\ Components\ Utilities\ Set [Actions in schemas only] A function for setting values in the schema data.
-
Schema state
$schemaStatemixed [Actions in schemas only] The current value of the schema that this action belongs to, like the current repeater item.
-
Selected Eloquent records
$selectedRecordsIlluminate\Support\ Collection|Illuminate\ Support\ LazyCollection [Actions in tables only] The selected records, filtered by individual record authorization when it is enabled. Requires
accessSelectedRecords().-
Selected Eloquent records query
$selectedRecordsQueryIlluminate\Database\ Eloquent\ Builder [Actions in Eloquent-query-backed tables only] The query for the selected records. Requires
accessSelectedRecords(). Individual record authorization has not been applied to this query.-
Table
$tableFilament\Tables\ Table [Actions in tables only] The table object that this action belongs to.
#Adding a badge to the corner of the button
You can add a badge to the corner of the button, to display whatever you want. It's useful for displaying a count of something, or a status indicator:
use Filament\Actions\Action;

Action::make('filter')
    ->iconButton()
    ->icon('heroicon-m-funnel')
    ->badge(5)
As well as allowing a static value, the badge() method also accepts a function to dynamically calculate it. You can inject various utilities into the function as parameters.
badge() method also accepts a function to dynamically calculate it. You can inject various utilities into the function as parameters.-
Action
$actionFilament\Actions\ Action The current action instance.
-
Arguments
$argumentsarray<string, mixed> The array of arguments passed to the action when it was triggered.
-
Data
$dataarray<string, mixed> The array of data submitted from form fields in the action's modal. It will be empty before the modal form is submitted.
-
Livewire
$livewireLivewire\Component The Livewire component instance.
-
Eloquent model FQN
$model?string<Illuminate\Database\ Eloquent\ Model> The Eloquent model FQN for the current action, if one is attached.
-
Mounted actions
$mountedActionsarray<Filament\Actions\ Action> The array of actions that are currently mounted in the Livewire component. This is useful for accessing data from parent actions.
-
Parent action
$parentAction?Filament\Actions\ Action The mounted parent action, or the containing parent action if one exists.
-
Eloquent record
$record?Illuminate\Database\ Eloquent\ Model The Eloquent record for the current action, if one is attached.
-
Schema
$schemaFilament\Schemas\ Schema [Actions in schemas only] The schema object that this action belongs to.
-
Schema component
$schemaComponentFilament\Schemas\ Components\ Component [Actions in schemas only] The schema component that this action belongs to.
-
Schema component state
$schemaComponentStatemixed [Actions in schemas only] The current value of the schema component.
-
Schema get function
$schemaGetFilament\Schemas\ Components\ Utilities\ Get [Actions in schemas only] A function for retrieving values from the schema data. Validation is not run on form fields.
-
Schema operation
$schemaOperationstring [Actions in schemas only] The current operation being performed by the schema. Usually
create,edit, orview.-
Schema set function
$schemaSetFilament\Schemas\ Components\ Utilities\ Set [Actions in schemas only] A function for setting values in the schema data.
-
Schema state
$schemaStatemixed [Actions in schemas only] The current value of the schema that this action belongs to, like the current repeater item.
-
Selected Eloquent records
$selectedRecordsIlluminate\Support\ Collection|Illuminate\ Support\ LazyCollection [Actions in tables only] The selected records, filtered by individual record authorization when it is enabled. Requires
accessSelectedRecords().-
Selected Eloquent records query
$selectedRecordsQueryIlluminate\Database\ Eloquent\ Builder [Actions in Eloquent-query-backed tables only] The query for the selected records. Requires
accessSelectedRecords(). Individual record authorization has not been applied to this query.-
Table
$tableFilament\Tables\ Table [Actions in tables only] The table object that this action belongs to.

You can also pass a color to be used for the badge:
use Filament\Actions\Action;

Action::make('filter')
    ->iconButton()
    ->icon('heroicon-m-funnel')
    ->badge(5)
    ->badgeColor('success')
As well as allowing a static value, the badgeColor() method also accepts a function to dynamically calculate it. You can inject various utilities into the function as parameters.
badgeColor() method also accepts a function to dynamically calculate it. You can inject various utilities into the function as parameters.-
Action
$actionFilament\Actions\ Action The current action instance.
-
Arguments
$argumentsarray<string, mixed> The array of arguments passed to the action when it was triggered.
-
Badge
$badge?string The evaluated value of the badge.
-
Data
$dataarray<string, mixed> The array of data submitted from form fields in the action's modal. It will be empty before the modal form is submitted.
-
Livewire
$livewireLivewire\Component The Livewire component instance.
-
Eloquent model FQN
$model?string<Illuminate\Database\ Eloquent\ Model> The Eloquent model FQN for the current action, if one is attached.
-
Mounted actions
$mountedActionsarray<Filament\Actions\ Action> The array of actions that are currently mounted in the Livewire component. This is useful for accessing data from parent actions.
-
Parent action
$parentAction?Filament\Actions\ Action The mounted parent action, or the containing parent action if one exists.
-
Eloquent record
$record?Illuminate\Database\ Eloquent\ Model The Eloquent record for the current action, if one is attached.
-
Schema
$schemaFilament\Schemas\ Schema [Actions in schemas only] The schema object that this action belongs to.
-
Schema component
$schemaComponentFilament\Schemas\ Components\ Component [Actions in schemas only] The schema component that this action belongs to.
-
Schema component state
$schemaComponentStatemixed [Actions in schemas only] The current value of the schema component.
-
Schema get function
$schemaGetFilament\Schemas\ Components\ Utilities\ Get [Actions in schemas only] A function for retrieving values from the schema data. Validation is not run on form fields.
-
Schema operation
$schemaOperationstring [Actions in schemas only] The current operation being performed by the schema. Usually
create,edit, orview.-
Schema set function
$schemaSetFilament\Schemas\ Components\ Utilities\ Set [Actions in schemas only] A function for setting values in the schema data.
-
Schema state
$schemaStatemixed [Actions in schemas only] The current value of the schema that this action belongs to, like the current repeater item.
-
Selected Eloquent records
$selectedRecordsIlluminate\Support\ Collection|Illuminate\ Support\ LazyCollection [Actions in tables only] The selected records, filtered by individual record authorization when it is enabled. Requires
accessSelectedRecords().-
Selected Eloquent records query
$selectedRecordsQueryIlluminate\Database\ Eloquent\ Builder [Actions in Eloquent-query-backed tables only] The query for the selected records. Requires
accessSelectedRecords(). Individual record authorization has not been applied to this query.-
Table
$tableFilament\Tables\ Table [Actions in tables only] The table object that this action belongs to.

#Outlined button style
When you're using the "button" trigger style, you might wish to make it less prominent. You could use a different color, but sometimes you might want to make it outlined instead. You can do this with the outlined() method:
use Filament\Actions\Action;

Action::make('edit')
    ->url(fn (): string => route('posts.edit', ['post' => $this->post]))
    ->button()
    ->outlined()

Optionally, you may pass a boolean value to control if the label should be hidden or not:
use Filament\Actions\Action;

Action::make('edit')
    ->url(fn (): string => route('posts.edit', ['post' => $this->post]))
    ->button()
    ->outlined(FeatureFlag::active())
As well as allowing a static value, the outlined() method also accepts a function to dynamically calculate it. You can inject various utilities into the function as parameters.
outlined() method also accepts a function to dynamically calculate it. You can inject various utilities into the function as parameters.-
Action
$actionFilament\Actions\ Action The current action instance.
-
Arguments
$argumentsarray<string, mixed> The array of arguments passed to the action when it was triggered.
-
Data
$dataarray<string, mixed> The array of data submitted from form fields in the action's modal. It will be empty before the modal form is submitted.
-
Livewire
$livewireLivewire\Component The Livewire component instance.
-
Eloquent model FQN
$model?string<Illuminate\Database\ Eloquent\ Model> The Eloquent model FQN for the current action, if one is attached.
-
Mounted actions
$mountedActionsarray<Filament\Actions\ Action> The array of actions that are currently mounted in the Livewire component. This is useful for accessing data from parent actions.
-
Parent action
$parentAction?Filament\Actions\ Action The mounted parent action, or the containing parent action if one exists.
-
Eloquent record
$record?Illuminate\Database\ Eloquent\ Model The Eloquent record for the current action, if one is attached.
-
Schema
$schemaFilament\Schemas\ Schema [Actions in schemas only] The schema object that this action belongs to.
-
Schema component
$schemaComponentFilament\Schemas\ Components\ Component [Actions in schemas only] The schema component that this action belongs to.
-
Schema component state
$schemaComponentStatemixed [Actions in schemas only] The current value of the schema component.
-
Schema get function
$schemaGetFilament\Schemas\ Components\ Utilities\ Get [Actions in schemas only] A function for retrieving values from the schema data. Validation is not run on form fields.
-
Schema operation
$schemaOperationstring [Actions in schemas only] The current operation being performed by the schema. Usually
create,edit, orview.-
Schema set function
$schemaSetFilament\Schemas\ Components\ Utilities\ Set [Actions in schemas only] A function for setting values in the schema data.
-
Schema state
$schemaStatemixed [Actions in schemas only] The current value of the schema that this action belongs to, like the current repeater item.
-
Selected Eloquent records
$selectedRecordsIlluminate\Support\ Collection|Illuminate\ Support\ LazyCollection [Actions in tables only] The selected records, filtered by individual record authorization when it is enabled. Requires
accessSelectedRecords().-
Selected Eloquent records query
$selectedRecordsQueryIlluminate\Database\ Eloquent\ Builder [Actions in Eloquent-query-backed tables only] The query for the selected records. Requires
accessSelectedRecords(). Individual record authorization has not been applied to this query.-
Table
$tableFilament\Tables\ Table [Actions in tables only] The table object that this action belongs to.
#Adding extra HTML attributes to an action
You can pass extra HTML attributes to the action via the extraAttributes() method, which will be merged onto its outer HTML element. The attributes should be represented by an array, where the key is the attribute name and the value is the attribute value:
use Filament\Actions\Action;

Action::make('edit')
    ->url(fn (): string => route('posts.edit', ['post' => $this->post]))
    ->extraAttributes([
        'title' => 'Edit this post',
    ])
As well as allowing a static value, the extraAttributes() method also accepts a function to dynamically calculate it. You can inject various utilities into the function as parameters.
extraAttributes() method also accepts a function to dynamically calculate it. You can inject various utilities into the function as parameters.-
Action
$actionFilament\Actions\ Action The current action instance.
-
Arguments
$argumentsarray<string, mixed> The array of arguments passed to the action when it was triggered.
-
Data
$dataarray<string, mixed> The array of data submitted from form fields in the action's modal. It will be empty before the modal form is submitted.
-
Livewire
$livewireLivewire\Component The Livewire component instance.
-
Eloquent model FQN
$model?string<Illuminate\Database\ Eloquent\ Model> The Eloquent model FQN for the current action, if one is attached.
-
Mounted actions
$mountedActionsarray<Filament\Actions\ Action> The array of actions that are currently mounted in the Livewire component. This is useful for accessing data from parent actions.
-
Parent action
$parentAction?Filament\Actions\ Action The mounted parent action, or the containing parent action if one exists.
-
Eloquent record
$record?Illuminate\Database\ Eloquent\ Model The Eloquent record for the current action, if one is attached.
-
Schema
$schemaFilament\Schemas\ Schema [Actions in schemas only] The schema object that this action belongs to.
-
Schema component
$schemaComponentFilament\Schemas\ Components\ Component [Actions in schemas only] The schema component that this action belongs to.
-
Schema component state
$schemaComponentStatemixed [Actions in schemas only] The current value of the schema component.
-
Schema get function
$schemaGetFilament\Schemas\ Components\ Utilities\ Get [Actions in schemas only] A function for retrieving values from the schema data. Validation is not run on form fields.
-
Schema operation
$schemaOperationstring [Actions in schemas only] The current operation being performed by the schema. Usually
create,edit, orview.-
Schema set function
$schemaSetFilament\Schemas\ Components\ Utilities\ Set [Actions in schemas only] A function for setting values in the schema data.
-
Schema state
$schemaStatemixed [Actions in schemas only] The current value of the schema that this action belongs to, like the current repeater item.
-
Selected Eloquent records
$selectedRecordsIlluminate\Support\ Collection|Illuminate\ Support\ LazyCollection [Actions in tables only] The selected records, filtered by individual record authorization when it is enabled. Requires
accessSelectedRecords().-
Selected Eloquent records query
$selectedRecordsQueryIlluminate\Database\ Eloquent\ Builder [Actions in Eloquent-query-backed tables only] The query for the selected records. Requires
accessSelectedRecords(). Individual record authorization has not been applied to this query.-
Table
$tableFilament\Tables\ Table [Actions in tables only] The table object that this action belongs to.
#Using actions in schemas
Action objects can be inserted anywhere in a schema, such as in form field slots, section headers and footers, or alongside prime components. When an action is used in a schema, it has access to the schema's state via utility injection - you can use $schemaGet and $schemaSet in closures to read and modify form field values.
use Filament\Actions\Action;
use Filament\Forms\Components\TextInput;
use Filament\Schemas\Components\Utilities\Get;
use Filament\Schemas\Components\Utilities\Set;

TextInput::make('title')
    ->afterContent(
        Action::make('generateSlug')
            ->action(function (Get $schemaGet, Set $schemaSet) {
                $schemaSet('slug', str($schemaGet('title'))->slug());
            })
    )

TextInput::make('slug')
#Adding a list of actions to a schema
If you want to render a list of action buttons on their own row in a schema, without attaching them to a specific field, you can wrap them in an Actions layout component:
use Filament\Actions\Action;
use Filament\Schemas\Components\Actions;

Actions::make([
    Action::make('star')
        ->icon('heroicon-m-star'),
    Action::make('resetStars')
        ->icon('heroicon-m-x-mark')
        ->color('danger'),
])
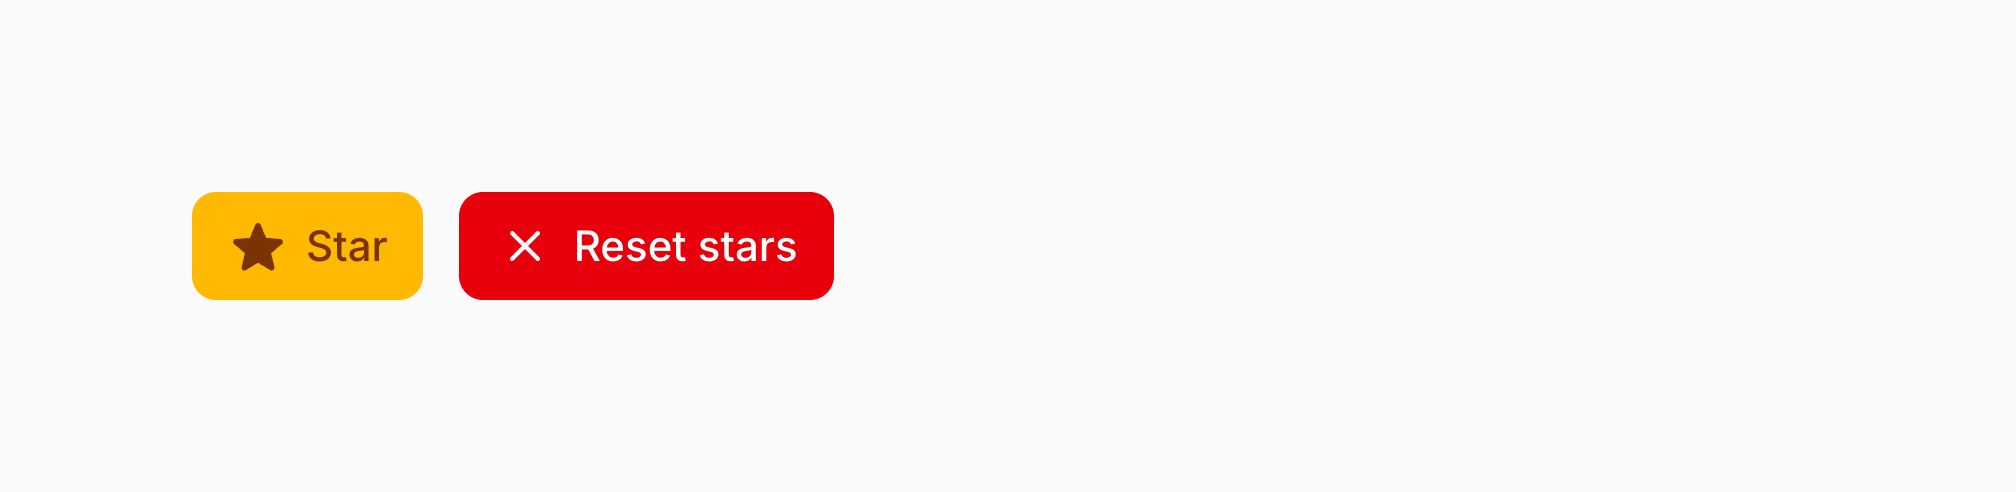
You can make the actions span the full width of the schema using the fullWidth() method:
use Filament\Actions\Action;
use Filament\Schemas\Components\Actions;

Actions::make([
    Action::make('star')
        ->icon('heroicon-m-star'),
    Action::make('resetStars')
        ->icon('heroicon-m-x-mark')
        ->color('danger'),
])->fullWidth()
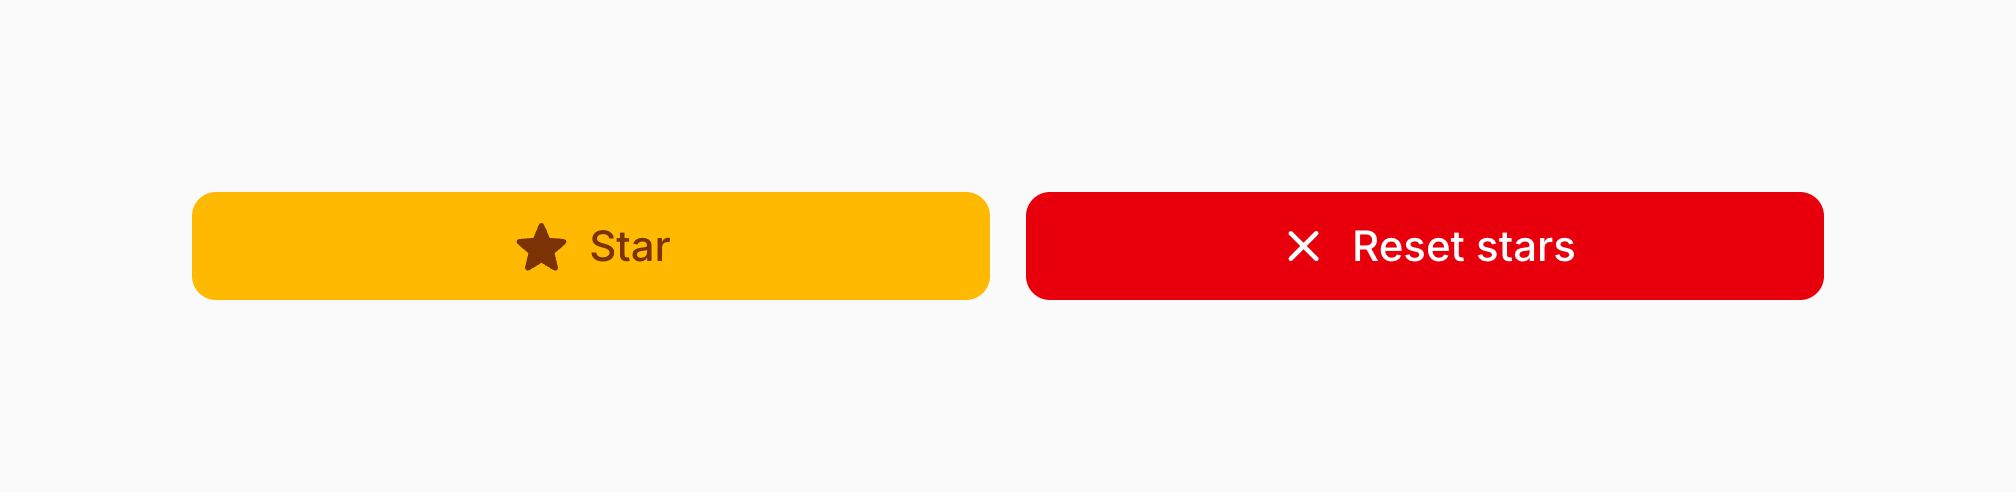
You can change the horizontal alignment of the actions using the alignment() method:
use Filament\Actions\Action;
use Filament\Schemas\Components\Actions;
use Filament\Support\Enums\Alignment;

Actions::make([
    Action::make('star')
        ->icon('heroicon-m-star'),
    Action::make('resetStars')
        ->icon('heroicon-m-x-mark')
        ->color('danger'),
])->alignment(Alignment::Center)

If the Actions component is in a grid alongside other components, you can change its vertical alignment using the verticalAlignment() method:
use Filament\Actions\Action;
use Filament\Schemas\Components\Actions;
use Filament\Support\Enums\VerticalAlignment;

Actions::make([
    Action::make('star')
        ->icon('heroicon-m-star'),
    Action::make('resetStars')
        ->icon('heroicon-m-x-mark')
        ->color('danger'),
])->verticalAlignment(VerticalAlignment::End)
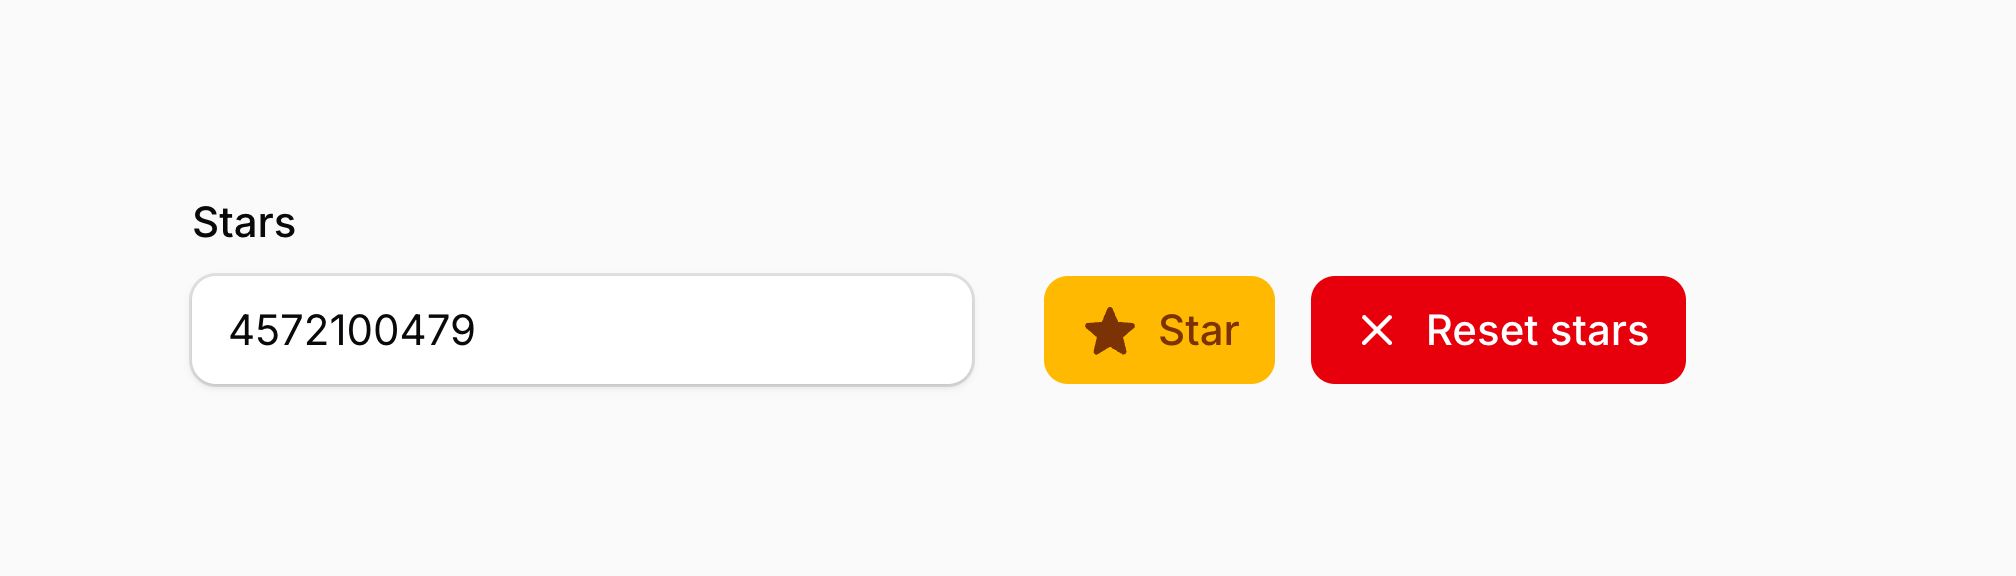
#Running JavaScript when an action is clicked
If you need a simple action that runs JavaScript directly in the browser without making a network request, you can use the actionJs() method. This is useful for simple interactions like updating form field values instantly:
use Filament\Actions\Action;
use Filament\Forms\Components\TextInput;

TextInput::make('title')
    ->live(onBlur: true)
    ->afterContent(
        Action::make('generateSlug')
            ->actionJs(<<<'JS'
                $set('slug', $get('title').toLowerCase().replaceAll(' ', '-'))
                JS)
    )

TextInput::make('slug')
The JavaScript string has access to $get() and $set() utilities, which allow you to read and modify the state of form fields in the schema.
As well as allowing a static value, the actionJs() method also accepts a function to dynamically calculate it. You can inject various utilities into the function as parameters.
actionJs() method also accepts a function to dynamically calculate it. You can inject various utilities into the function as parameters.-
Action
$actionFilament\Actions\ Action The current action instance.
-
Arguments
$argumentsarray<string, mixed> The array of arguments passed to the action when it was triggered.
-
Data
$dataarray<string, mixed> The array of data submitted from form fields in the action's modal. It will be empty before the modal form is submitted.
-
Livewire
$livewireLivewire\Component The Livewire component instance.
-
Eloquent model FQN
$model?string<Illuminate\Database\ Eloquent\ Model> The Eloquent model FQN for the current action, if one is attached.
-
Mounted actions
$mountedActionsarray<Filament\Actions\ Action> The array of actions that are currently mounted in the Livewire component. This is useful for accessing data from parent actions.
-
Parent action
$parentAction?Filament\Actions\ Action The mounted parent action, or the containing parent action if one exists.
-
Eloquent record
$record?Illuminate\Database\ Eloquent\ Model The Eloquent record for the current action, if one is attached.
-
Schema
$schemaFilament\Schemas\ Schema [Actions in schemas only] The schema object that this action belongs to.
-
Schema component
$schemaComponentFilament\Schemas\ Components\ Component [Actions in schemas only] The schema component that this action belongs to.
-
Schema component state
$schemaComponentStatemixed [Actions in schemas only] The current value of the schema component.
-
Schema get function
$schemaGetFilament\Schemas\ Components\ Utilities\ Get [Actions in schemas only] A function for retrieving values from the schema data. Validation is not run on form fields.
-
Schema operation
$schemaOperationstring [Actions in schemas only] The current operation being performed by the schema. Usually
create,edit, orview.-
Schema set function
$schemaSetFilament\Schemas\ Components\ Utilities\ Set [Actions in schemas only] A function for setting values in the schema data.
-
Schema state
$schemaStatemixed [Actions in schemas only] The current value of the schema that this action belongs to, like the current repeater item.
-
Selected Eloquent records
$selectedRecordsIlluminate\Support\ Collection|Illuminate\ Support\ LazyCollection [Actions in tables only] The selected records, filtered by individual record authorization when it is enabled. Requires
accessSelectedRecords().-
Selected Eloquent records query
$selectedRecordsQueryIlluminate\Database\ Eloquent\ Builder [Actions in Eloquent-query-backed tables only] The query for the selected records. Requires
accessSelectedRecords(). Individual record authorization has not been applied to this query.-
Table
$tableFilament\Tables\ Table [Actions in tables only] The table object that this action belongs to.
#Opening an action from a URL
You can link to an action modal on a Filament page using ?action=sendEmail. For a table action, use ?tableAction=view&tableActionRecord=123. Unqualified links target the page, not its embedded Livewire components. You can also explicitly target the page using actionComponent=page.
You may pass arguments using actionArguments[source]=email or tableActionArguments[source]=email, and ordinary action context using actionContext[...].
#Targeting an embedded Livewire component
To enable deep links for a relation manager or another Livewire component using InteractsWithActions, override getDefaultActionUrlIdentifier() on that component:
public function getDefaultActionUrlIdentifier(): ?string
{
    return 'departments';
}
Then include its identifier in the link:
?actionComponent=departments&action=sendEmail
?actionComponent=departments&tableAction=view&tableActionRecord=123
Use a stable identifier unique to each component instance on the page. Do not use Livewire's runtime component ID, or reuse the reserved page identifier for an embedded component. Components returning null (the default outside pages) do not automatically open URL actions. Custom component views must render <x-filament-actions::modals />; Filament tables already include it.
If the component is inside an inactive tab, your link must also select that tab using the page's existing URL state. For example, a page binding its active content tab to ?tab= could use ?tab=departments&actionComponent=departments&tableAction=view&tableActionRecord=123. The action target does not select tabs or render otherwise absent components.
#Initializing URL actions
An action is initialized once per component lifetime, so closing its modal or re-rendering the component does not reopen it. Deferred table actions wait until the table has loaded. Prefer linking to one action at a time rather than combining action and tableAction.
Closing an ordinary action removes its action parameters from the URL. Table action parameters remain; a newly mounted component, including after navigation or destroying and recreating a child, can consume a link still present in the URL again.
#Action utility injection
The vast majority of methods used to configure actions accept functions as parameters instead of hardcoded values:
use Filament\Actions\Action;

Action::make('edit')
    ->label('Edit post')
    ->url(fn (): string => route('posts.edit', ['post' => $this->post]))
This alone unlocks many customization possibilities.
The package is also able to inject many utilities to use inside these functions, as parameters. All customization methods that accept functions as arguments can inject utilities.
These injected utilities require specific parameter names to be used. Otherwise, Filament doesn't know what to inject.
#Injecting the current modal form data
If you wish to access the current modal form data, define a $data parameter:
function (array $data) {
    // ...
}
Be aware that this will be empty if the modal has not been submitted yet.
#Injecting the Eloquent record
If your action is associated with an Eloquent record, for example if it is on a table row, you can inject the record using a $record parameter:
use Illuminate\Database\Eloquent\Model;

function (Model $record) {
    // ...
}
#Injecting the current arguments
If you wish to access the current arguments that have been passed to the action, define an $arguments parameter:
function (array $arguments) {
    // ...
}
#Injecting utilities from a schema
You can access various additional utilities if your action is defined in a schema:
$schema- The schema instance that the action belongs to.$schemaComponent- The schema component instance that the action belongs to.$schemaComponentState- The current value of the schema component.$schemaState- The current value of the schema that this action belongs to, like the current repeater item.$schemaGet- A function for retrieving values from the schema data. Validation is not run on form fields.$schemaSet- A function for setting values in the schema data.$schemaOperation- The current operation being performed by the schema. Usuallycreate,edit, orview.
For more information, please visit the Schemas section.
#Injecting the current Livewire component instance
If you wish to access the current Livewire component instance that the action belongs to, define a $livewire parameter:
use Livewire\Component;

function (Component $livewire) {
    // ...
}
#Injecting the current action instance
If you wish to access the current action instance, define a $action parameter:
function (Action $action) {
    // ...
}
#Injecting multiple utilities
The parameters are injected dynamically using reflection, so you are able to combine multiple parameters in any order:
use Livewire\Component;

function (array $arguments, Component $livewire) {
    // ...
}
#Injecting dependencies from Laravel's container
You may inject anything from Laravel's container like normal, alongside utilities:
use Illuminate\Http\Request;

function (Request $request, array $arguments) {
    // ...
}
#Rate limiting actions
You can rate limit actions by using the rateLimit() method. This method accepts the number of attempts per minute that a user IP address can make. If the user exceeds this limit, the action will not run and a notification will be shown:
use Filament\Actions\Action;

Action::make('delete')
    ->rateLimit(5)
If the action opens a modal, the rate limit will be applied when the modal is submitted.
The limit is separate for each IP address, Livewire component class, and action context, including its arguments and record. It is not a combined limit across all records or arguments. For a shared limit, such as a per-user quota across records, use a custom rate limit key.
As well as allowing a static value, the rateLimit() method also accepts a function to dynamically calculate it. You can inject various utilities into the function as parameters.
rateLimit() method also accepts a function to dynamically calculate it. You can inject various utilities into the function as parameters.-
Action
$actionFilament\Actions\ Action The current action instance.
-
Arguments
$argumentsarray<string, mixed> The array of arguments passed to the action when it was triggered.
-
Data
$dataarray<string, mixed> The array of data submitted from form fields in the action's modal. It will be empty before the modal form is submitted.
-
Livewire
$livewireLivewire\Component The Livewire component instance.
-
Eloquent model FQN
$model?string<Illuminate\Database\ Eloquent\ Model> The Eloquent model FQN for the current action, if one is attached.
-
Mounted actions
$mountedActionsarray<Filament\Actions\ Action> The array of actions that are currently mounted in the Livewire component. This is useful for accessing data from parent actions.
-
Parent action
$parentAction?Filament\Actions\ Action The mounted parent action, or the containing parent action if one exists.
-
Eloquent record
$record?Illuminate\Database\ Eloquent\ Model The Eloquent record for the current action, if one is attached.
-
Schema
$schemaFilament\Schemas\ Schema [Actions in schemas only] The schema object that this action belongs to.
-
Schema component
$schemaComponentFilament\Schemas\ Components\ Component [Actions in schemas only] The schema component that this action belongs to.
-
Schema component state
$schemaComponentStatemixed [Actions in schemas only] The current value of the schema component.
-
Schema get function
$schemaGetFilament\Schemas\ Components\ Utilities\ Get [Actions in schemas only] A function for retrieving values from the schema data. Validation is not run on form fields.
-
Schema operation
$schemaOperationstring [Actions in schemas only] The current operation being performed by the schema. Usually
create,edit, orview.-
Schema set function
$schemaSetFilament\Schemas\ Components\ Utilities\ Set [Actions in schemas only] A function for setting values in the schema data.
-
Schema state
$schemaStatemixed [Actions in schemas only] The current value of the schema that this action belongs to, like the current repeater item.
-
Selected Eloquent records
$selectedRecordsIlluminate\Support\ Collection|Illuminate\ Support\ LazyCollection [Actions in tables only] The selected records, filtered by individual record authorization when it is enabled. Requires
accessSelectedRecords().-
Selected Eloquent records query
$selectedRecordsQueryIlluminate\Database\ Eloquent\ Builder [Actions in Eloquent-query-backed tables only] The query for the selected records. Requires
accessSelectedRecords(). Individual record authorization has not been applied to this query.-
Table
$tableFilament\Tables\ Table [Actions in tables only] The table object that this action belongs to.
#Customizing the rate limited notification
When an action is rate limited, a notification is dispatched to the user, which indicates the rate limit.
To customize the title of this notification, use the rateLimitedNotificationTitle() method:
use Filament\Actions\DeleteAction;

DeleteAction::make()
    ->rateLimit(5)
    ->rateLimitedNotificationTitle('Slow down!')
As well as allowing a static value, the rateLimitedNotificationTitle() method also accepts a function to dynamically calculate it. You can inject various utilities into the function as parameters.
rateLimitedNotificationTitle() method also accepts a function to dynamically calculate it. You can inject various utilities into the function as parameters.-
Action
$actionFilament\Actions\ Action The current action instance.
-
Arguments
$argumentsarray<string, mixed> The array of arguments passed to the action when it was triggered.
-
Data
$dataarray<string, mixed> The array of data submitted from form fields in the action's modal. It will be empty before the modal form is submitted.
-
Livewire
$livewireLivewire\Component The Livewire component instance.
-
Eloquent model FQN
$model?string<Illuminate\Database\ Eloquent\ Model> The Eloquent model FQN for the current action, if one is attached.
-
Mounted actions
$mountedActionsarray<Filament\Actions\ Action> The array of actions that are currently mounted in the Livewire component. This is useful for accessing data from parent actions.
-
Parent action
$parentAction?Filament\Actions\ Action The mounted parent action, or the containing parent action if one exists.
-
Eloquent record
$record?Illuminate\Database\ Eloquent\ Model The Eloquent record for the current action, if one is attached.
-
Schema
$schemaFilament\Schemas\ Schema [Actions in schemas only] The schema object that this action belongs to.
-
Schema component
$schemaComponentFilament\Schemas\ Components\ Component [Actions in schemas only] The schema component that this action belongs to.
-
Schema component state
$schemaComponentStatemixed [Actions in schemas only] The current value of the schema component.
-
Schema get function
$schemaGetFilament\Schemas\ Components\ Utilities\ Get [Actions in schemas only] A function for retrieving values from the schema data. Validation is not run on form fields.
-
Schema operation
$schemaOperationstring [Actions in schemas only] The current operation being performed by the schema. Usually
create,edit, orview.-
Schema set function
$schemaSetFilament\Schemas\ Components\ Utilities\ Set [Actions in schemas only] A function for setting values in the schema data.
-
Schema state
$schemaStatemixed [Actions in schemas only] The current value of the schema that this action belongs to, like the current repeater item.
-
Selected Eloquent records
$selectedRecordsIlluminate\Support\ Collection|Illuminate\ Support\ LazyCollection [Actions in tables only] The selected records, filtered by individual record authorization when it is enabled. Requires
accessSelectedRecords().-
Selected Eloquent records query
$selectedRecordsQueryIlluminate\Database\ Eloquent\ Builder [Actions in Eloquent-query-backed tables only] The query for the selected records. Requires
accessSelectedRecords(). Individual record authorization has not been applied to this query.-
Table
$tableFilament\Tables\ Table [Actions in tables only] The table object that this action belongs to.
You may customize the entire notification using the rateLimitedNotification() method:
use DanHarrin\LivewireRateLimiting\Exceptions\TooManyRequestsException;
use Filament\Actions\DeleteAction;
use Filament\Notifications\Notification;

DeleteAction::make()
    ->rateLimit(5)
    ->rateLimitedNotification(
       fn (TooManyRequestsException $exception): Notification => Notification::make()
            ->warning()
            ->title('Slow down!')
            ->body("You can try deleting again in {$exception->secondsUntilAvailable} seconds."),
    )
As well as allowing a static value, the rateLimitedNotification() method also accepts a function to dynamically calculate it. You can inject various utilities into the function as parameters.
rateLimitedNotification() method also accepts a function to dynamically calculate it. You can inject various utilities into the function as parameters.-
Action
$actionFilament\Actions\ Action The current action instance.
-
Arguments
$argumentsarray<string, mixed> The array of arguments passed to the action when it was triggered.
-
Data
$dataarray<string, mixed> The array of data submitted from form fields in the action's modal. It will be empty before the modal form is submitted.
-
Exception
$exceptionDanHarrin\LivewireRateLimiting\ Exceptions\ TooManyRequestsException The exception encountered when the rate limit was hit.
-
Livewire
$livewireLivewire\Component The Livewire component instance.
-
Minutes until available
$minutesint The number of minutes until the rate limit will pass.
-
Eloquent model FQN
$model?string<Illuminate\Database\ Eloquent\ Model> The Eloquent model FQN for the current action, if one is attached.
-
Mounted actions
$mountedActionsarray<Filament\Actions\ Action> The array of actions that are currently mounted in the Livewire component. This is useful for accessing data from parent actions.
-
Notification
$notificationFilament\Notifications\ Notification The default notification object for the rate limit, which could be a useful starting point for customization.
-
Parent action
$parentAction?Filament\Actions\ Action The mounted parent action, or the containing parent action if one exists.
-
Eloquent record
$record?Illuminate\Database\ Eloquent\ Model The Eloquent record for the current action, if one is attached.
-
Schema
$schemaFilament\Schemas\ Schema [Actions in schemas only] The schema object that this action belongs to.
-
Schema component
$schemaComponentFilament\Schemas\ Components\ Component [Actions in schemas only] The schema component that this action belongs to.
-
Schema component state
$schemaComponentStatemixed [Actions in schemas only] The current value of the schema component.
-
Schema get function
$schemaGetFilament\Schemas\ Components\ Utilities\ Get [Actions in schemas only] A function for retrieving values from the schema data. Validation is not run on form fields.
-
Schema operation
$schemaOperationstring [Actions in schemas only] The current operation being performed by the schema. Usually
create,edit, orview.-
Schema set function
$schemaSetFilament\Schemas\ Components\ Utilities\ Set [Actions in schemas only] A function for setting values in the schema data.
-
Schema state
$schemaStatemixed [Actions in schemas only] The current value of the schema that this action belongs to, like the current repeater item.
-
Seconds until available
$secondsint The number of seconds until the rate limit will pass.
-
Selected Eloquent records
$selectedRecordsIlluminate\Support\ Collection|Illuminate\ Support\ LazyCollection [Actions in tables only] The selected records, filtered by individual record authorization when it is enabled. Requires
accessSelectedRecords().-
Selected Eloquent records query
$selectedRecordsQueryIlluminate\Database\ Eloquent\ Builder [Actions in Eloquent-query-backed tables only] The query for the selected records. Requires
accessSelectedRecords(). Individual record authorization has not been applied to this query.-
Table
$tableFilament\Tables\ Table [Actions in tables only] The table object that this action belongs to.
#Customizing the rate limit behavior
If you wish to customize the rate limit behavior, you can use Laravel's rate limiting features and Filament's flash notifications together in the action.
If you want to rate limit immediately when an action modal is opened, you can do so in the mountUsing() method:
use Filament\Actions\Action;
use Filament\Notifications\Notification;
use Illuminate\Support\Facades\RateLimiter;

Action::make('delete')
    ->requiresConfirmation()
    ->mountUsing(function (Action $action) {
        if (RateLimiter::tooManyAttempts(
            $rateLimitKey = 'delete:' . auth()->id(),
            maxAttempts: 5,
        )) {
            Notification::make()
                ->title('Too many attempts')
                ->body('Please try again in ' . RateLimiter::availableIn($rateLimitKey) . ' seconds.')
                ->danger()
                ->send();

            $action->halt();
        }

        RateLimiter::hit($rateLimitKey);
    })
Call $action->halt() to prevent the modal from opening; returning from mountUsing() alone does not stop it. This limits modal openings, not submissions. Keep submission-time limiting if the operation also needs it. If the action has form fields, fill its schema in mountUsing() as well.
If you want to rate limit when an action is run, you can do so in the action() method:
use Filament\Actions\Action;
use Filament\Notifications\Notification;
use Illuminate\Support\Facades\RateLimiter;

Action::make('delete')
    ->action(function () {
        if (RateLimiter::tooManyAttempts(
            $rateLimitKey = 'delete:' . auth()->id(),
            maxAttempts: 5,
        )) {
            Notification::make()
                ->title('Too many attempts')
                ->body('Please try again in ' . RateLimiter::availableIn($rateLimitKey) . ' seconds.')
                ->danger()
                ->send();

            return;
        }

        RateLimiter::hit($rateLimitKey);

        // ...
    })