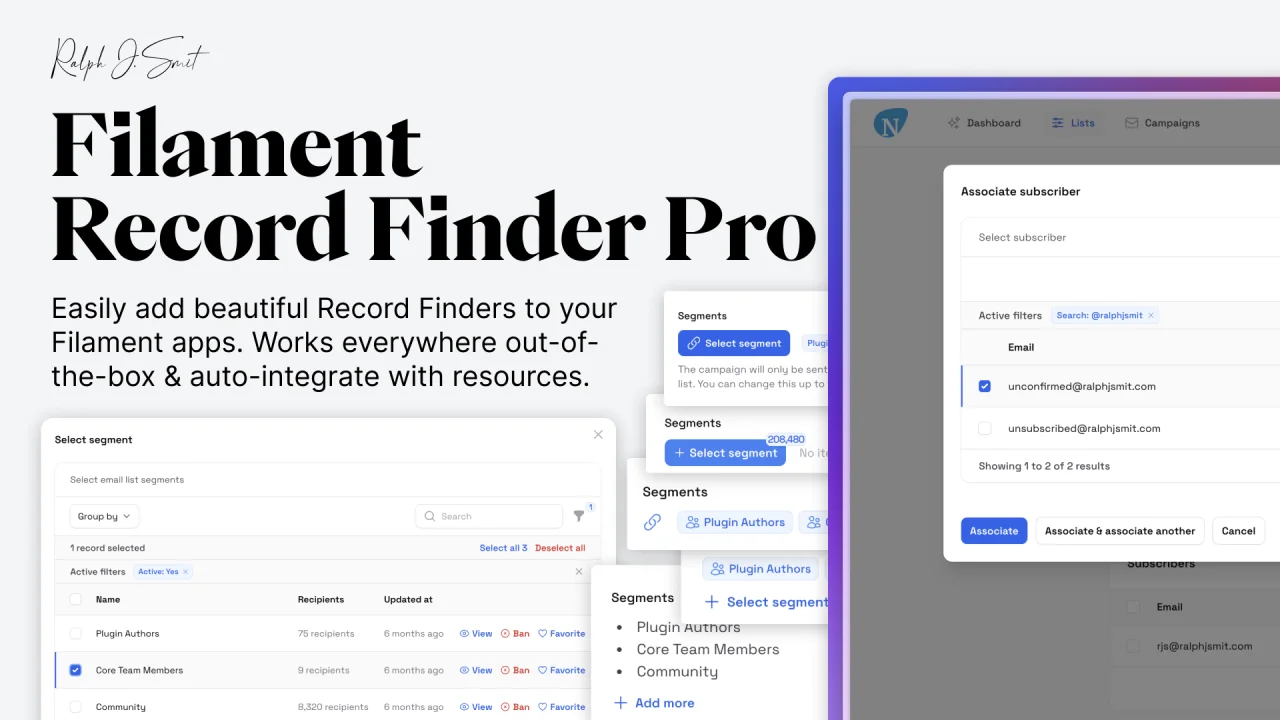
Record Finder Pro
Replace your `Select`'s with beautiful Record Finders to make searching easier. Works everywhere out-of-the-box & integrates with resources.
 Author:
Ralph J. Smit
Author:
Ralph J. Smit
Documentation
- Features
- Prerequisites
- Table
- Configuration options
- Roadmap
- Support
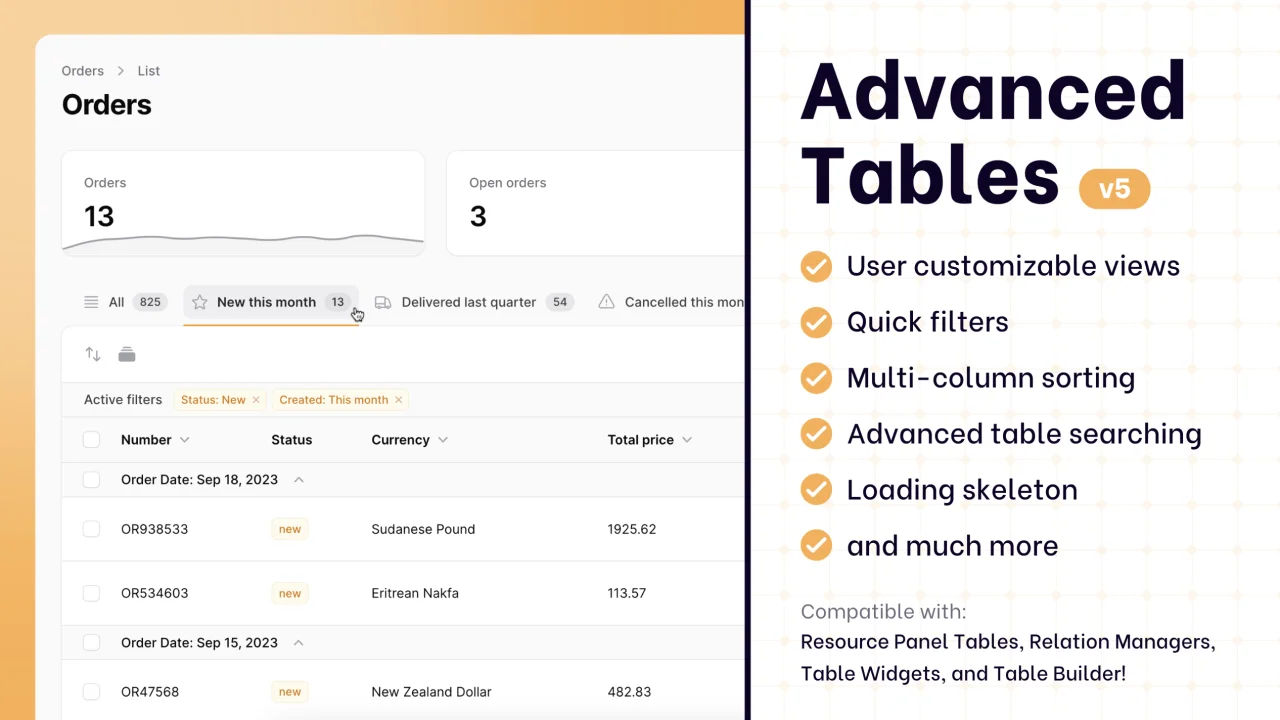
This packages allows you to easily integrate a beautiful Record Finder into your Filament forms. A Record Finder is an advanced component that allows you to select records, attach relationships, choose options, etc. from a fully Filament-powered table in a modal or slide-over. This greatly improves the UX of your Filament-app compared to a regular Select component, which only allow a simple label, or some simple custom HTML at best. In contrast, the Record Finder allows your users to comprehensively search and filter through all available records in order to select just the right ones. Record Finder Pro works both inside and outside panels, automatically integrates with relationships and resources, and allows you to noticeably improve your UX greatly with almost no effort!
NEW: The package supports Filament V3, V4 & V5.
#Features
- Record Finder component to select records from a full Filament-powered table 💛
- Supports single & multiple selection.
- Automatically integrates with relationships ✅
- Automatically integrates with resources when used in panels 🚀
- Apply filters, grouping, summarizers, sorting, etc. to the table ✨
- Fully customizable table 👌
- Disables current record.
- Very versatile ways to display selected records in form⚡️
- Inline layout option.
- Special table actions to "attach" or "associate" new records.
- Supported inside nested modals and slide-overs.
- Beautiful design & integration with Filament Panels.
- Works outside panels in all forms. 🎈
- Support for dark mode 🌚
- Fully & easily translatable.
- Supports Filament V5, V4 & V3. 🎉
The Record Finder is a plugin that will replace any Select component in your application that queries Eloquent models. This makes it very convenient to give your users the ability to search for records through a large data set and/or to display additional information in the form of table columns for each row. All-in-all, once you reach more than 5 or 10 records, the RecordFinder is a much more advanced and convenient way to select records than from default Select component.
The RecordFinder has been created to provide the most out-of-the-box experience possible. This is visible in e.g. the fact that when you have a RecordFinder for a certain model (e.g. a record finder to select User item(s)) in a panel, the package will automatically check if a UserResource exists within your application, and if yes, it will automatically fetch the columns and other table configuration from the resource, and applying any settings necessary to make it work.
The package has automatic support for the ->relation() method, so chances are very high that you can simply find and replace your Select components with a RecordFinder and you are good to go.
Furthermore, a wide variety of configuration options are available to customize how the selected records appear in your form. Want to use badges with dynamic icons and colors? Want to show a bulleted list? Want to show a collapsible list? An inline component? Style the action button differently, as link or icon? All are possible with the easy and straightforward configuration options.
Finally, the package also provides special table actions to associate or attach new records. This is very useful in the context of relation managers, where you want to search for new records to attach or associate to HasMany or BelongsToMany relationships.
#Form component
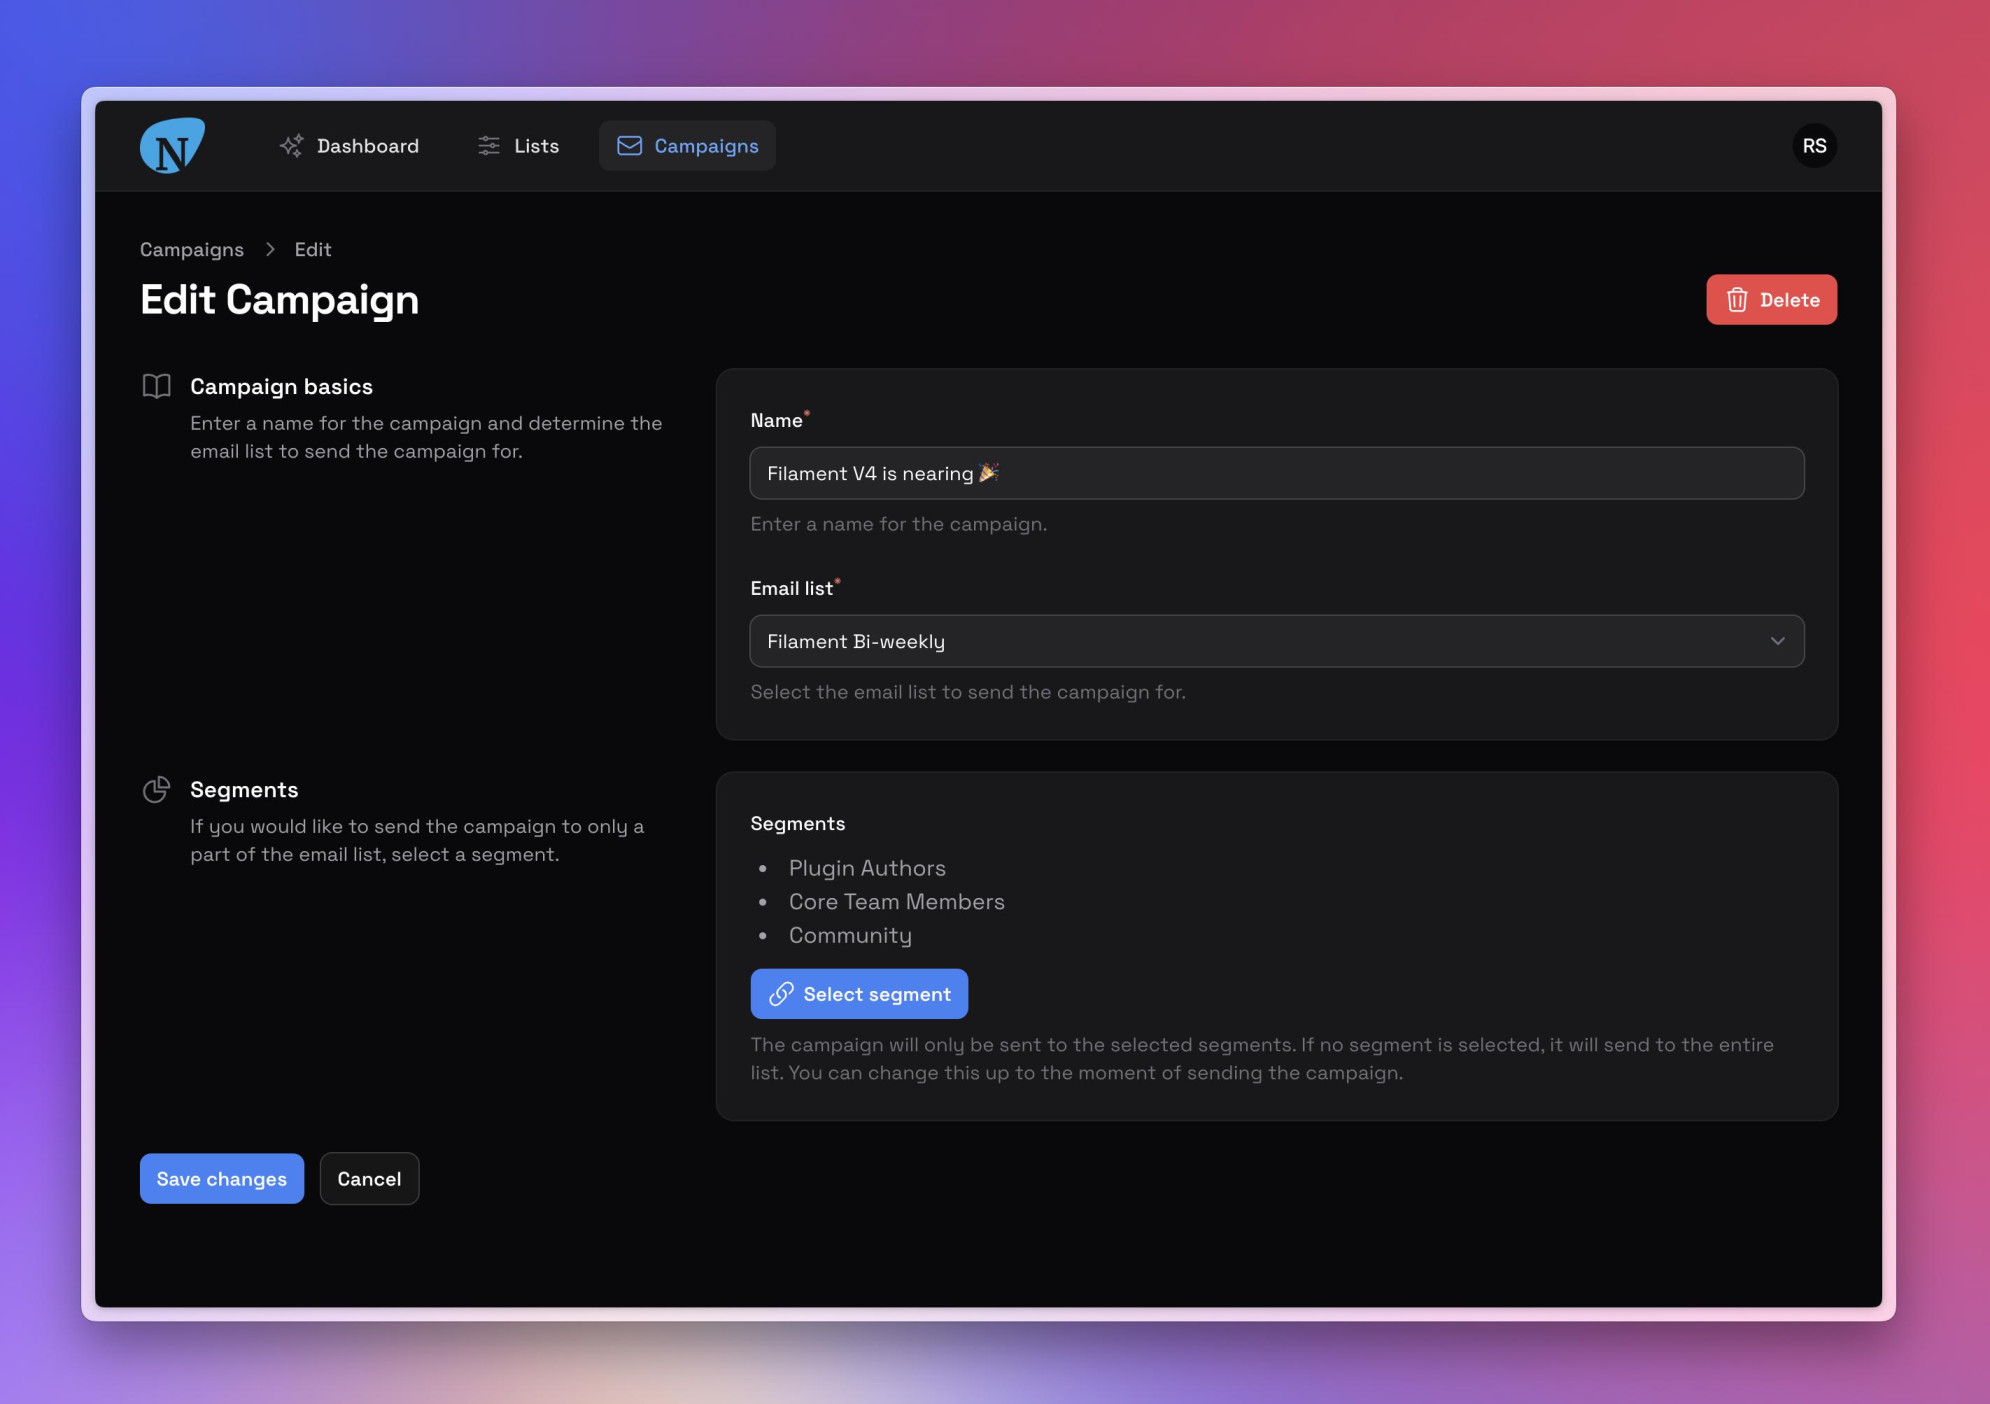
The default appearance of the RecordFinder will show as follows within your form:

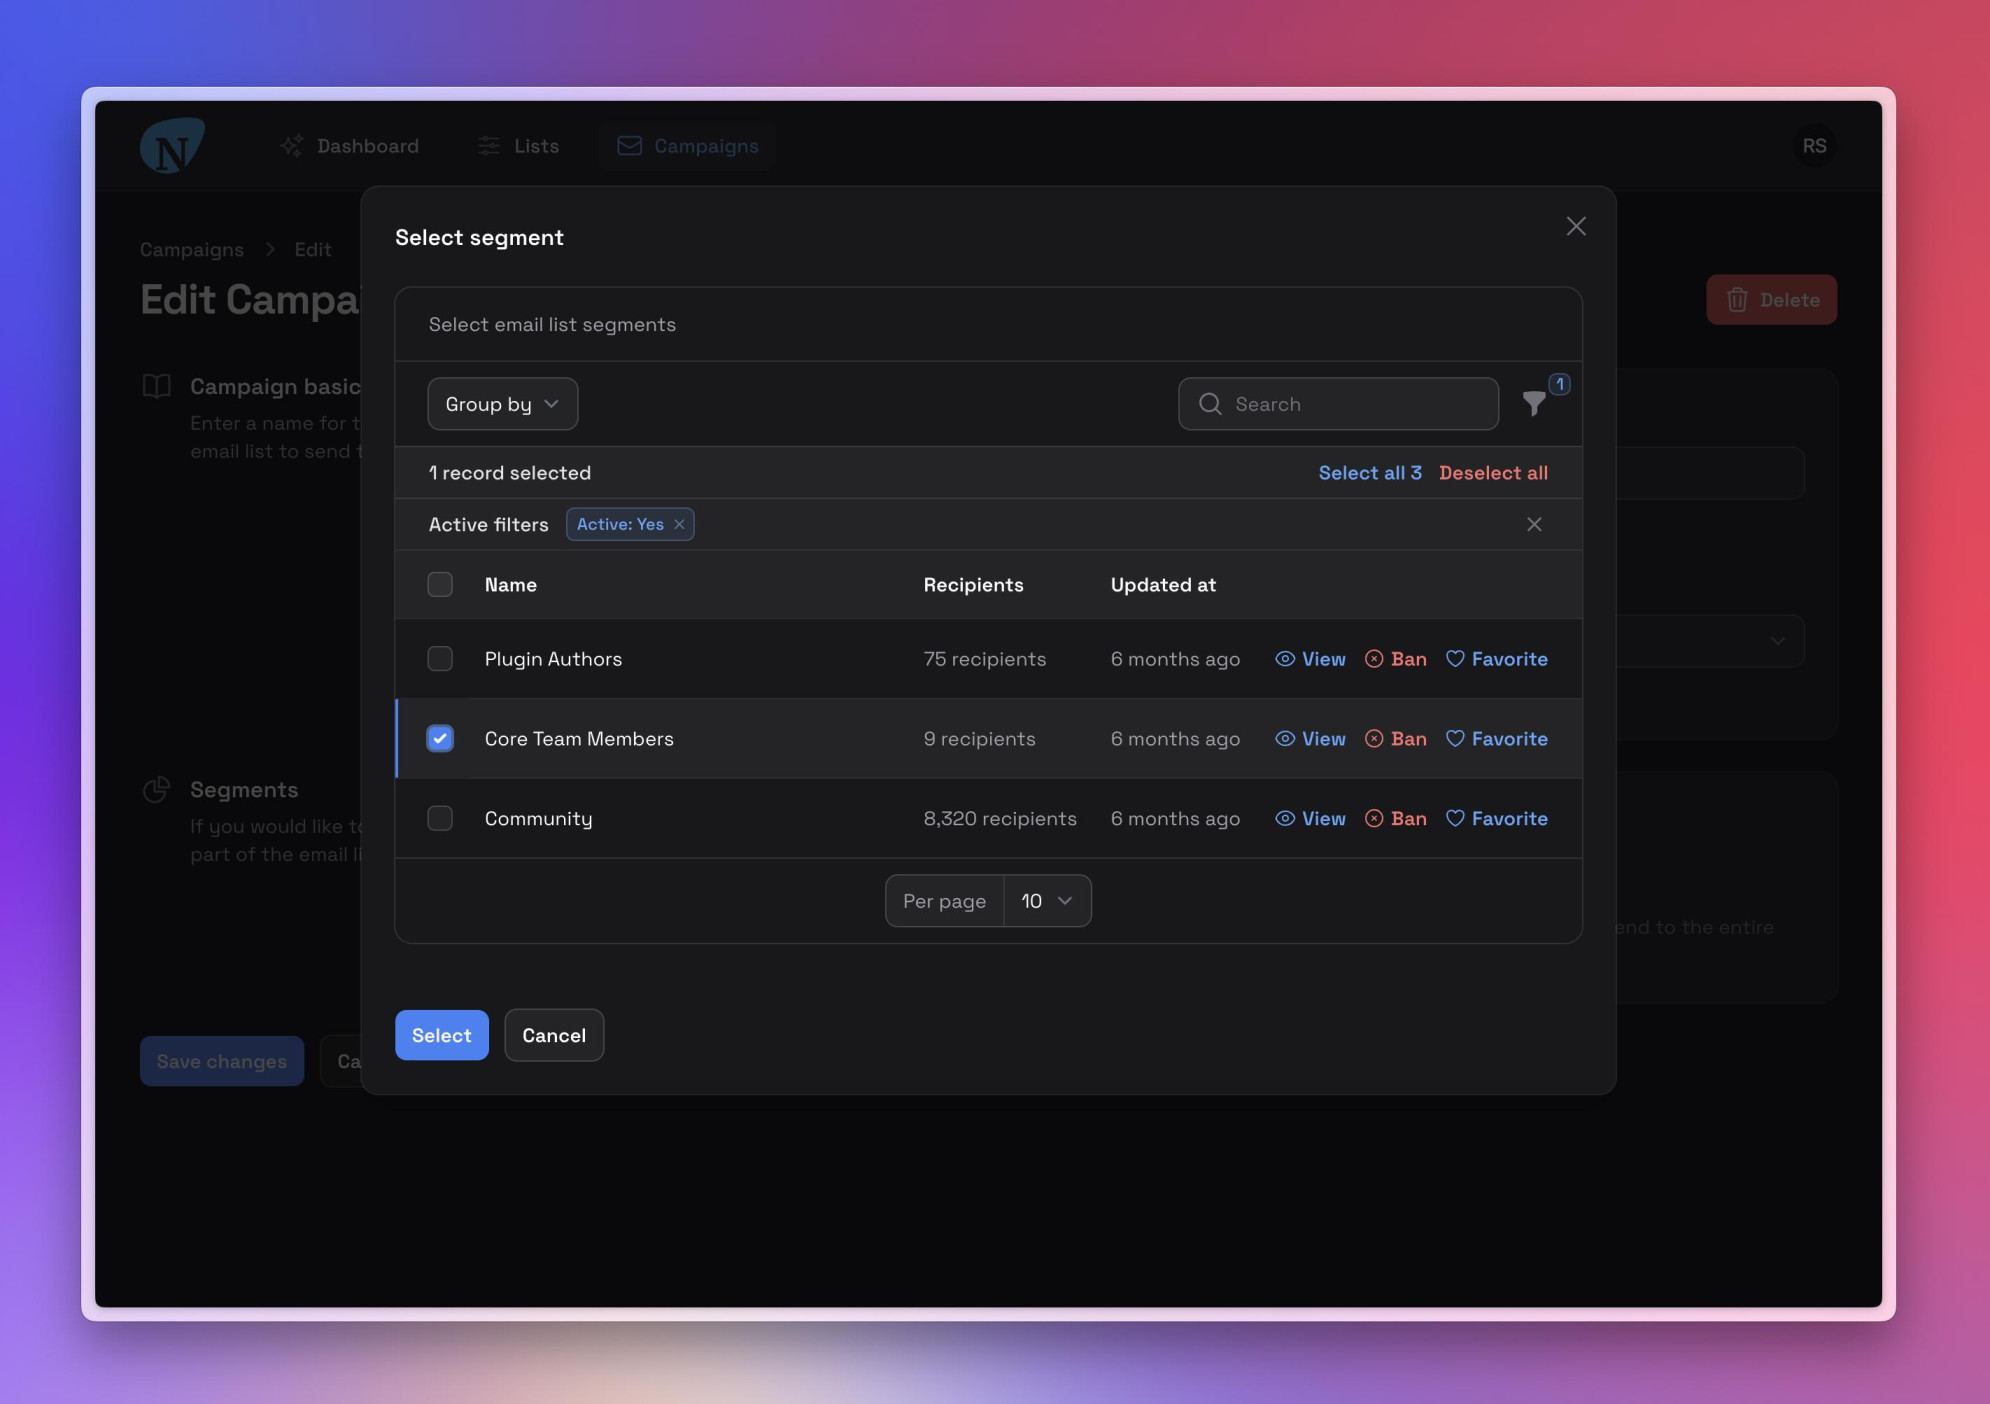
When clicking on the action to select a record, a full-blown modal (or slide-over) will open with a table to select one or more new records to attachs:
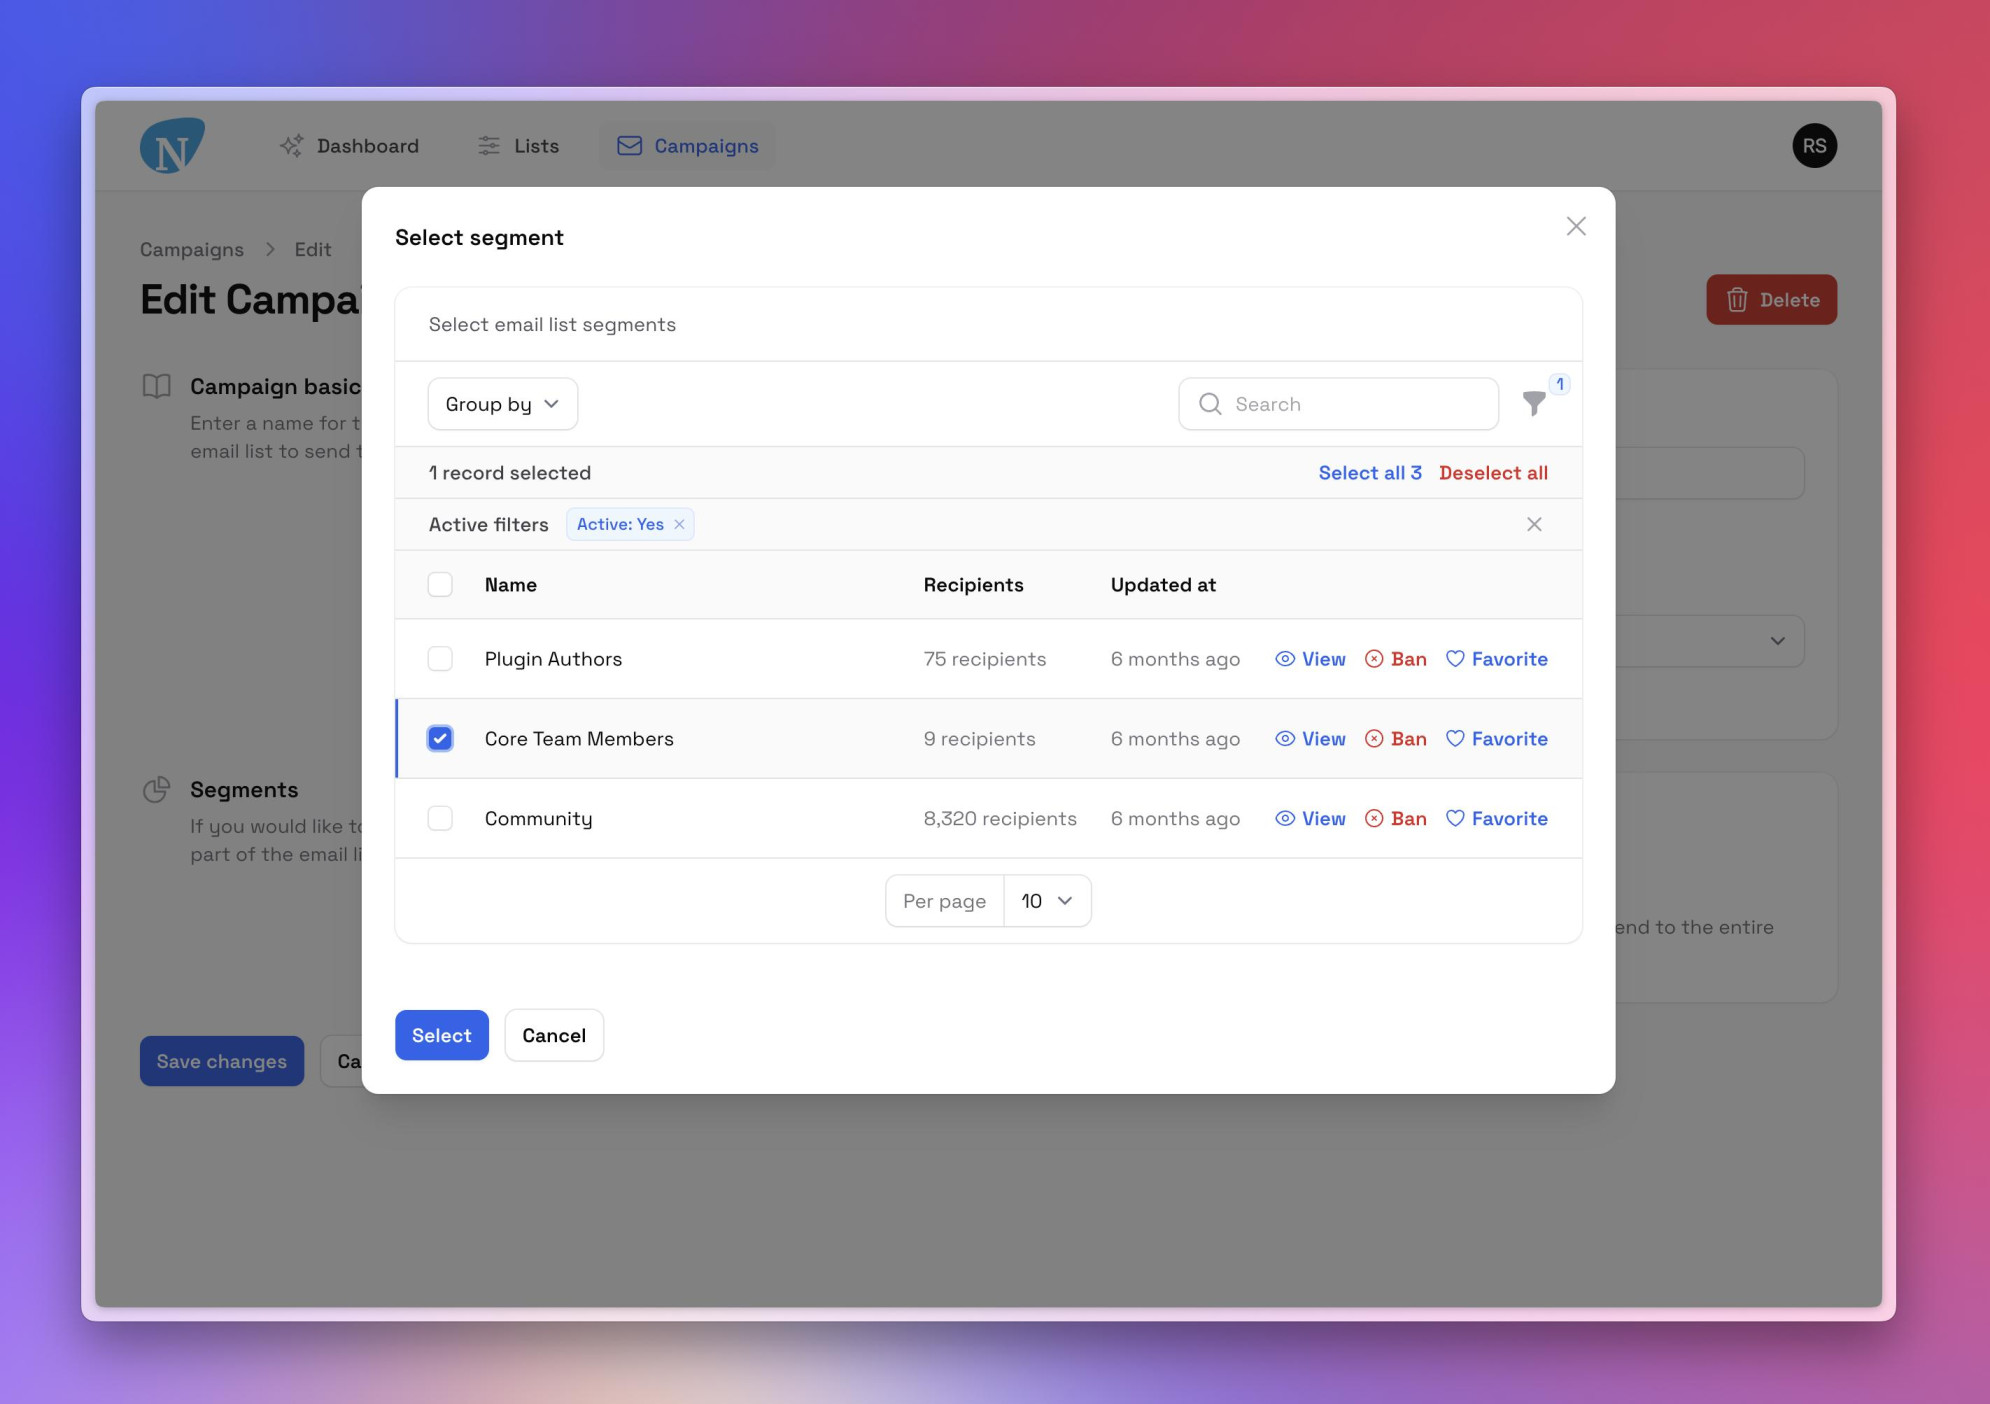
As you can see, the modal contains an entire table. Everything is fully configurable, so you can add filters, groups, summaries, actions, etc. to the table. The package can be used inside and outside the panel builder. If the package is used inside the panel builder, then the table will automatically detect if there is a resource in your application for the model you are querying, and if yes, display the table in the same way as your resource configuration (of course, you can still override or disable this).
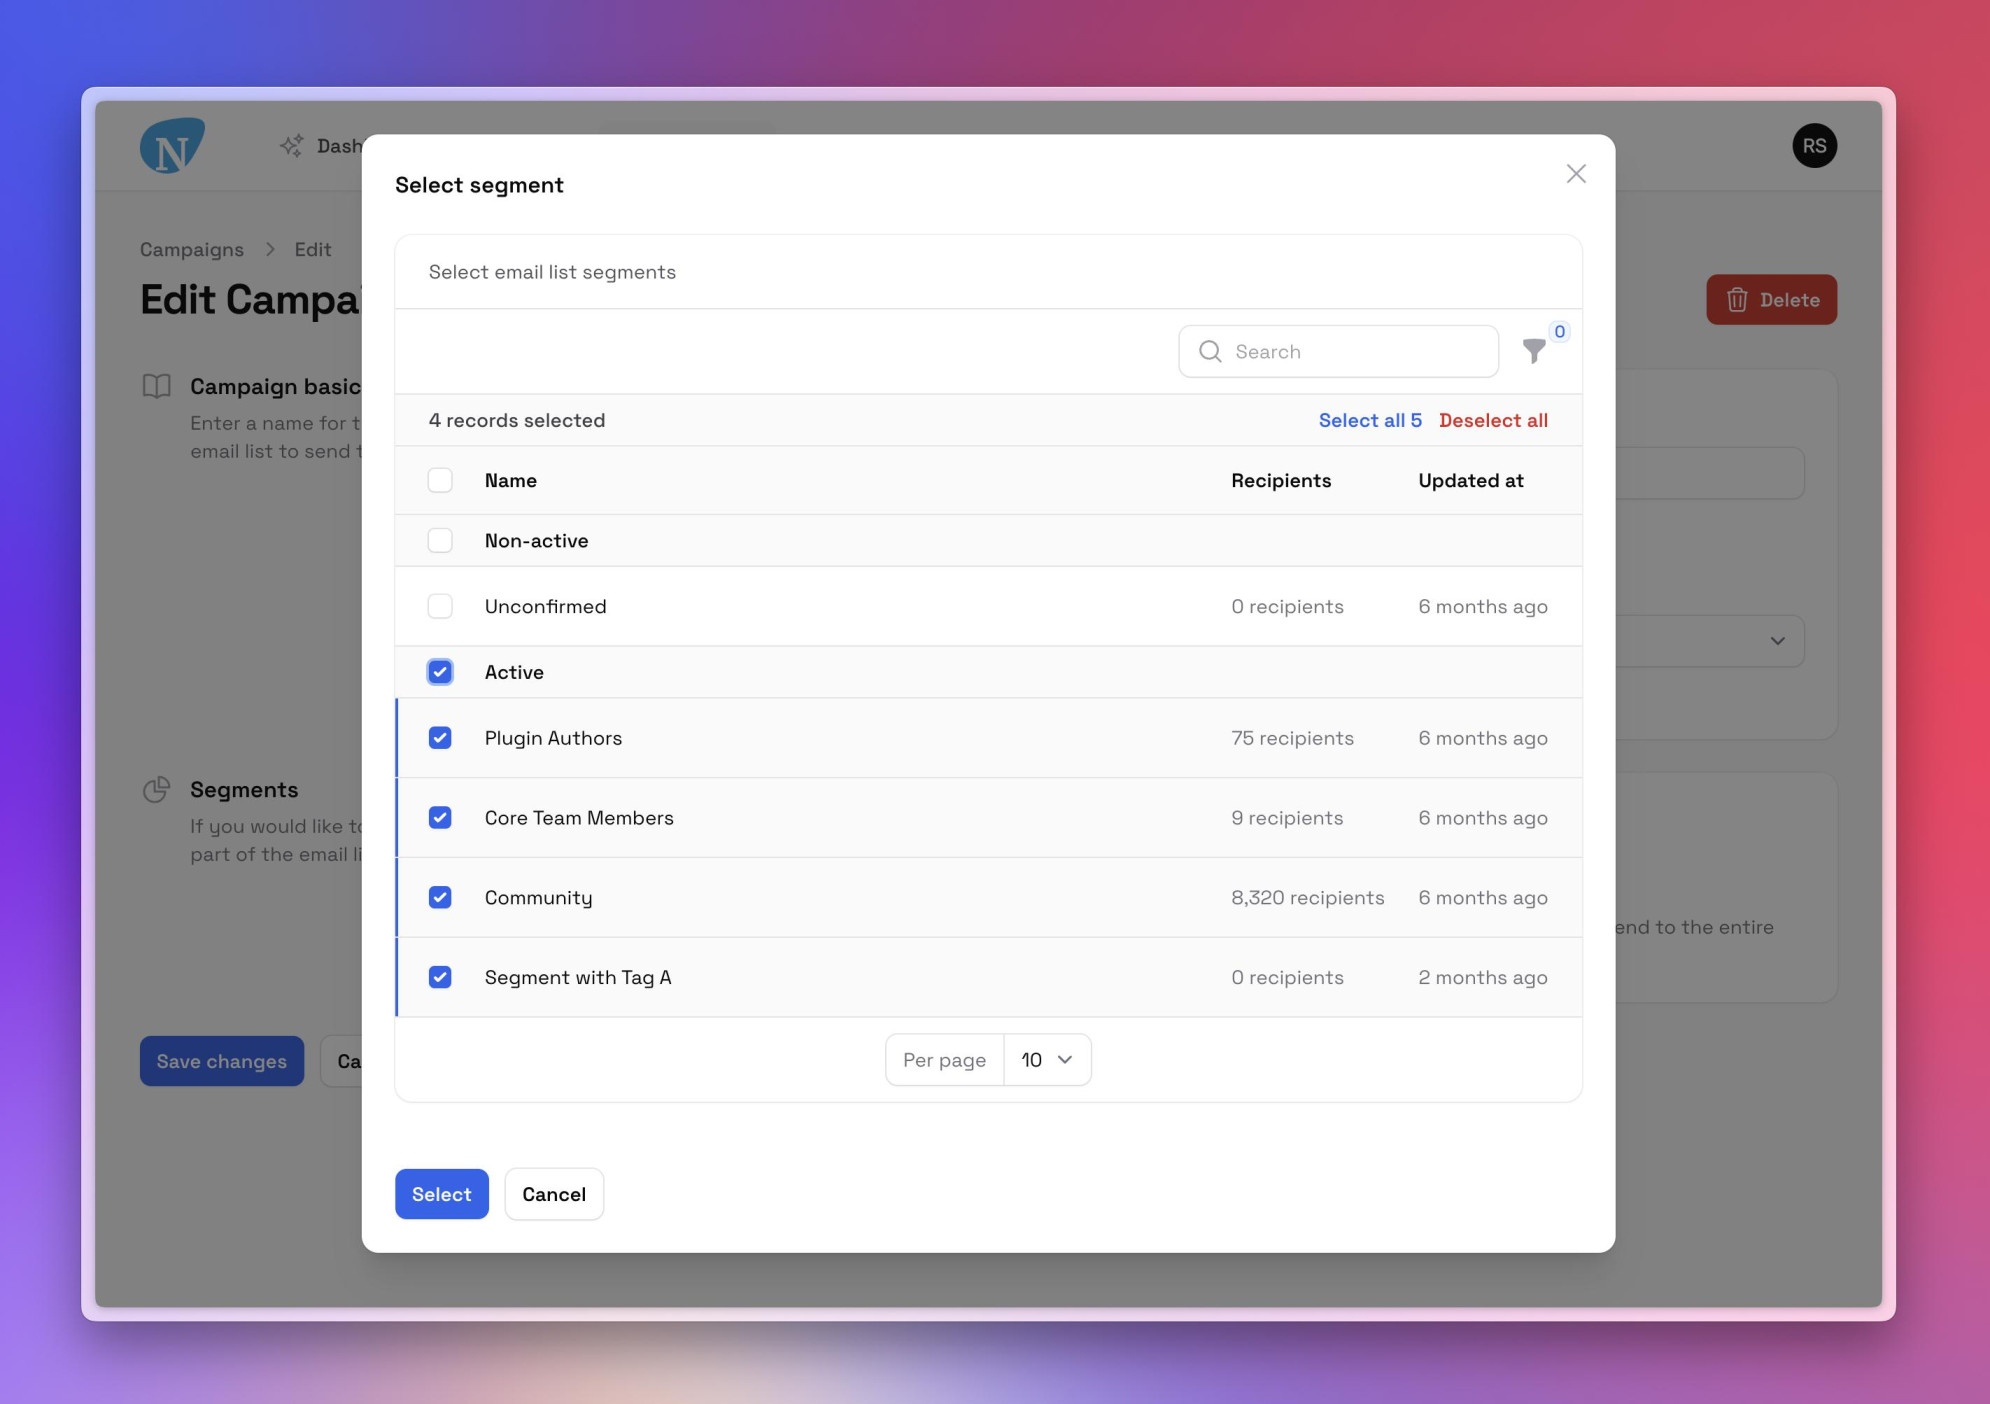
A nice use case would be to group the table and apply bulk-selection per group:
Of course, dark mode works fully as well:
Once the user has an item selected there are many ways to display the selected records inline in the form:
Simple (bulleted) list:
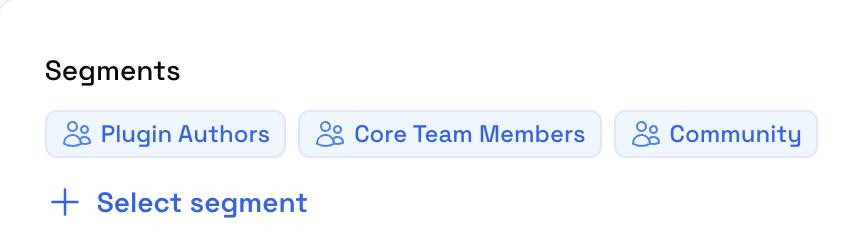
Badges with icons:
![]()
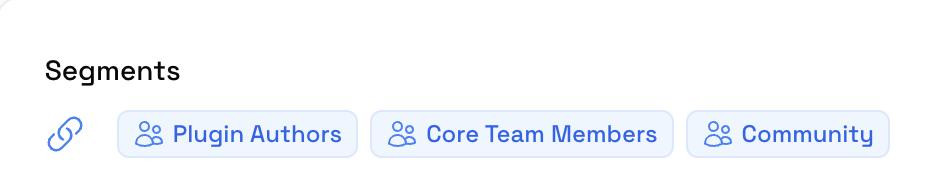
Inline design (button inline with selected items):
![]()
And some other designs to get inspiration from:
Updated design of action button:
Icon button in combination with inline:
Changed action icon with badge to preview number of records to choose from:

Bulleted list and less prominent link version of action:

Thank you for purchasing the Record Finder Pro plugin for Filament!
We tried to make the plugin as easy-to-install and versatile as possible. Nevertheless, if you still have a question or a feature request, please send an e-mail to support@ralphjsmit.com.
#Prerequisites
Before starting the further installation, you should have Filament Forms and/or Panels installed.
The package is supported on Laravel 10 or higher (with earlier versions available since Laravel 8). Please be aware though that support for security fixes for Laravel 10 ends within a few months.
#Installation via Composer
To install the package you should add the following lines to your composer.json file in the repositories key in order to get access to the private package:
{
    "repositories": [
        {
            "type": "composer",
            "url": "https://satis.ralphjsmit.com"
        }
    ]
}
If you have one of my other premium packages installed already, then you don't need to repeat these lines.
Next, you should require the package via the command line. You will be prompted for your username (which is your e-mail) and your password (which is your license key, e.g. 8c21df8f-6273-4932-b4ba-8bcc723ef500).
composer require ralphjsmit/laravel-filament-record-finder
#Add plugin Blade files to custom theme.css (required)
For all panels that you want to use the package in, make sure that you have created a Filament custom theme. Next, for each theme, you need to add the following line to the theme.css file:
@source '../../../../vendor/ralphjsmit/laravel-filament-record-finder/resources/**/*.blade.php';
If you are using the plugin outside a panel, then make sure to include the above line in the CSS-file that is used to generate the CSS for the Livewire components where you will use the upload component in.
#Configuring the plugin per-panel
The Filament Record Finder package works in all forms, irrespective of whether you also have a Filament panel or not. This means that you can nicely include the Record Finder in your app, anywhere you want and wherever you have a Filament form.
If you do decide to use the Filament Record Finder package in a panel, then you should register the plugin in the $panel providers that you want to use the plugin in:
use RalphJSmit\Filament\RecordFinder\FilamentRecordFinder;

$panel
    ->plugin(FilamentRecordFinder::make())
There currently are no configuration methods on the plugin itself. However, it is best practice in Filament V3 to register plugins in the panels that a plugin is used in. Also, if it ever becomes necessary in the future to add per-panel configuration methods to the plugin, then I will be able to do so without needing a breaking change.
The Record Finder will be provided as form component that you can use in any of your forms:
use RalphJSmit\Filament\RecordFinder\Forms\Components\RecordFinder;

RecordFinder::make('product_id')
    ->label('Product')
#Table
The record finder component will show a button to choose/select records. Clicking the button will open a full modal or slide-over with a table.
#Specifying table query
You can provide a query to the table using the ->tableQuery() (or alias ->query()) method. The method accepts a query, a Relation or a closure that returns a query or a Relation. For example:
RecordFinder::make('product_id')
    ->tableQuery(Product::query())
    ->query(Filament::getTenant()->products()) // Alias `query()` for convenience...
Of course, you can provide any constraints to your query that you want:
RecordFinder::make('post_id')
    ->query(fn (User $record) => Post::query()->whereBelongsTo($record))
#Relationships
You can integrate the RecordFinder also very easily into into a relationship using the ->relationship() method. This will automatically adjust the query to the relationship and save the selected record(s) to the relationship. For example:
Select::make('product_id')
    ->relationship(name: 'products')
If you want to integrate with a BelongsToMany relationship, you can use the ->multiple() method in combination with ->relationship():
RecordFinder::make('products')
    ->multiple()
    ->relationship()
When using ->disabled() with ->multiple() and ->relationship(), ensure that ->disabled() is called before ->relationship(). This ensures that the dehydrated() call from within relationship() is not overridden by the call from disabled(). This works the same as with the regular Select component:
RecordFinder::make('products')
    ->multiple()
    ->disabled()
    ->relationship()
#Attaching pivot table
You can also attach pivot data if you want:
RecordFinder::make('products')
    ->multiple()
    ->relationship()
    ->pivotData(function (Forms\Get $get) {
        return [...];
    })
If you're building a form inside your Livewire component, make sure you have set up the form's model. Otherwise, the
RecordFinderdoesn't know which model to use to retrieve the relationship from.
The
->relationship()support is identical to the native FilamentSelectimplementation. Don't be afraid to just simply replaceSelectbyRecordFinder, remove the option label method calls (if present) and you should be good to go!
#Excluding the current record
When working with recursive relationships, you will likely want to remove the current record from the set of results. This can be easily be done using the ignoreRecord argument to the ->relationship() method:
RecordFinder::make('parent_id')
    ->relationship('parent', ignoreRecord: true)
#Customizing the relationship query
You may customize the database query that retrieves options using the modifyQueryUsing parameter of the ->relationship() method:
RecordFinder::make('products')
    ->multiple()
    ->relationship('products', function (Builder $query) {
        return $query->whereBelongsTo(Filament::getTenant())->withTrashed();
    })
#Customizing table columns
You can provide columns to the table using the ->tableColumns() (or alias ->table()) method:
use Filament\Tables;

RecordFinder::make('product_id')
    ->tableStandalone() // Ensure table configuration starts empty...
    ->tableColumns([
        Tables\Columns\TextColumn::make('tenant.name'),
        Tables\Columns\TextColumn::make('name')
            ->description(fn (Product $product) => $product->description),
    ])
    // Alias `table()` for convenience...
    ->table([...])
Note regarding closures: the package supports using closures everywhere as you are normally used to. This means that you can just use closures to inject the current
$record, the current$column, the current$livewireor any other parameter that Filament provides. The only limitation is that you cannot reference the variable$thisorstatic(in the sense ofstatic::someMethod()) inside your closures. However, this has never been recommended practice and you wouldn't normally ever need to use$this, since all relevant parameters can be injected by Filament as a closure parameter. If you want to force yourself not to use these, you can make a habit of writing every closure as astatic functionorstatic fn () => ....
#Getting table columns from the resource
By default, if you do not provide any columns to the ->table() method, the Record Finder will automatically check which Eloquent model the table query is querying. If that model has a resource in the current panel, then the Record Finder will automatically use the table configuration from that particular resource.
Said differently, if you do not provide a custom table configuration (like columns, groups and filters), the Record Finder will automatically take these from how you configured them on your resource. This has the benefit that in most cases the table in the selection modal will look identical to the resource in your app. For users this can be a great UX, since they are already familiar with the table from the resource and most of the times there is no real reason to deviate from that in the record finder. It is also beneficial for you as developer, because you don't need to repeat common configuration like columns, groups and filters.
Then only exception is that all type of actions are not automatically take from the resource. If you want to add any of these, use the ->tableHeaderActions(), ->tableActions() or ->tableEmptyStateActions().
If you want to disable this behaviour, you can use the ->tableStandalone() (or alias ->standalone()) method. This will ensure you'll start with a fresh table:
RecordFinder::make('product_id')
    ->tableStandalone()
    ->standalone() // Alias for convenience...
    ->tableColumns([
        TextColumn::make('name'),
        // ...
    ])
    // ...
#Customizing table filters
You can add table filters by using the ->tableFilters() method. This allows you to easily add functionality to filter records from the table. For example:
RecordFinder::make('product_id')
    ->tableFilters([
        Tables\Filters\TernaryFilter::make('is_public'),
    ])
#Customizing table groups
You can add provide table groups ->tableGroups() method.
RecordFinder::make('product_id')
    ->tableGroups([
        'category.name',
        Tables\Grouping\Group::make('category.name'),
    ])
You can set the default group using the ->tableDefaultGroup() method:
RecordFinder::make('product_id')
    ->tableGroups(['category.name'])
    ->tableDefaultGroup('category.name')
You can hide the grouping settings using the ->tableGroupingSettingsHidden() method:
RecordFinder::make('product_id')
    ->tableGroups(['category.name'])
    ->tableDefaultGroup('category.name')
    ->tableGroupingSettingsHidden()
This works great if you want to always group a table by default on e.g. category and necessarily not allow the end user to change the grouping.
#Customizing table actions
You can add actions to the table using the ->tableHeaderActions(), ->tableActions(), ->tableBulkActions() and ->tableEmptyStateActions() methods. This allows you to easily add functionality to create, edit or delete records from the table. For example:
use Filament\Tables;

RecordFinder::make('author_id')
    ->tableHeaderActions([
        Tables\Actions\Action::make('your_header_action')
    ])
    ->tableActions([
        Tables\Actions\Action::make('your_action'),
    ])
    ->tableBulkActions([
        Tables\Actions\BulkAction::make('your_bulk_action')
    ])
    ->tableEmptyStateActions([
        Tables\Actions\Action::make('your_empty_state_action'),
    ])
#Customizing table pagination page options
You can add table filters by using the ->tableFilters() method. This allows you to easily add functionality to filter records from the table. For example:
RecordFinder::make('product_id')
    ->tablePaginationPageOptions([10, 25, 50, 100])
#Modifying the underlying table
You can modify the underlying table object in the Record Finder by passing a closure to the modifyTableUsing() method and returning the modified table:
RecordFinder::make('product_id')
    ->tableGroups([
        'category.name'
    ])
    ->modifyTableUsing(function (Table\Table $table) {
        // Nice example: force a certain group to be applied always and disallow the user to select a group.
        $table->defaultGroup('category.name')->groupingSettingsHidden();
    })
#Configuration options
See below for an overview of all possible configuration options (in addition to the standard form component options, like label, helper text, hint, columns, etc.).
#Selecting multiple records
You can allow selecting multiple records by using the ->multiple() method:
RecordFinder::make('product_ids')
    ->multiple()
#Displaying selected records
By default, the Record Finder will allow you to display the selected records in a variety of ways. For each record we will determine a label based on the (ID of the) Eloquent model(s) that was selected. In most cases, you would need to provide an attribute name to ->recordLabelAttribute() to set the attribute that should be used as the label. For example:
RecordFinder::make('product_id')
    ->query(Product::query())
    // Provide an attribute available on the `Product` model that will be used as the label to identify a record:
    ->recordLabelAttribute('title'),
You can also provide a closure to manually construct a label for each record:
RecordFinder::make('product_id')
    ->query(Product::query())
    ->getRecordLabelFromRecordUsing(fn (Product $product) => "{$product->title} ({$product->sku})")
    // If you have a `->multiple()` Record Finder, then this closure will run individually for every selected record
    // that is visible in the list, meaning that you can always assume an individual Eloquent model to be injected...
If you do not provide a value or a closure to ->recordLabelAttribute() or ->getRecordLabelFromRecordUsing(), then the package will try to determine a label automatically based on the following fallback order:
- Check if the Eloquent model implements the
Filament\Support\Contracts\HasLabelcontract. If so, use thegetLabel()method. - Check if the Eloquent model implements the
Filament\Models\Contracts\HasFilamentNamecontract. If so, use thegetFilamentName()method. - Check if the Eloquent has any of the following default attributes:
title,nameorfull_name. If so, use these attributes (in the order given). - Finally, if none of the above provide a result, use the Model key as fallback.
#Displaying as a (bulleted) list
By default, the label for the selected will display as pure text. If you have selected multiple records, then the labels for the records are joined together into a comma-separated list.
You can also choose to display the selected records as a list with line breaks:
RecordFinder::make('products')
    ->multiple()
    ->listWithLineBreaks()
This will display the selected records as an <ul> list with line breaks, but without bullets. If you want to display the items as a bulleted list, use the ->bulleted() method instead:
RecordFinder::make('products')
    ->multiple()
    ->bulleted()
This configuration method and the following ones work the same as Filament's
TextEntryinfolist component.
#Limiting nr. of records in list
If you want to limit the number of records that are displayed in the list, you can use the ->limitList() method:
RecordFinder::make('products')
    ->multiple()
    ->limitList(3)
In case that there are more items than can be displayed, it will show a text "and x more" at the end of the list.
This will only display the first 3 selected records. Any furhter remaining records are hidden. If you want to show a "show more" link, you can use the ->expandableLimitedList() option:
RecordFinder::make('products')
    ->multiple()
    ->limitList(3)
    ->expandableLimitedList()
If there are more items than can be displayed, it will show a link button "Show X more" that you can click on to display all items. When all items are shown, an "Show X less" button is visible to collapse the items again.
#Displaying records as badge
Sometimes it can be nice to display selected records as a badge (or a list of multiple badges). You can do so by using the ->badge() method:
RecordFinder::make('product_id')
    ->badge(),
You can also determine the badge color using the ->badgeColor() method:
RecordFinder::make('product_id')
    ->badge()
    ->badgeColor('gray'),
Alternatively, badge colors can also be determined using a closure based on the selected record that the badge is for:
RecordFinder::make('products')
    ->multiple()
    ->badge()
    ->badgeColor(fn (Product $product) => $product->stock_count ? 'success' : 'danger'),
You can also provide a custom badge icon and determine the icon position:
use Filament\Support\Enums\IconPosition;
use Filament\Support\Icons\Heroicon;

RecordFinder::make('products')
    ->multiple()
    ->badge()
    ->badgeIcon(fn (Product $state) => match ($state->type) {
        ProductType::Product => Heroicon::Cube,
        ProductType::ProductBundle => Heroicon::RectangleGroup,
    })
    ->badgeIconPosition(IconPosition::After),
#Changing alignment
By default, lists and text will align at the left side. You can change the alignment by using the available alignment methods:
RecordFinder::make('products')
    ->multiple()
    ->alignLeft()
    ->alignCenter()
    ->alignRight()
#Setting a placeholder
By default, the Record Finder will show a placeholder "No item selected yet". If you want to override this, you can set a placeholder for the Record Finder using the ->placeholder() method:
RecordFinder::make('product_id')
    ->placeholder('Click the button to select a product...')
#Customizing the modal
The Record Finder Pro plugin gives you full flexibility to customize the modal that opens with the table with records.
#Setting the open modal button
By default, the record finder will show a button to open the modal/slide-over. The label of the button will be "Select :modelLabel" or "Select :pluralModelLabel" (for multiple) by default. You can customize the label by using the ->openModalActionLabel() method.
By default, the model label is automatically determined based on the following order:
- If a custom model label is set using
->modelLabel()/->pluralModelLabel(), use that. An example is below. - If the component is used in a panel, check if there is a resource for the model. If so, use the resource's
getModelLabel()/getPluralModelLabel()methods. - Automatically determine the model label based on the field name. For example, the field name
some_author_idturns intosome authoras model label.
You can also set a custom color and icon using the ->openModalActionColor() and ->openModalActionIcon() methods:
use Filament\Support\Icons\Heroicon;

RecordFinder::make('product_id')
    ->openModalActionLabel('Search product')
    ->openModalActionColor('gray')
    ->openModalActionIcon(Heroicon::OutlinedLink)
If you want to customize other attributes of the button, use the methods described below or use the ->openModalAction() method to provide a closure to manually modify the action (see below).
#Customizing the modal heading
By default, the Record Finder modal will have a heading similar to "Select author"/"Select authors", depending on whether or not the Record Finder is set to multiple. You can use the ->openModalActionModalHeading() (or alias: ->modalHeading()) methods to customize the heading:
RecordFinder::make('user_id')
    ->openModalActionModalHeading('Select a new admin user')
#Customizing the modal description
You can set a custom modal description using the ->openModalActionModalDescription() (or alias ->modalDescription()) methods:
RecordFinder::make('user_id')
    ->openModalActionModalDescription('Use the search bar and/or filters to narrow the selection.')
#Using a slide-over instead of a modal
By default, the modal that opens will be a modal. However, you can also turn it into a slide-over modal by using the ->openModalActionSlideOver() (or alias ->slideOver() method:
RecordFinder::make('user_id')
    ->openModalActionSlideOver()
#Customizing the modal width
Depending on how many columns you have in your table, you can customize the width of the modal or slide-over by using the ->openModalActionModalWidth() (or alias ->modalWidth()) method:
use Filament\Support\Enums\MaxWidth;

RecordFinder::make('user_id')
    ->openModalActionModalWidth(MaxWidth::TwoExtraLarge)
#Customizing the open modal action
You can also customize the full action by providing a closure to the ->openModalAction() method. This can be very useful if you want to change the look-and-feel of the button. For example, you could add an icon, change the color, use a link-style button, etc. For example, the following will show the button as a link:
use Filament\Support\Icons\Heroicon;

RecordFinder::make('user_id')
    ->hiddenLabel()  // Hide the field label above the button...
    ->openModalAction(function (Action $action) {
        return $action->link()->icon(Heroicon::OutlinedLink);
    })
    ->openModalActionLabel('Select user')
#Customizing submit modal button label
Each modal with a table will have a submit button to confirm the current selection. By default, the label will be "Choose". You can customize the label of the submit button using the ->openModalActionModalSubmitActionLabel() (or alias ->modalSubmitActionLabel()) method:
RecordFinder::make('user_id')
    ->openModalActionModalSubmitActionLabel('Confirm')
#Customizing model label
If you want, you can provide a custom model label using the ->modelLabel() method:
RecordFinder::make('author_id')
    ->modelLabel('writer')
The plural model label is automatically determined by pluralizing the singular model label. However, if that doesn't work for your case, you can still override the plural model label using the ->pluralModelLabel() method:
RecordFinder::make('author_id')
    ->pluralModelLabel('writers')
#Inline layout
By default, the button to select new records will be displayed below the current selection. You can enable an inline layout using the ->inline() method, which brings the button and the selection on the same line:
RecordFinder::make('product_id')
    ->inline()
The label of the field will still stay on top of the field. You can use the ->inlineLabel() to achieve an inline label as well:
RecordFinder::make('product_id')
    ->inline()
    ->inlineLabel()
#Table actions & relation managers
#Attach action
You can include the RecordFinderAttachAction on your relation manager in the ->headerActions() method to allow attaching new records to your BelongsToMany relationship:
public function table(Table $table): Table
{
    // Within a relation manager...
    return $table
         ->headerActions([
            RecordFinderAttachAction::make()
                ->multiple(),
        ])
        // ...
}
The action works in exactly the same way as the Filament\Tables\Actions\AttachAction::make() class.
The attach action works by guessing the inverse relationship name. In case you are getting an error when attaching a record, provide the inverse relationship name yourself using `$table->inverseRelationship('...').
The shown record finder will populate its table columns in the same way as the form component. As a reminder, if there is a resource in your application for the model that is being queried, then the table configuration from the resource will be used. Otherwise, the table columns will be empty.
You can use the ->tableColumns() method in order to add or override the shown columns:
RecordFinderAttachAction::make()
    ->tableColumns([
        Tables\Columns\TextColumn::make('name')
            ->searchable(),
        // ...
    ])
In addition, all other methods available on the RecordFinder component are available here:
->tableStandalone()whether to disable automatic inheritance of resource table.->tableColumns()to add or override the shown columns.->tableGroups()to add or override the shown groups.->tableDefaultGroup()to set the default group.->tableDeselectAllRecordsWhenFiltered()to deselect all records when a user searches or filters->tableGroupingSettingsHidden()to hide the grouping settings.->tableFilters()to add or override the shown filters.->tableHeaderActions()to add or override the shown header actions.->tableActions()to add or override the shown actions.->tableBulkActions()to add or override the shown bulk actions.->tableEmptyStateActions()to add or override the shown empty state actions.->tablePaginationPageOptions()to set the pagination page options.->modifyTableUsing()to modify the underlying table object.
If you want to customize the query that is used to populate the table, you can use the ->recordFinderTableQuery() method:
RecordFinderAttachAction::make()
    ->recordFinderTableQuery(function (Builder $query) {
        // return $query->where('type', ...);
    })
If you want to pre-select certain records in the table on opening, you can use the ->defaultState() method:
RecordFinderAttachAction::make()
    ->defaultState(User::find(999))
#Associate action
You can include the RecordFinderAssociateAction on your relation manager in the ->headerActions() method to allow associating new records to your HasMany or MorphMany relationship:
public function table(Table $table): Table
{
    // Within a relation manager...
    return $table
         ->headerActions([
            RecordFinderAssociateAction::make()
                ->multiple(),
        ])
        // ...
}
The action works in exactly the same way as the Filament\Tables\Actions\AssociateAction::make() class.
The associate action works by guessing the inverse relationship name. In case you are getting an error when associating a record, provide the inverse relationship name yourself using `$table->inverseRelationship('...').
The RecordFinderAssociateAction has the same methods & options as the above RecordFinderAttachAction.
#Upgrade guide (from V1 to V2)
If you are upgrading from version 1.x to 2.x, then you should remove the following line from your custom theme tailwind.config.js:
content: [
    // Your other files
    './vendor/ralphjsmit/laravel-filament-record-finder/resources/**/*.blade.php',
],
Instead, add the following line to your theme.css file:
@source '../../../../vendor/ralphjsmit/laravel-filament-record-finder/resources/**/*.blade.php';
The V2 is available to all customers who purchased a license.
#Known issues
The V2 currently has the following known issues:
- Action modals inside RecordFinder table (filament/filament#16549).
#Roadmap
I hope this package will be useful to you! If you have any ideas or suggestions on how to make it more useful, please let me know (support@ralphjsmit.com).
#Support
If you have a question, bug or feature request, please e-mail me at support@ralphjsmit.com or tag @ralphjsmit on #record-finder-pro on the Filament Discord. Love to hear from you!
The author
From the same author

SEO
This package is a convenient helper for using the laravel-seo package with Filament Admin and Forms.
Author:
Ralph J. Smit
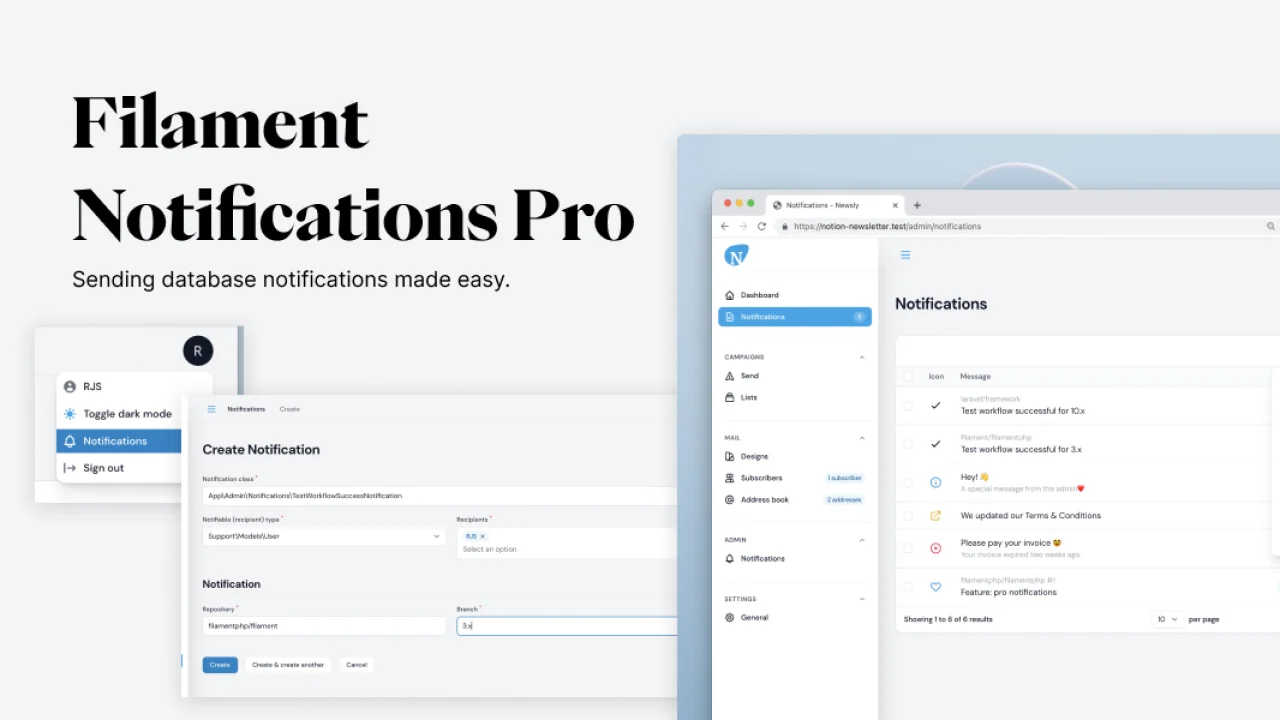
Notifications Pro
Seamlessly integrate Laravel database notifications with Filament.
Author:
Ralph J. Smit
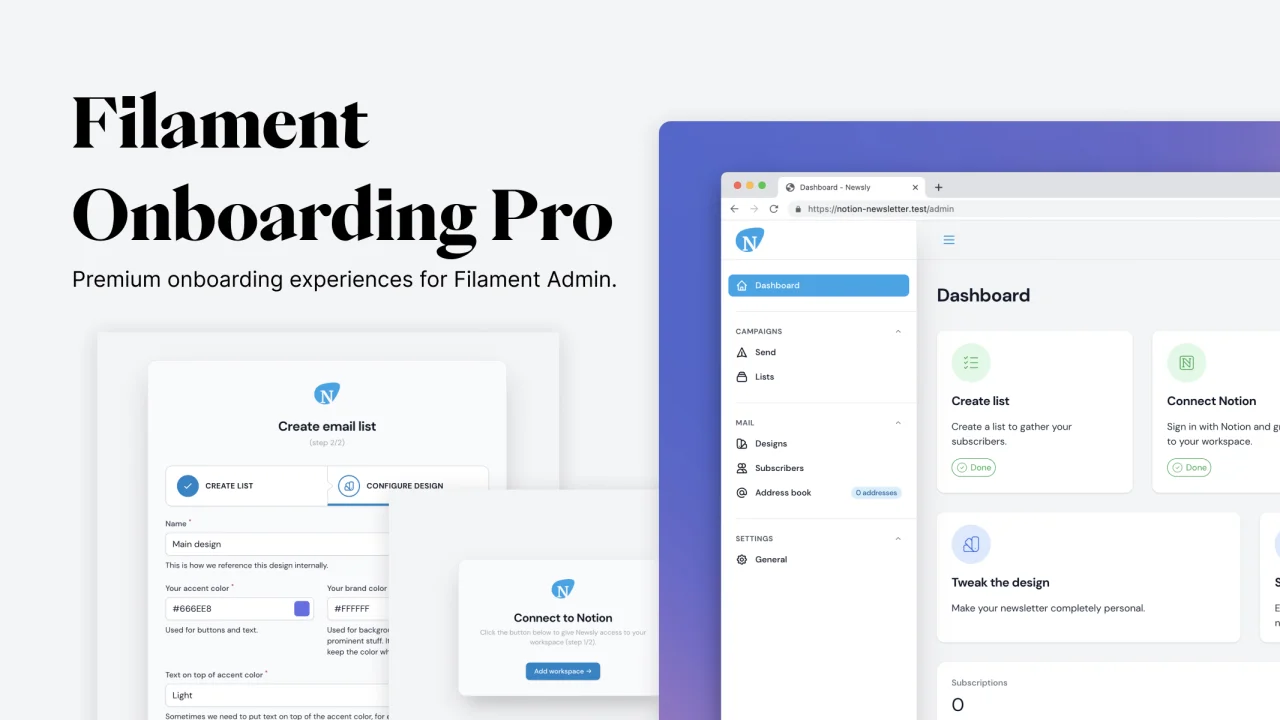
Onboarding Manager Pro
Beautiful onboarding experiences for Filament Admin.
Author:
Ralph J. Smit
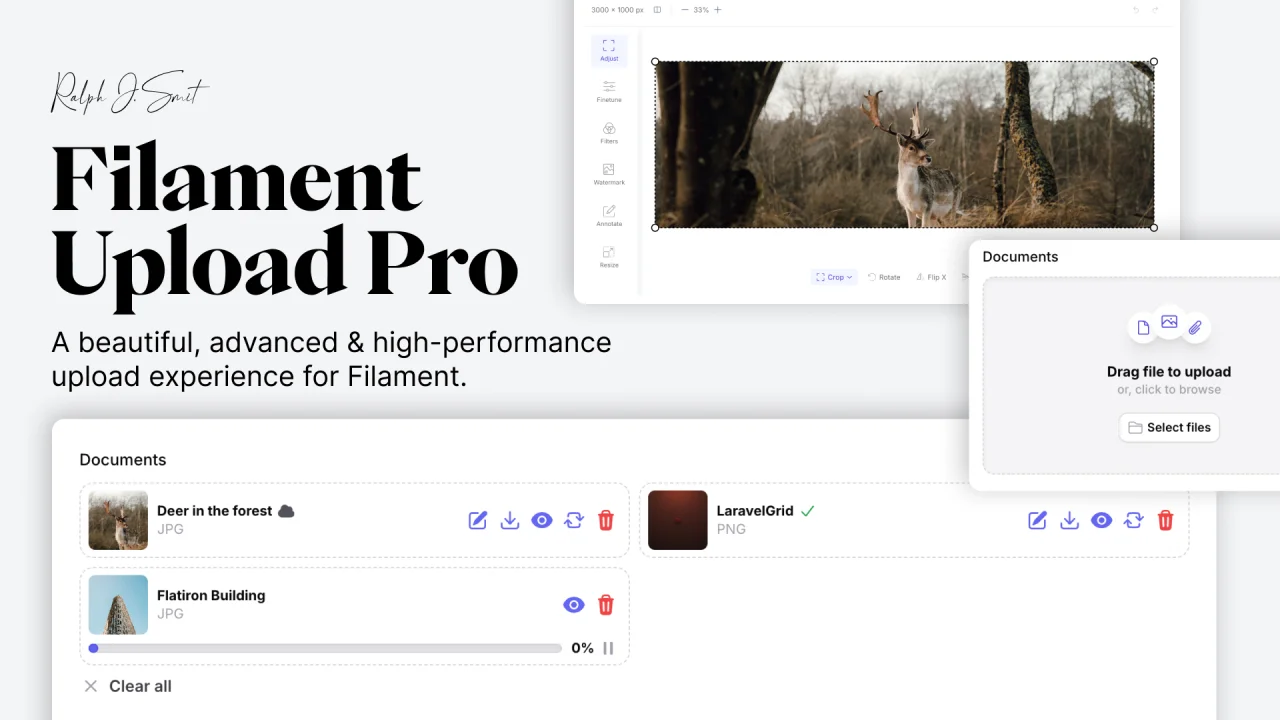
Upload Pro
A beautiful, advanced & high-performance upload experience for Filament.
Author:
Ralph J. Smit
Featured Plugins
A selection of plugins curated by the Filament team
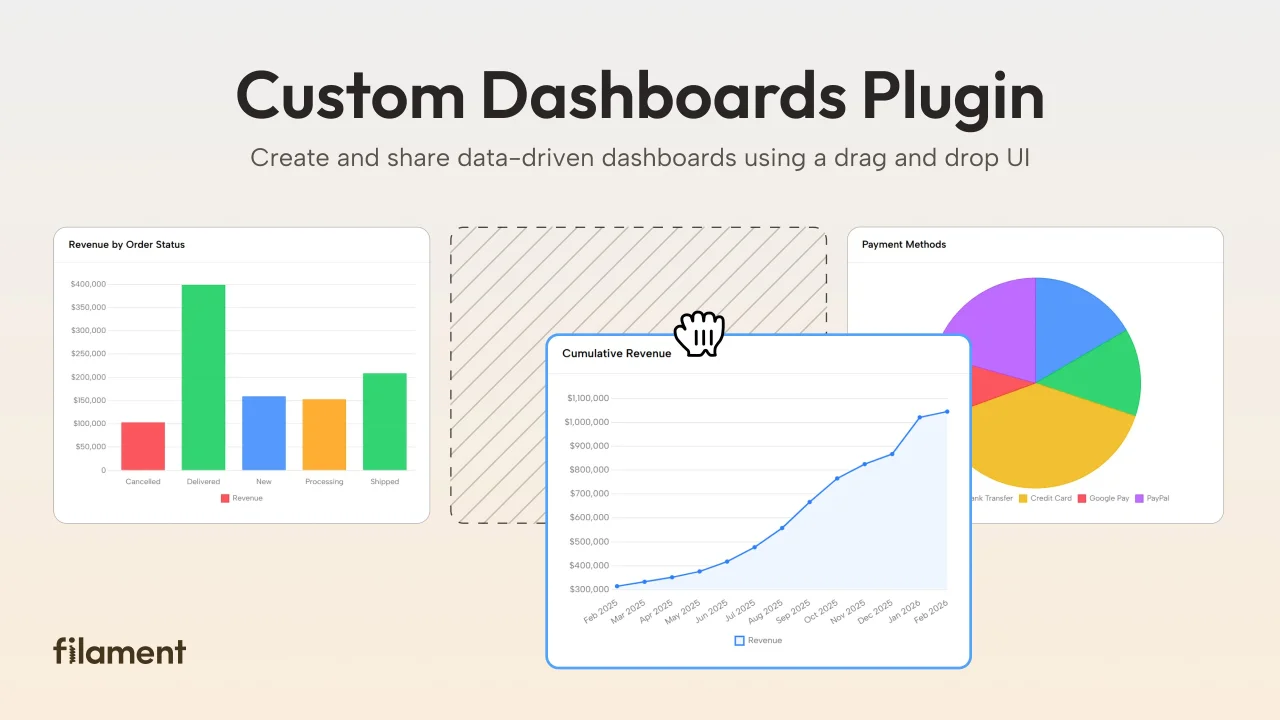
Custom Dashboards
Let your users build and share their own dashboards with a drag-and-drop interface. Define your data sources in PHP and let them do the rest.
 Filament
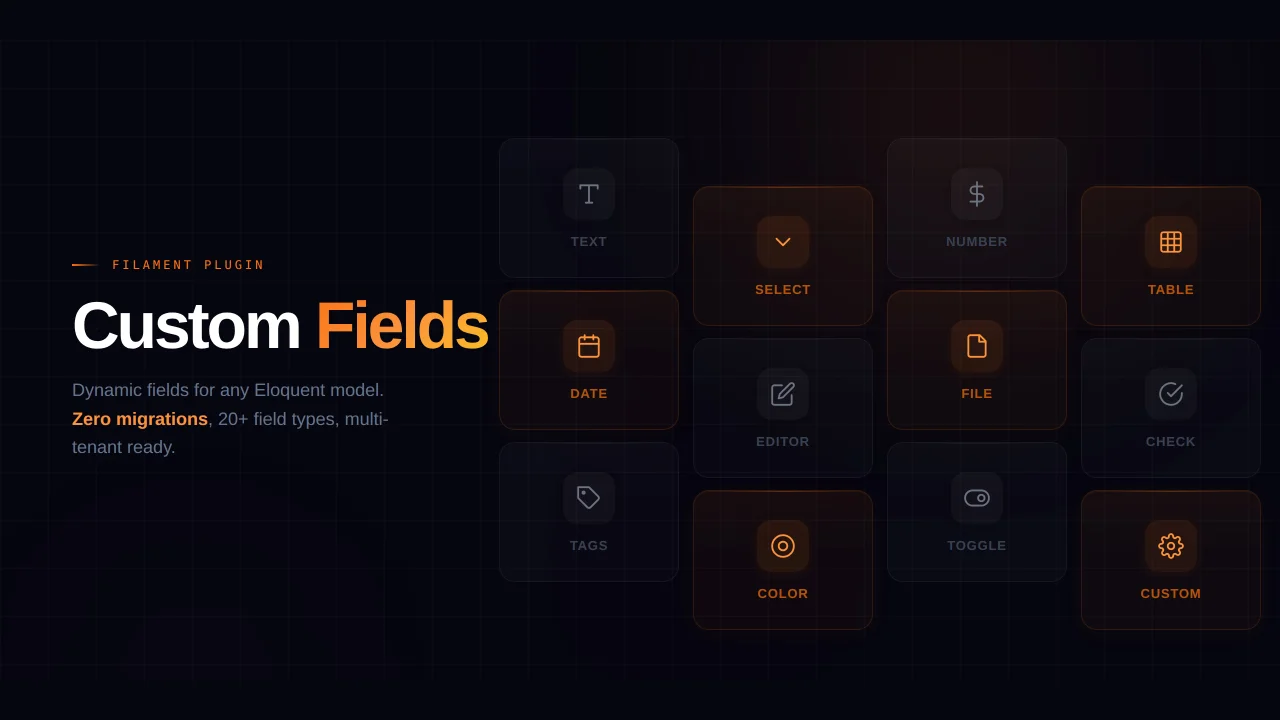
Custom Fields
Eliminate custom field migrations forever. Let your users create and manage form fields directly in Filament admin panels with 20+ built-in field types, validation, and zero database changes.
 Relaticle
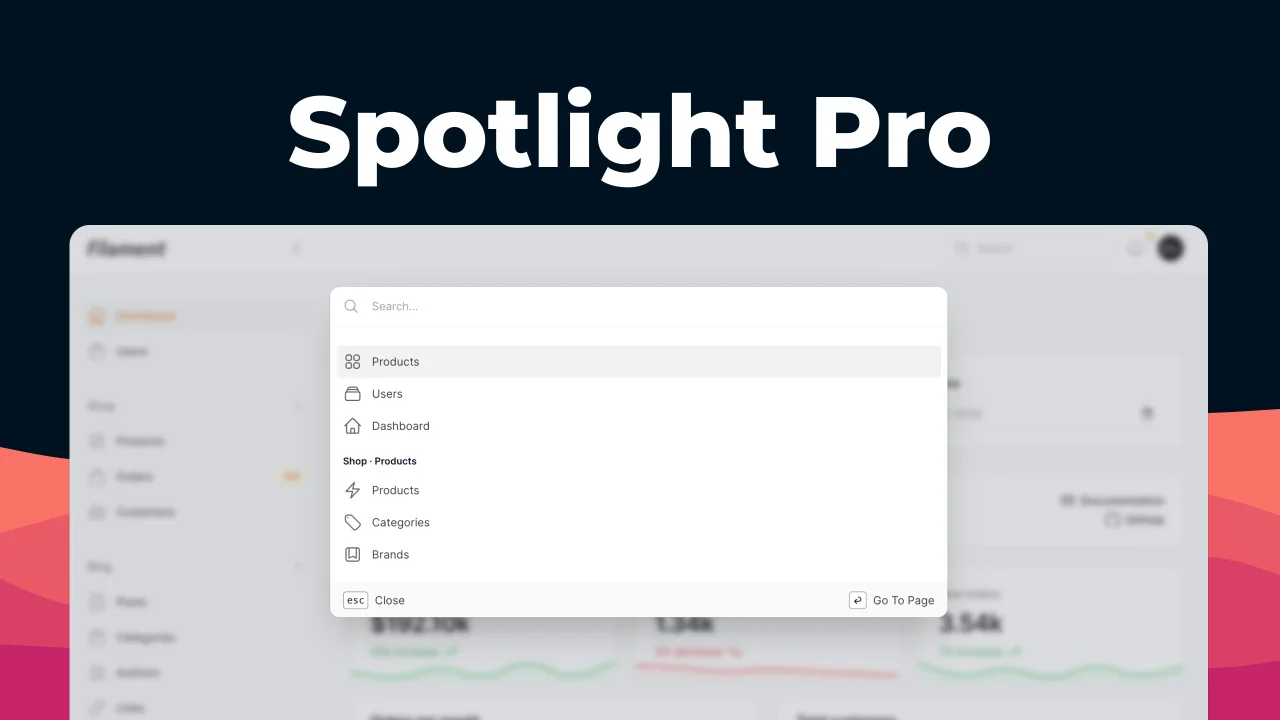
Spotlight Pro
Browse your Filament Panel with ease. Filament Spotlight Pro adds a Spotlight/Raycast like Command Palette to your Filament Panel.
 Dennis Koch