Onboarding Manager Pro
CommunityBeautiful onboarding experiences for Filament Admin.
filament/
namespace. Review the source and install at your own risk. Found
malware or an unresolved security issue the author won't
address?
Report it
.
 Author:
Ralph J. Smit
Author:
Ralph J. Smit
Documentation
- Features
- Installation
- Usage
- Support
This package allows you to design beautiful and fully integrated onboarding experiences for Filament Admin. Make it painless for your users to start using your app or SaaS and prevent them from dropping off. The package provides easy syntax inspired by the Spatie's and Caleb Porzio's Laravel Onboard.
NEW: The package supports Filament V3, V4 & V5.
#Features
- Prevent users from accessing Filament without first completing required parts of your onboarding.
- Add optional onboarding steps with the beautiful dashboard widget.
- Guide your users through one or multiple wizards.💫
- Redirect users to links (e.g. for an OAuth-process) or guide them through a multi-step wizard.
- Let users complete actions straight from the dashboard using Filament actions (NEW).
- Allow users to skip actions (NEW).
- Beautiful design & integration with Filament Admin.
- Advanced widget design with native support for columns and column spans.
- Support for dark mode. 🌚
- Can be easily translated with a language file. – Redirect to custom route after completing onboard flow.
#Screenshots
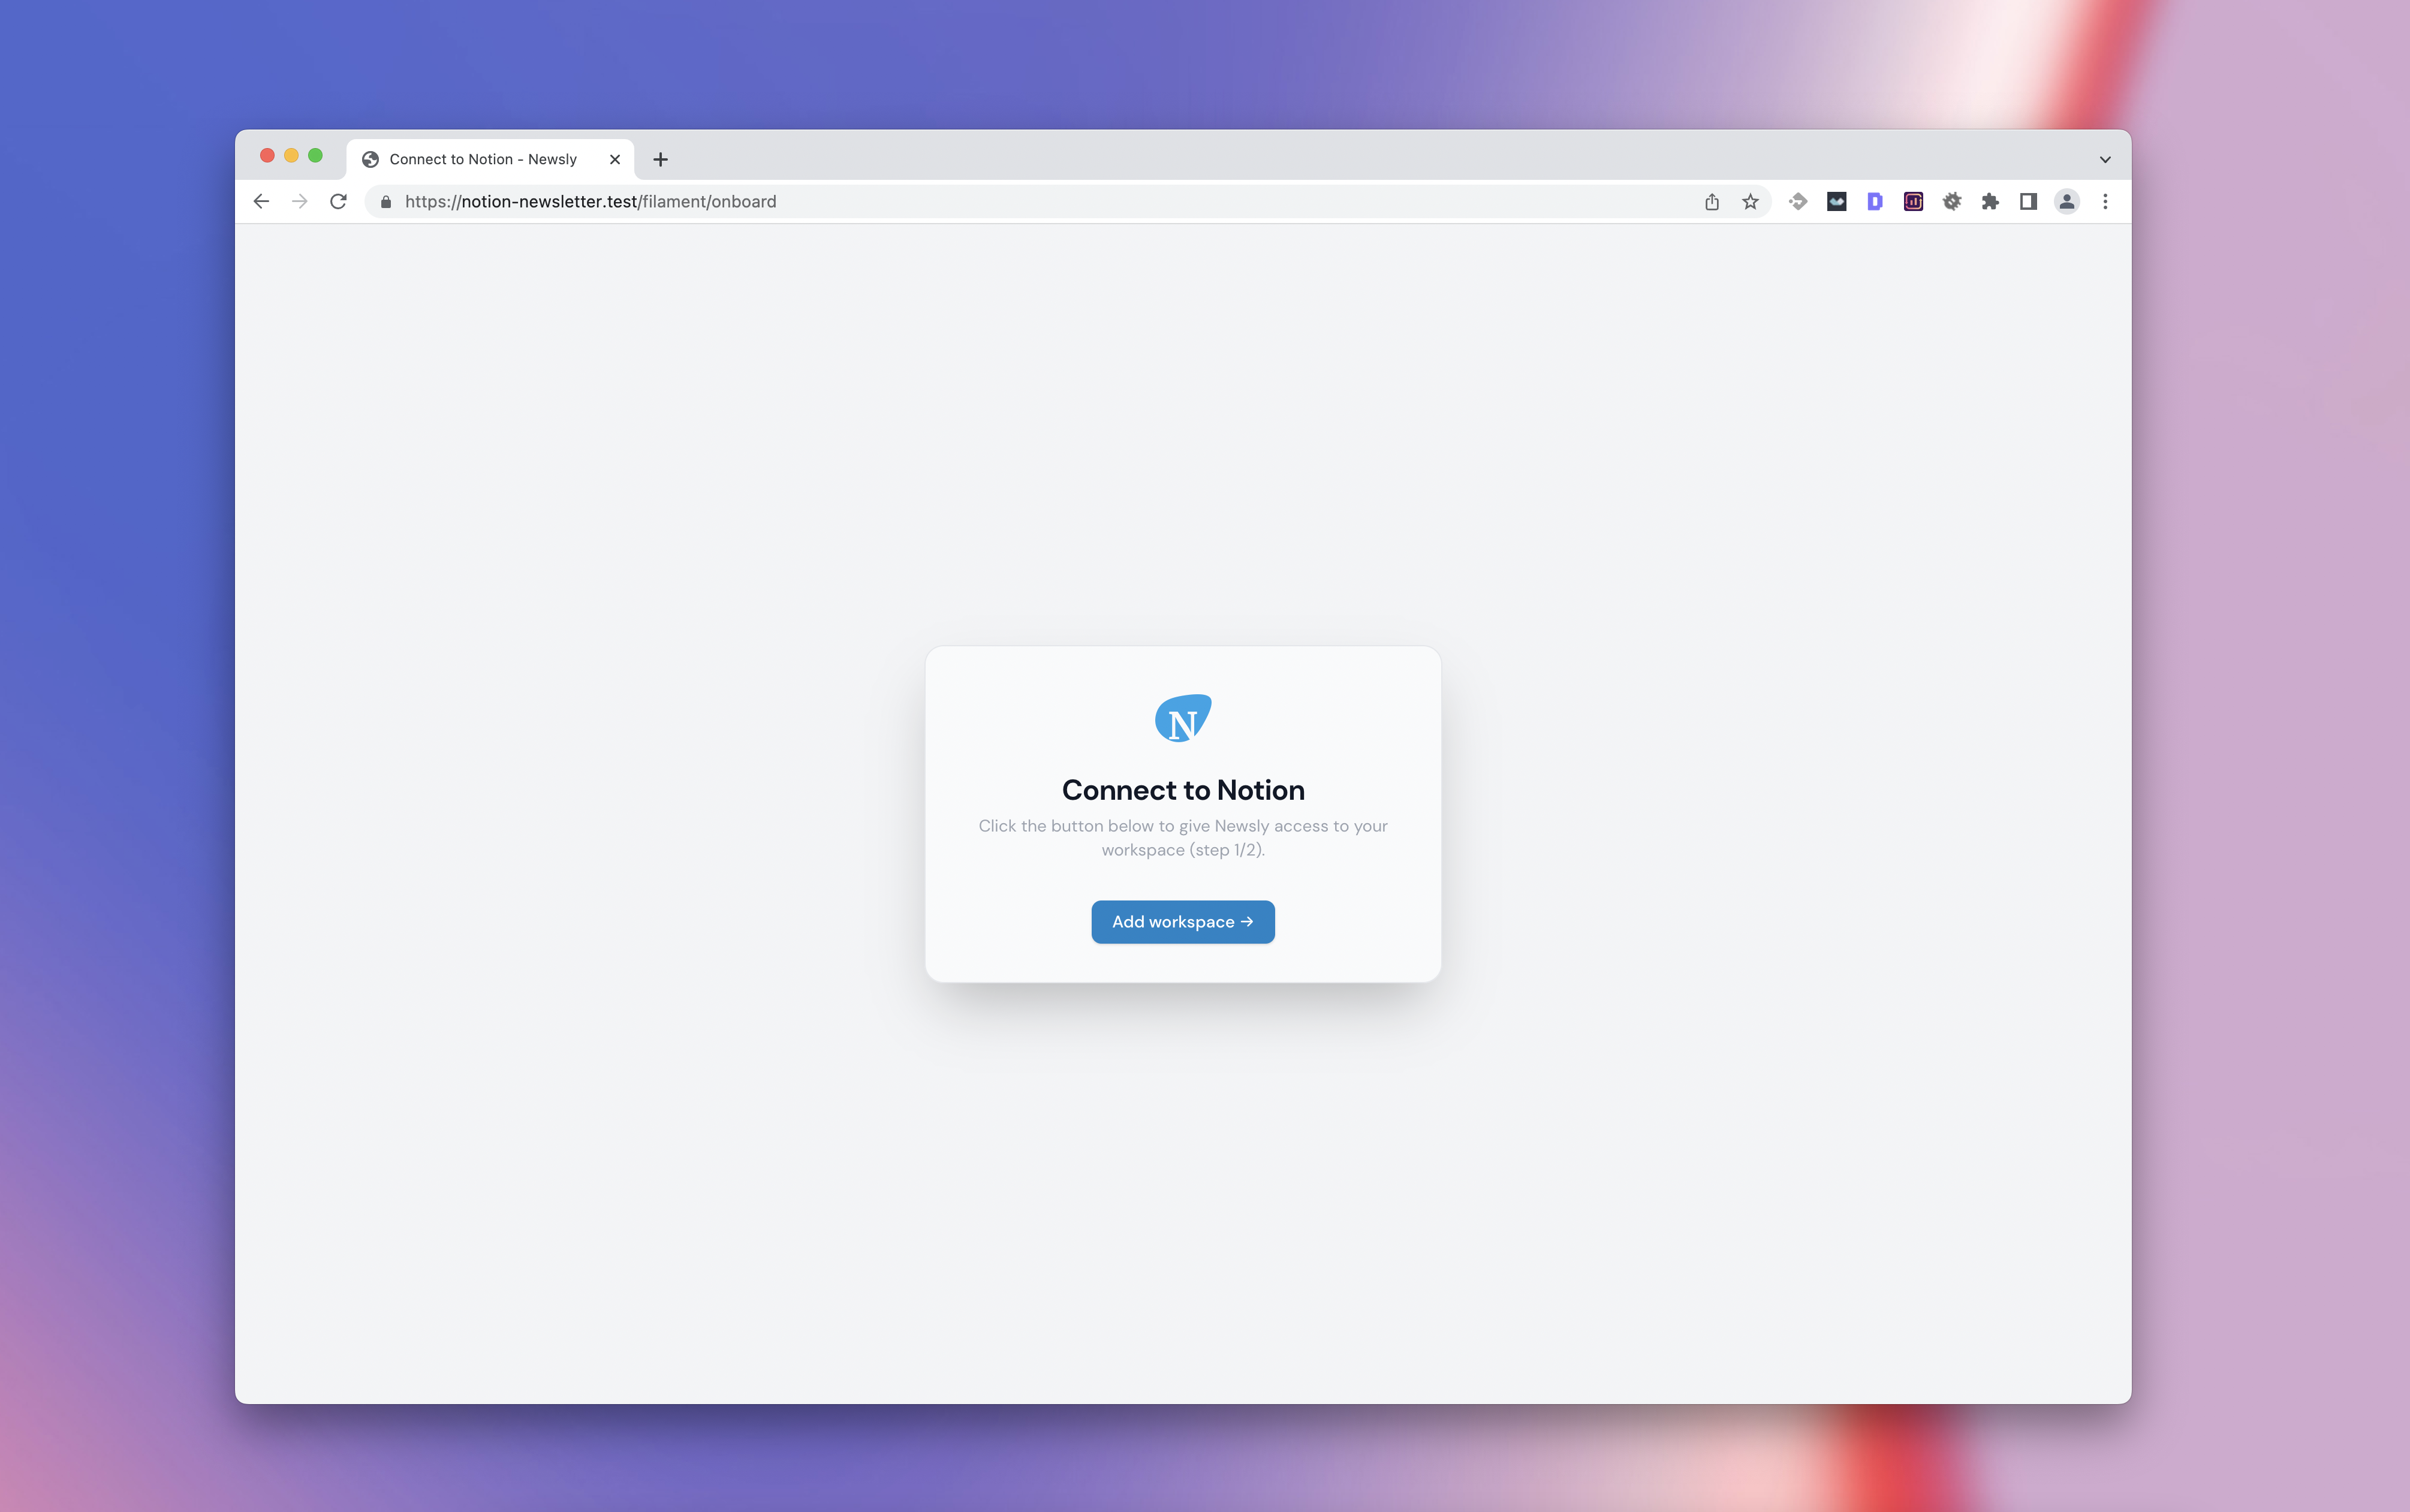
#OAuth flow
You redirect users to a link. This is very handy for authorizing OAuth flows. Without completing this step, you users will not be able to access the dashboard.
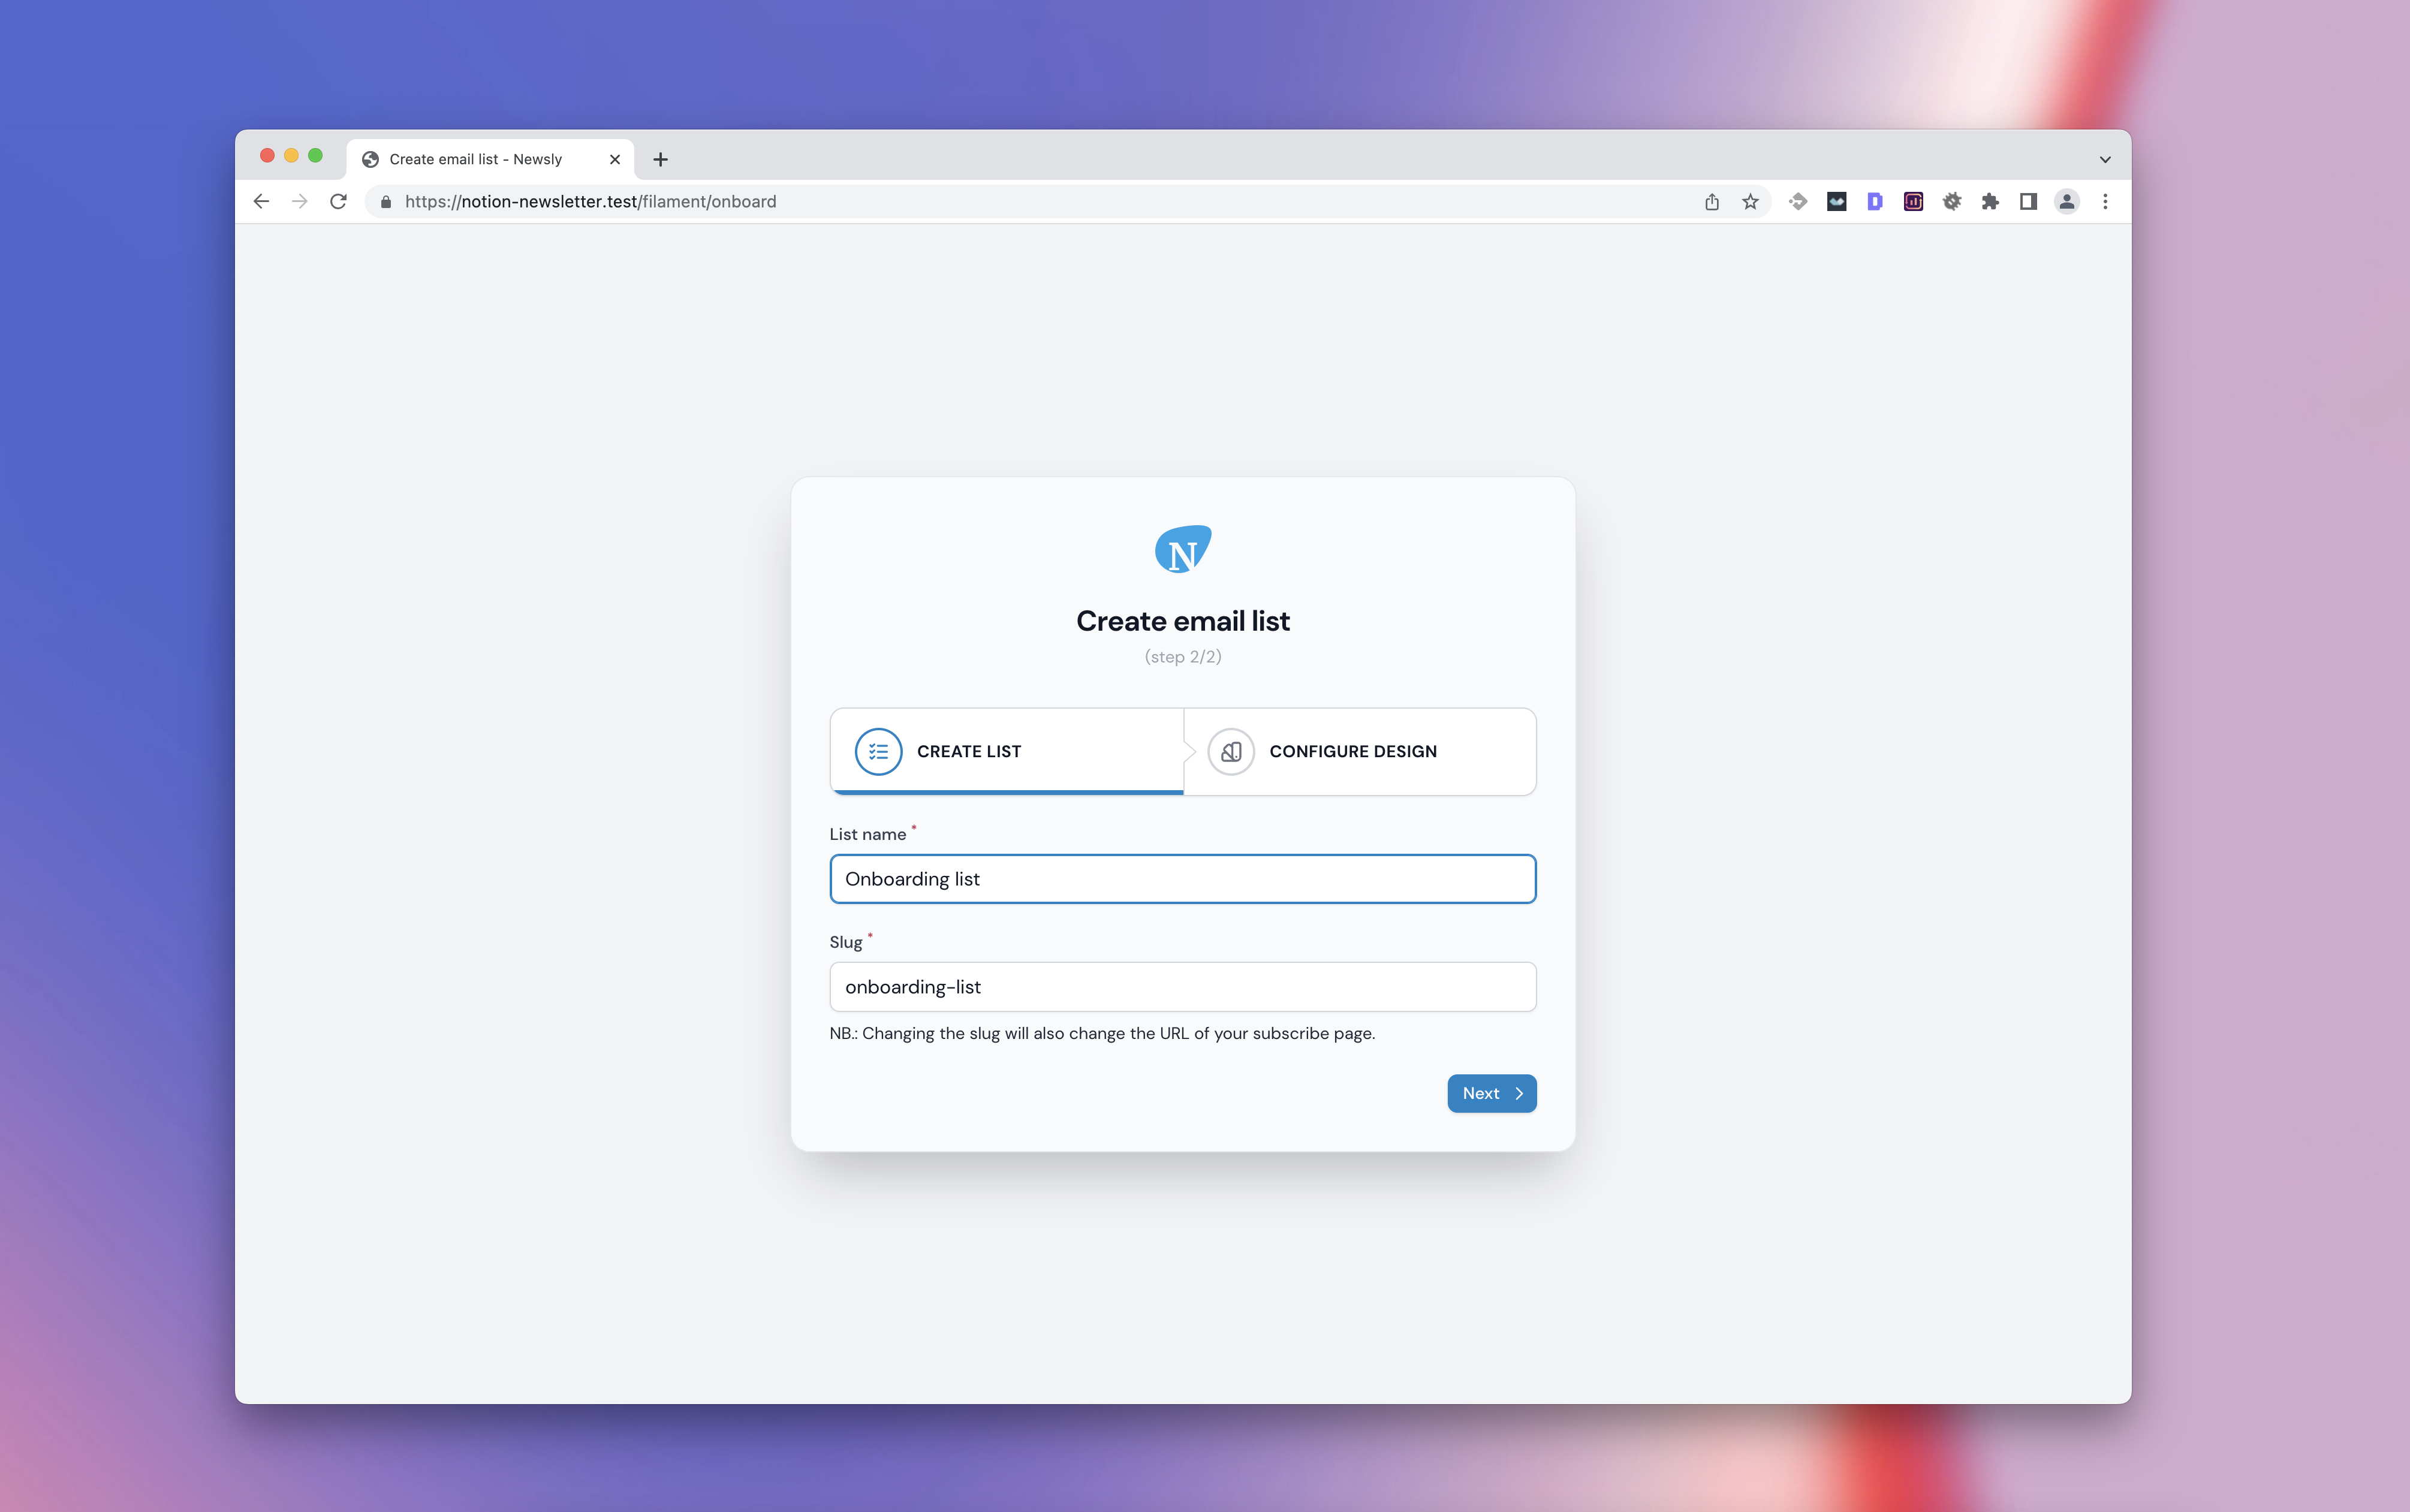
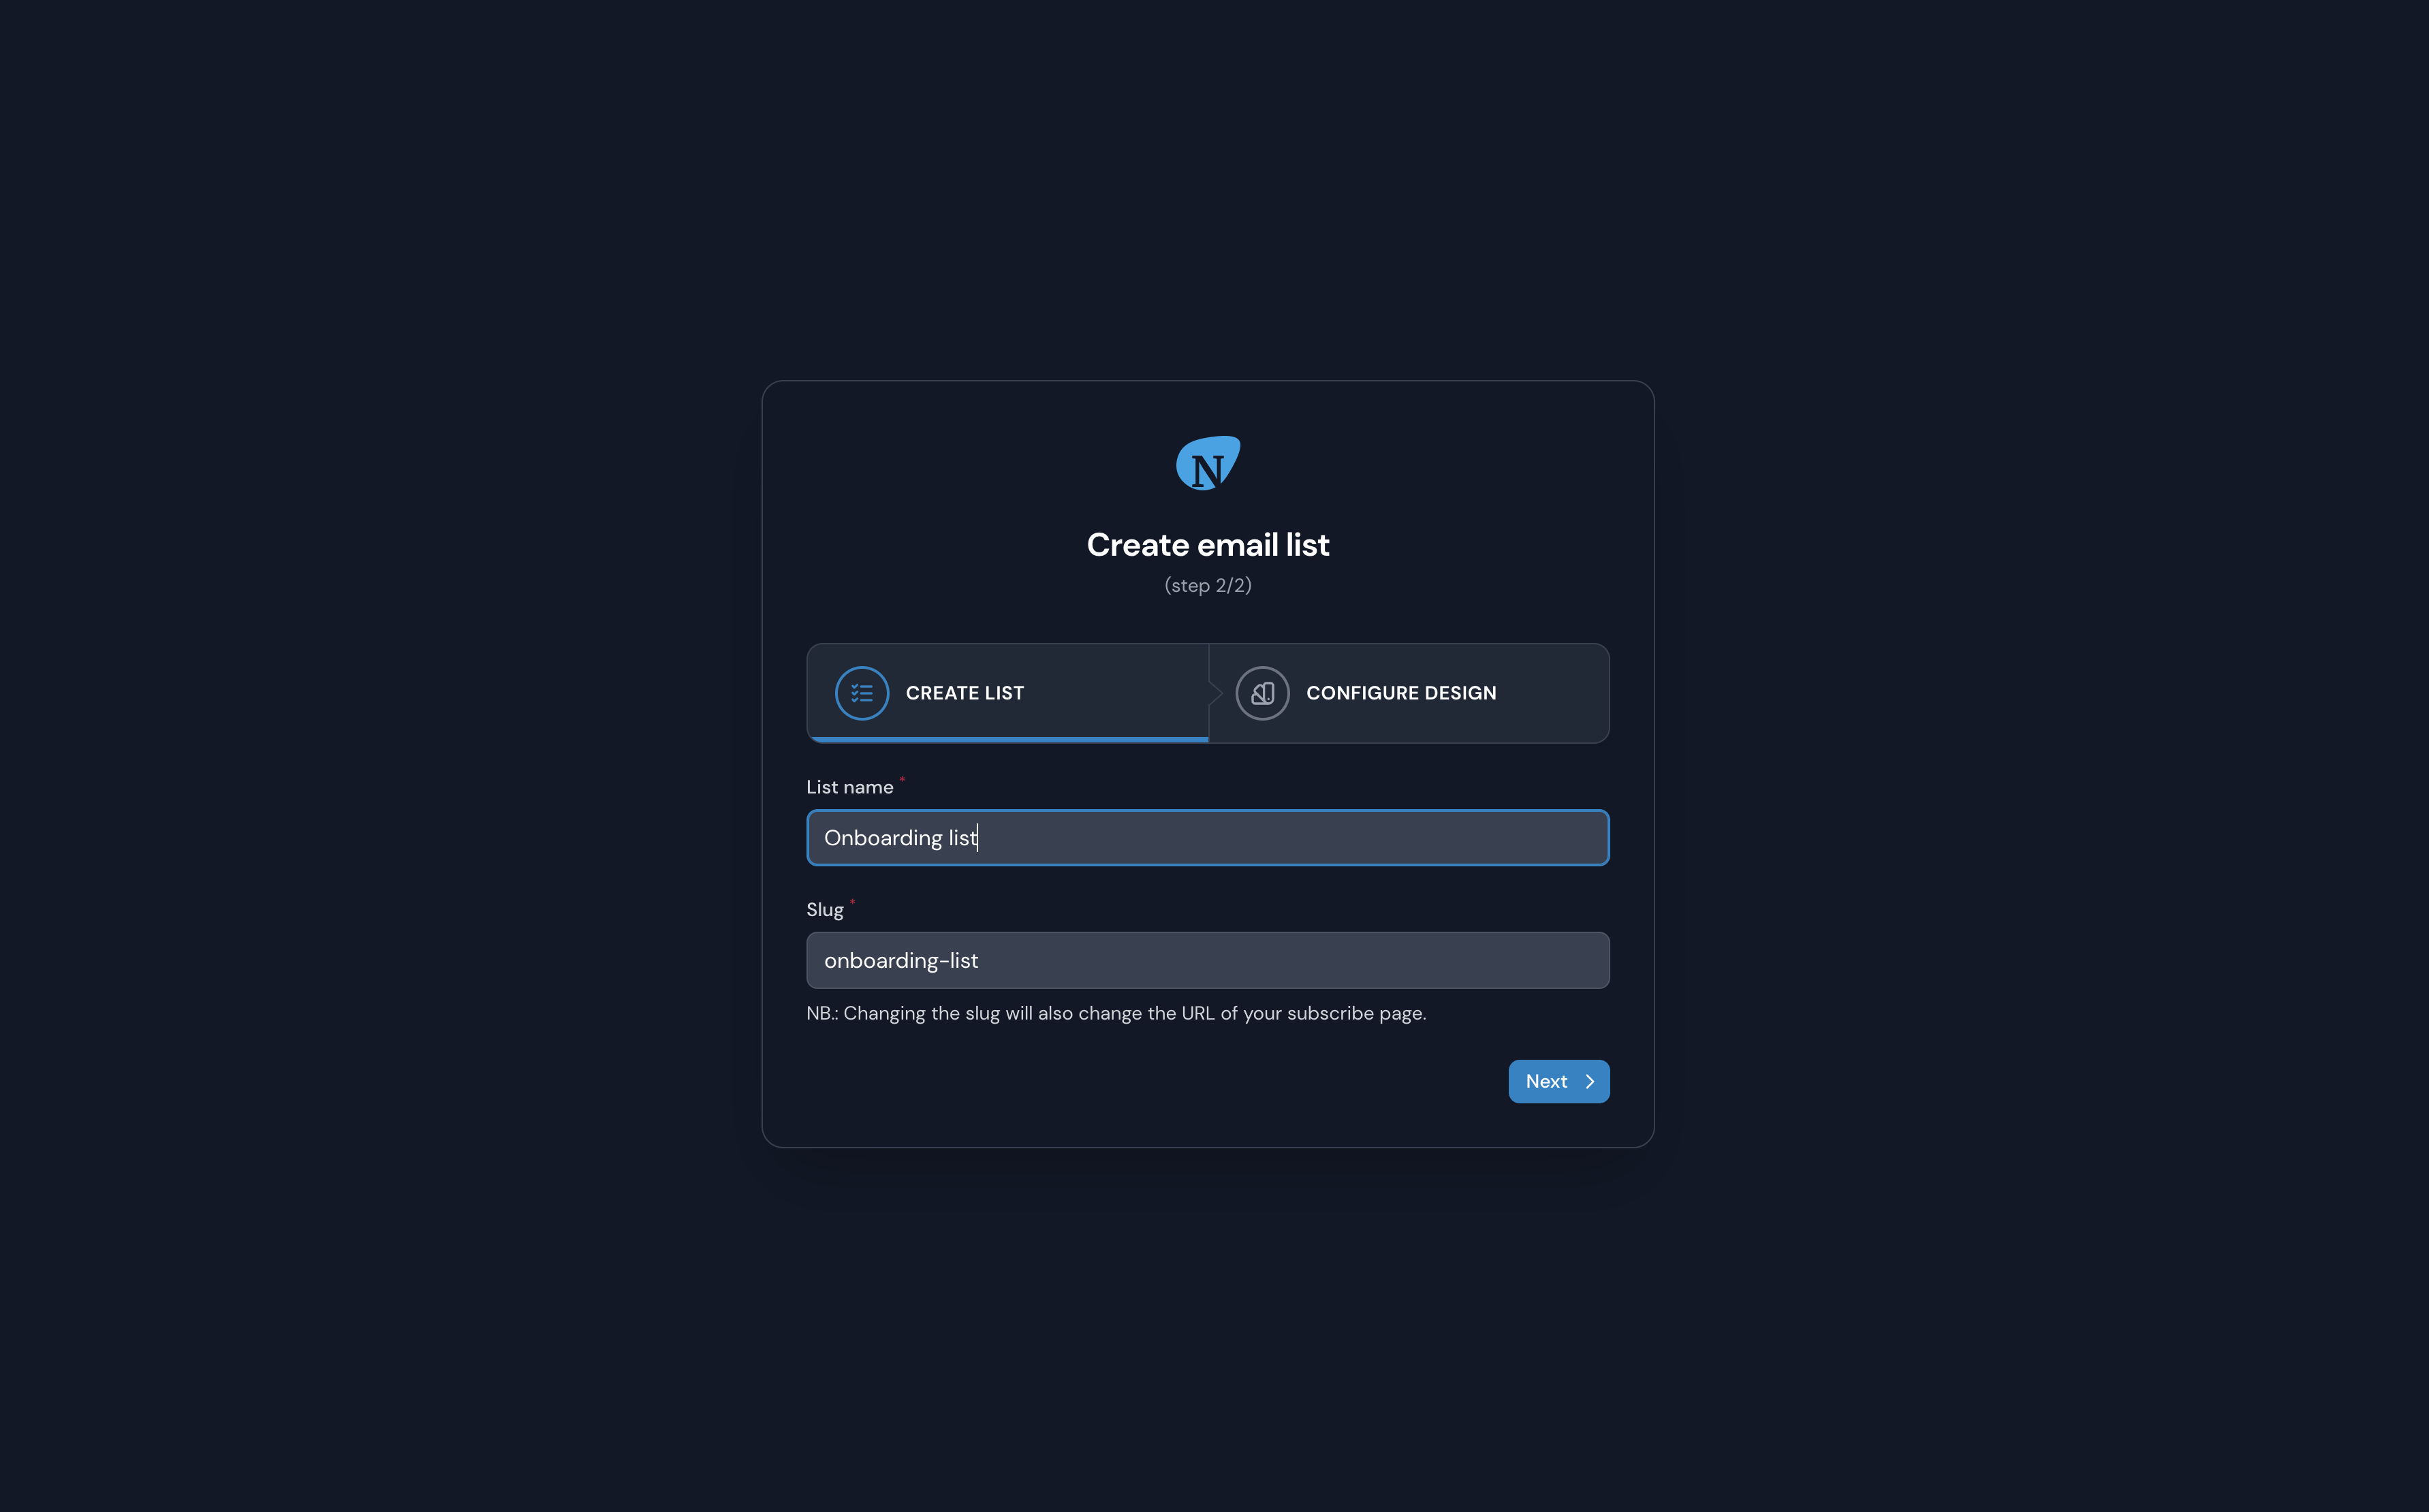
#Wizard
You can require users to complete one or multiple forms in a wizard. This is very useful for creating records and collecting required information. Your users will not be able to access the dashboard before completing the wizard either.

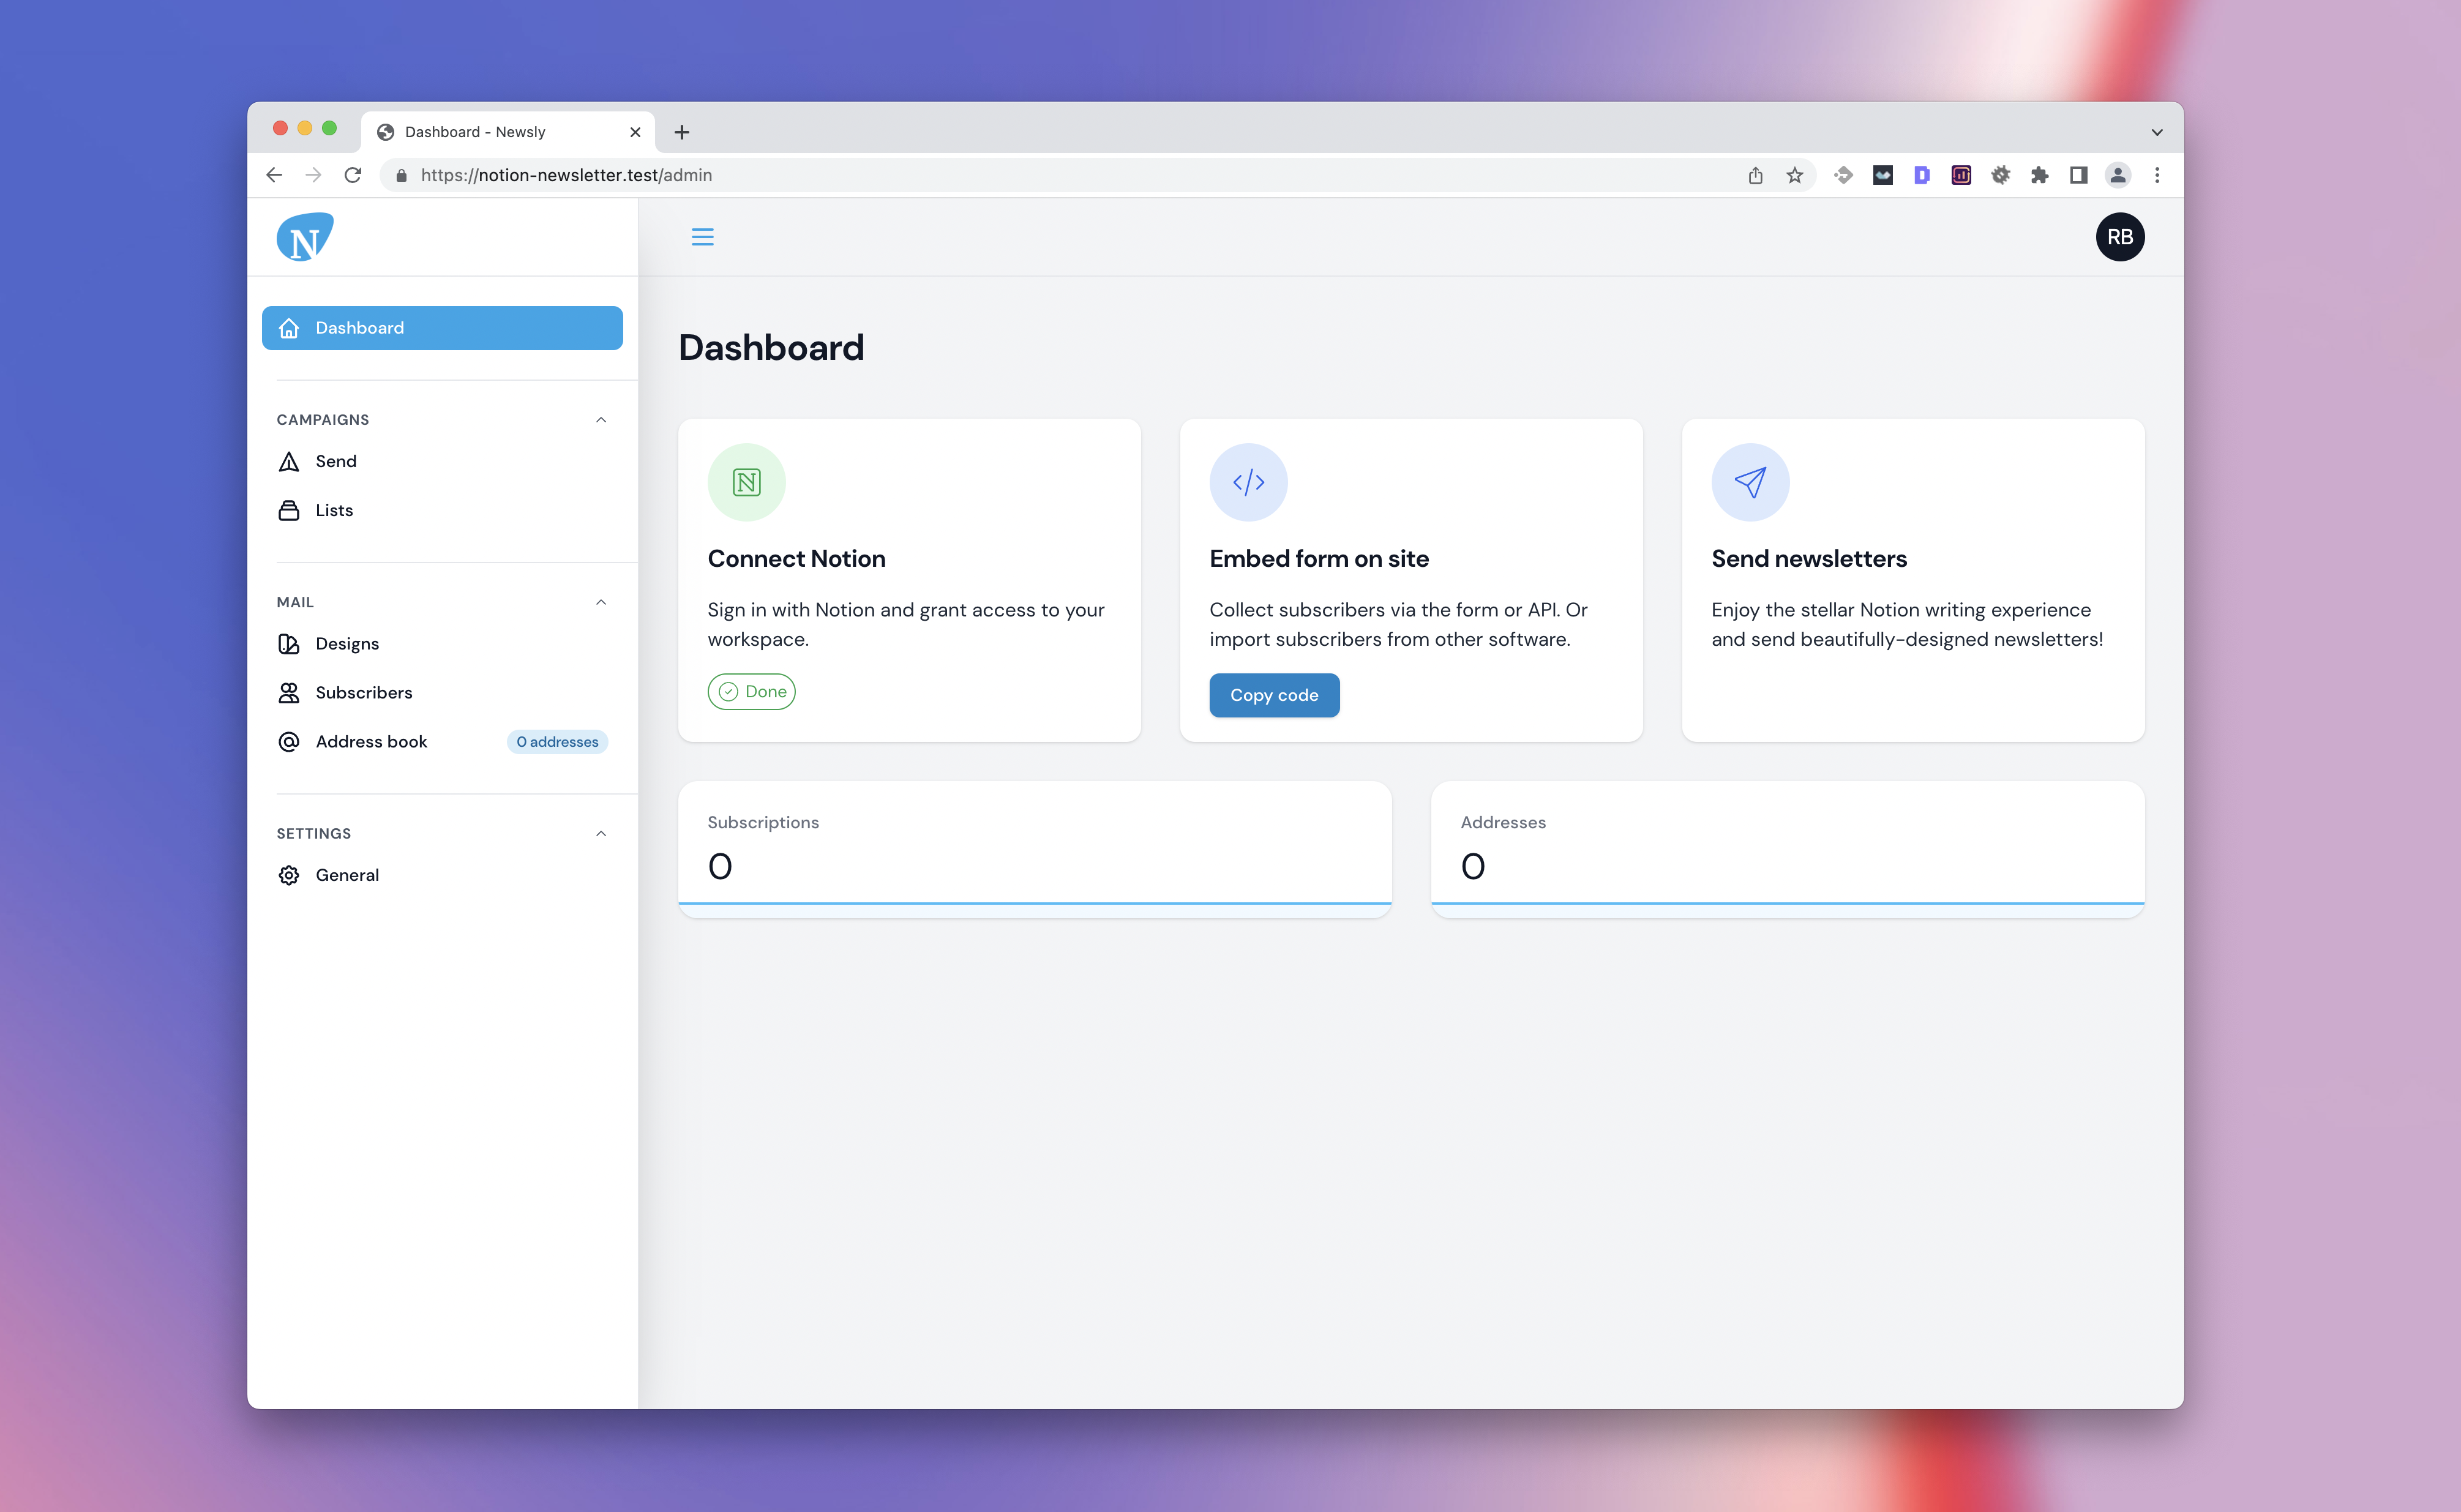
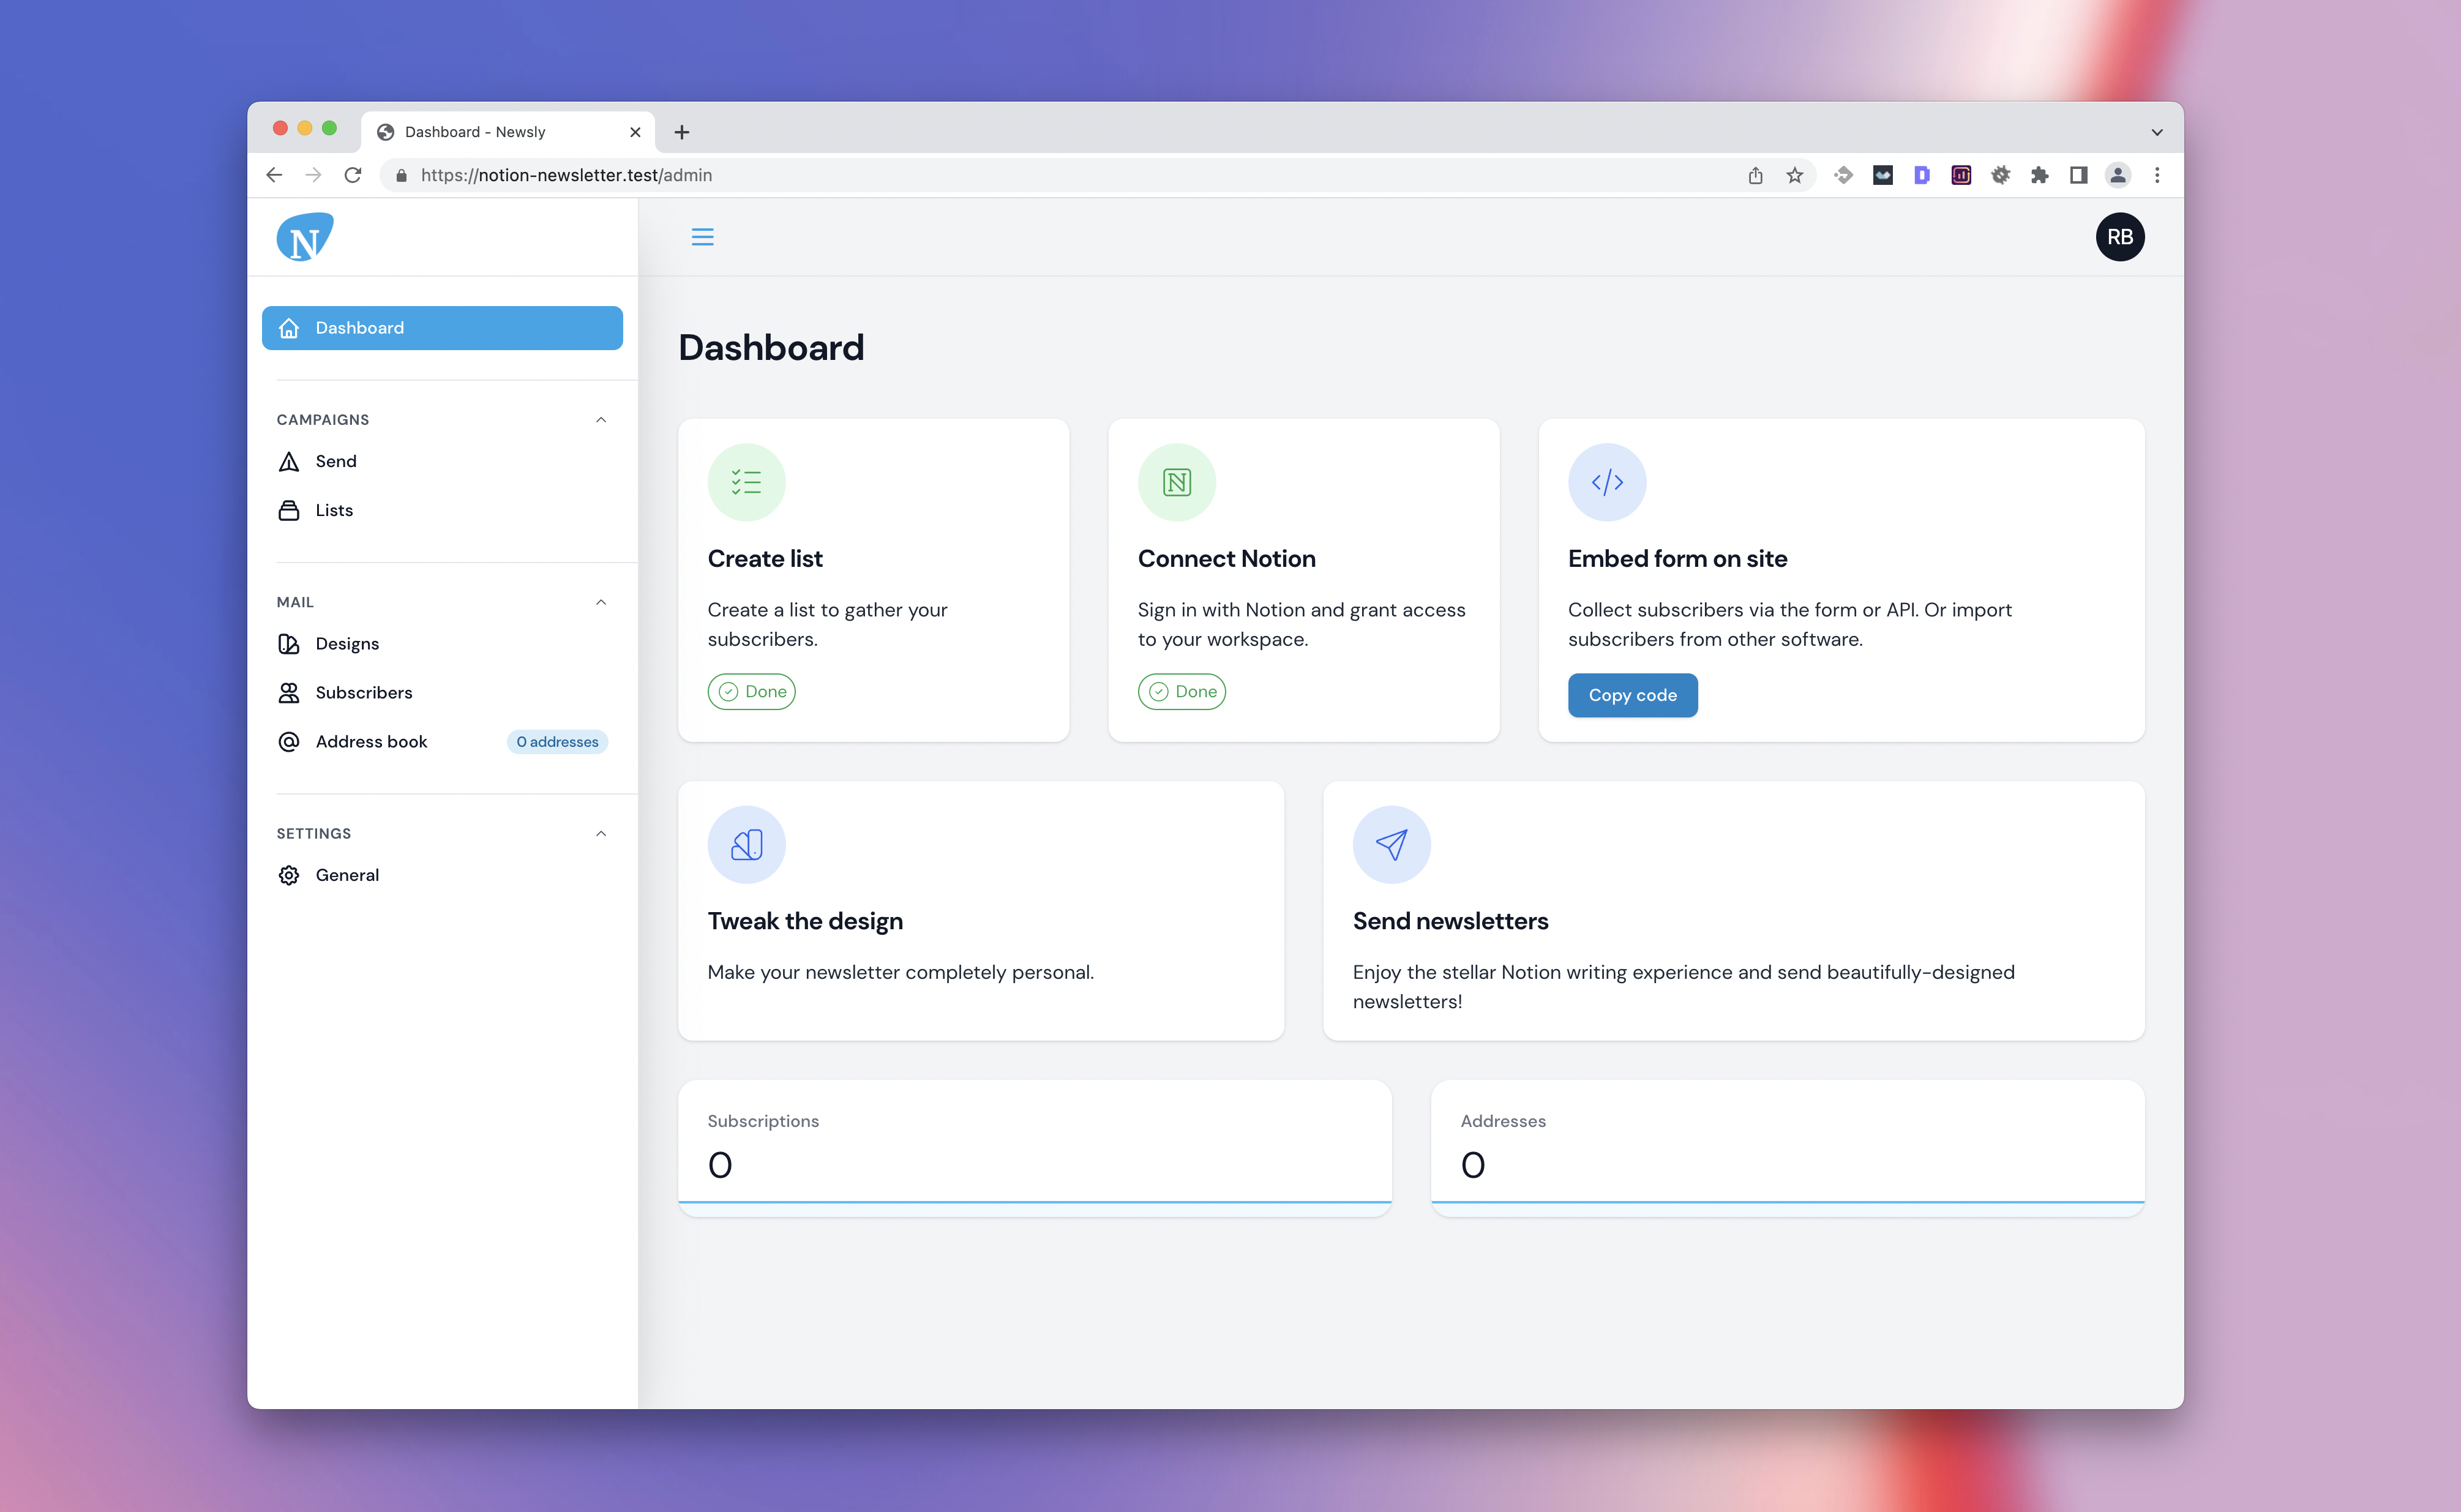
#Widget (simple design)
You can use the dashboard widget to nudge your users into completing certain steps. In this phase, your users will already have access to the dashboard.
#Widget (advanced design)
The widget is responsive and you can create very advanced designs with it. It uses the same technique as the native Grid component in Filament.
#Widget (compact design, less space between widgets)
There is also an option to reduce the space between the cards in the widget if that looks better to you:

#Dark mode
There's also full support for a gorgeous dark mode:


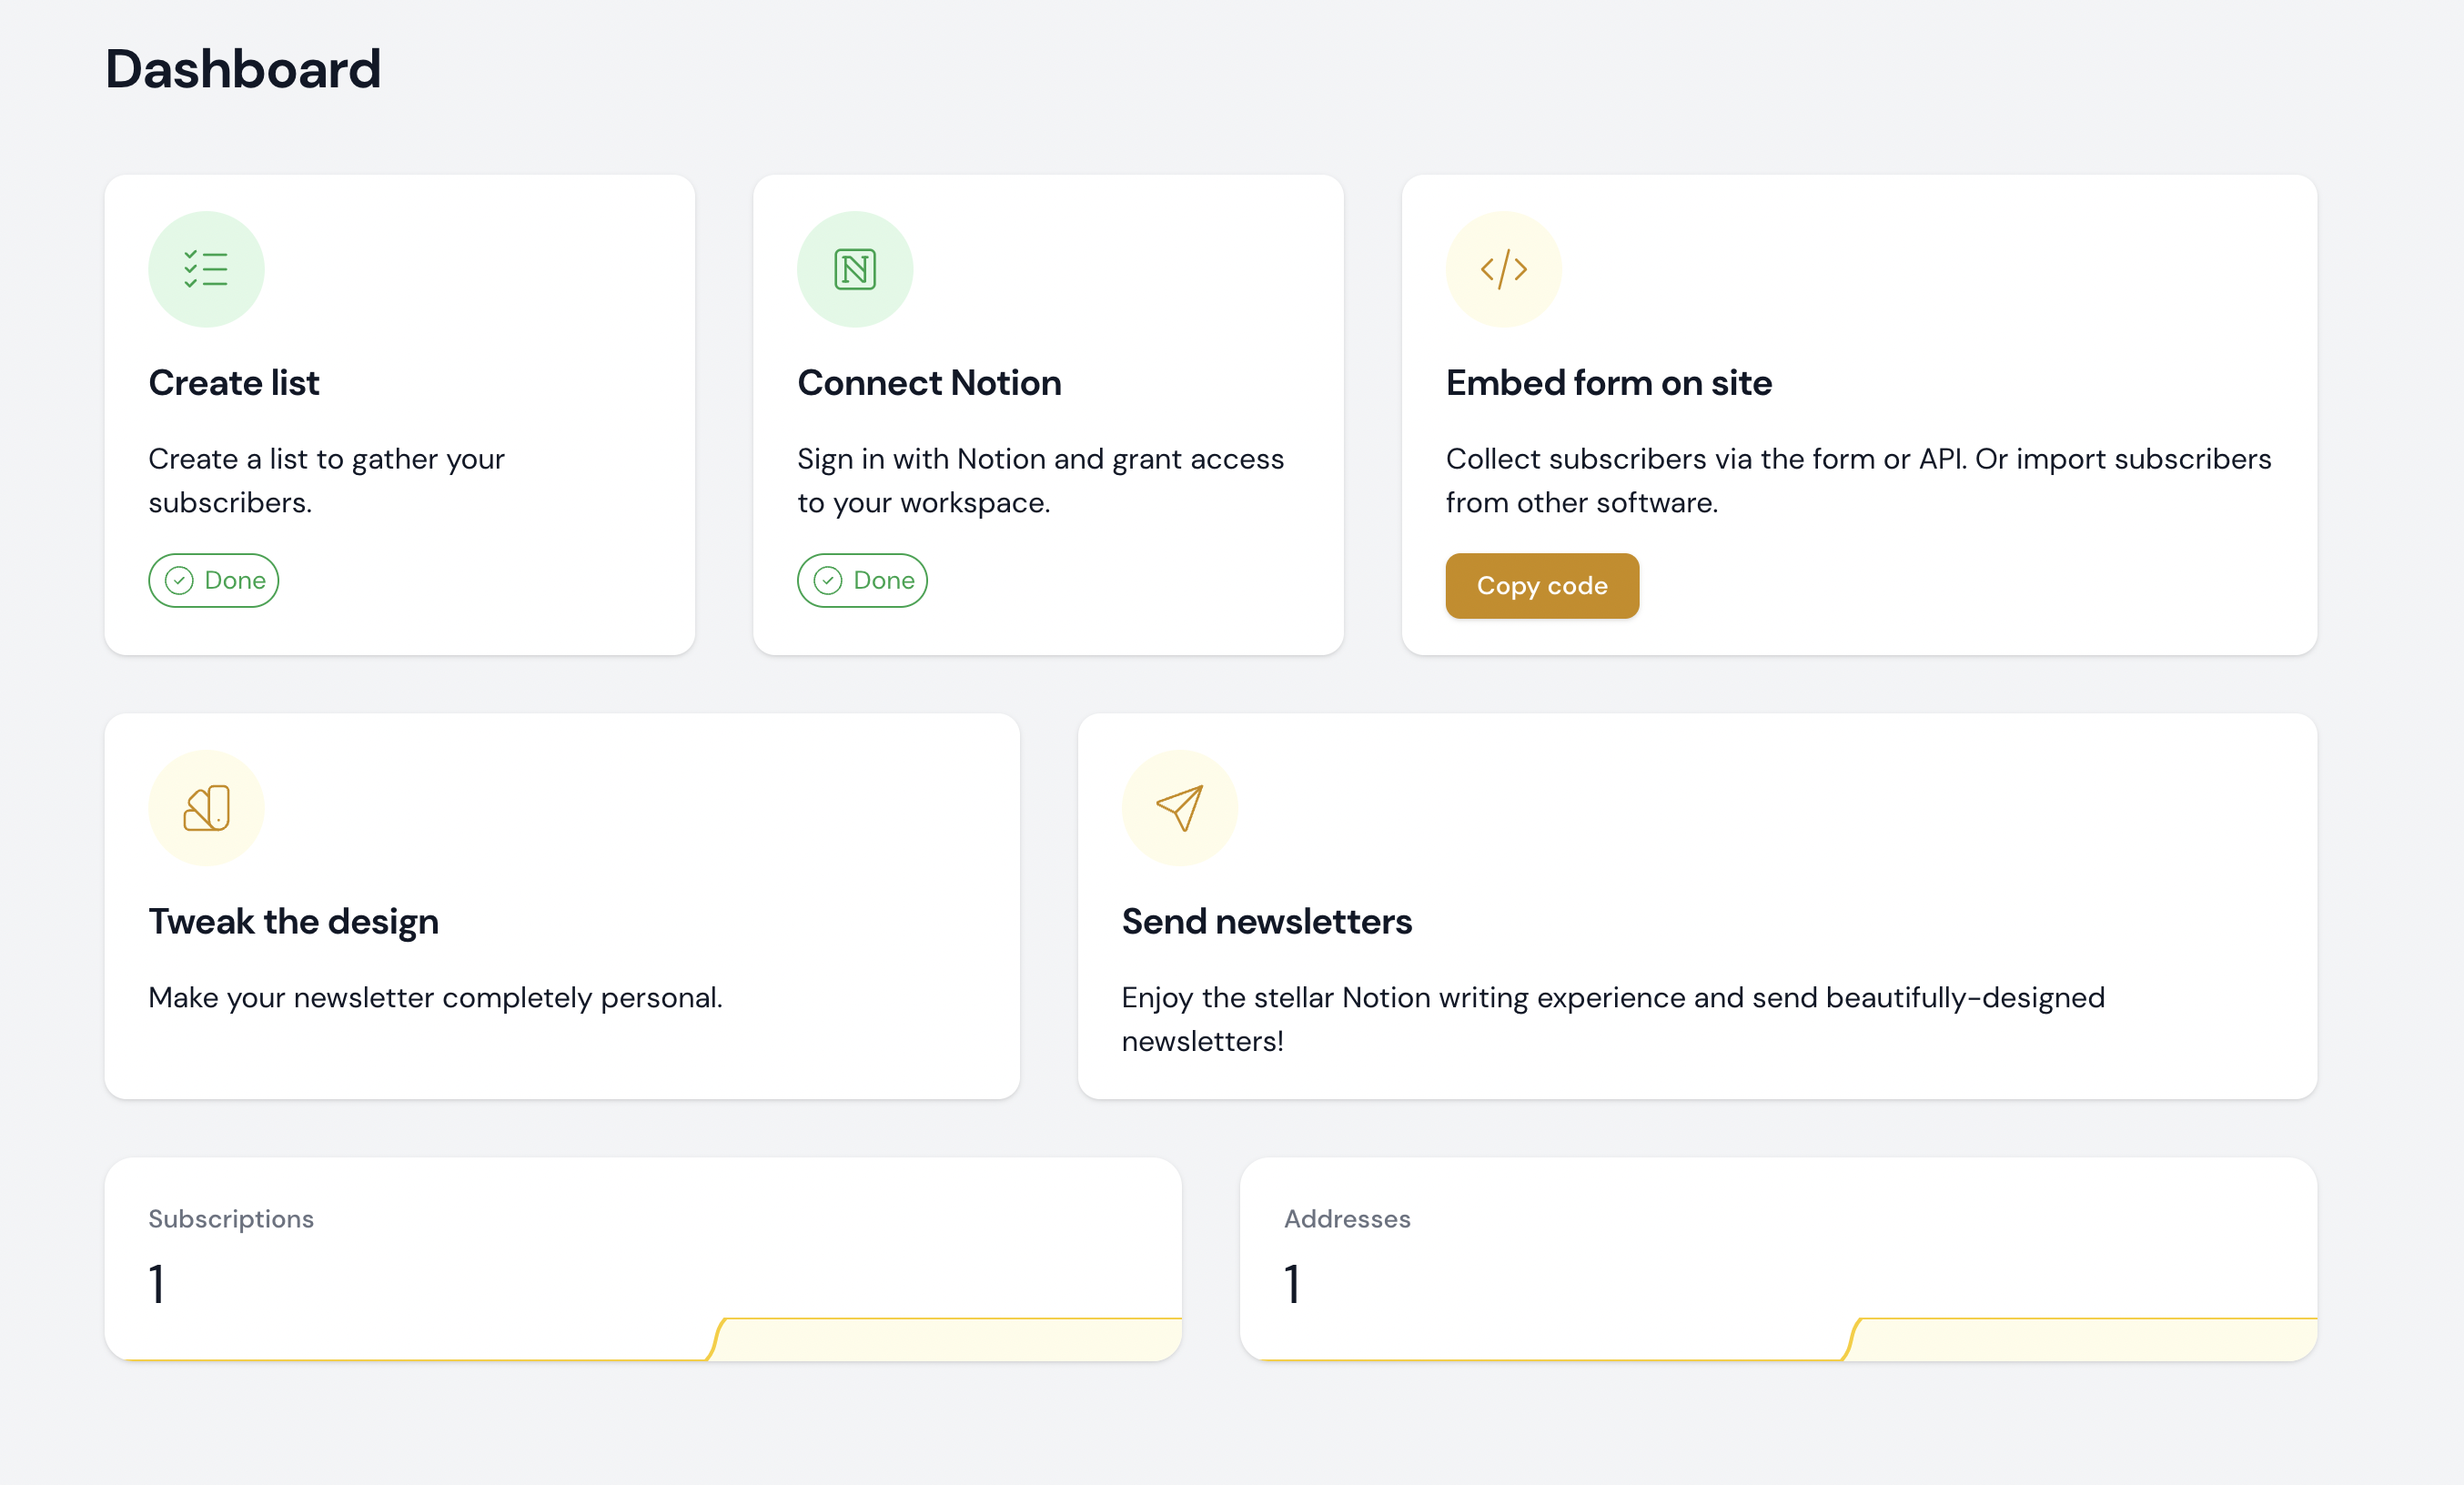
#Custom theme
The plugin integrates with any custom theme and of course the default theme. Here's an example of how the widget looks on the default theme:
Thank you for purchasing the Onboarding Manager Pro plugin for Filament Admin!
We tried to make the library as easy-to-install and versatile as possible. Nevertheless, if you still have a question or a feature request, please send an e-mail to support@filamentplugins.com.
In this guide I'll show you how to install the library, so you can start using it right away.
#Installation
#Prerequisites
For these installation instructions to work, you'll need to have the Filament Panels package installed and configured.
The package is supported on Filament V3, V4 and V5; and Laravel 10 or higher (with earlier versions available since Laravel 8). Please be aware though that support for security fixes for Laravel 10 ends within a few months.
#Installation via Composer
To install the package you should add the following lines to your composer.json file in the repositories key in order to allow access to the private package:
{
    "repositories": [
        {
            "type": "composer",
            "url": "https://satis.ralphjsmit.com"
        }
    ]
}
If you have one of my other premium packages installed already, then you don't need to repeat these lines.
Next, you should require the package via the command line. You will be prompted for your username (which is your e-mail) and your password (which is your license key, e.g. 8c21df8f-6273-4932-b4ba-8bcc723ef500).
composer require ralphjsmit/laravel-filament-onboard
After purchasing the plugin, you'll also be shown installation instructions with the appropriate credentials pre-filled.
Optionally, you can publish the config file and/or translations.
php artisan vendor:publish --tag="filament-onboard-config"

php artisan vendor:publish --tag="filament-onboard-translations"
#Configuring the plugin per-panel (Filament V3)
If you are using the plugin in Filament V3, you should register the plugin in each of the panels that you have in your project and would like to use the onboarding package in:
use RalphJSmit\Filament\Onboard\FilamentOnboard;

$panel
    ->plugin(FilamentOnboard::make())
In the rest of the documentation, if you see any code examples that use the $panel variable, it will refer to this variable in the panel service provider for each of the panels that you register the plugin in.
In the rest of the docs, if we refer to the $plugin variable, then we mean the $plugin = FilamentOnboard::make(). This is not necessarily a variable, but it helps to keep the code examples shorter and simpler.
Therefore, the following code examples mean the same:
$plugin
    ->prefix('welcome')
    ->someOtherMethod();
use RalphJSmit\Filament\Onboard\FilamentOnboard;

$panel
    ->plugin(
        FilamentOnboard::make()
            ->prefix('welcome')
            ->someOtherMethod()
    )
#Add plugin Blade files to custom theme tailwind.config.js (required)
Since this plugin registers new HTML, you need to make sure that the Tailwind CSS classes are generated. New in Filament V3 is that you need to create a custom theme in order to include CSS from plugins (in order to keep your panel as fast as possible). If you do not follow this step, you risk that the plugin pages/designs look weird, because CSS is missing.
First, make sure you are using a custom theme for every panel that you want to use the onboarding package in. Please check that you registered your theme in your panel provider(s) using $panel->viteTheme('resources/css/filament/{nameOfTheme}/theme.css)` for Vite or the method for Mix specified in the create theme command output.
Next, you'll need to instruct Tailwind to also purge the view-files for the onboarding package. Add the following key to the content key of the tailwind.config.js file for each of the themes you use the onboarding package in:
content: [
    // Your other files
    './vendor/ralphjsmit/laravel-filament-onboard/resources/**/*.blade.php',
],
NB. The
tailwind.config.jsyou need to add this line to is not a possibletailwind.config.jsfile in your root project, but only in theresources/css/filament/{nameOfTheme}/tailwind.config.jsfile(s) of your theme(s).
#Usage
Configuring your onboarding is very simple. First, I'll show you how to configure the widget. Next, I'll show you how to prevent users from accessing the dashboard without completing certain onboarding and how to make wizards
#Technical details
It might be handy to know a little bit about how the package works. Two important concepts here are tracks and steps. Each track is a series of steps that a user has to complete. Your application typically has one or two tracks: one track for outside the admin panel and one track for the widget.
You can determine yourself using a closure when a step is viewed as "complete". If all steps in a track are complete, the whole track is deemed complete as well.
#Creating a track
The place to create a track is in the panel() methods of each panel service provider that you want to use the plugin in.
Create a track using the $plugin->addTrack() method.
$plugin
    ->addTrack(fn () => Track::make([
        /** Your steps */
    ]),
Please make sure that you put the fn() => before the Track::make() part, so that the argument is a closure instead of a direct. Otherwise, the logic in the plugin will be executed too early and it will throw an error.
#Adding steps to a track
Next, you can add steps to a track by adding an array with steps. Create a single step by using the Step::make() method.
When using the admin widget, each step is represented by a nice card (see the images above).
The Step::make() method accepts two parameters:
- The name of the step. This name is displayed to the user.
- A unique identifier for the step. This identifier should be a string and is unique in your complete application.
Track::make([
    Step::make(name: 'Connect Notion', identifier: 'widget::connect-notion')
        /** Other configuration for the step... */
])
You can also provide a name using a closure:
Step::make(name: fn () => 'Hello ' . auth()->user()->first_name, identifier: 'greeting')
#Adding a description
You can add a description for the step by adding the ->description() method. Provide either a string, an HtmlString or a closure.
Step::make(name: 'Connect Notion', identifier: 'widget::connect-notion')
    ->description('Sign in with Notion and grant access to your workspace.')
#Adding an icon
You can add an icon (as string or as closure that returns string) to the step by using the ->icon() method:
Step::make(name: 'Connect Notion', identifier: 'widget::connect-notion')
    ->icon('heroicon-o-check-circle')
#Setting a color
You can set the color of the icon using the ->color() method. The default is primary.
Step::make(name: 'Connect Notion', identifier: 'widget::connect-notion')
    ->icon('heroicon-o-check-circle')
    ->color('info')
#Adding a url or action
Each Step can have a button at the bottom of the page. This button can either be a link/url or an advanced Filament action, including things like modals or forms.
You can use the ->url() method to add a link to the step. Combine this method with the performStepActionLabel() to define the label that should be on the button.
The link will be displayed to the user. You can use this to redirect to an OAuth provider or to a specific page in the dashboard:
Step::make(name: 'Connect Notion', identifier: 'widget::connect-notion')
    ->performStepActionLabel('Add workspace →')
    ->url(route('callbacks.notion.authorize'), shouldOpenInNewTab: true)
Alternatively, you can modify the performStepAction() to include any advanced code. This can include a modal or a form or any other PHP action that you want to run.
For example, this is an action that would open the "notifications" slide-over using Livewire:
Step::make(name: 'Notifications overview', identifier: 'open-notifications')
  ->performStepAction(function (Action $action) {
      return $action
        ->label('Open notifications overview')
        ->action(function (OnboardTrackWidget $livewire) {
            $livewire->dispatch('open-modal', id: 'database-notifications');
        });
  })
#Determining if a step is complete
You can use the ->completeIf() method to specify a closure that will determine whether this step is complete. This closure should return a boolean:
Step::make(name: 'Connect Notion', identifier: 'widget::connect-notion')
    ->completeIf(fn () => auth()->user()->workspaces()->exists())
#Allowing users to skip actions (NEW)
You can now also allow your users to skip a certain step. You can do this by providing a closure to the skippable() method. Below is an example of how this logically might work together:
Step::make(name: 'Notifications overview', identifier: 'open-notifications')
  ->completeIf(function ()  {
    return auth()->user()->onboarding_notifications_completed;
  })
  ->skippable(function ()  {
      auth()->user()->onboarding_notifications_completed = true;
      auth()->user()->save();
  })
  ->performStepAction(function (Action $action) {
      return $action
        ->label('Open notifications overview')
        ->action(function (OnboardTrackWidget $livewire) {
            $livewire->dispatch('open-modal', id: 'database-notifications');

            auth()->user()->onboarding_notifications_completed = true;
            auth()->user()->save();
        });
  })
By default, a user will be prompted with a model to confirm that they indeed want to skip the test. You can customize the modal details with the ->skipStepActionLabel(), ->skipStepActionColor(), ->skipStepActionModalHeading() and ->skipStepActionModalDescription() methods:
$step
    ->skipStepActionLabel('Skip notifications')
    ->skipStepActionColor('gray')
    ->skipStepActionModalHeading('Are you sure you want to skip this step?')
    ->skipStepActionModalDescription('Your notifications will always still arrive in your overview.')
#Adding a column span
You can use the ->columnSpan() method to specify how many columns wide the card should be. You can use the Onboard::addTrack(/** Your steps */)->columns(/** Nr of columns */) to specify how many columns there should be in total.
You can even use an array to make the design responsive. It uses the same technique as the native Grid, so you can use the same techniques here.
Track::make([
    Step::make(/** */)
        ->columnSpan(['default' => 1, 'md' => 1, 'lg' => 2, ])
        // Other steps..
    ])
    ->columns(['default' => 1, 'md' => 3, 'lg' => 6, ])
Cards will automatically wrap to the next row.
The final result might look something like this:
use Filament\Facades\Filament;
use RalphJSmit\Filament\Onboard\FilamentOnboard;

public function panel(Panel $panel): Panel
{
    return $panel
        ->default()
        ->id('admin')
        ->path('admin')
        // Other panel configuration...
        ->plugin(
            FilamentOnboard::make()
                ->addTrack(fn () => Track::make([
                    Step::make(name: 'Connect Notion', identifier: 'widget::connect-notion')
                        ->description('Sign in with Notion and grant access to your workspace.')
                        ->icon('heroicon-o-check-circle')
                        ->performStepActionLabel('Add workspace →')
                        ->url(route('callbacks.notion.authorize'))
                        ->completeIf(fn () => auth()->user()->workspaces()->exists())
                        ->columnSpan(1),
                    // Other steps
                    // Step::make(/** */)...
                    // Step::make(/** */)...
                ])->columns(3)
              )
        );
}
#Allowing non-sequential steps
Normally, each Track is assumed to run sequentially: you need to complete Step 1, before being able to do Step 2. If this behaviour doesn't work for you or if you just want to provide a few steps using the widget that can be done in any order the user likes, you can use the ->sequential() function on the Track object to disable the sequential behaviour.
Track::make(fn () => [
    // Steps can be completed in any order...
    Step::make('First step', 'first-step')
        ->icon('heroicon-o-cube-transparent')
        ->url(FirstResource::getUrl()),
    Step::make('Second step', 'second-step')
        ->icon('heroicon-o-cube')
        ->url(SecondStep::getUrl()),
])
    ->sequential(false)
#Display the widget more compact
You can chain the ->compact() method to the track that you created in order to make the design more compact.
#Using the widget
Now that we have defined our steps, we can register the widget class to use on the dashboard. You can also use the widget on resources and pages.
The widget class is RalphJSmit\Filament\Onboard\Widgets\OnboardTrackWidget.
You can register the widget by via a panel service provider:
use RalphJSmit\Filament\Onboard\Widgets\OnboardTrackWidget;

$panel
    ->widgets([
        OnboardTrackWidget::class,
  ])
Now your widget should be visible on the dashboard!
#Preventing users from accessing the dashboard
The package also provides easy functionality to prevent the users from accessing the dashboard. In order to force a user to complete a track, you can chain the ->completeBeforeAccess() to the track:
Track::make([
    Step::make(name: 'Connect Notion', identifier: 'widget::connect-notion')
        ->description('Sign in with Notion and grant access to your workspace.')
        ->icon('heroicon-o-check-circle')
        ->performStepActionLabel('Add workspace →')
        ->url(route('callbacks.notion.authorize'))
        ->completeIf(fn () => auth()->user()->workspaces()->exists())
        ->columnSpan(1),
    // Other steps
    // Onboard::addStep(/** */)...
    // Onboard::addStep(/** */)...
])
->completeBeforeAccess()
Next, you should register a middleware. Open your panel service providers and add the middleware to the ->authMiddleware() or ->tenantMiddleware(). If you are using a panel without tenancy, you should use the ->authMiddleware() method. If you are using a panel with tenancy, you should use the ->tenantMiddleware() method. In both methods, you should add the OnboardMiddleware::class to the end of the array.
use RalphJSmit\Filament\Onboard\Http\Middleware\OnboardMiddleware;

$panel
    // If you have a panel without tenancy:
    ->authMiddleware([
        Authenticate::class,
        OnboardMiddleware::class, // Add here.
    ])
    // Or, if you have a panel with tenancy:
    ->tenantMiddleware([
        OnboardMiddleware::class, // Add here.
    ])
Now, whenever a user visits a page and there is still a track with uncompleted steps, they will be automatically redirected to a page where they can complete that step.
#Allowing routes to be always accessible
If you would like to whitelist certain pages that should be accessible at all times to users, without the middleware kicking in to redirect the user to the onboarding page, you can provide the route in $plugin->accessibleRoutes() to whitelist the page:
$plugin
    ->accessibleRoutes([
        'filament.app.pages.dashboard',
        'filament.app.pages.profile',
    ])
Exact route names can be determined by running php artisan route:list in your terminal.
#Custom url when completing before access (NEW)
By default, this page will have the url path "/filament/onboard". You can change this url by providing a different prefix to the ->prefix() method when configuring the plugin:
$plugin
    // This is the route prefix that will be used for the route(s) in the package.
    // Currently, there is only one route, but this prefix would also be used for
    // new routes if new routes would ever be added.
    ->prefix('welcome')
#Forcing a user to visit a link
If you want your users to visit a url, e.g. for an OAuth app, you can use the exact same syntax as described earlier, without any changes.
#Adding wizards
If you want your user to complete a wizard, you can use the ->wizard(/** Your wizard steps */) method:
use Filament\Forms\Components\TextInput;
use Filament\Forms\Components\Wizard\Step as WizardStep;
use RalphJSmit\Filament\Onboard\Step;

Step::make('Your title', 'onboard::unique-identifier')
    ->wizard([
        WizardStep::make("Your label")
            ->statePath('step_1') // It is recommended to keep the form data in a separate array key for each step.
            ->schema([
                TextInput::make('name')
                    ->required(),
                Select::make('plan_id')
                    ->options([
                        'default' => 'Regular',
                        'pro' => 'Pro',
                        'unlimited' => 'Unlimited'
                    ])
                    ->required(),
                // More components...
            ])
            // More steps...
    ])
NB. The example import the steps for the wizard using
Filament\Forms\Components\Wizard\Step as WizardStep. Otherwise, it would collide with theRalphJSmit\Filament\Onboard\Step. The actual class name is stillStep.
For all the Step configuration options (adding an icon and description), see the Filament documentation.
#Pre-filling the wizard form with data
You can use the ->wizardFillFormUsing() method to specify data that will be pre-filled into the form. For example, this is useful if you want to retrieve information about an existing record.
use Filament\Forms\Components\Wizard\Step as WizardStep;
use RalphJSmit\Filament\Onboard\Step;

Step::make('Your title', 'onboard::unique-identifier')
    ->wizard([
        WizardStep::make("Your label")
            ->statePath('step_1') // It is recommended to keep the form data separate for each step.
            ->schema([
                TextInput::make('name')
                    ->required(),
                // ...
            ])
            // ...
    ])
    ->wizardFillFormUsing(function() {
        return [
            'step_1' => [
                'name' => auth()->user()->name,
                // ...
            ],
            'step_2' => [
                // ...
            ]
        ];
    })
#Saving the data on form submit
You can use the ->wizardSubmitFormUsing() method to pass a closure that will be executed when a user submits a form. The closure receives two parameters:
array $state. An array of the submitted form data. The data is already validated.\RalphJSmit\Filament\Onboard\Http\Livewire\Wizard $livewire. The Livewire component that is used to render the wizard.
You can omit one of the parameters if you don't need it, but make sure to always use the parameter names $state and $livewire. Dependency injection is also supported.
Usually you will use this closure to save the data and then redirect. It is handy to redirect the user to the filament.pages.dashboard route, because if there are no steps left, the user will be redirected to the dashboard. And if there still are steps to complete, the middleware will automatically pick that up and redirect the user to the next step.
use Filament\Forms\Components\Wizard\Step as WizardStep;
use RalphJSmit\Filament\Onboard\Step;

Step::make('Your title', 'onboard::unique-identifier')
    ->wizard([
        WizardStep::make("Your label")
            ->statePath('step_1') // It is recommended to keep the form data separate for each step.
            ->schema([
                TextInput::make('name')
                    ->required(),
                // ...
            ])
            // ...
    ])
    ->wizardFillFormUsing(function() {
        // ...
    })
    ->wizardSubmitFormUsing(function(array $state, \RalphJSmit\Filament\Onboard\Http\Livewire\Wizard $livewire) {
        auth()->user()->update($state['step_1']);
        // ...

        $livewire->redirectRoute('filament.pages.dashboard');
    })))
#Customizing the Wizard "submit" button
You can customize the "submit" button in the wizard by using the ->wizardSubmitButton("Your label") method.
#Marking the wizard as completed
Don't forget the use the ->completeIf() method to specify when the wizardstep has been completed. Otherwise, your users might be locked into the wizard forever.
->completeIf(fn () => user()->plan_id !== null)
#Customizing the wizard
You can customize the wizard using the ->modifyWizardUsing() function:
->modifyWizardUsing(function (\Filament\Forms\Components\Wizard $wizard) {
    return $wizard->nextAction(fn (StaticAction $action) => $action->icon('heroicon-m-arrow-right'));
})
#Changing the card width
You can use the ->cardWidth() method to specify how wide the link or wizard should be rendered.
Possible values are: xs, sm, md, lg, xl, 2xl, 3xl, 4xl, 5xl, 6xl, 7xl.
#Customizing the redirect
By default, the package redirects the user to the admin dashboard after successfully completing the onboarding flow. However, you may customize the route that it used using the $plugin->redirectRoute().
Make sure to add a route and not a url. Inputting a url won't work, only routes do.
$plugin
    ->redirectRoute('some-custom-route')
#Advanced complete onboarding example
Below you can find a complete and more advanced onboarding example. This example is also used in the application from the screenshots above.
The below code is used to generate the cards in the onboarding widget:
Track::make([
    Step::make('Create list', 'widget::create-list')
        ->description("Create a list to gather your subscribers.")
        ->performStepActionLabel('Create list')
        ->url(fn () => ListResource::getUrl('create'))
        ->icon('tabler-list-check')
        ->columnSpan(2)
        ->completeIf(fn () => auth()->user()->workspaces()->exists()),
    Step::make('Connect Notion', 'widget::connect-notion')
        ->description("Sign in with Notion and grant access to your workspace.")
        ->performStepActionLabel('Add workspace →')
        ->url(route('callbacks.notion.authorize'))
        ->icon('tabler-brand-notion')
        ->columnSpan(2)
        ->completeIf(fn () => auth()->user()->workspaces()->exists()),
    Step::make('Embed form on site', 'widget::embed-form')
        ->description("Collect subscribers via the form or API. Or import subscribers from other software.")
        ->performStepActionLabel('Copy code')
        ->performStepAction(function (Action $action) {
            return $action
                ->action(function (OnboardTrackWidget $livewire) {
                    $livewire->dispatch('copy-code', code: '<div>...</div>')
                });
        })
        ->icon('tabler-code')
        ->columnSpan(3)
        ->completeIf(fn () => auth()->user()->copied_embed_form !== null),
    Step::make('Tweak the design', 'widget::tweak-design')
        ->description("Make your newsletter completely personal.")
        ->performStepActionLabel('Create a new design')
        ->url(fn () => DesignResource::getUrl('create'))
        ->icon('tabler-color-swatch')
        ->columnSpan(3)
        ->completeIf(fn () => auth()->user()->designs->first->created_at->lt(auth()->user()->designs->first->updated_at)),
    Step::make('Send newsletters', 'widget::send-newsletters')
        ->description("Enjoy the stellar Notion writing experience and send beautifully-designed newsletters!")
        ->icon('tabler-send')
        ->columnSpan(4)
        ->completeIf(fn () => auth()->user()->created_at->lt(now()->subWeek(2))),
])->columns(7)->compact(false);
The below code is used for the onboarding part outside the admin panel:
use Filament\Forms\Components\Wizard\Step as WizardStep;

Onboard::make()
    ->addTrack([
        Step::make('Connect to Notion', 'onboard::connect-notion')
            ->description('Click the button below to give Newsly access to your workspace')
            ->performStepActionLabel('Add workspace →')
            ->url(route('callbacks.notion.authorize'))
            ->icon('tabler-brand-notion')
            ->completeIf(fn () => user()->workspaces()->exists()),
        Step::make('Create email list', 'onboard::create-email-list')
            ->wizard([
                WizardStep::make("Create list")
                    ->icon('tabler-list-check')
                    ->statePath('list')
                    ->schema([
                        TextInput::make('name')
                            ->columnSpan(2)
                            ->label("List name")
                            ->reactive()
                            ->required(),
                        TextInput::make('slug')
                            ->columnSpan(2)
                            ->helperText('NB.: Changing the slug will also change the URL of your subscribe page.')
                            ->required(),
                    ]),
                WizardStep::make("Configure design")
                    ->icon('tabler-color-swatch')
                    ->statePath('design')
                    ->schema(DesignResource::form(Form::make())->getSchema()),
            ])
            ->wizardFillFormUsing(fn () => [
                'list' => [
                    'name' => auth()->user()->defaultList?->name,
                    'slug' => auth()->user()->defaultList?->slug,
                ],
                'design' => [
                    'user_id' => auth()->id(),
                    'name' => 'Main design',
                    'accent_color' => '#666EE8',
                    'brand_color' => '#FFFFFF',
                    'accent_color_text' => 'light',
                    'font_family' => 'sans',
                ],
            ])
            ->wizardSubmitFormUsing(function (array $state, \RalphJSmit\Filament\Onboard\Http\Livewire\Wizard $livewire) {
                auth()->user()->defaultList->update($state['list'] ?? []);

                $design = auth()->user()->designs()->create($state['design'] ?? []);

                $livewire->redirectRoute('filament.pages.dashboard');
            })
            ->wizardSubmitButton('Submit')
            ->completeIf(fn () => user()->designs()->exists())
            ->cardWidth('2xl'),
    ])
    ->completeBeforeAccess();`
#Upgrading from V1 to V2
The Filament Onboarding plugin has a V2 version that already has support for Filament V3.
If you want to upgrade to Onboarding Manager V2, and therefore Filament V3 support, take the following steps:
- Require
ralphjsmit/laravel-filament-onboard'^2.0'instead of a 1.x version. - For each of the panels that you want to use the Onboard plugin in, please register the plugin like follows:
use RalphJSmit\Filament\Onboard\FilamentOnboard; $panel ->plugin(FilamentOnboard::make()) - Filament V3 offers plugins the ability to be customized per panel. This means that instead of global config values that apply to all panels, you can now set different values per panel. If you want, review the
config/filament-onboard.phpconfiguration file. Set the values that you want to change using the methods on theFilamentOnboardclass. The methods look very similar to the keys they had in the config. For example, the keyredirect-routehas become a methodFilamentOnboard::make()->redirectRoute(). You can also choose to do nothing. The package will retain compatibility with your current config. Whilst we do recommend to stay up-to-date and migrate your config, it is not a stricty requirement. An example plugin configuration could look like:
    $panel
        ->plugin(
            FilamentOnboard::make()
                ->redirectRoute('some-route-name')
                ->prefix('welcome')
                // ..
        )
- Replace all code referring
Onboard::addTrack()andOnboard::make()->addTrack()withRalphJSmit\Filament\Onboard\Track::make(). TheOnboardfacade has been removed. - Replace all code referring
Onboard::addStep()andOnboard::make()->addStep()withRalphJSmit\Filament\Onboard\Step::make(). TheOnboardfacade has been removed. - Previously, all tracks were registered in the
boot()method of a service provider which you could choose. Now, the logic for registering tracks has moved into the panel service providers. That has the benefit that you can now register different tracks per panel. For a example, a different onboarding track in your admin panel than the track for your normal users. For upgrading, it means that you will need to copy the code that you previously had asOnboard::addTrack(), and update it to use the$plugin->addTrack()method. You will also need to create the track usingTrack::make():
    $panel
        ->plugin(
            FilamentOnboard::make()
                ->addTrack(fn () => Track::make([
                    Step::make(/** */),
                    // Other steps...
                ])
                    ->completeBeforeAccess(/** */),
                    // Other methods on the Track...
                )
                // ..
        )
- Please make sure that you are registering the track inside
->addTrack()using a closure:fn () => Track::make(). If you register it without a closure, it will throw an error. - If you have extended components like the
Track,TrackCollection,SteporStepCollection, please check your custom overrides with the new code. The best is to publish your views again.
The V2 is available to all customers who previously purchased a license for V1.
#Support
If you have a question, bug or feature request, please e-mail me at support@filamentplugins.com or tag @ralphjsmit on #onboarding-manager-pro on the Filament Discord. Love to hear from you!
🙋♂️ Ralph J. Smit
The author
From the same author

SEO
This package is a convenient helper for using the laravel-seo package with Filament Admin and Forms.
Author:
Ralph J. Smit
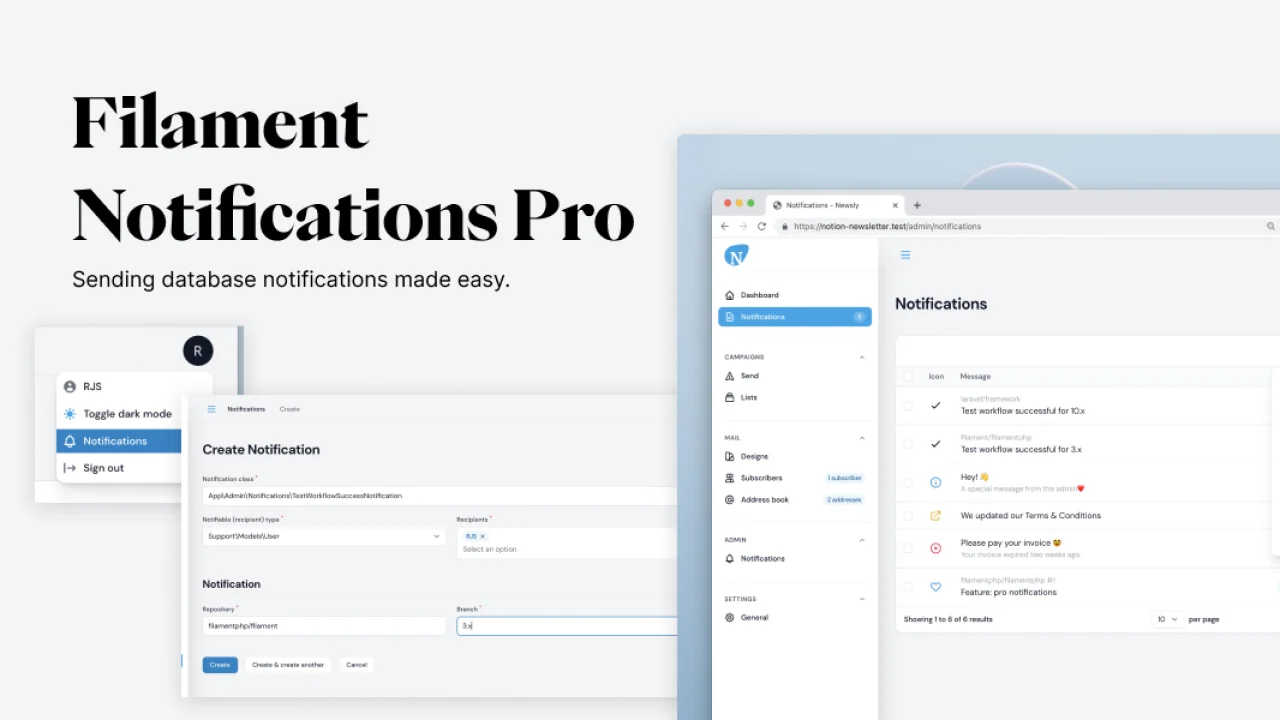
Notifications Pro
Seamlessly integrate Laravel database notifications with Filament.
Author:
Ralph J. Smit
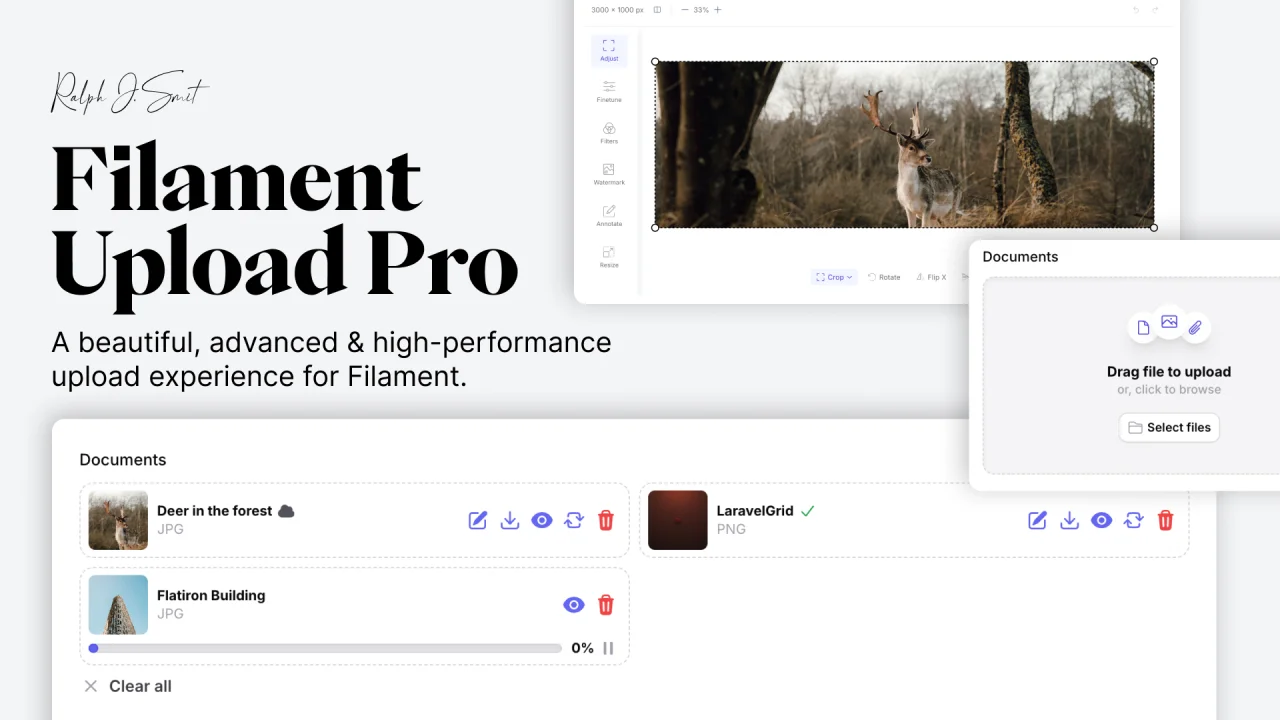
Upload Pro
A beautiful, advanced & high-performance upload experience for Filament.
Author:
Ralph J. Smit
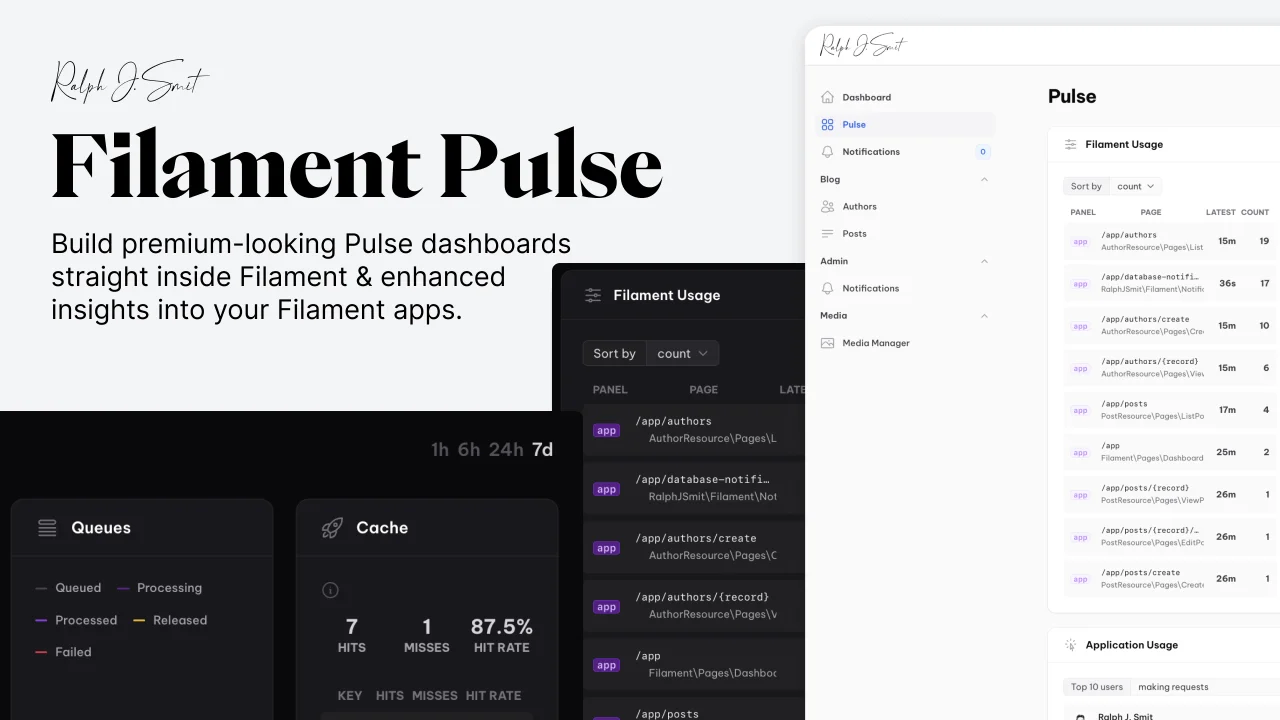
Laravel Pulse
This package is a beautiful integration between Filament & Laravel Pulse.
Author:
Ralph J. Smit
Featured Plugins
A selection of plugins curated by the Filament team

Custom Dashboards
Let your users build and share their own dashboards with a drag-and-drop interface. Define your data sources in PHP and let them do the rest.
 Filament
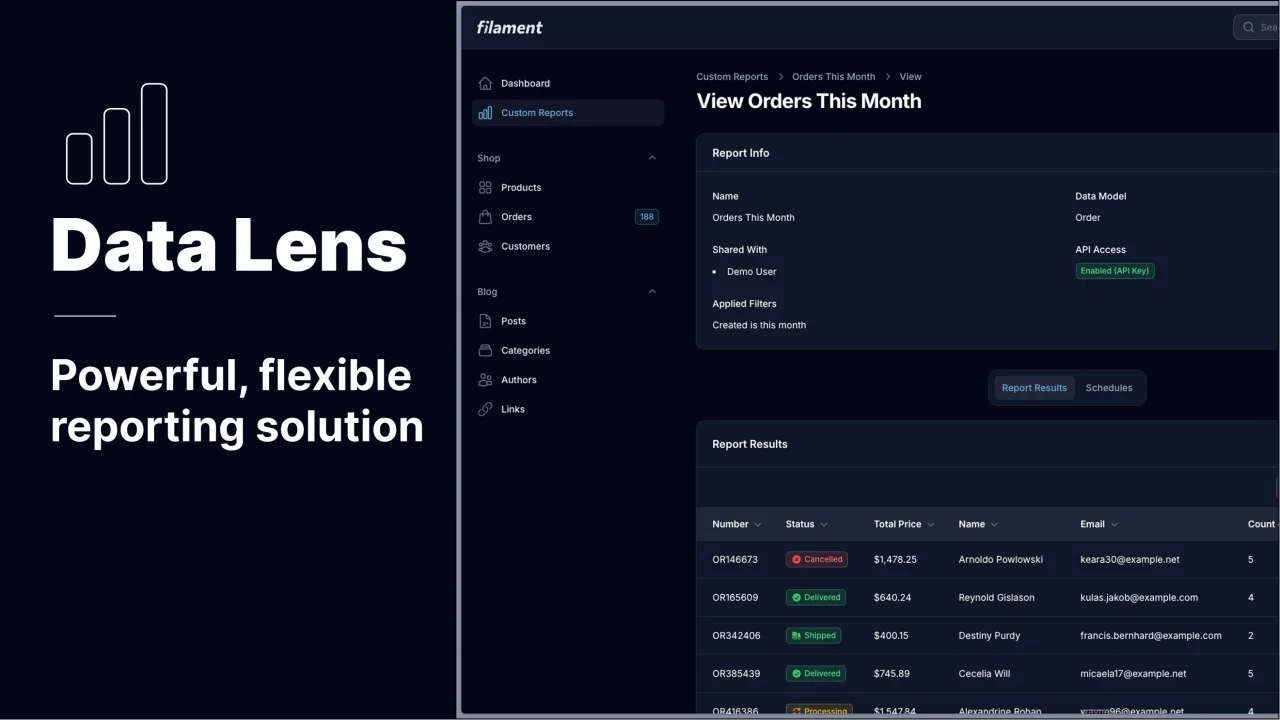
Data Lens
Advanced Data Visualization for Laravel Filament - a premium reporting solution enabling custom column creation, sophisticated filtering, and enterprise-grade data insights within admin panels.
 Padmission

Custom Fields
Eliminate custom field migrations forever. Let your users create and manage form fields directly in Filament admin panels with 20+ built-in field types, validation, and zero database changes.
 Relaticle