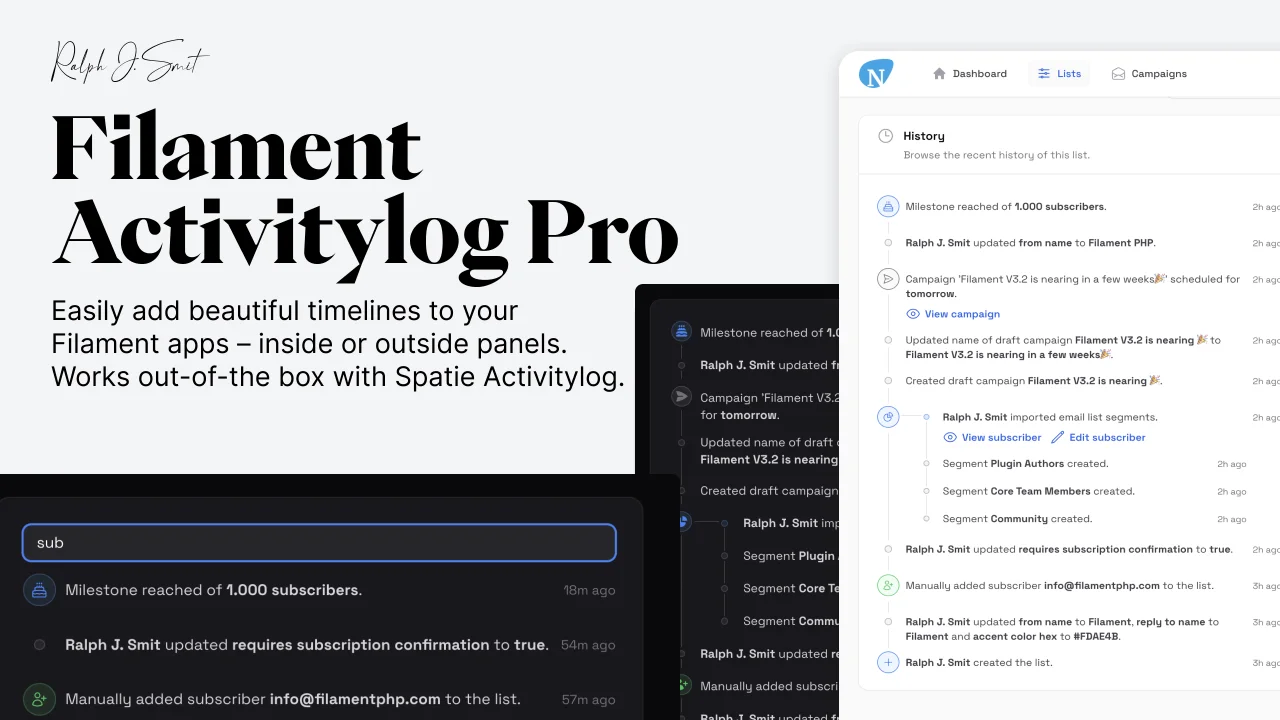
Activitylog Pro
CommunityEasily add beautiful timelines to your Filament apps – inside panels or stand-alone. Integrates with Spatie Activitylog.
filament/
namespace. Review the source and install at your own risk. Found
malware or an unresolved security issue the author won't
address?
Report it
.
 Author:
Ralph J. Smit
Author:
Ralph J. Smit
Documentation
- Features
- Screenshots
- Installation guide: Filament Activitylog Pro
- Usage
- Logging model events
- Custom events
- Timeline
- Actions
- Upgrade guide (from V1 to V2)
- Roadmap
- Support
This package allows you to easily integrate beautiful timelines into your Filament app, including outside the admin panel, allowing you to display timelines with minimal effort. The package integrates Spatie Activitylog into Filament and it works out-of-the-box with the underlying activitylog. Therefore, this package is great way to get a premium activitylog in your app for new projects, but also for existing projects that already have recorded events using the Spatie Activitylog.
The package supports both form & infolist components, includes special actions for tables & pages, and allows you to easily extend the timelime with additional actions.
NEW: The package supports Filament V2, V3, V4 & V5.
#Features
- Form & infolist components for the activity timeline with many configuration options. 💛
- Timelines in many beautiful variations.
- Searchable, compact & scrollable timelines. ✨
- Include custom actions inside your timelines.
- Timeline action components to use in tables & pages.
- Support for displaying activity batches. ✍️
- Support for displaying activities from relations and related models, including auto-linking to the specific resource. 👌
- Easy global configuration of icons, colors, actions, descriptions & more. 🚀
- Beautiful design & integration with Filament Admin.
- Works outside the admin panel in all forms, infolists & tables.
- Support for dark mode. 🌚
- Fully & easily translatable.
- Works out-of-the-box with model events. ⚡️
- Supports Filament V5, V4, V3 and V2. 🎉
#Screenshots
#Timeline form/infolist component
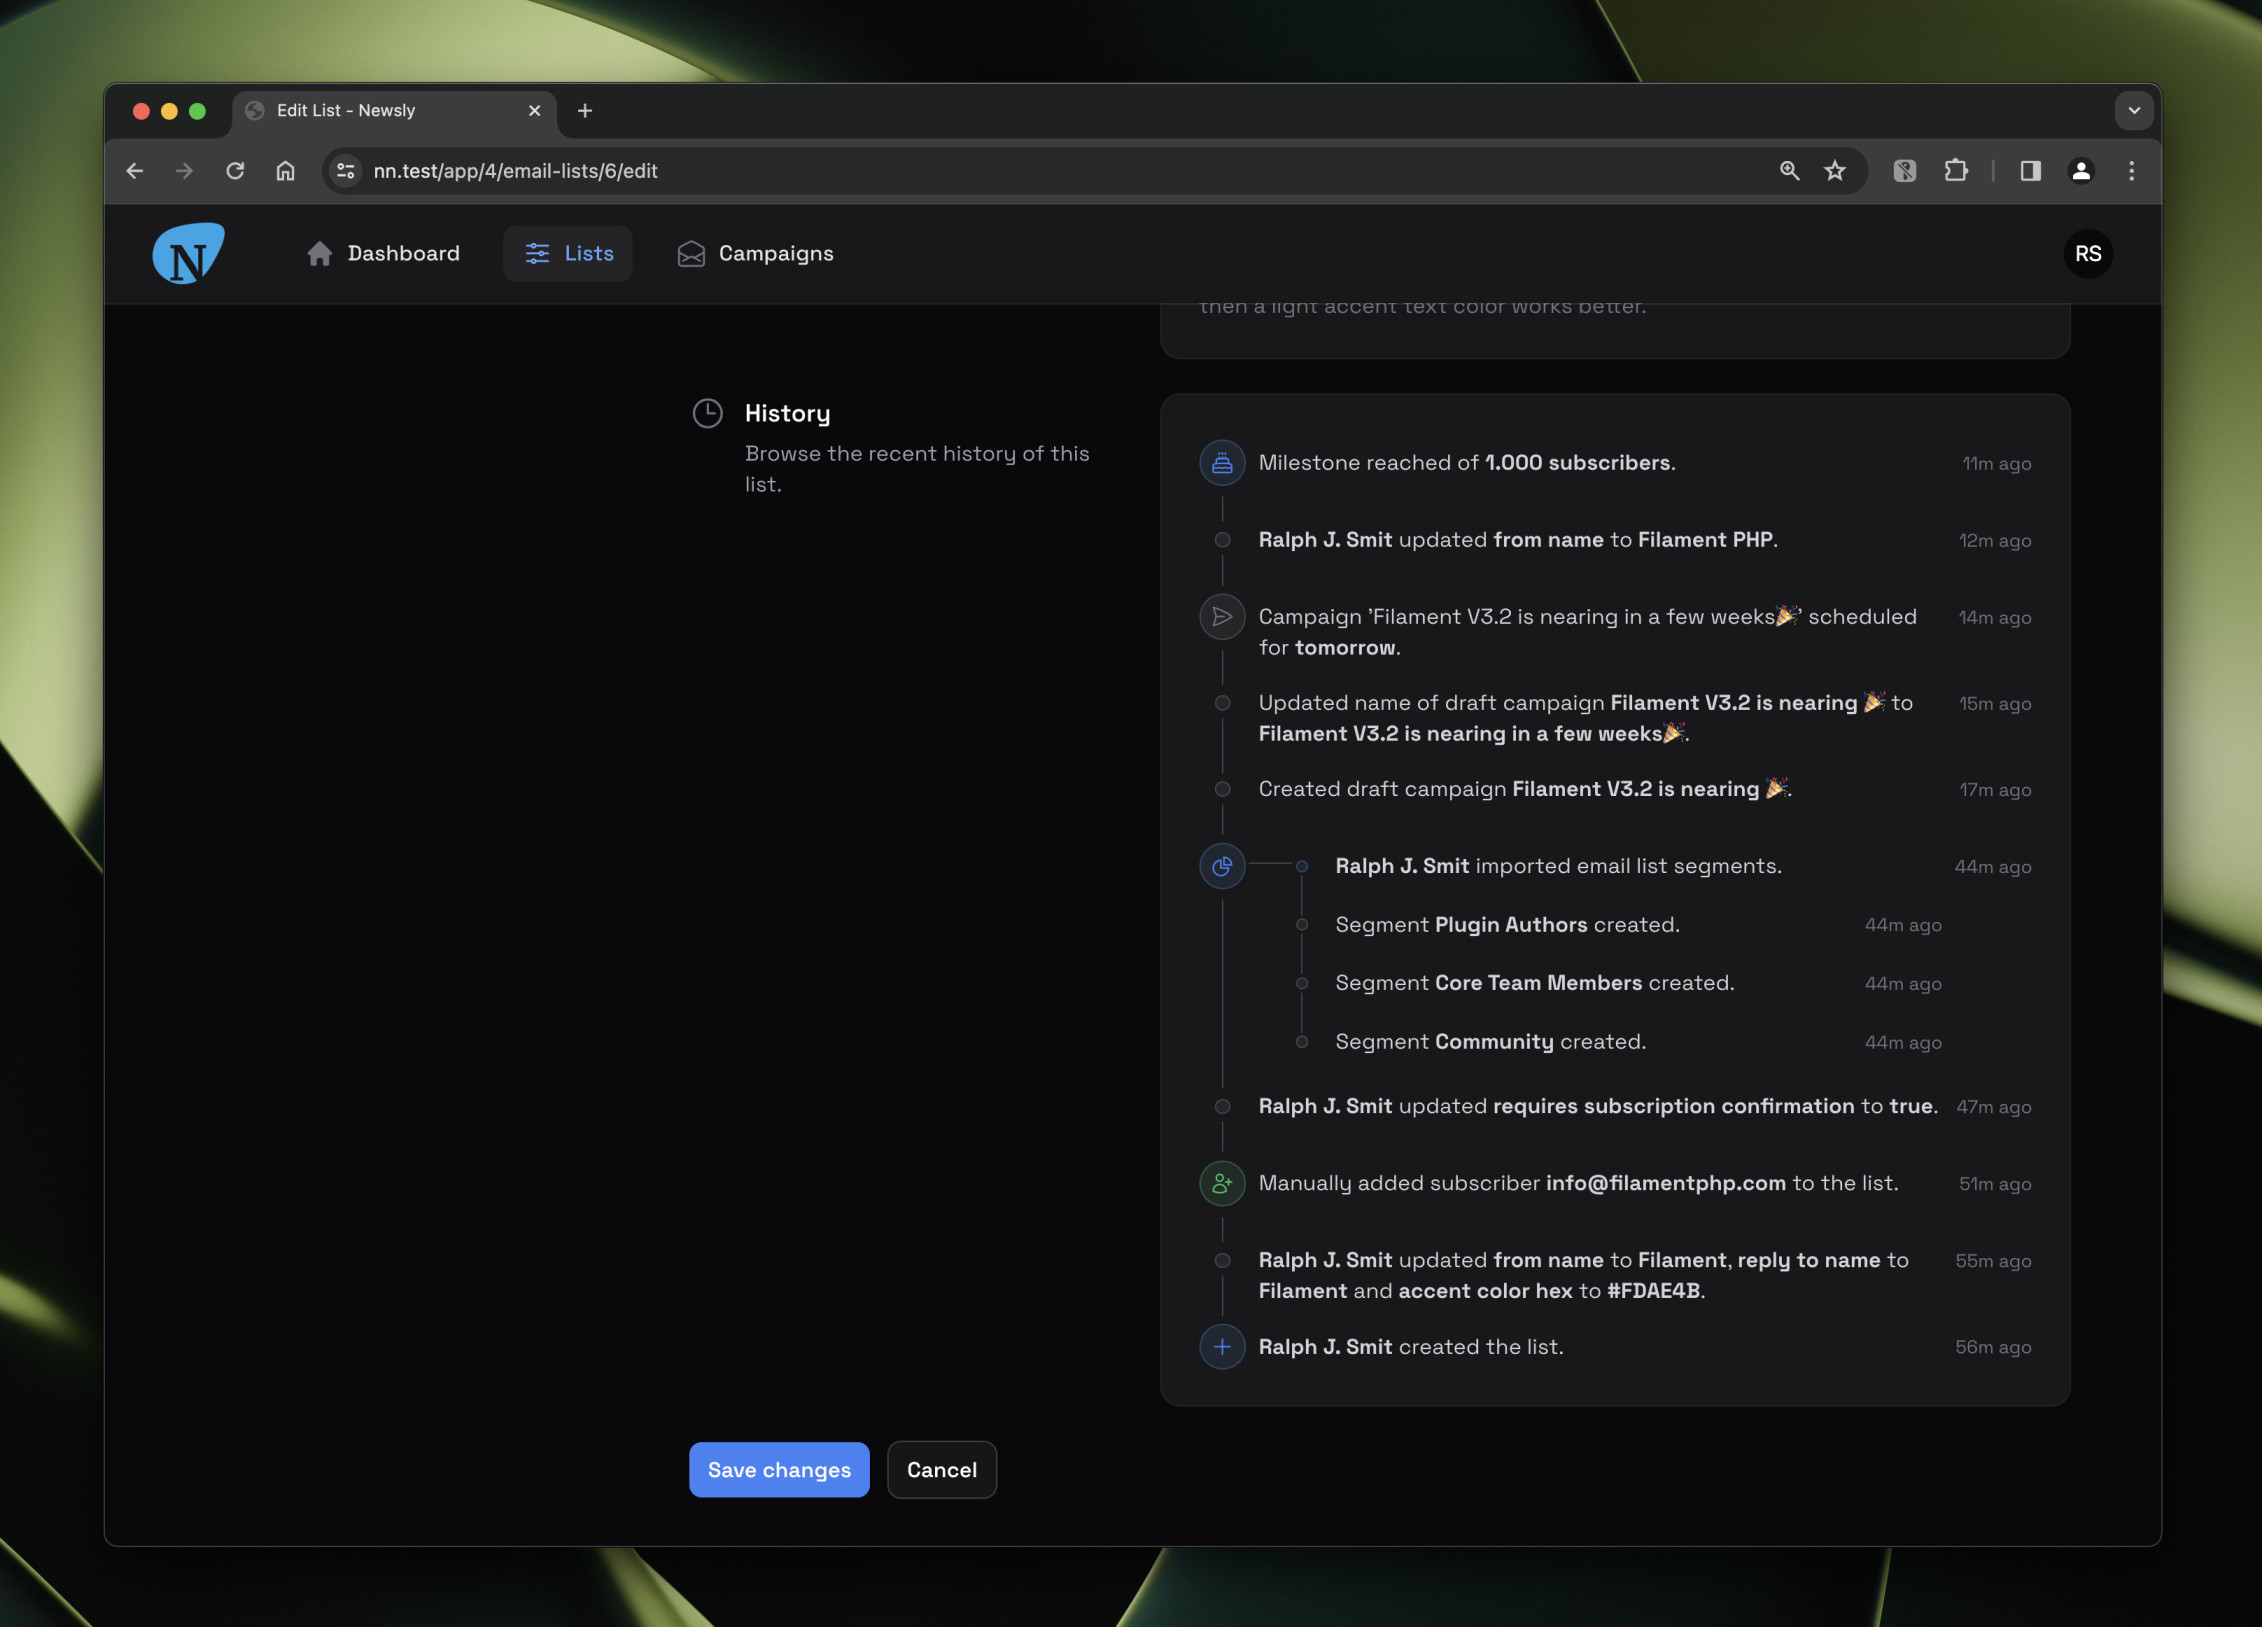
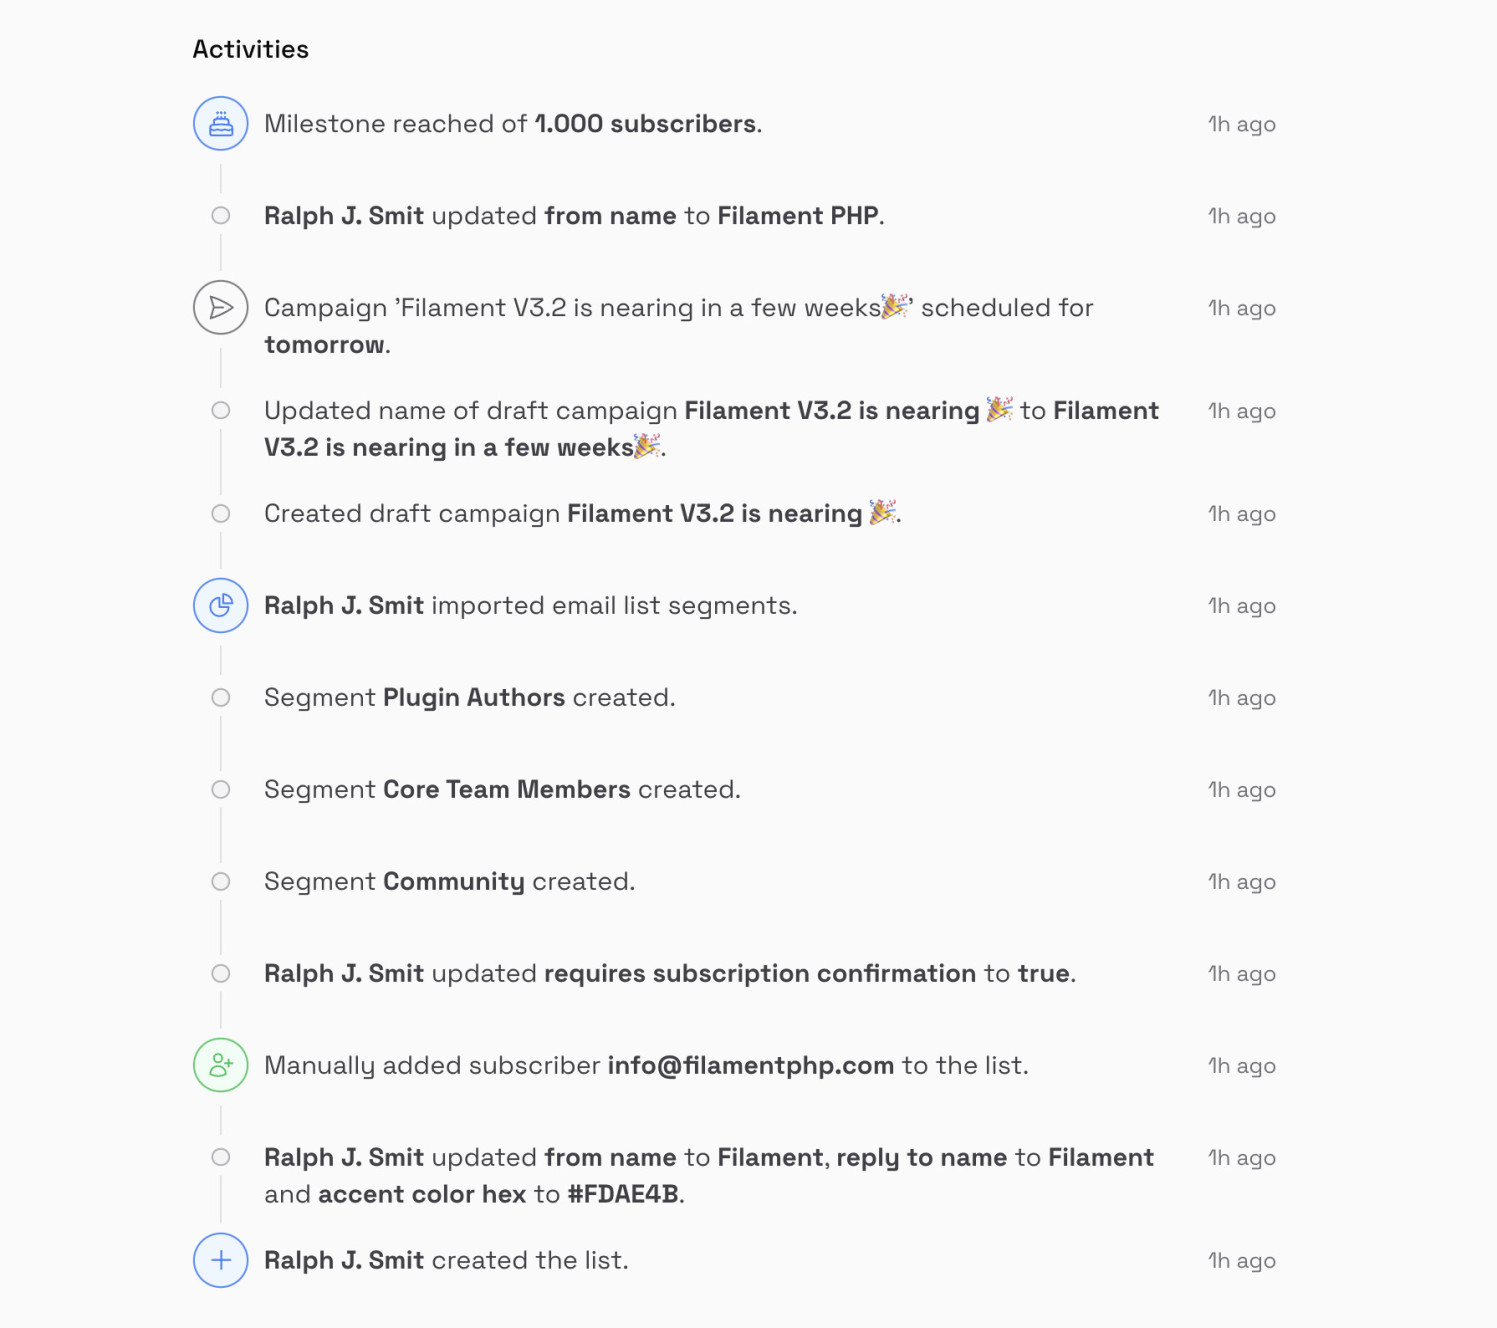
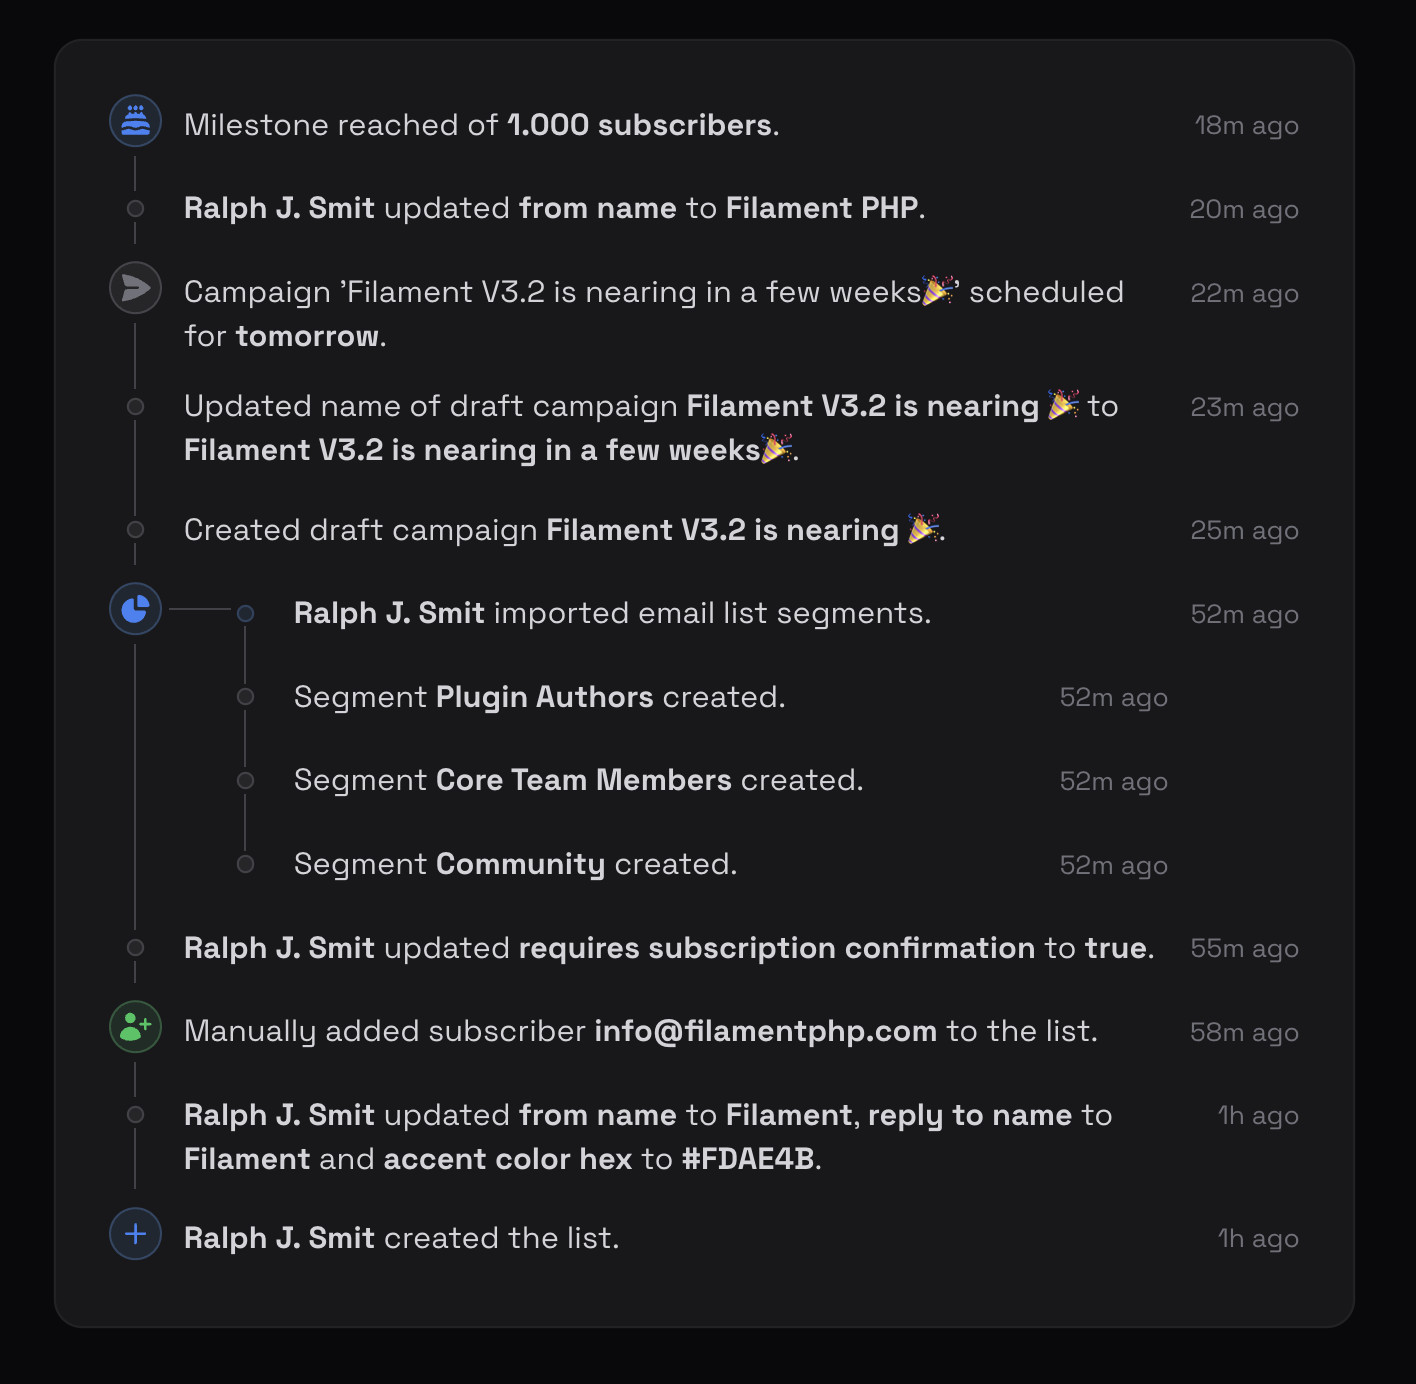
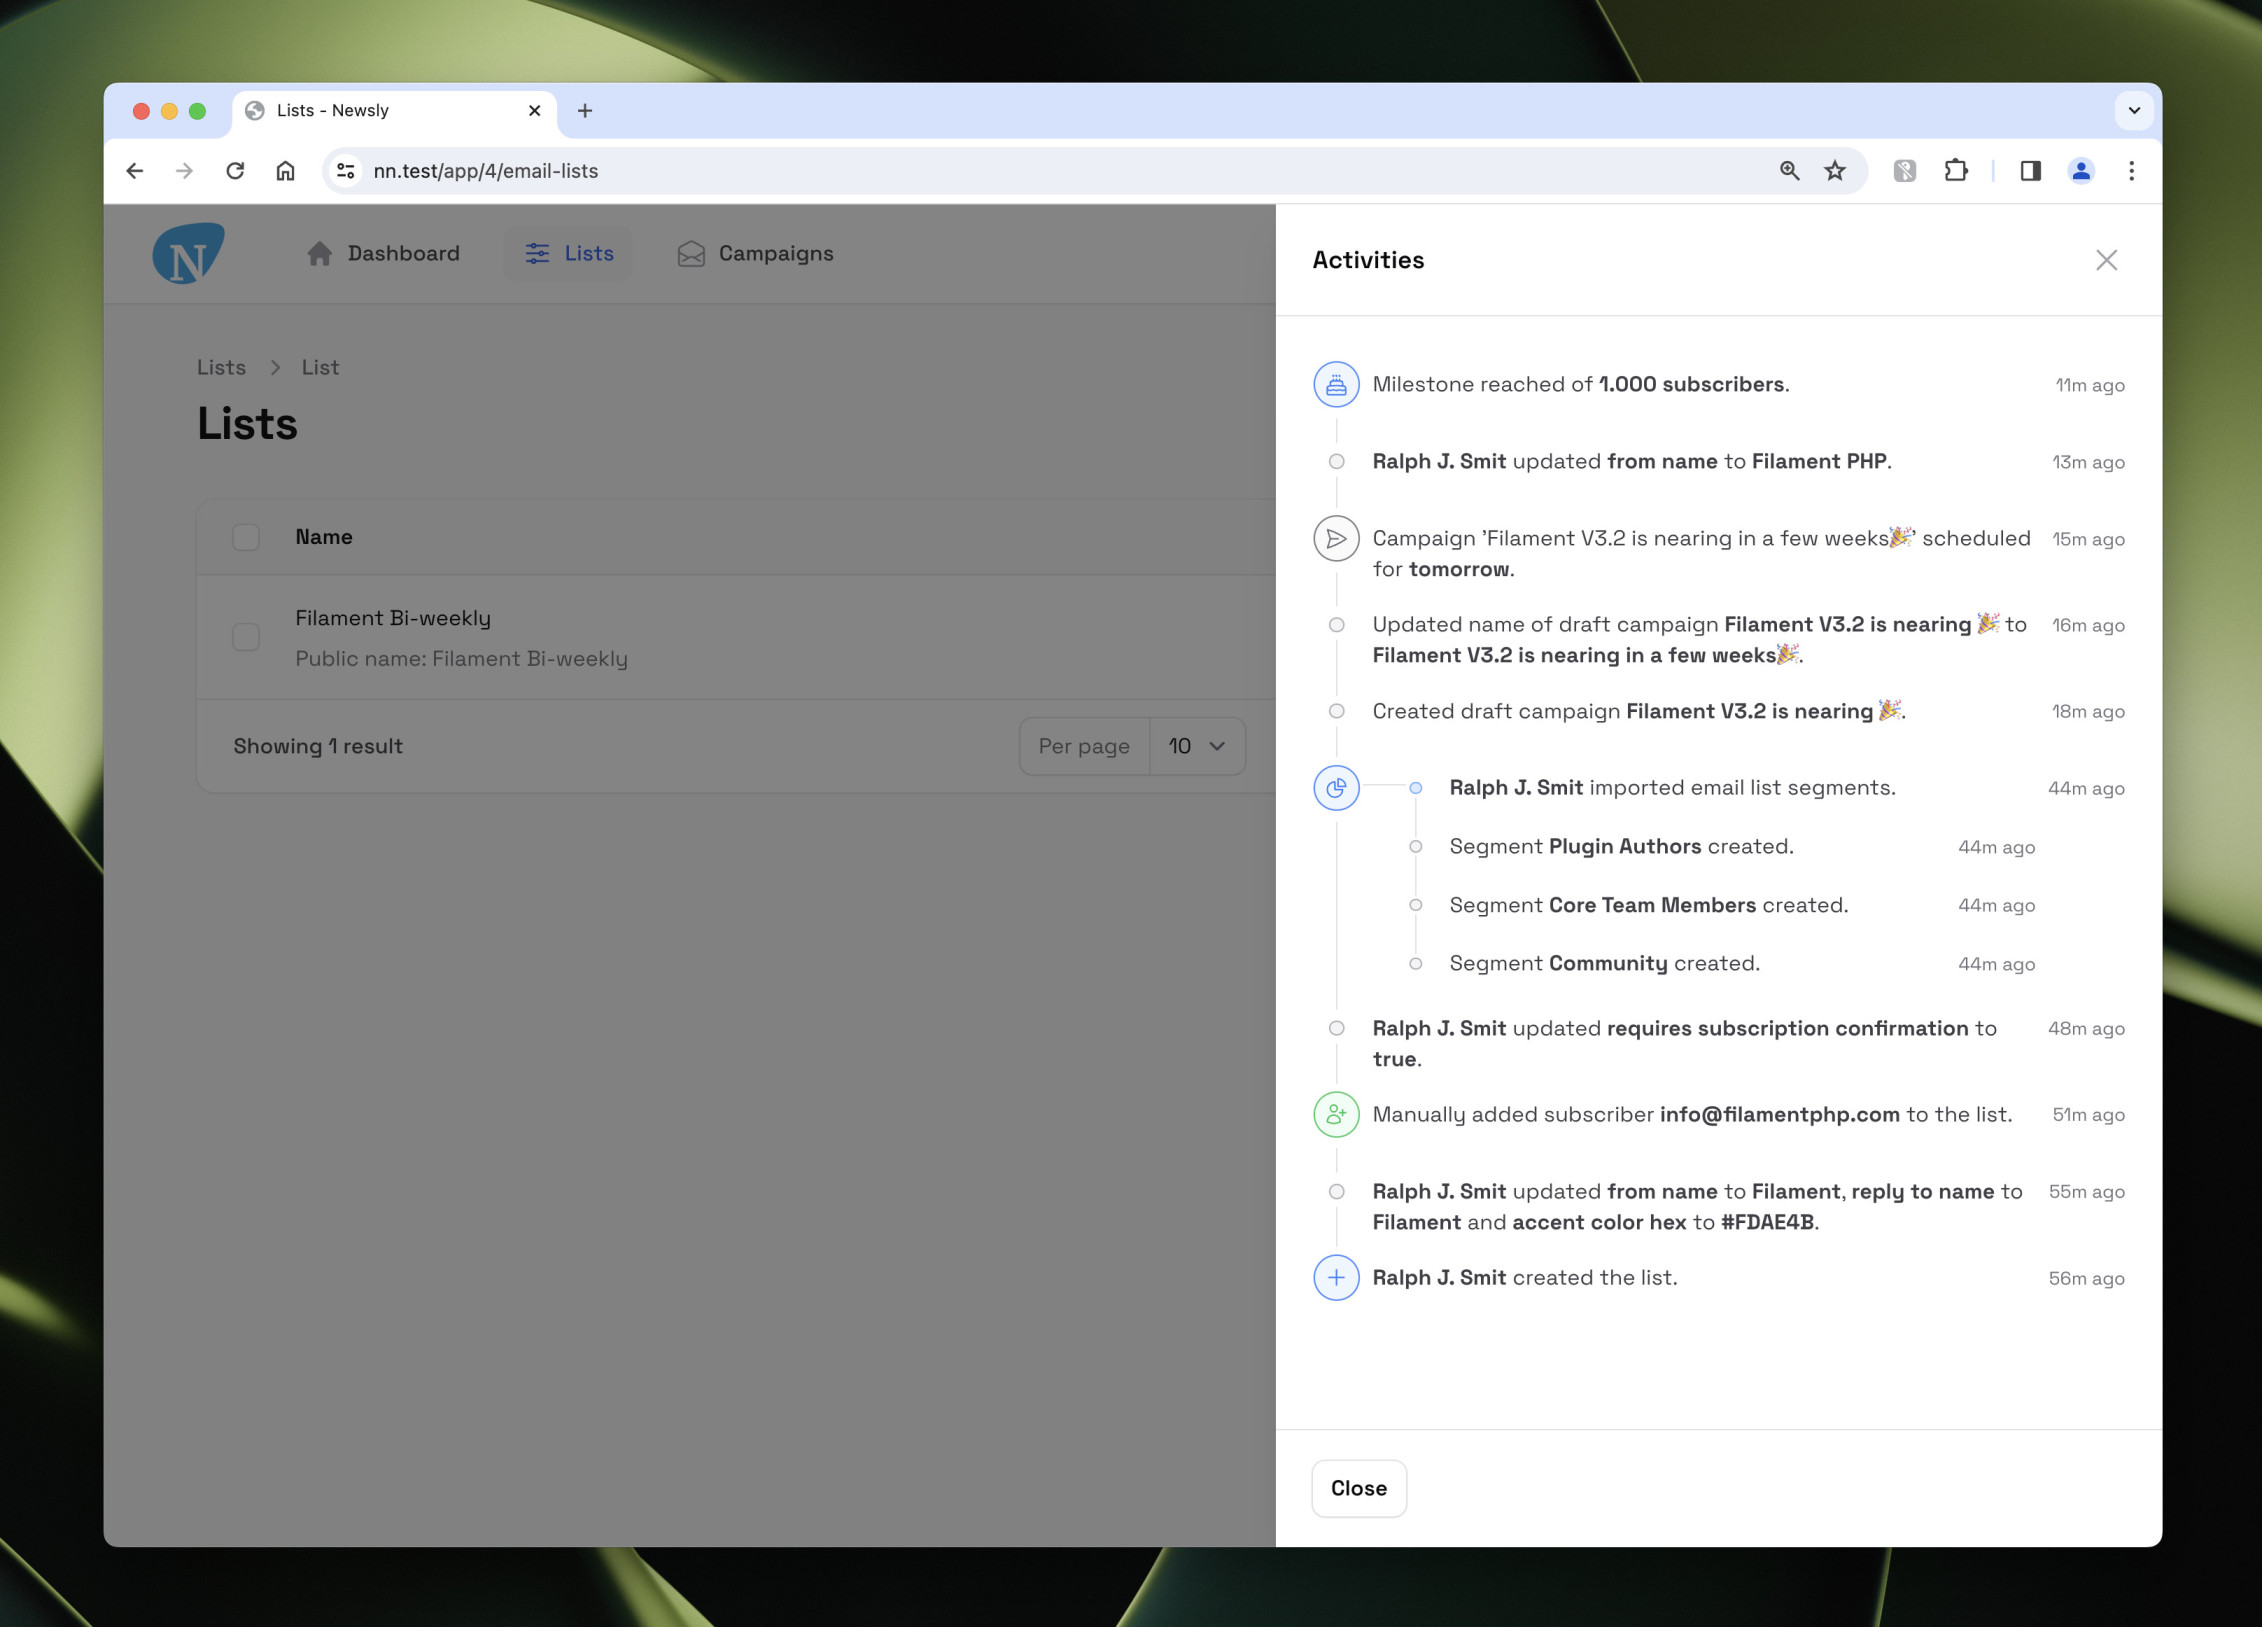
The timeline component will work out-of-the-box in any Filament form or infolist, also outside the admin panel. It looks like this:
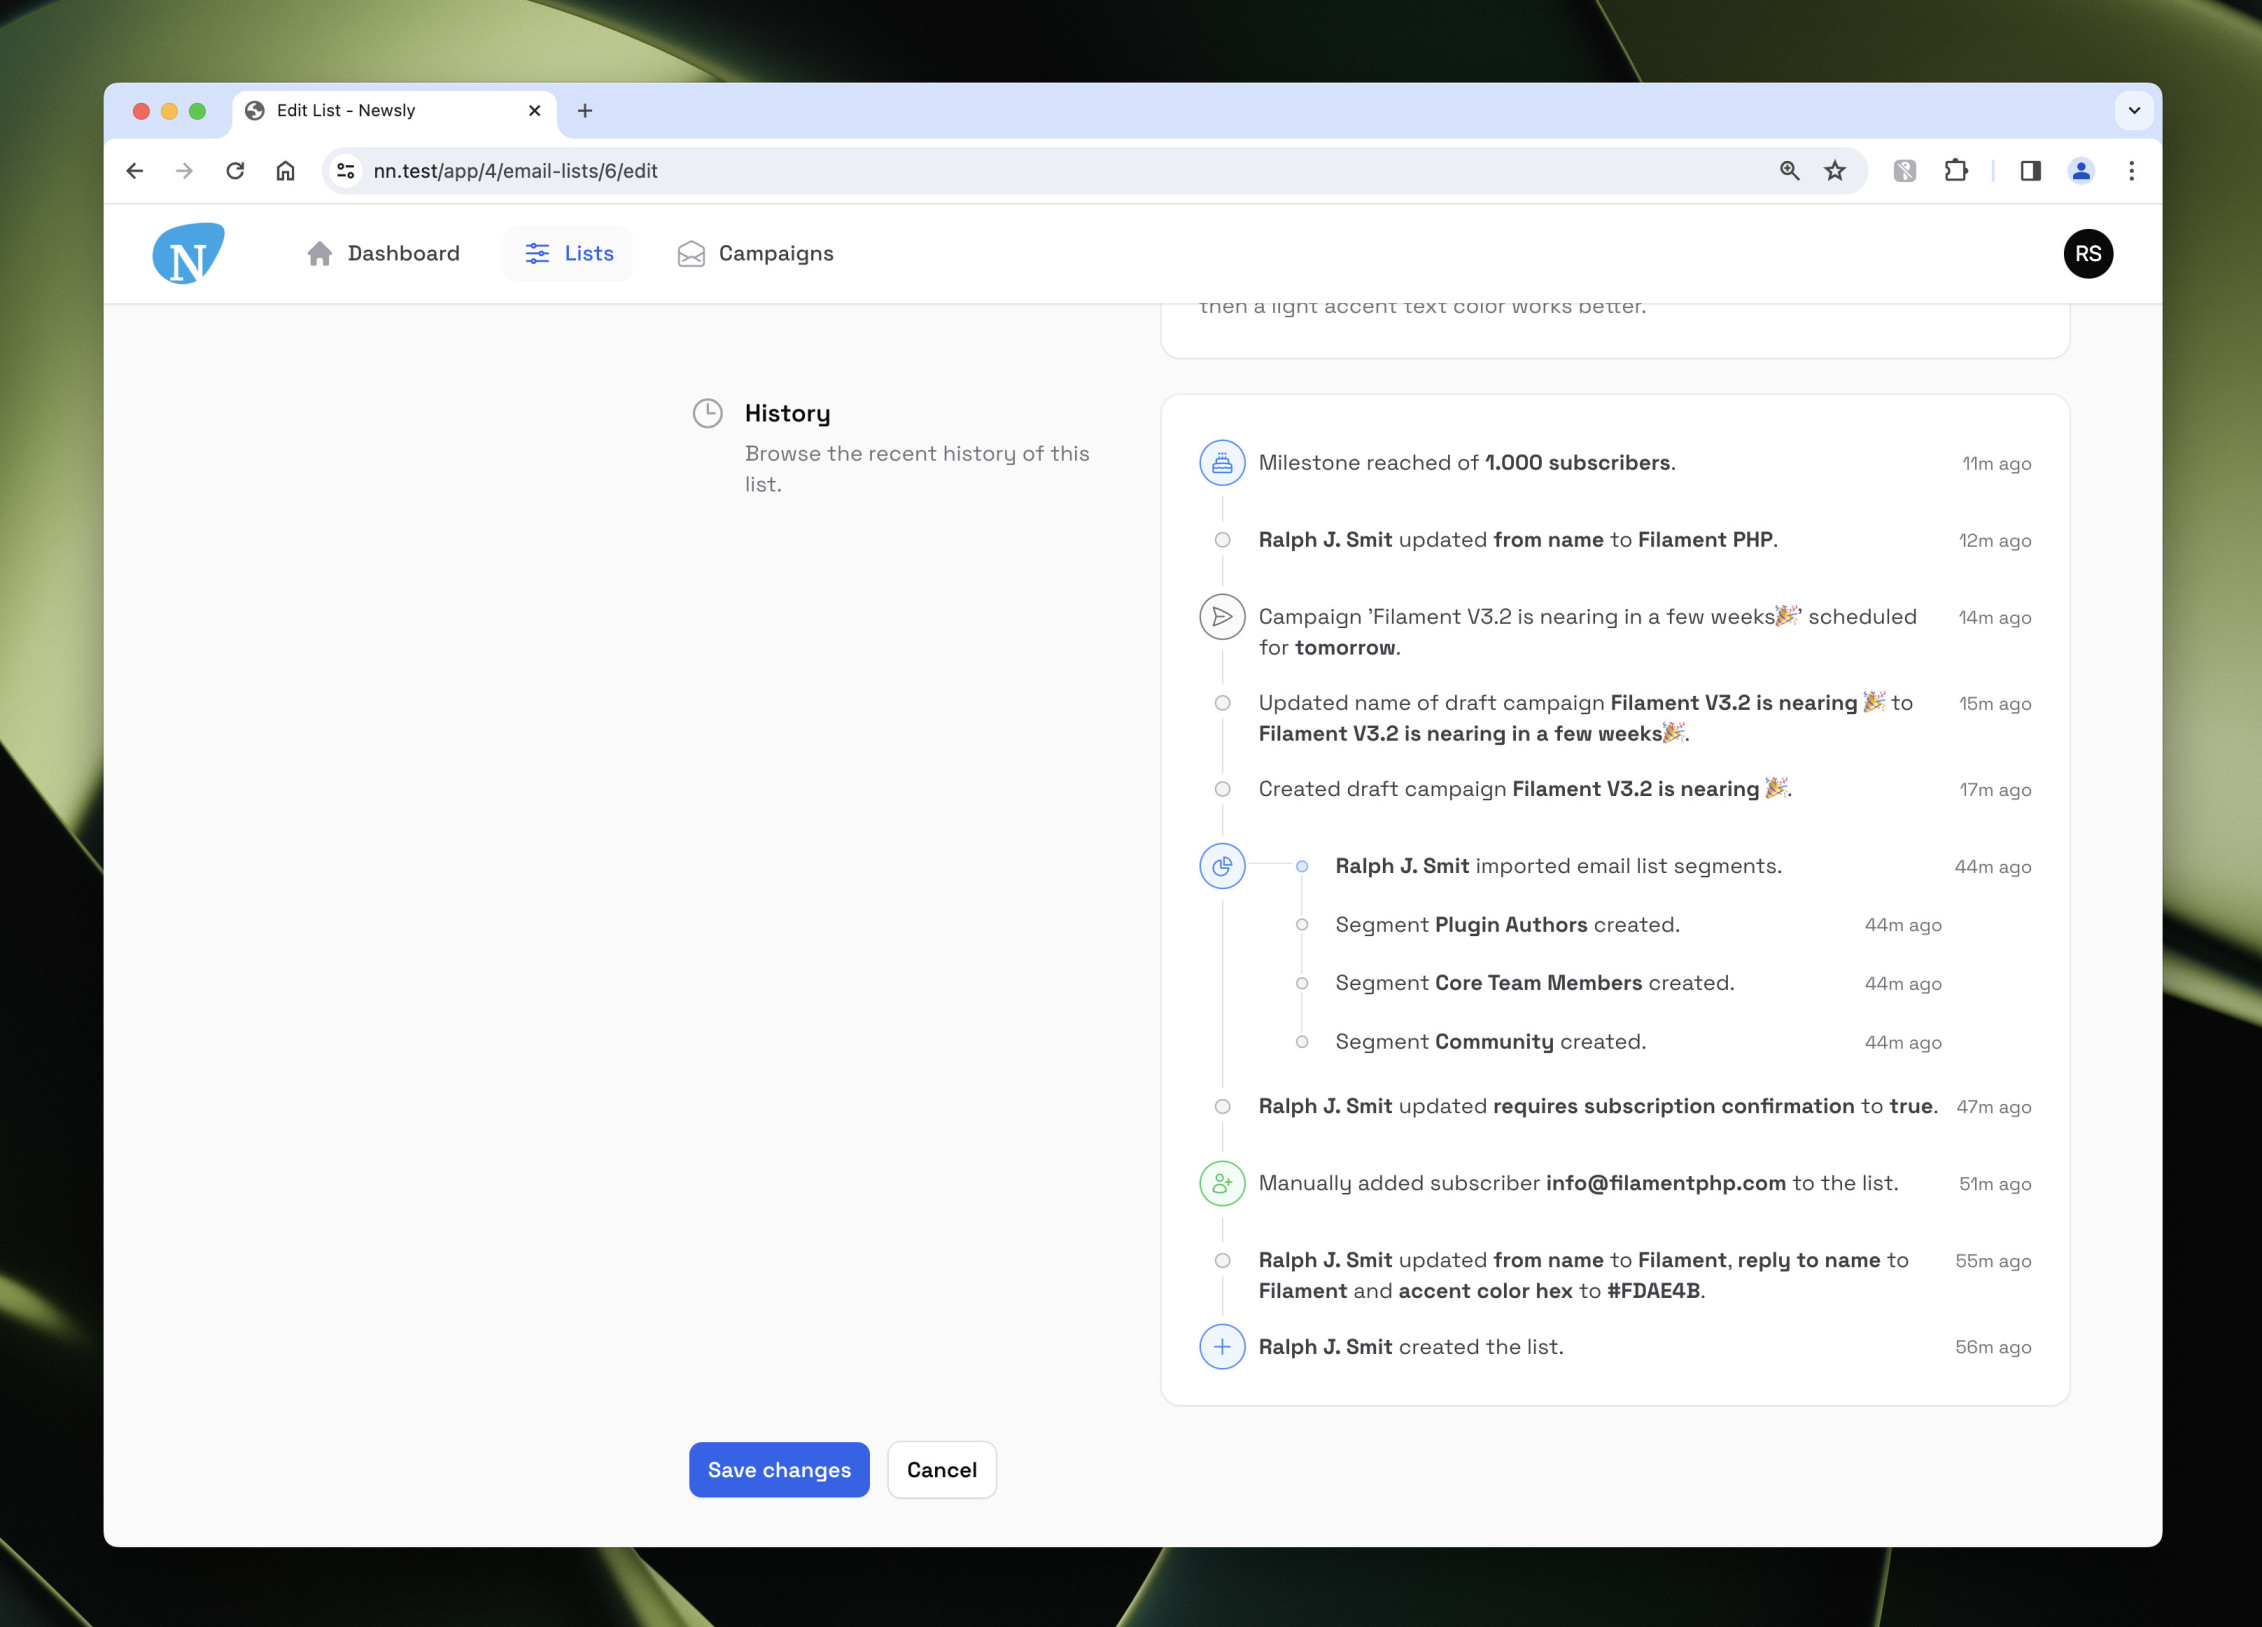
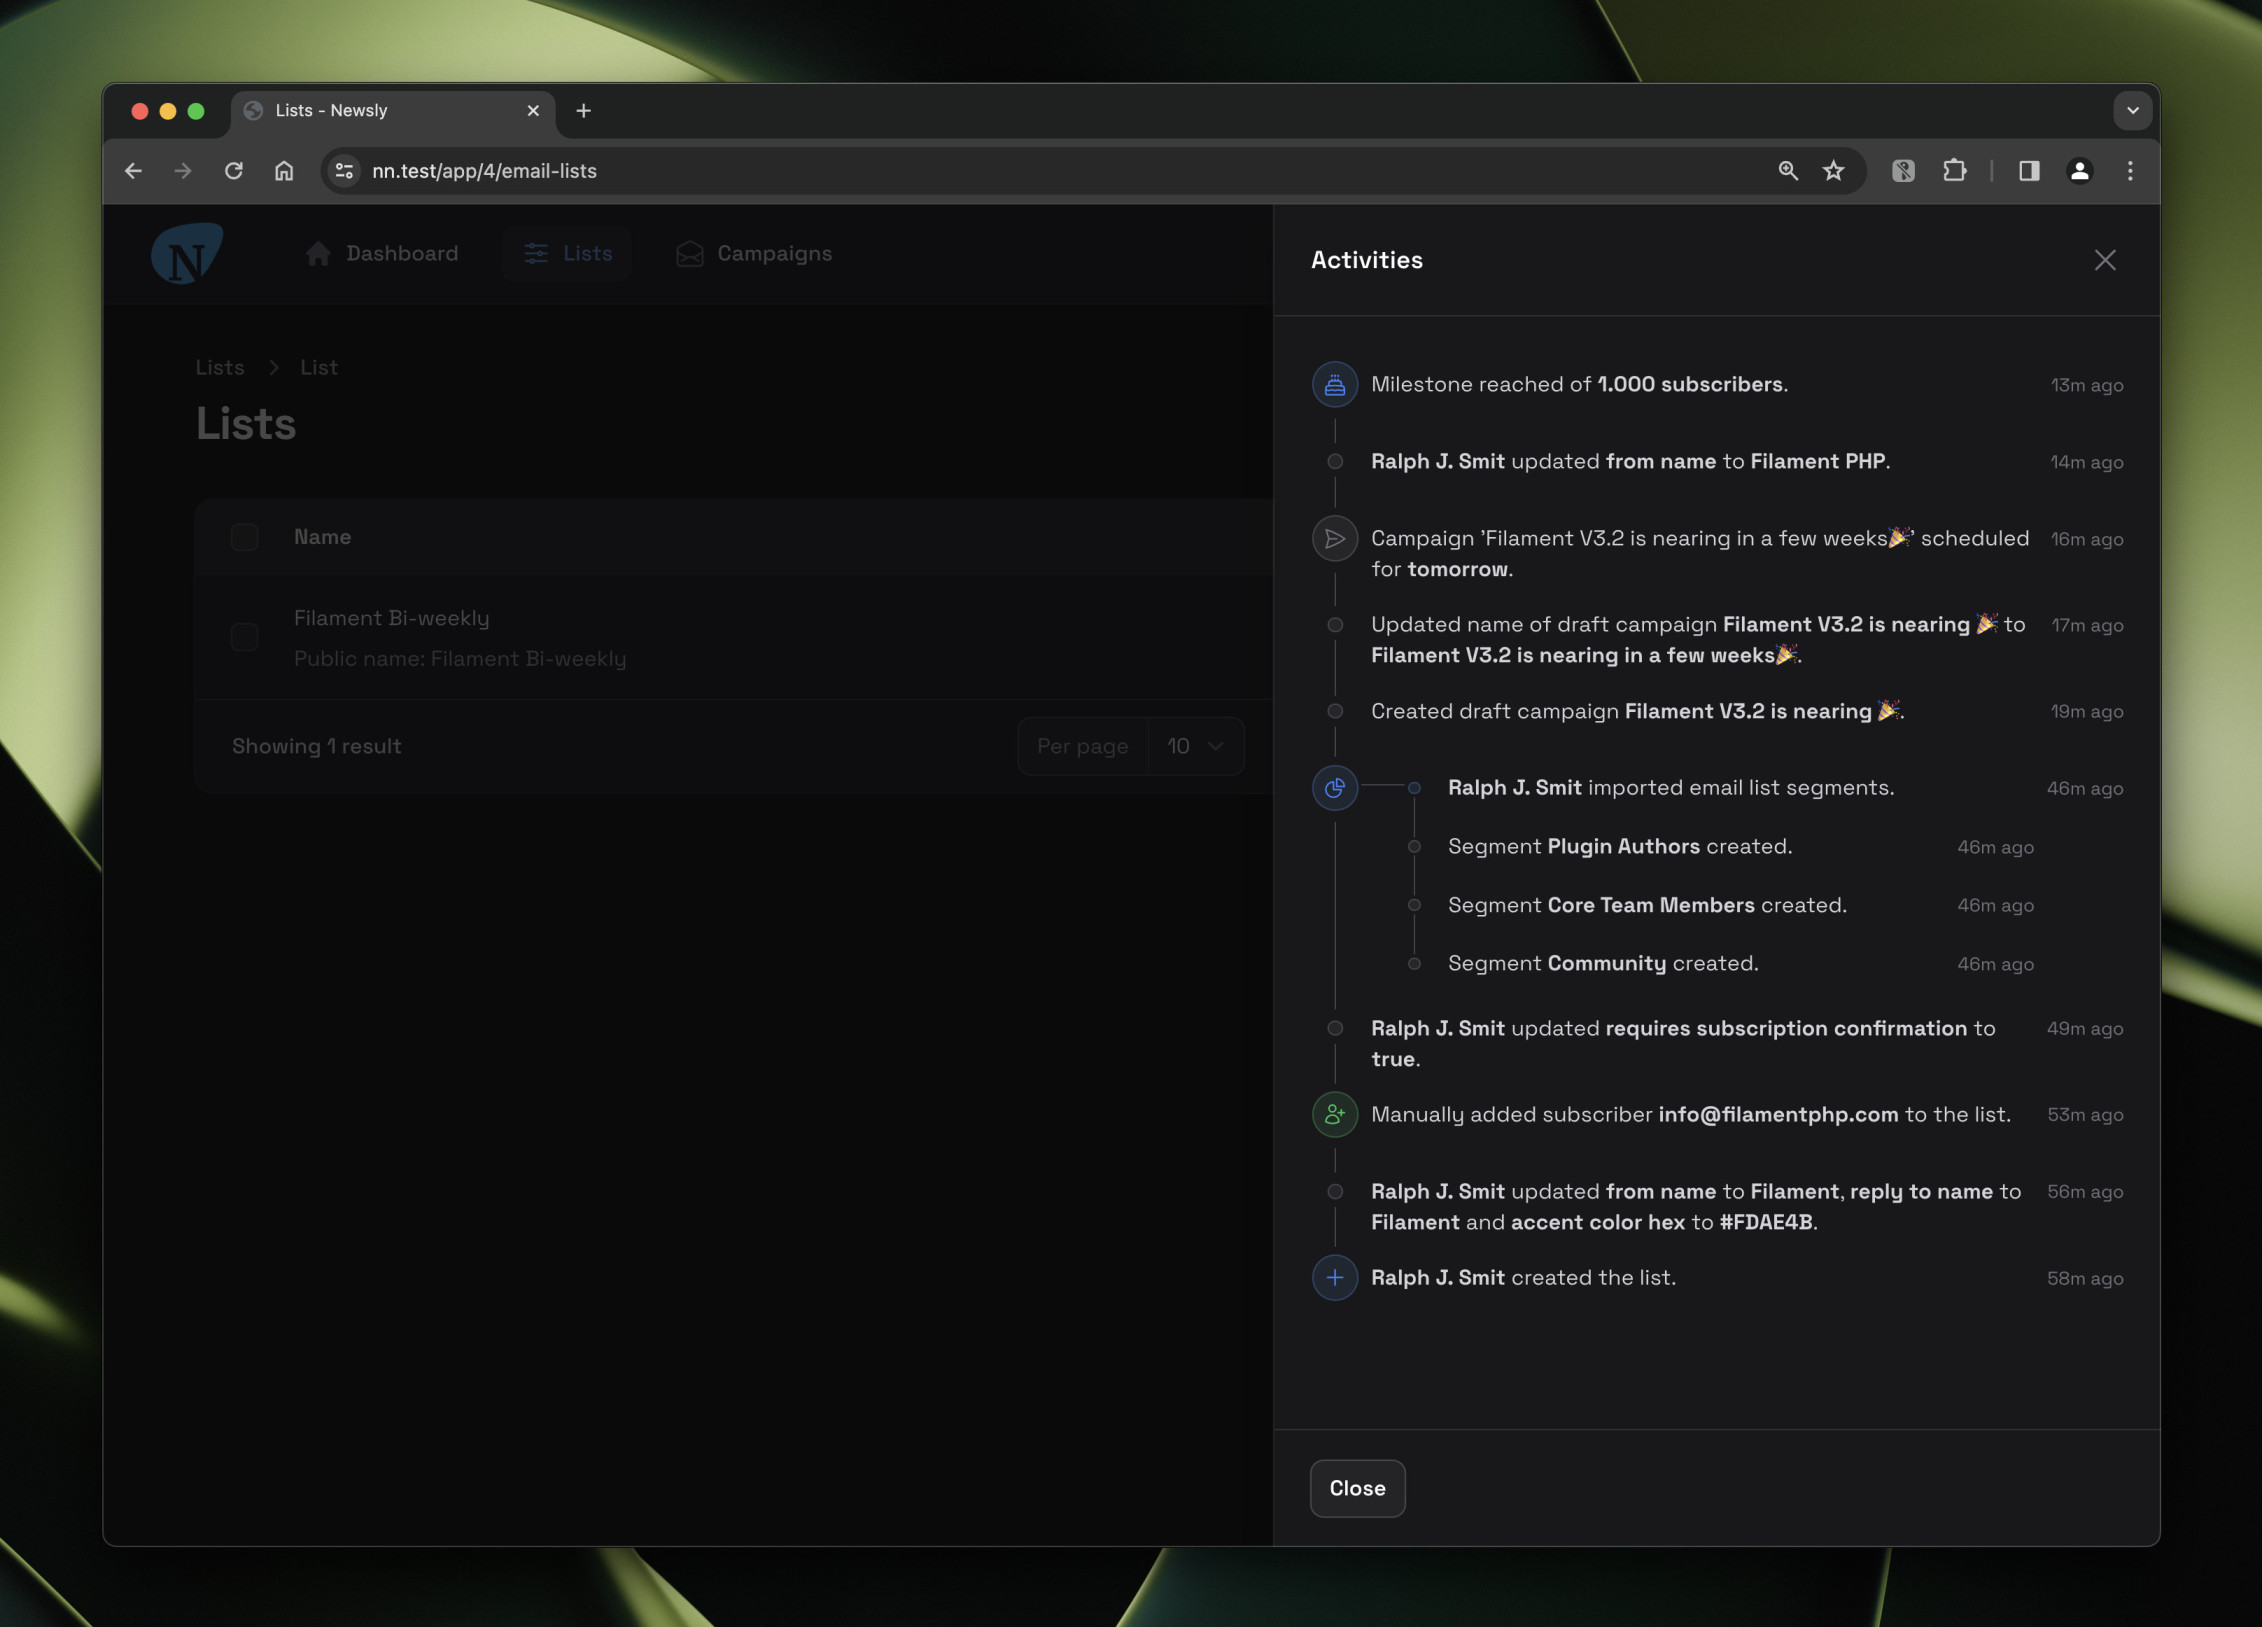
As you see in the above image, placing the timeline inside a Section works really well. The timeline looks great in dark mode also:
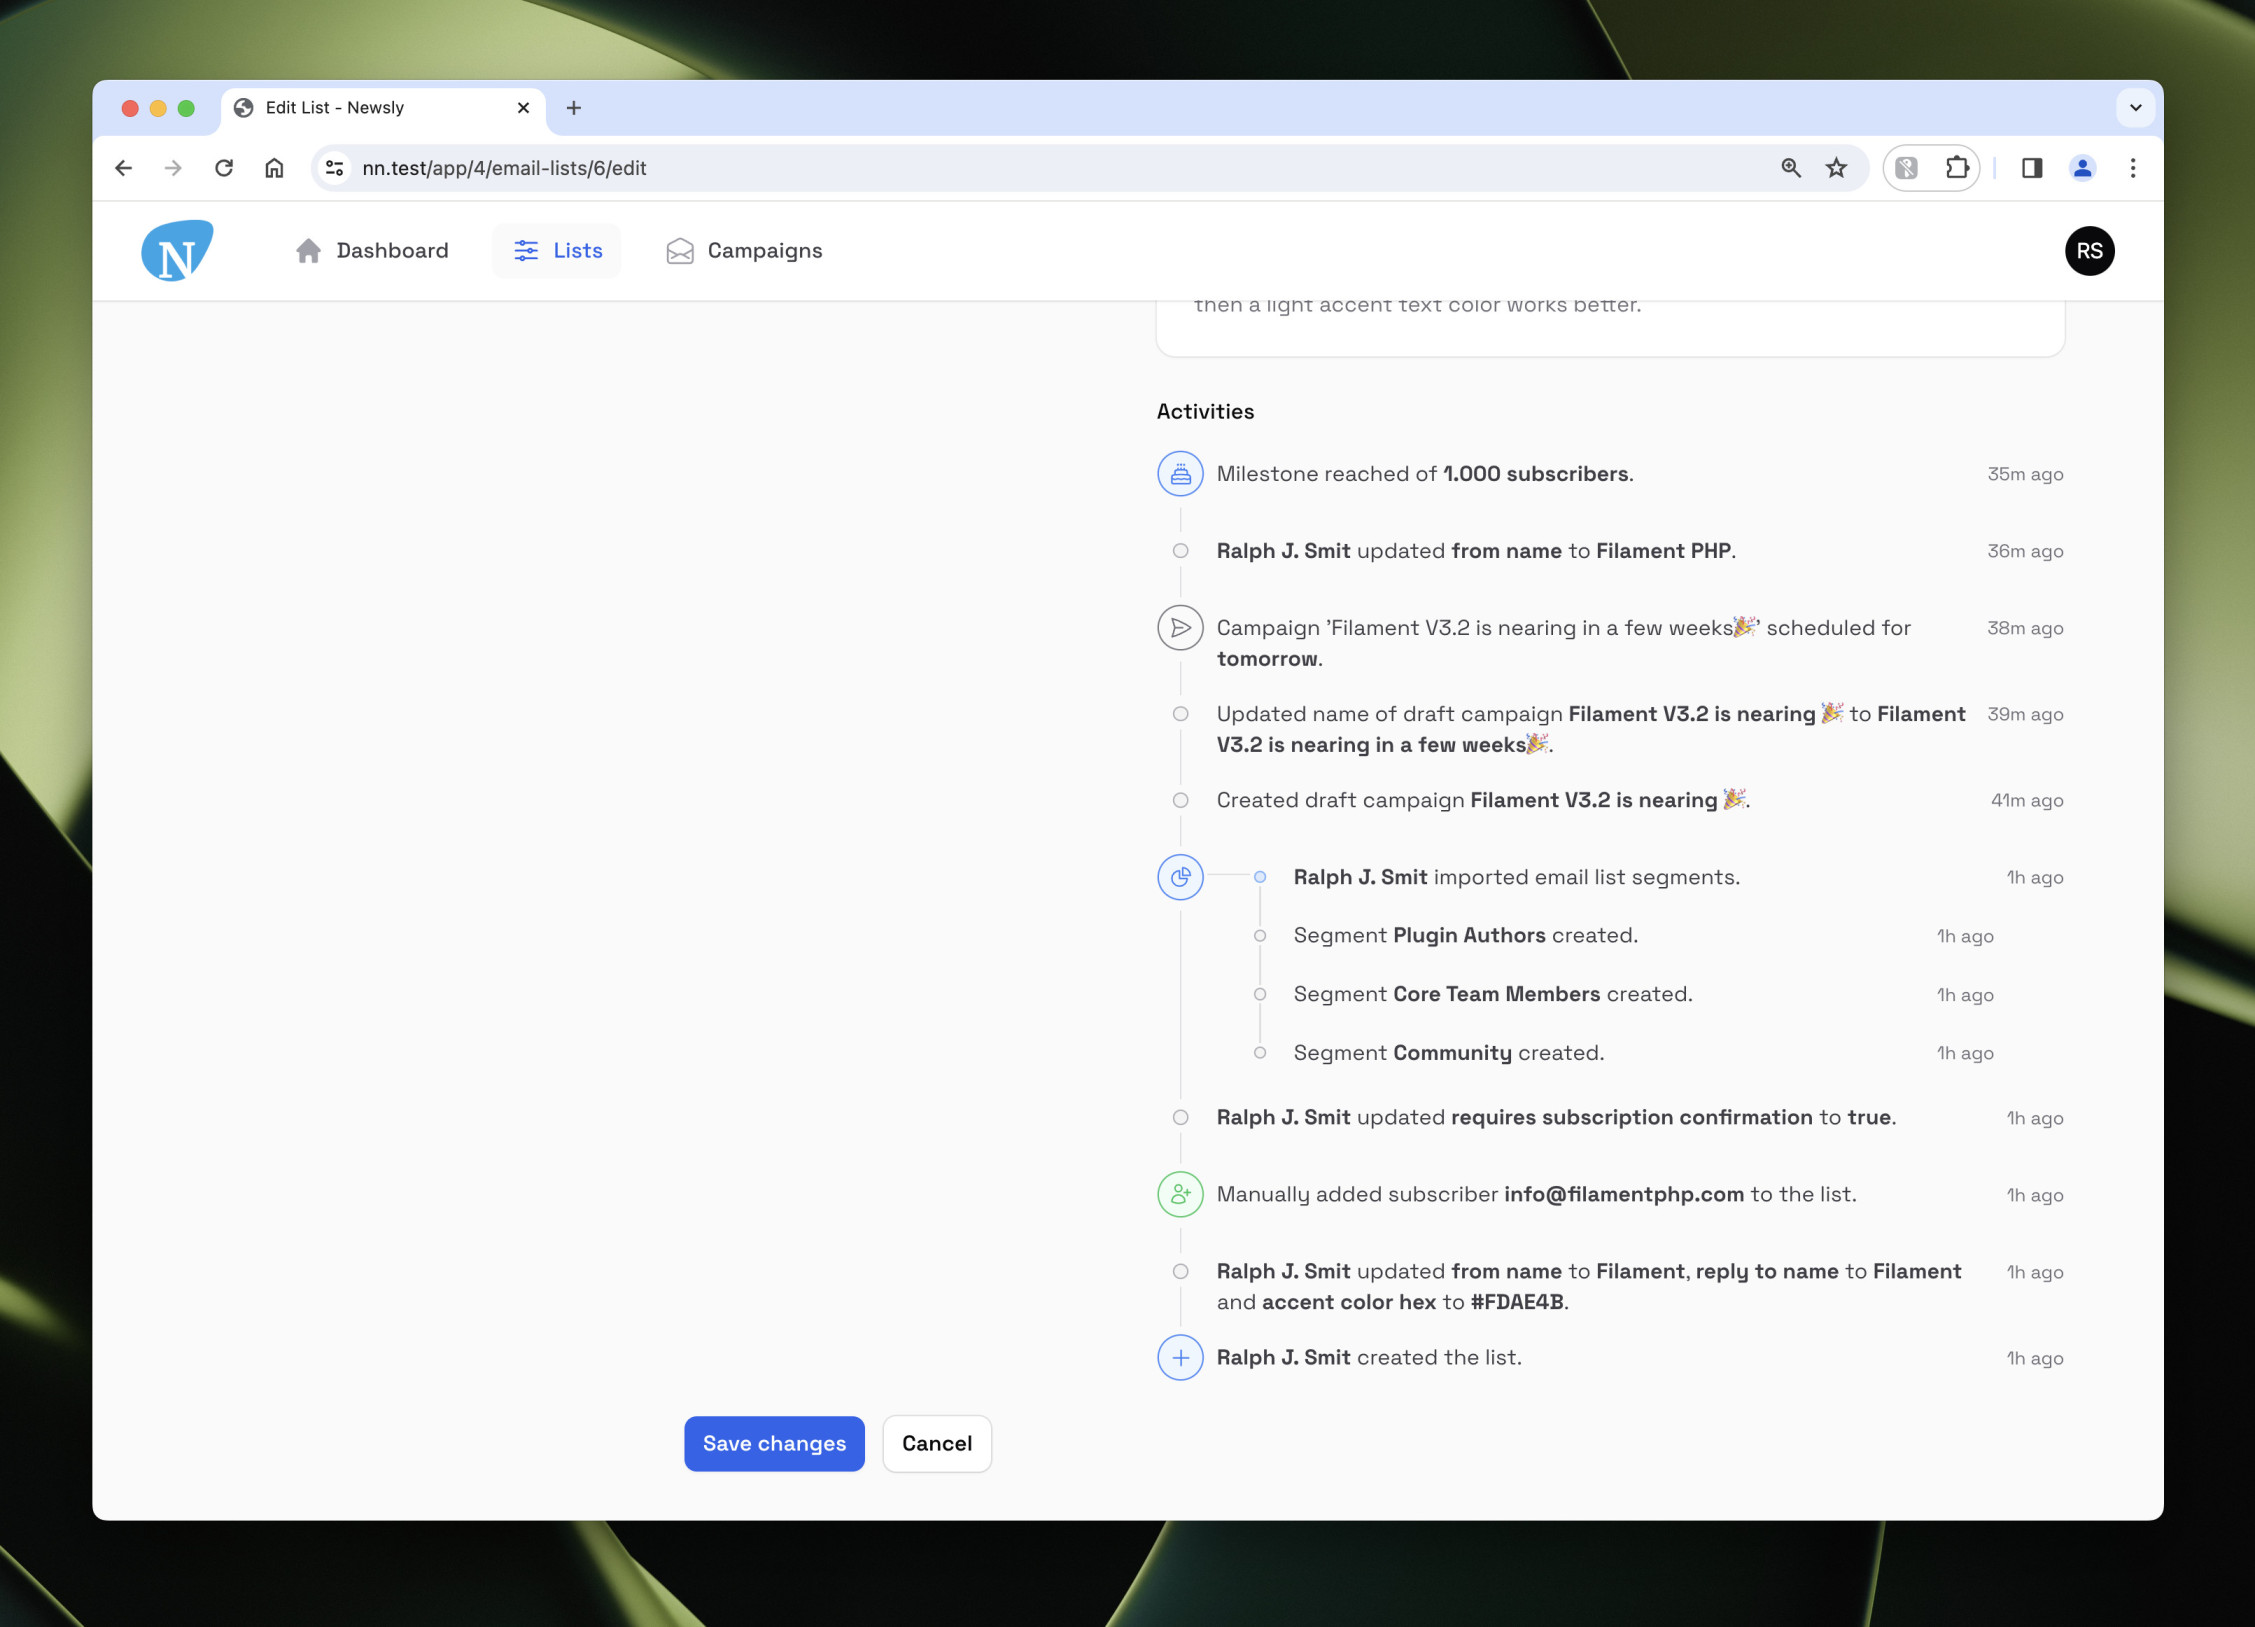
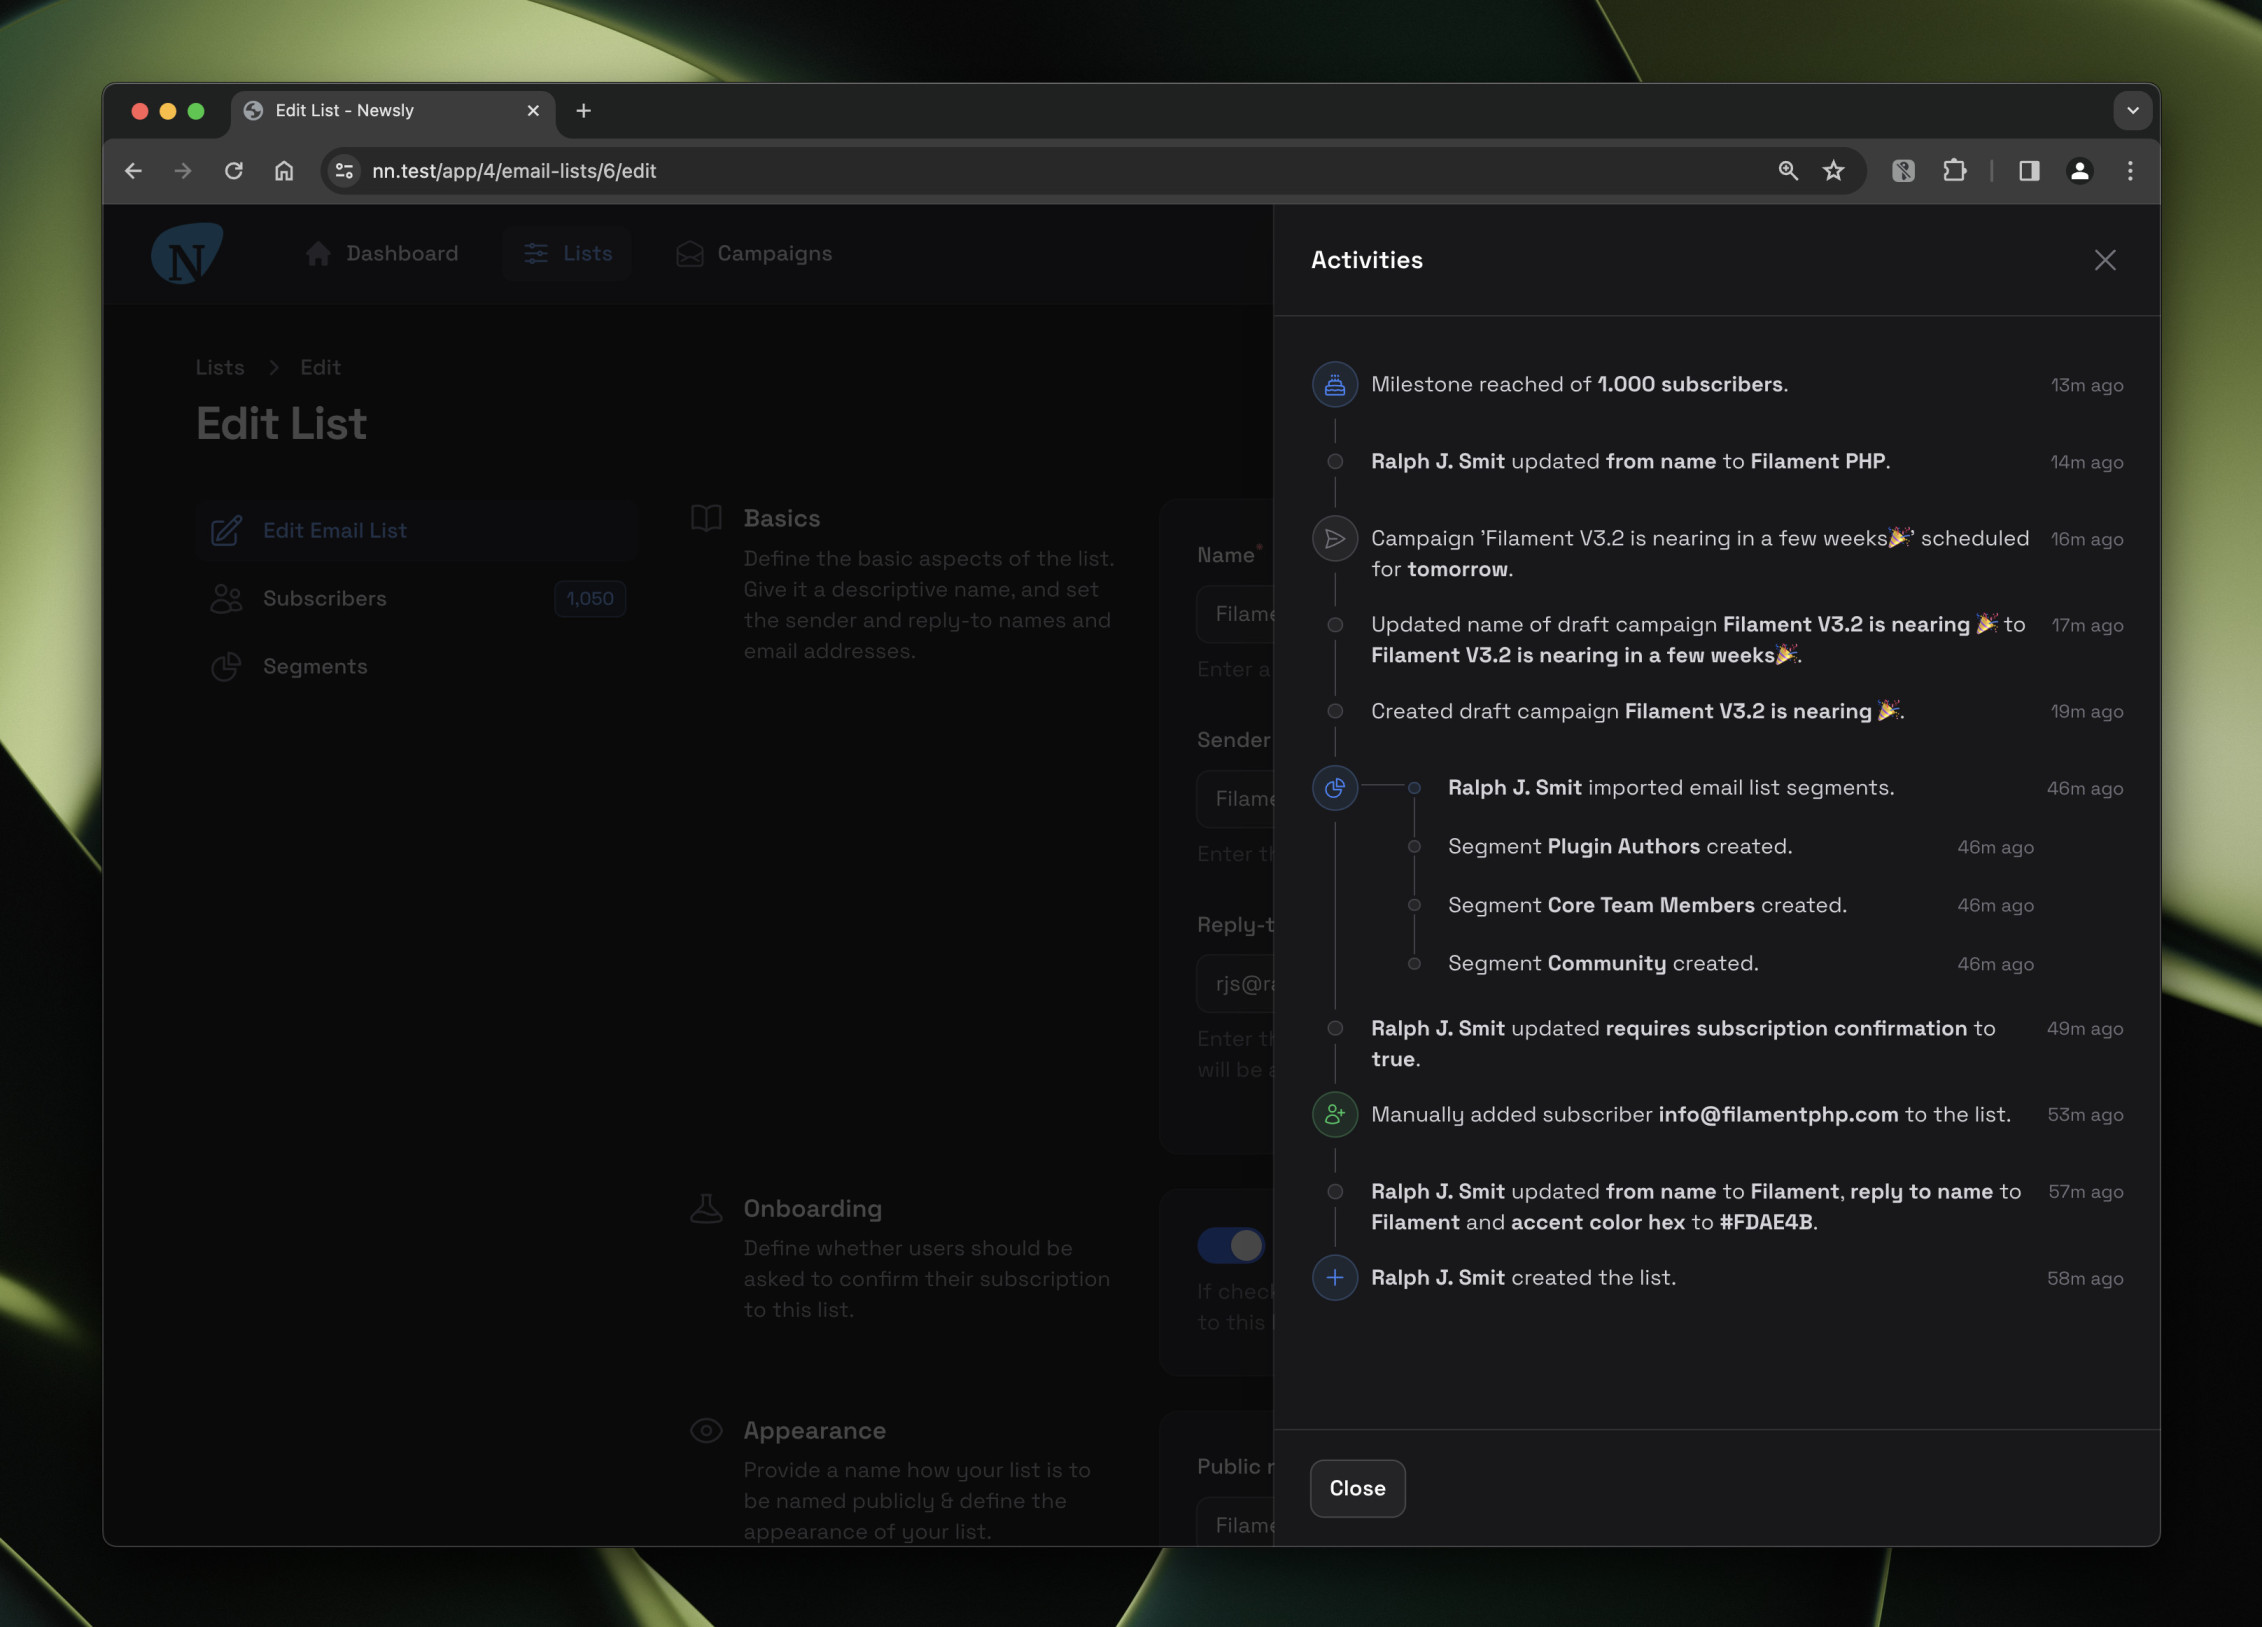
Another option would be to place the timeline directly on the page. This makes the timeline feel more 'supplemental' to the main content of the page:
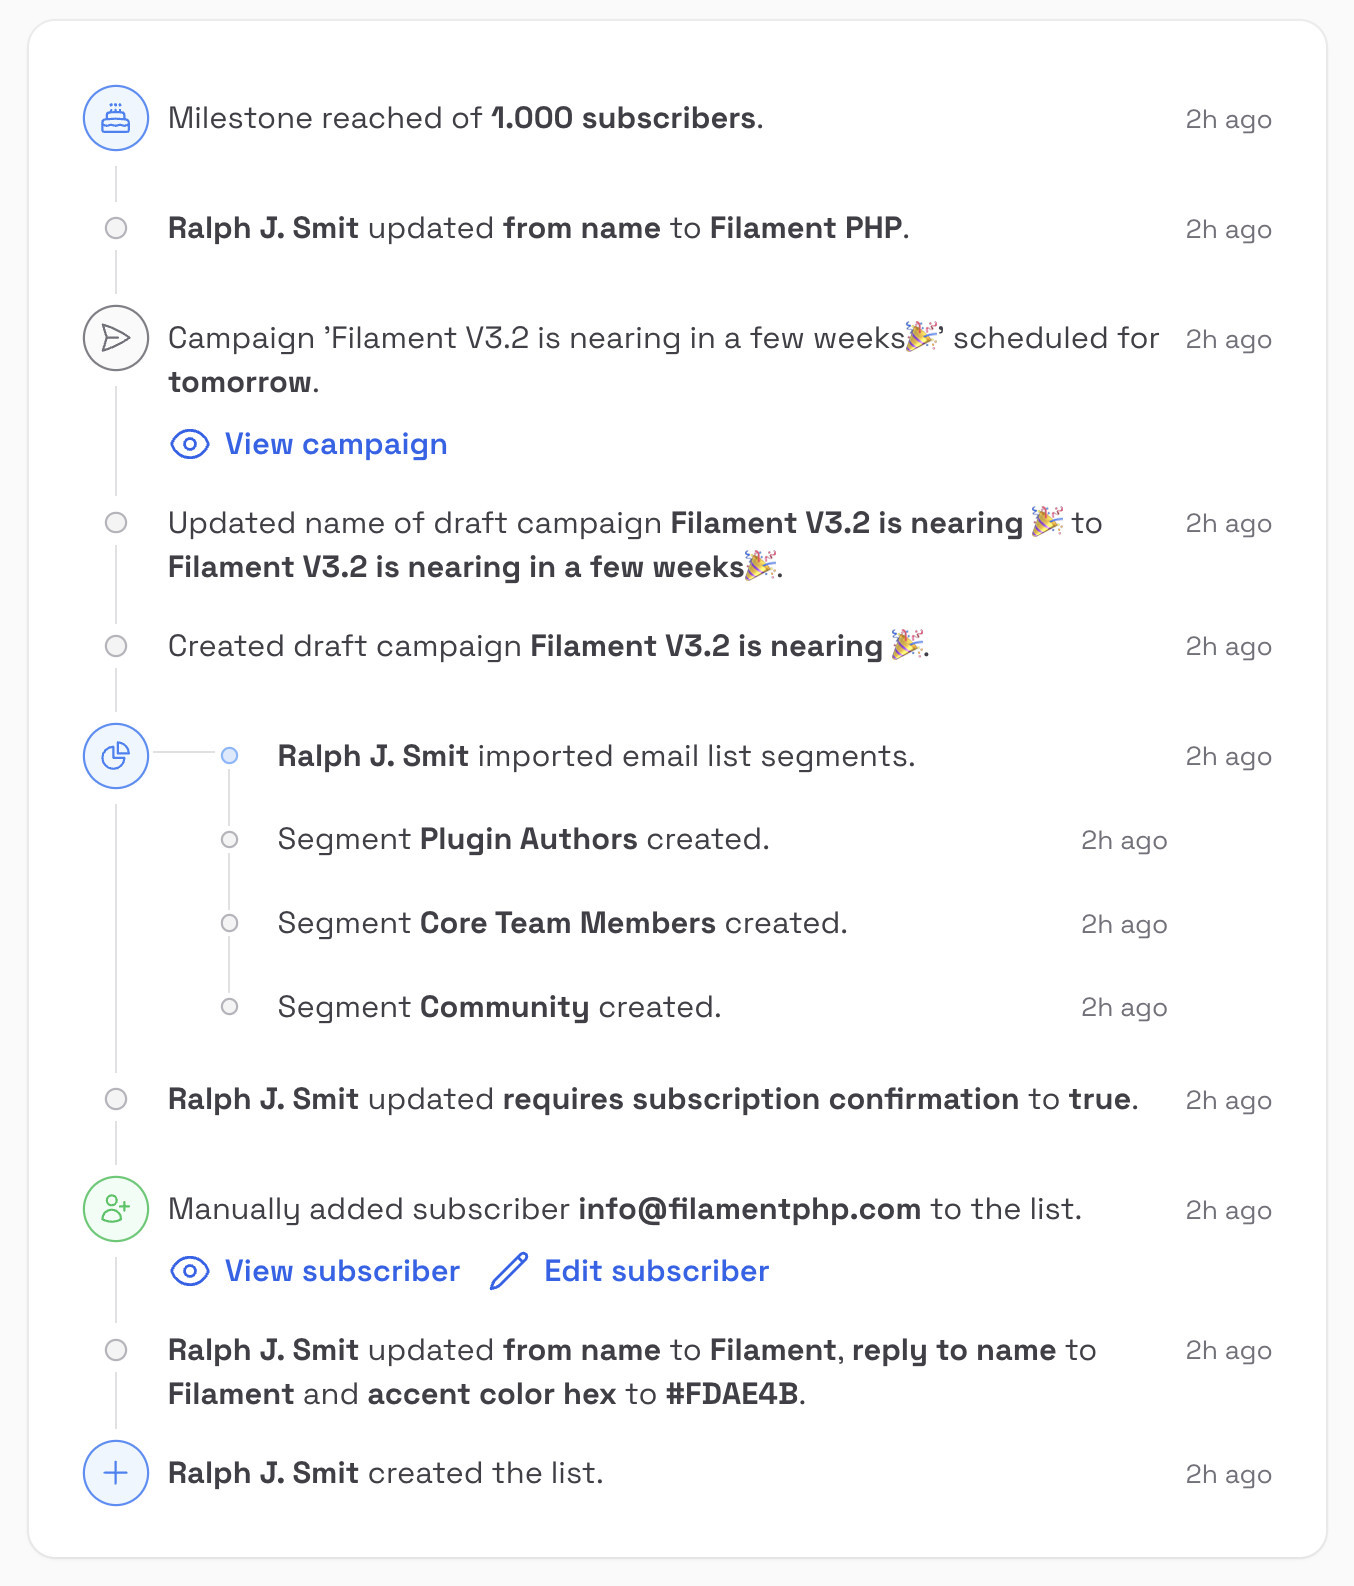
All icons & colors in the timeline are fully customizable. You can also add actions to the timeline, including actions that can open modals. The actions will be displayed beneath each item in the timeline:
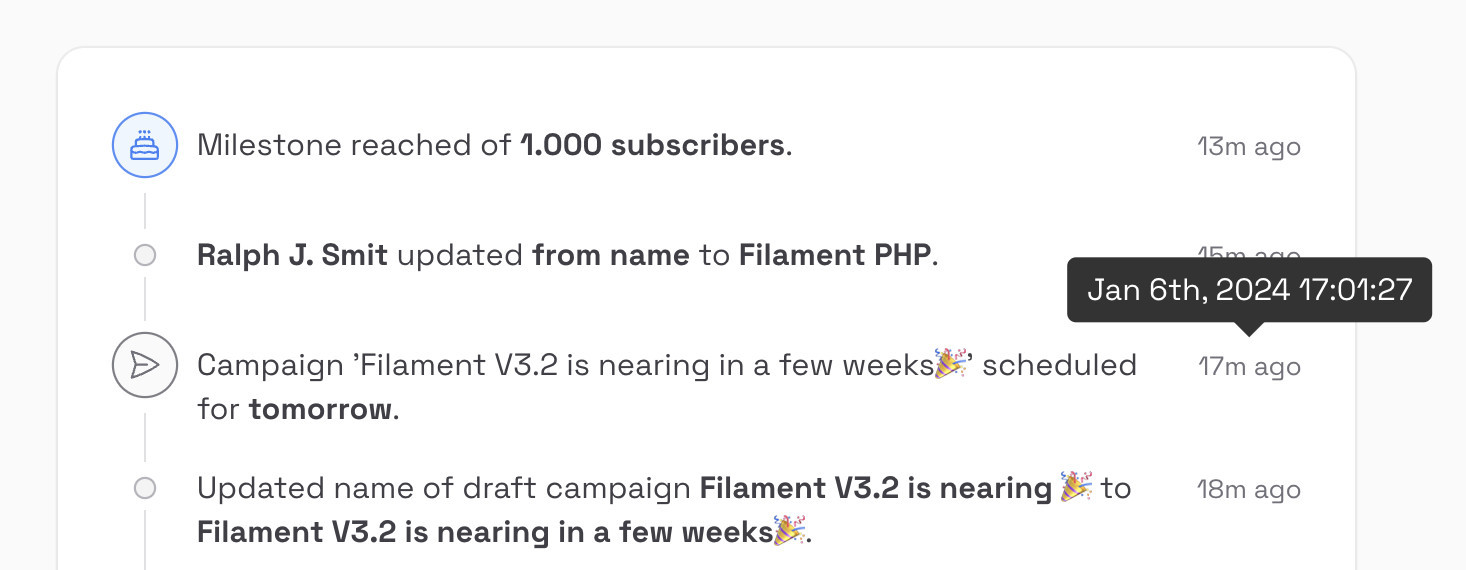
If you hover over a timestamp, you can see the exact date & time of the activity:
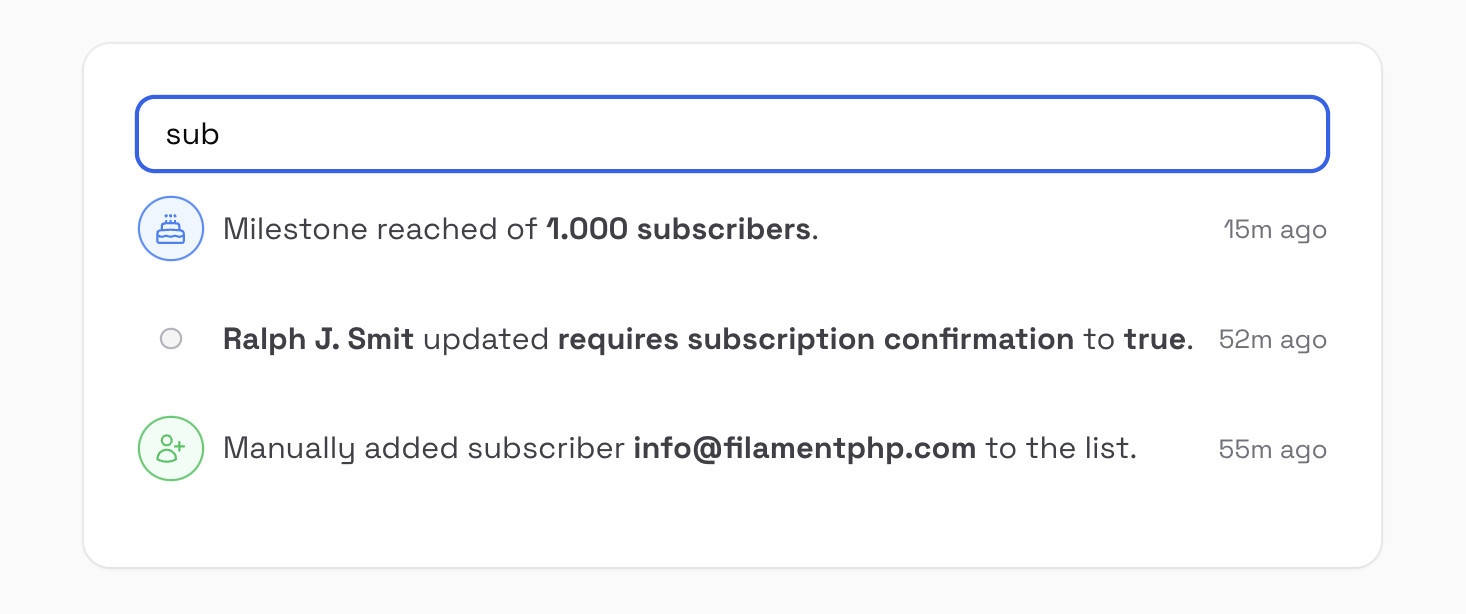
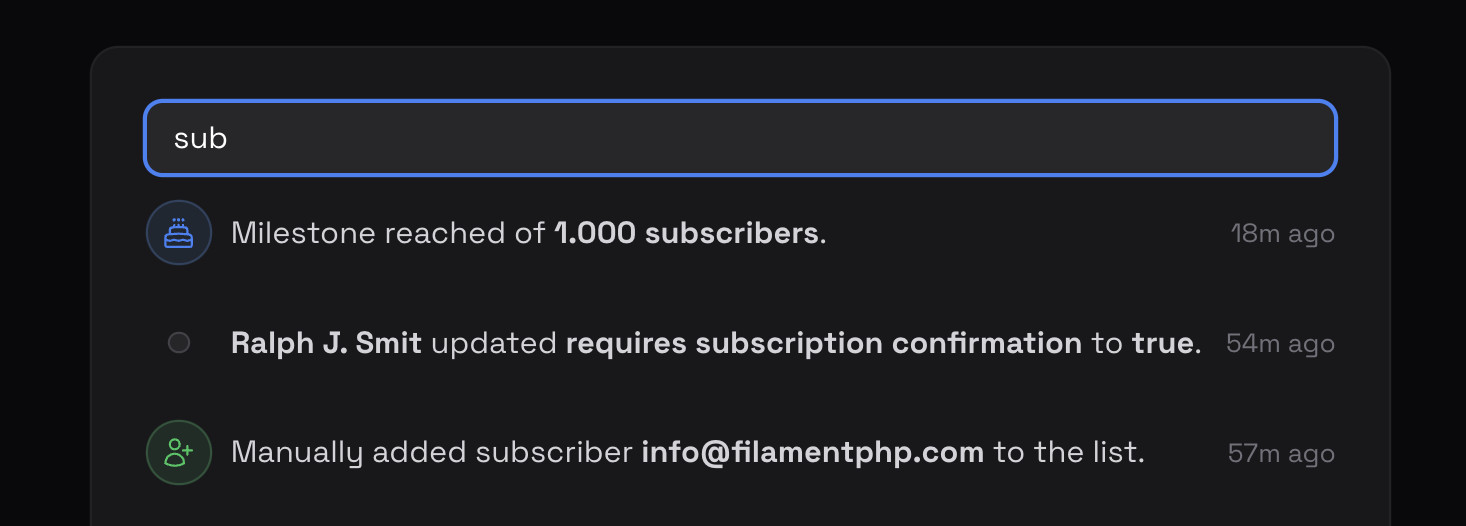
Next, you can also allow your users to search through the timeline. The searching is done all in the browser, so this will feel super-snappy 👌
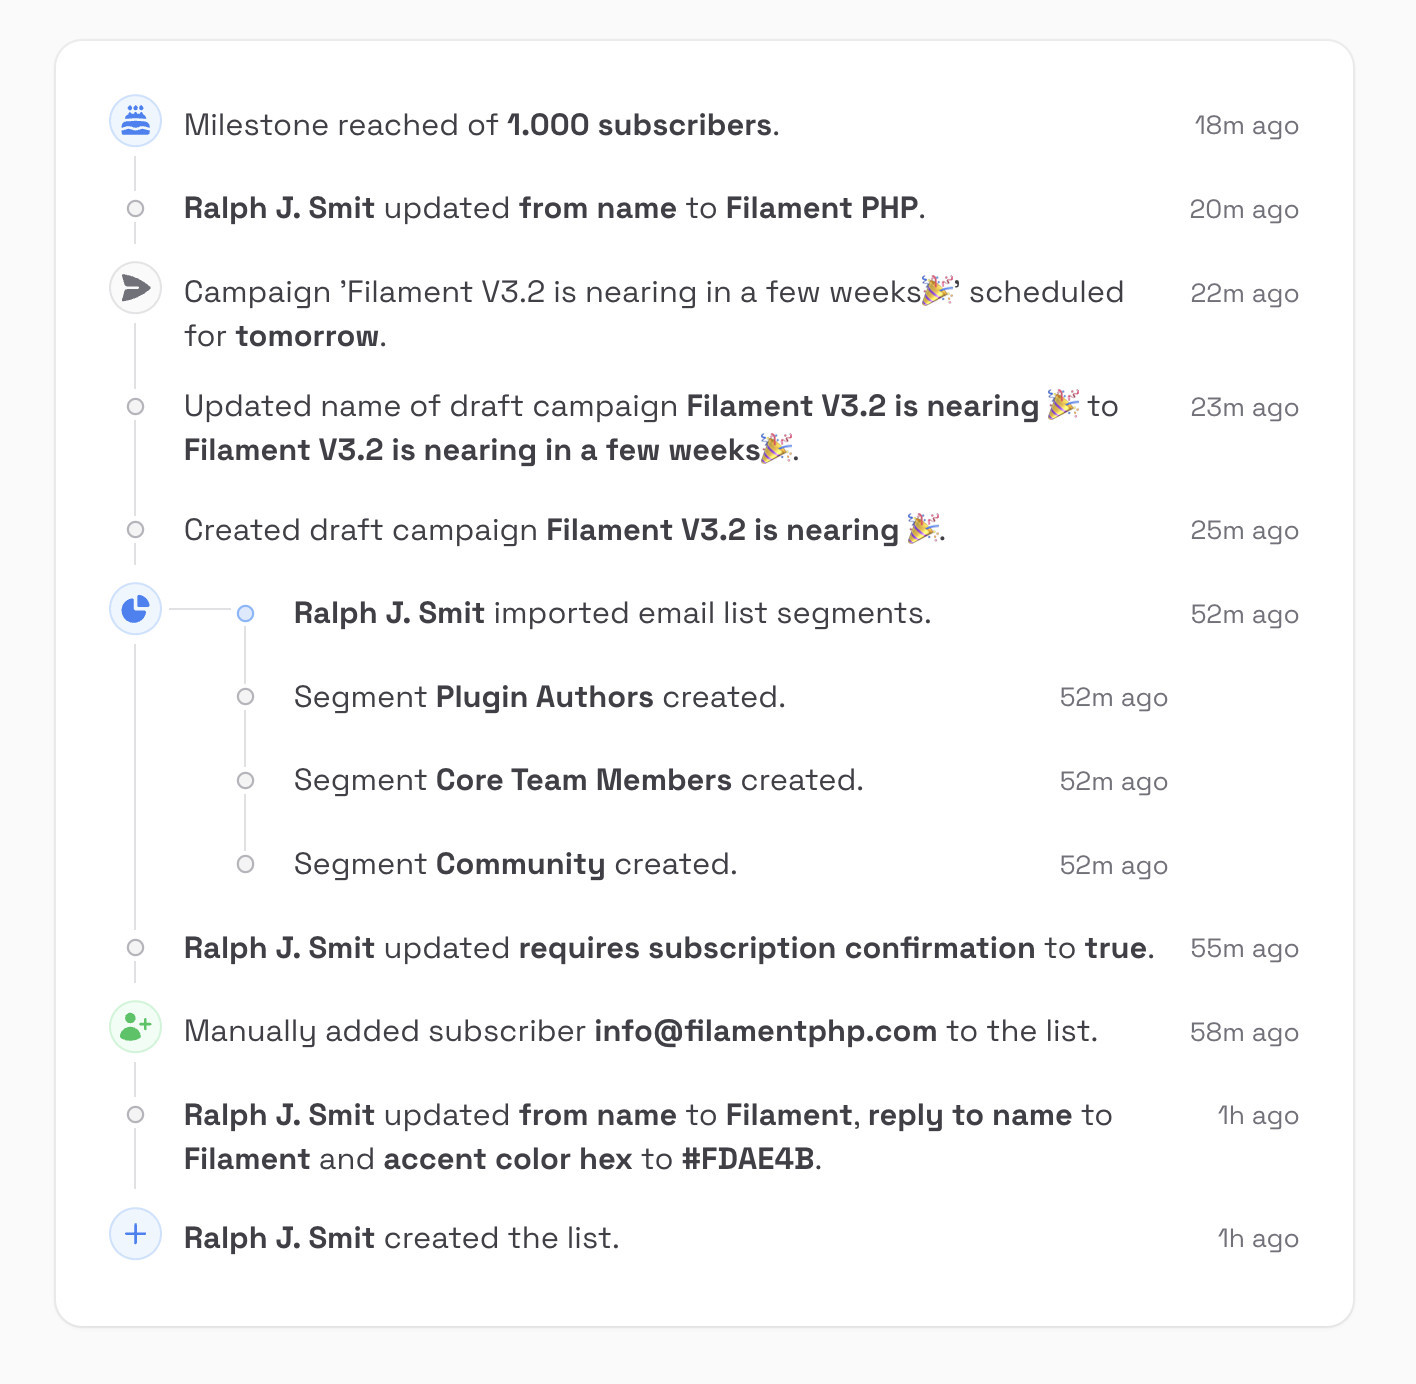
The timeline has automatic support for displaying activities that were logged in batches (e.g. activities related to each other). These batches are by default shown as an indented, compact sub-timeline, but still connected to the main timeline.
However, you can also choose to display the batch inline with the main timeline. The items will now be merged with the main timeline:
The timeline also comes with a special compact design, which is especially useful when you have many activities. As you can see, the timeline is re-designed to occopy less space:
Of course, this looks great in dark mode as well:
If you want to limit the space used by the timeline even more, you can set a maximum height. The timeline will then become scrollable if the content exceeds the maximum height.
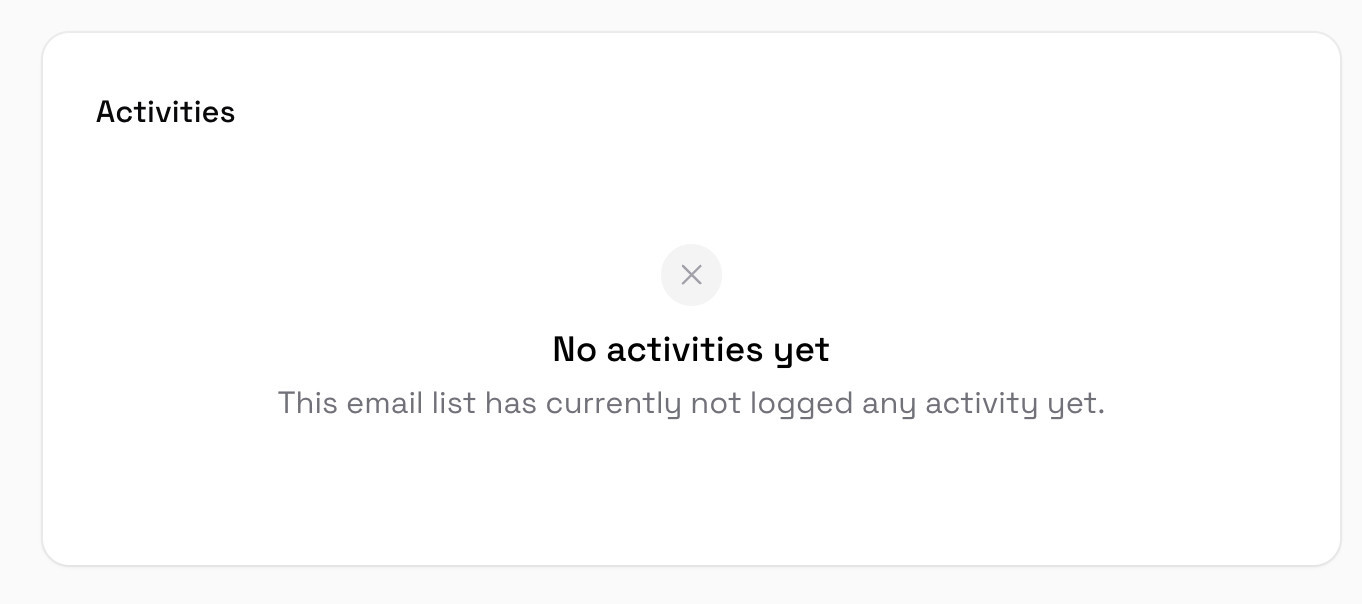
If there are no activities logged yet, the timeline will display an empty state. You can style the empty state as you wish, by providing a custom text, custom description and custom icon:
#Timeline Actions
The package also provides a nice Timeline action that you can use in your tables & pages. For example, the page action can be placed in the getHeaderActions() method, on the top-level or in an ActionGroup:

The action also has a special version for use in tables:
#Installation guide: Filament Activitylog Pro
Thank you for purchasing the Activitylog Pro plugin for Filament!
We tried to make the plugin as easy-to-install and versatile as possible. Nevertheless, if you still have a question or a feature request, please send an e-mail to support@ralphjsmit.com.
#Prerequisites
Before starting the further installation, you should already have the Spatie Activitylog package installed according to the Spatie Activitylog installation guide.
If you already have the Spatie Activitylog installed in your project and already recorded data, you can immediately proceed to the next step.
The package is supported on Laravel 10 or higher and Filament V2, V3, V4 and V5.
#Installation via Composer
To install the package you should add the following lines to your composer.json file in the repositories key in order to get access to the private package:
{
    "repositories": [
        {
            "type": "composer",
            "url": "https://satis.ralphjsmit.com"
        }
    ]
}
If you have one of my other premium packages installed already, then you don't need to repeat these lines.
Next, you should require the package via the command line. You will be prompted for your username (which is your e-mail) and your password (which is your license key, e.g. 8c21df8f-6273-4932-b4ba-8bcc723ef500).
composer require ralphjsmit/laravel-filament-activitylog

# You can also publish the translations if wanted:
php artisan vendor:publish --tag="filament-activitylog-translations"
If you are installing the package in a Filament V2 installation, you should require the version
^0.1.
#Add plugin Blade files to custom theme.css (required)
For all panels that you want to use the package in, make sure that you have created a Filament custom theme. Next, for each theme you need to add the following line to the theme.css file:
@source '../../../../vendor/ralphjsmit/laravel-filament-activitylog/resources/**/*.blade.php';
If you are using the plugin outside a panel, then make sure to include the above line in the CSS-file that is used to generate the CSS for the Livewire components where you will use the timeline in.
#Configuring the plugin per-panel
The Filament Activitylog Pro package works in all forms, tables & infolists, irrespective of whether you also have a Filament panel or not. This means that you can nicely include the Activitylog in your app, anywhere you want and wherever you have a form, table or infolist.
If you do decide to use the Filament Activitylog package in a panel, then you should register the plugin in the $panel providers that you want to use the plugin in:
use RalphJSmit\Filament\Activitylog\FilamentActivitylog;

$panel
    ->plugin(FilamentActivitylog::make())
There currently are no configuration methods on the plugin itself. However, it is best practice in Filament V3 to register plugins in the panels that a plugin is used in. Also, if it ever becomes necessary in the future to add per-panel configuration methods to the plugin, then I will be able to do so without needing a breaking change.
#Usage
In general, the underlying spatie/laravel-activitylog package allows two things:
- Automatically log model events on Eloquent models.
- Log custom events & associate them with Eloquent models.
#Logging model events
For information about logging model events and how to set it up, see the Spatie documentation. I would recommend to enable logging these model events first, and using them as the basis of your timelines.
#Custom events
#Terminology
When logging custom activities, there are four main properties relevant to each activity log:
- Subject – the Eloquent model on which the event was logged.
- Causer – the Eloquent model for (usually) the User that caused the event, or
nullwhen no user was logged. - Event - the programmatic name of the event as a verb in the past tense. Examples:
created,updated,deleted,restored, but can also be custom events likepublished,unpublished,archived,verified, etc. - Description – most of the time identical to the event name, but can also be a human-readable description.
#Logging custom events
It is required to always include an event name in the activity. For example, let's say that we want to log a 'published' event on a Post model. We can do this as follows:
$post = Post::find(1);
$johnDoe = User::firstWhere('email', 'johndoe@example.com');

$post->touched('published_at');

activity()
    ->performedOn($post)
    ->causedBy($johnDoe) // Not necessary if there is an authenticated user.
    ->event('published')
    ->log('published');
By default, this will show an item in the timeline with the following description:
John Doe published the post.
#Displaying the causer name
The name of the causer is automatically inferred from the causer model using following steps:
- If the causer model implements the
Filament\Models\Contracts\HasNamecontract, then thegetFilamentName()method will be used. - If the causer model has an attribute called
name, then this attribute will be used. - If the causer model has an attribute called
first_nameand/orlast_name, then these attributes will be used. - Otherwise, no name for the causer will be included ("The post was published.").
Alternatively, if you want to override the above logic, you can use the ->causerName() and ->causerNames() methods:
Timeline::make()
    ->causerName(User::class, fn (User $causer) => ...)
    ->causerNames([
        User::class => fn (User $causer) => ...,
    ])
#Displaying a fallback causer name
If you want to display a fallback causer name when the causer_type/causer_id columns are null, you can pass null as the first argument to the ->causerName() method. This will allow you to use "System" or "Application" as fallback causer name for actions not attached to a user:
Timeline::make()
    ->causerName(null, 'System')
#Adding a causer name url
You can make the causer name a link by providing a closure to the ->causerUrl() method. If your system has multiple types of causers, make sure to handle each type in the closure:
Timeline::make()
    ->causerUrl(function (User $causer) {
        return UserResource::getUrl('edit', ['record' => $causer]);
    })
#Displaying/logging custom descriptions
Usually, the description of the activity (the string passed to the ->log('...') method) will be the same as the event name. If that is the case, then the package will automatically construct a nice human-readable string.
If you want to log a custom description instead, you can do that as well:
activity()
    ->performedOn($post)
    ->event('published')
    ->log('This is a custom description');
Keep in mind though that this description is stored directly in the database and therefore also not translatable. If you want to use a custom description that is translatable, use the ->eventDescription() method on the component instead (see below).
If you want, you can use inline markdown to apply formatting like bold or italic.
#Logging activity in batches
The Spatie Activitylog package allows you to log activity in batches. You can consider a batch as a group of actions that are performed together in one go. Each timeline can display the batches and the linked activities.
You can start a new batch as follows:
LogBatch::startBatch();

$post->touch('published_at');
$post->tweet()->create(['content' => 'Check out my new blog post ✍️']);
$post->draftPosts->each(fn (DraftPost $draftPost) => $draftPost->delete());

LogBatch::endBatch();
You can also start and end a batch using a closure, similar to a database transaction:
LogBatch::withinBatch(function () {
    // ...
});
This is the basics about batches, but there are some gotchas relating to e.g. queue jobs. You can read more about that in the documentation.
#Timeline
The timeline form component can be used in your forms and infolists to display a timeline of the activities related to the current record. The timeline will automatically be filled with the activities that happened to the current Eloquent model:
use RalphJSmit\Filament\Activitylog\Filament\Infolists\Components\Timeline;

Timeline::make()
    ->label('History'),
As in Filament V4 you are able to mix form and infolist components together, you can use this infolist component also inside your forms.
In general, you don't have data yet on pages where you create an item. Therefore, by default, the timeline will hide itself on pages where $operation === 'create', so you don't need to manually hide the timeline on create pages. If you still want to show it, just pass ->visible(true) to the component.
If the timeline is empty (meaning that there are no activities yet displayed), then the timeline will display an empty state, which you can also customize (see below).
#Relation support
By default, the timeline component will display only the activities relating to the current Eloquent model in the form. If you want to also display activities for related Eloquent models, you may use the ->withRelations() method. This method will automatically include activities for related models that are linked to the current model.
For example, say that we are editing a Customer model, and each customer can have one or more related Address'es using a hasMany ->addresses() relationship. We can now display the creation and changes of the related address models also in the timeline:
use Filament\Support\Icons\Heroicon;

Timeline::make()
    ->withRelations(['addresses'])
    // Display all address activities with a home icon, regardless of the type of event.
    ->itemIcon('*', Heroicon::OutlinedHomeModern, [Address::class])
If the timeline detects that an item is for a related model, it will automatically update the text used like "John Doe added related address Main St. 123, NYC." or "John Doe updated related address Main St. 123, NYC street to Main St..".
NB: currently there is one caveat to be aware of. If a related model (like an address) is at any point not currently related to the current Eloquent model anymore, the previous activities would disappear from the timeline. So if an address is transferred to another customer, the activities for that address would disappear entirely from the timeline of the original customer.
#Identifying related models by title attribute
By default, the plugin will try to identify the related model by a title attribute. First, it is checked if the model implements the Filament\Support\Contracts\HasName or Filament\Support\Contracts\HasLabel interfaces. If yes, then these will be next. Next, it will be checked if the model has the attributes name, title or label. If yes, then these will be used. If still no result found, then the message will be generic ("John Doe updated a related post" instead of "John Doe updated related post Current Post Title").
You can provide custom attributes to use as title using the following methods:
Timeline::make()
    ->recordTitleAttribute(Post::class, 'id')
    ->recordTitleAttributes([
        Post::class => 'id',
        Address::class => 'display_summary',
    ])
    ->getRecordTitleUsing(Post::class, fn (Post $post) => $post->id)
    ->getRecordTitleUsing(Address::class, fn (Address $address) => "{$address->city}, {$address->state}")
])
#Customising URLs to related record
By default, if the Activitylog detects a related record, it will check if there is an associated resource in the current panel for that model. If yes, then it will automatically insert a link to viewing the related record in the description. If you want, you can customise the URL creation logic using the ->relatedRecordUrl() method, for example, to link to your frontend page instead:
Timeline::make()
    ->recordUrl(Post::class, fn (Post $post) => route('frontend.posts.show', ['post' => $post]))
If you want to disable automatic linking to the related record, you can use the ->recordUrl() method as well by returning null:
Timeline::make()
    ->recordUrl(Post::class, fn (Post $post) => null)
#Limiting results
You can also limit the Addresses for which we will retrieve activity items:
Timeline::make()
    ->withRelations([
        'addresses' => function (HasMany $relation) {
            return $relation->where('type', AddressType::Shipping);
        }
    ]),
#Customizing timeline items
#Icons & colors
By default, each item in the timeline will be a small, gray dot. You can customize the icon and color of each item using the ->itemIcon() and ->itemIconColor() methods.
use Filament\Support\Icons\Heroicon;
use Spatie\Activitylog\Models\Activity;

Timeline::make()
    // You can let the package inject both the actual `Activity` Eloquent model, or just the string/nullable event name:
    ->itemIcon('created', Heroicon::OutlinedPlusCircle)
    ->itemIcon('deleted', Heroicon::OutlinedTrash)
    ->itemIcons([
        'created' => fn (Activity $activity) => $activity->causer->isAdmin() ? Heroicon::OutlinedPlus : Heroicon::OutlinedPlusSmall,
        'deleted' => Heroicon::OutlinedTrash,
    ])
    ->itemIconColor('created', 'info')
    ->itemIconColor('deleted', 'danger')
    ->itemIconColors([
        'created' => 'info',
        'deleted' => 'danger',
    ]),
Tip: generally, in a single timeline, it is nice to use a combination of both items with and without an icon. For example, you could consider giving "major" activity events an icon, like 'created' or 'deleted', whereas you could leave other events (like 'updated') without an icon.
Instead of strings, you can also pass custom closures. You can let the package inject both the actual Activity Eloquent model, or just the string/nullable event name:
use Spatie\Activitylog\Models\Activity;

Timeline::make()
    ->itemIcon('created', fn (string $event, Activity $activity) => /** */)
    ->itemIconColor('created', fn (string $event, Activity $activity) => /** */)
You can also scope the icons & colors to specific Eloquent models. This can be useful in cases where you have a timeline with activities for multiple types of Eloquent models (e.g. when working with batches), and you only want to apply a certain icon or color to one or more particular models.
use Filament\Support\Icons\Heroicon;

Timeline::make()
    ->itemIcon('created', Heroicon::OutlinedPlusCircle, [Post::class]) // Either array of classes or a single class.
    ->itemIconColor('created', 'success', Post::class)
#Badges
If you want, you can add a badge after the event description. You can provide a badge based on the event name using the ->itemBadge() method. A badge color can be provided using the ->itemBadgeColor() method:
use Filament\Support\Colors\Color;

Timeline::make()
    ->itemBadge('email_sent', function (Activity $activity) {
        $status = Status::tryFrom($activity->getExtraProperty('status'));

        return $status->getLabel();
    })
    ->itemBadges([
        'email_sent' => fn () => ...,
        'created' => 'New',
    ])
    ->itemBadgeColor('email_sent', function (Activity $activity) {
        $status = Status::tryFrom($activity->getExtraProperty('status'));

        return match ($status) {
            Status::Bounce => 'danger',
            Status::Complaint => 'danger',
            Status::Reject => Color::Orange,
            Status::RenderingFailure => Color::Orange,
            Status::Send => Color::Cyan,
            Status::DeliveryDelay => Color::Sky,
            Status::Delivery => Color::Blue,
            Status::Open => Color::Violet,
            Status::Click => Color::Purple,
            default => 'gray',
        };
    })
    ->itemBadgeColors([
        'email_sent' => fn () => ...,
        'created' => 'info',
    ])
You can also scope the badges for events to specific Eloquent models. This can be useful in cases where you have a timeline with activities for multiple types of Eloquent models (e.g. when working with batches), and you only want to apply a certain icon or color to one or more particular models.
Timeline::make()
    ->itemBadge('created', 'New', [Post::class]) // Either array of classes or a single class.
    ->itemBadgeColor('created', 'success', Post::class)
#Time format & time zone
You can customize the time format used in the timestamp tooltip by using the ->itemDateTimeFormat() method. The default format is M jS, Y H:i:s. You can also specify a timezone to convert the timestamps to using ->itemDateTimeTimezone().
Timeline::make()
    ->itemDateTimeFormat('Y-m-d H:i')
    ->itemDateTimeTimezone(fn () => auth()->user()->timezone)
These are also great candidates for global configuration (see below).
#Actions
You can easily add actions to the timeline using the ->itemActions() method. This method allows you to specify the event name and provide an array of actions that will be displayed beneath each item in the timeline.
The below example shows how to add actions for the 'published' event on a Post model:
use Filament\Actions;
use Filament\Forms;
use Filament\Support\Icons\Heroicon;

Timeline::make()
    ->itemActions('published', [
          Actions\Action::make('view_url_in_search_console')
            ->label('Open Google Search Console')
            ->icon(Heroicon::MagnifyingGlass)
            ->url(fn (Post $post) => "https://search.google.com/...."),
          Actions\Action::make('create_tweet')
            ->label('Send Tweet')
            ->icon(Heroicon::Megaphone)
            ->hidden(fn (Post $post) => $post->tweeted_at !== null)
            ->form([
                Forms\Components\Textarea::make('content')
                    ->label('Tweet')
                    ->helperText('Max. 280 characters')
                    ->maxLength(280)
                    ->required()
            ])
            ->action(function (Post $post, array $data) {
                // Send tweet...

                $post->touch('tweeted_at');

                // Of course, we will also log a new activity to the timeline :)
                activity()
                    ->performedOn($post)
                    ->causedBy(auth()->user())
                    ->event('tweeted')
                    ->log('tweeted');

                Notification::make()
                    ->title('Tweet sent')
                    ->body('Let\'s hope our followers like it as much as we do 🙏')
                    ->success()
                    ->send();
            })
        ])
    ]),
If you are mixing timeline items for multiple Eloquent models and you need access to the current underlying Spatie Activitylog model, you can use the $arguments['activity_id'] parameter:
Timeline::make()
    ->itemActions('published', [
        Actions\Action::make('edit')
            ->fillForm(function (array $arguments) {
                $activity = Activity::find($arguments['activity_id']);

                // ...
            })
            ->form([
                Forms\Components\TextInput::make('title')
            ])
            ->action(function (array $arguments, array $data) {
                $activity = Activity::find($arguments['activity_id']);

                // ...
            })
    ]),
#Define icons, colors & actions globally
If you want to globally provide icons, colors and actions, you can make use of the Filament configureUsing() method. When working globally with timelines, it is generally very handy to scope the configuration to specific models:
use Filament\Support\Icons\Heroicon;

Timeline::configureUsing(function (Timeline $timeline) {
   return $timeline
        ->itemIcons([
            // Applies to all Eloquent models...
            'created' => Heroicon::OutlinedPlusCircle,
            'deleted' => Heroicon::OutlinedTrash,
        ])
        ->itemIcon('created', Heroicon::OutlinedPencil, [Post::class, GlossaryItem::class]) // Applies only to `Post` and `GlossaryItem` model.
        ->itemIcon('created', null, User::class) // Disables icon for the `User` model.
        ->itemIconColors([
            'created' => 'info',
            'deleted' => 'danger',
        ])
        ->itemActions(
            event: 'published',
            actions: [
                // ...
            ],
            subjectScopes: [Post::class],
        )
});
These globals are kept as defaults. If you provide a custom override on any individual timeline, then that value will override the global defaults.
#Descriptions
By default, the Filament Activitylog package will generate a nice description for you based on the event name and whether or not there's a causer name (see above). If you want to override the description for individual events, you can do so via the ->eventDescription() method:
Timeline::make()
    ->eventDescription('published', 'Post is now shared with the world 🌎') // Instead of: John Doe published the post.
You can scope the custom descriptions also to specific Eloquent models:
use App\Models\Post;

Timeline::make()
    ->eventDescription('published', 'Post is now shared with the world 🌎', [Post::class]) // Apply description only to `Post` models and not to `Tweet` models.
You can also set descriptions in bulk:
use Spatie\Activitylog\Models\Activity;

Timeline::make()
    ->eventDescriptions(
        descriptions: [
            'created' => fn (Activity $activity) => "{$activity->causer->full_name} started a draft post",
            'published' => 'Post is now shared with the world 🌎',
        ],
        subjectScopes: [Post::class]
    )
If you want to still make use of the description generation service provided by the package, but still modify part of the description, you can use the ->modifyEventDescriptionUsing() method:
use Spatie\Activitylog\Models\Activity;

Timeline::make()
    ->modifyEventDescriptionUsing(function (string $eventDescription, Activity $activity, string $recordTitle, ?string $causerName, ?string $changesSummary) {
        return "{$eventDescription} for {$recordTitle}";
    ])
#Formatting attribute values
If you have enabled the logging of changed attributes, the timeline will automatically display changed attributes in the description for the updated event. For example, consider the following changed attributes:
[
    'title' => 'New title',
    'some_boolean' => true,
    'some_date' => Carbon::parse('2024-01-01 10:00'),
]
The package will automatically generate a description like this:
[Causer name] updated title to New title, some boolean to true and some date to 2024-01-01 10:00.
As you can see, the package automatically formats the values of the attributes in a human-readable way. Strings are kept, booleans are converted to 'true'/'false' in text, arrays are converted to JSON, enums are converted to either their name or to the getLabel() method if you implemented the Filament\Support\Contracts\HasLabel interface and dates are converted to a better format.
#Using custom casts
If you have custom casts on your Eloquent, then the Spatie Activitylog will automatically log updates to casted attributes. However, the way these values are stored in the database or displayed might not always work immediately satisfactory out-of-the-box.
First, in order to make the cast formatting work better, make sure that all attributes with custom casts are in the useAttributeRawValues() method in the getActivityLogOptions():
class Order extends Model
{
    use LogsActivity;

    protected $casts = [
        'status' => SomeEnum::class,  // Simple enum casts or other native Laravel casts will work right away.
        'amount' => MoneyCast::class, // Custom casts should be added in the `useAttributeRawValues()` array.
    ];

    public function getActivitylogOptions(): LogOptions
    {
        return LogOptions::defaults()
            ->useAttributeRawValues(['amount'])
            ->logAll();
    }
}
Explanation: for example, consider that you have an arrayable
Moneyobject as a cast on your Eloquent model. By default, Spatie Activitylog will store the value from the arrayable Money object as a change (so an array as JSON). However, it could be that the database actually contains just an integer value and not a JSON array. Therefore, it is recommended to store custom casts as raw values in the database.
#Formatting by attribute
Next, the above should work to automatically cast model values to the correct types. Next, you can provide custom callbacks to format specific attributes in the timeline before they appear:
Timeline::make()
  ->attributeLabel('amount', 'purchase amount')
  ->attributeValue('amount', fn (?Money $value) => $value?->formatWithoutZeroes())
    // Make sure to also account for `null` values...
You can also use the attributeValues() to provide an array of formatting callbacks:
Timeline::make()
    ->attributeValues([
        'amount' => fn (?Money $value) => $value?->formatWithoutZeroes(),
        // ...
    ]),
These methods can also be scoped to specific Eloquent models if you prefer, similar to the other methods in the package. This can be handy when configuring these callbacks globally.
#Formatting by cast class
Alternatively, it can also be handy sometimes to provide a formatting callback for a specific cast class. For example, if you have a Money object in multiple models on different attribute names. You can use the attributeCast() method to provide a formatting calback that will receive the value:
Timeline::make()
    ->attributeCast(MoneyCast::class, fn (?Money $value) => $value?->formatWithoutZeroes()),
This method can come in handy when globally configuring the timeline:
Timeline::configureUsing(function (Timeline $timeline) {
    return $timeline->attributeCast(MoneyCast::class, fn (?Money $value) => $value?->formatWithoutZeroes());
})
Again, you may also use the attributeCasts() method to provide formatting callbacks using an array:
Timeline::make()
    ->attributeCasts([
        MoneyCast::class => fn (?Money $value) => $value?->formatWithoutZeroes()),
        CurrencyCast::class => fn (?Currency $value) => $value?->code()),
    ]),
#Hiding old attribute values
By default, the descriptions for an updated event display both the old values and the new values that attributes were changed to. In case you would like to hide the old values in the description, you can pass false to the ->changesSummaryOldAttributeValues() method:
Timeline::make()
    ->changesSummaryOldAttributeValues(false)
- Before: John Doe updated title from Old title to New title and slug from old-slug to new-slug.
- After: John Doe updated title to New title and slug to new-slug.
#Hiding attribute values
Sometimes the changed attribute values can be very long or you have a preference not to include the new values that attributes were updated to in the description. In that case, use the ->changesSummaryAttributeValues() method to hide attribute values in the generated descriptions and changes summary:
Timeline::make()
    ->changesSummaryAttributeValues(false)
- Before: John Doe updated title to New title and slug to new-slug.
- After: John Doe updated title and slug.
#Formatting attribute labels
For getting the human-readable names of the attributes, the package will first automatically and intelligently check whether there is any other form component on the page that has a custom label for this attribute. For example, if you have a DatePicker::make('some_date')->label('Published at'), then the package will automatically use the label 'published at'.
You can also provide custom labels for attributes by using the ->attributeLabel() or ->attributeLabels() method:
Timeline::make()
  ->attributeLabel('some_date', 'published at')
  ->attributeLabel('some_date', fn () => 'published at')
  ->attributeLabels([
      'some_boolean' => 'is hidden from SEO',
  ]),
Finally, if there is still no attribute label found, the package will automatically try to convert the attribute name to a human-readable label. For example, some_date will be converted to some date.
#Customizing model labels
By default, when creating descriptions the package will automatically generate model labels based on the Eloquent model. If you use the timeline in a panel, it will also first check if there's an associated resource. If yes, then the ResourceName::getModelLabel() method is used as the model label.
The resulting model label is then lower-cased and used inside the automatically generated descriptions. If you want to provide a custom model label, or if the lower-casing doesn't work for you (e.g. in languages like German), then you can use the ->modelLabel() and ->modelLabels() method:
Timeline::make()
    ->modelLabel(User::class, 'Benutzer')
    ->modelLabels([
        Post::class => 'Beitrag',
    ]),
#Activity batches
By default, if the package detects that an event belongs to a batch, it will display the batch in a compact, inline timeline. The inline timeline will be 'connected' to the "main" timeline. This looks nice and can be very useful to your users to view related events together.
If you don't have the room for an inline timeline, you can also opt to display the batch inline. This means that the activity items from the batch will be shown inline with the main timeline items, just as if the items from the batch was part of the main timeline.
Timeline::make()
    ->inlineBatches(),
#Customizing query to get batches
By default, the package will automatically retrieve all activity items from the batch that have a subject. You can however modify the query used to retrieve these items using the ->modifyBatchActivitiesQueryUsing() using:
Timeline::make()
    ->modifyBatchActivitiesQueryUsing(function (Builder $query, Activity $activity, string $batchUuid) {
        return $query->whereIn('event', ['deleted', 'restored']);
    })
#Overriding query to get batches
You can also choose to override the query entirely:
Timeline::make()
    ->getBatchActivitiesUsing(function (Activity $activity, string $batchUuid) {
        return Activity::forBatch($batchUuid)->get();
    })
#Customizing empty state
When the timeline is empty, it will show an empty state (similar to how the empty state looks in Filament tables). You can customize the empty state using the following methods:
use Filament\Support\Icons\Heroicon;

Timeline::make()
    ->emptyStateHeading('No history')
    ->emptyStateDescription('Nothing has happened to this Eloquent model.')
    ->emptyStateIcon(Heroicon::OutlinedBarsArrowDown),
#Compact timeline
By default, the timeline has a very nice design, but with a larger number of activities it can take up a lot of space. To solve this, you can opt to make use of the ->compact() option, which will provide a more compact design:
Timeline::make()
    ->compact(),
If you want to make all timelines compact by default, you can configure that globally:
Timeline::configureUsing(fn (Timeline $timeline) => $timeline->compact());
#Heroicon Mini icons
If you use a compact timeline, it generally looks better to use icons from the heroicons-m- set instead of the heroicons-o- set, because the Heroicon Mini versions are designed for smaller sizes. On compact timelines, the package will automatically convert icons from the heroicons-o- set to the heroicons-m- set, and vice-versa on non-compact timelines.
If you want to disable this, you can do so passing false to the ->convertHeroicons() method:
Timeline::make()
    ->convertHeroicons(false),
Timeline::configureUsing(fn (Timeline $timeline) => $timeline->convertHeroicons(false));
#Searchable timelines
If you have many activities in your timeline, you might want to make the timeline searchable:
Timeline::make()
    ->searchable(),
This will display a small text input above the timeline. Whenever a user types a search query in the input, it will look through the descriptions of all activities using JavaScript, and only display the activities that match the search query.
#Maximum height
If you have a timeline with many activities, you might want to define a maximum height for the timeline. This will make the timeline scrollable:
Timeline::make()
    ->maxHeight() // Default 500px
    ->maxHeight(800) // 800 px
    ->maxHeight('50vh') // Any CSS value
#Sorting the activities ascending
By default, the activities are sorted descending (latest first). If you want to sort the activities ascending (oldest first), you can use the ->sortActivitiesDescending(false) method:
Timeline::make()
    ->sortActivitiesDescending(false)
#Getting custom activities
By default, the timeline will assume that your current Eloquent model has the LogsActivity trait. In that case, your model has an ->activities() relationship and the timeline assumes that you want to display these activities. If you want to filter the activities being shown, you can use the ->modifyActivitiesQueryUsing() method:
Timeline::make()
    ->modifyActivitiesQueryUsing(function (Builder $query) {
        return $query->where('log_name', 'notifications');
    }),
If you want override the activities logic entirely for determining which activities to display, you can provide a custom callback to the ->getActivitiesUsing() method available on all the components:
Timeline::make()
    ->getActivitiesUsing(function () {
        return Activity::get(); // Provide the activities as you wish.
    }),
It would be recommended to first try the
->modifyActivitiesQueryUsing()if possible and only then use the->getActivitiesUsing()method.
#Tip: hiding label
Usually the design of the timeline will be clear enough to the user what it represents, so hiding the label will make the end result cleaner. You can hide the label using the ->hiddenLabel() method:
Timeline::make()
    ->hiddenLabel(),
#Actions
#Action (timeline)
You can use the RalphJSmit\Filament\Activitylog\Filament\Actions\TimelineAction action in your pages and tables to display a button that will open the timeline of the record in a modal slideover:
class EditPost extends EditRecord
{
    // ...

    public function getHeaderActions(): array
    {
        return [
             RalphJSmit\Filament\Activitylog\Filament\Actions\TimelineAction::make(),
        ];
    }
}
$table
    ->recordActions([
        RalphJSmit\Filament\Activitylog\Filament\Actions\TimelineAction::make()
    ]);
Of course, you can chain any of the methods available on the default action component to tweak the action to your liking.
The timeline in the slide-over is displayed using an infolist Timeline component. You can customize the component by passing a callback to the modifyTimelineUsing() method:
TimelineAction::make()
    ->modifyTimelineUsing(function (Timeline $timeline) {
        return $timeline->compact()->searchable();
    }),
#Upgrade guide (from V1 to V2)
If you are upgrading from version 1.x to 2.x, then you should perform a global search-and-replace for the following components:
RalphJSmit\Filament\Activitylog\Infolists\Components\TimelinetoRalphJSmit\Filament\Activitylog\Filament\Infolists\Components\Timeline.RalphJSmit\Filament\Activitylog\Forms\Components\TimelinetoRalphJSmit\Filament\Activitylog\Filament\Infolists\Components\Timeline(in Filament V4 you are able to mix form and infolist components together, you can use this infolist component also inside your forms).RalphJSmit\Filament\Activitylog\Actions\TimelineActiontoRalphJSmit\Filament\Activitylog\Filament\Actions\TimelineAction.RalphJSmit\Filament\Activitylog\Tables\TimelineActiontoRalphJSmit\Filament\Activitylog\Filament\Actions\TimelineAction(in Filament V4 regular actions can be used inside tables as well).
Then you should remove the following line from your custom theme tailwind.config.js:
content: [
    // Your other files
    './vendor/ralphjsmit/laravel-filament-activitylog/resources/**/*.blade.php',
],
Instead, add the following line to your theme.css file:
@source '../../../../vendor/ralphjsmit/laravel-filament-activitylog/resources/**/*.blade.php';
The V2 is available to all customers who previously purchased a license for V1.
#Roadmap
I hope this package will be useful to you! If you have any ideas or suggestions on how to make it more useful, please let me know (support@ralphjsmit.com).
#Support
If you have a question, bug or feature request, please e-mail me at support@ralphjsmit.com or tag @ralphjsmit on #activitylog-pro on the Filament Discord. Love to hear from you!
The author
From the same author

SEO
This package is a convenient helper for using the laravel-seo package with Filament Admin and Forms.
Author:
Ralph J. Smit
Notifications Pro
Seamlessly integrate Laravel database notifications with Filament.
Author:
Ralph J. Smit
Onboarding Manager Pro
Beautiful onboarding experiences for Filament Admin.
Author:
Ralph J. Smit
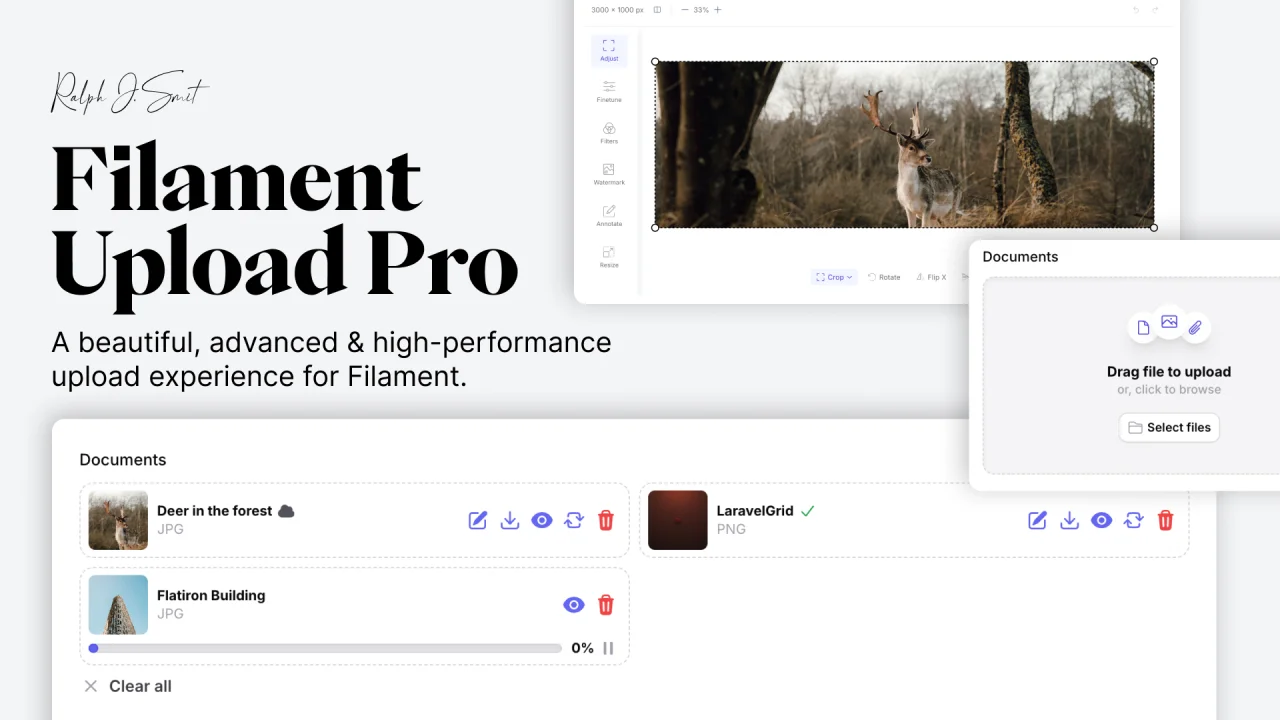
Upload Pro
A beautiful, advanced & high-performance upload experience for Filament.
Author:
Ralph J. Smit
Featured Plugins
A selection of plugins curated by the Filament team
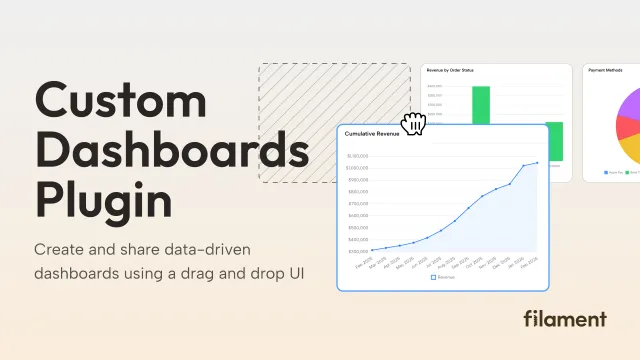
Custom Dashboards
Let your users build and share their own dashboards with a drag-and-drop interface. Define your data sources in PHP and let them do the rest.
 Filament
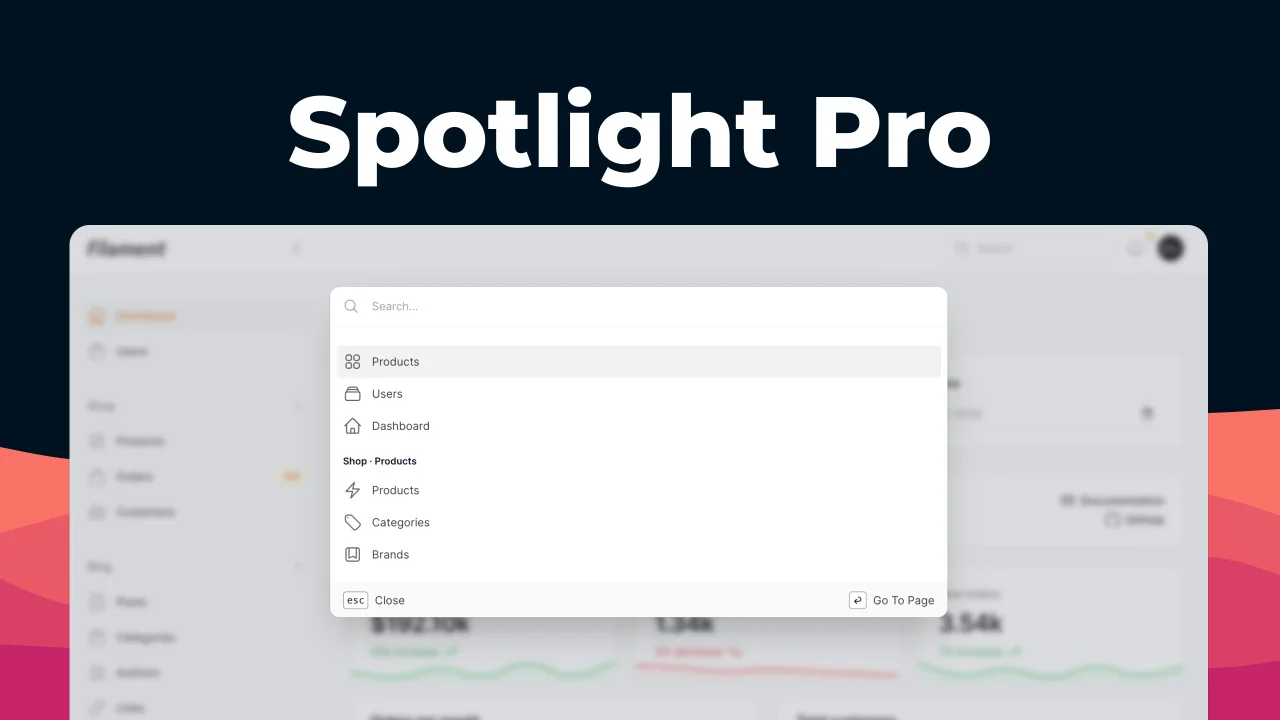
Spotlight Pro
Browse your Filament Panel with ease. Filament Spotlight Pro adds a Spotlight/Raycast like Command Palette to your Filament Panel.
 Dennis Koch

Blueprint
Filament Blueprint is a premium Laravel Boost extension that helps AI agents produce accurate, detailed implementation plans and security reports for Filament apps.
Filament