AI Writer
CommunityUnchain the power of AI in your Filament Panel! With this plugin you can easily let AI write all your content.
filament/
namespace. Review the source and install at your own risk. Found
malware or an unresolved security issue the author won't
address?
Report it
.
 Author:
Marcus Venghaus
Author:
Marcus Venghaus
Documentation
- Get a license
- Requirements
- Installation
- Configuration
- Usage
- Examples
- Usage without a form
- Writing your own AI Integration
- Contact
Unchain the power of AI in your Filament Panel! With this plugin you can easily let AI write all your content.
#Get a license
#Requirements
You need Filament v3, a valid license and an OpenAI API Token.
#Installation
To install the package via composer you need to add the private repository to your composer.json.
"repositories": [
    {
        "type": "composer",
        "url": "https://filament-plugin-ai-writer.composer.sh"
    }
]
Now you are ready to install the package:
composer require mvenghaus/filament-plugin-ai-writer:"^3.0"
You will be asked for a username and password. Use your order email address as username and the license key you received as password.
#Configuration
Register the plugin in panel provider:
use Mvenghaus\FilamentPluginAIWriter\FilamentPlugin;
use Mvenghaus\FilamentPluginAIWriter\Integrations\OpenAI\OpenAI;
use Mvenghaus\FilamentPluginAIWriter\Integrations\OpenAI\Models\Gpt4;

...

class AdminPanelProvider extends PanelProvider
{
    public function panel(Panel $panel): Panel
    {
        return $panel
            ...
            ->plugin(
                FilamentPlugin::make(
                    // create the Open AI Integration
                    OpenAI::make(
                        'YOUR_TOKEN',
                        // choose the model you want to use
                        Gpt4::make(
                            maxTokens: 100 // optional
                        )
                    )
                )
            )
        }
    }

...
#Storing the token
You are free to store the token wherever you want. But if you only have one global token it's a good practice to store it in .env and resolving it using the services config.
#.env
OPENAI_TOKEN="MY_TOKEN"
#config/services.php
<?php

return [
    ...
    'openai' => [
        'token' => env('OPENAI_TOKEN')
    ]
];
#Use token in plugin configuration
OpenAI::make(config('services.openai.token'), ...);
#Options
#maxTokens
To limit your costs you can use the maxTokens option.
#OpenAI - Supported Models
- Mvenghaus\FilamentPluginAIWriter\Integrations\OpenAI\Models\Gpt35Turbo
- Mvenghaus\FilamentPluginAiWriter\Integrations\OpenAI\Models\Gpt4
#Usage
Basically the integration is "just" a button, but a very powerful one.
The principle is always structured as follows:
************       ************       ************
*  SOURCE  *  -->  *  MODIFY  *  -->  *  TARGET  *
************       ************       ************
#Basis Structure
<?php

use Mvenghaus\FilamentPluginAIWriter\Forms\Components\AIWriterButton;

...

    public static function form(Form $form): Form
    {
        return $form
            ->schema([
                AIWriterButton::make('name')
                    ->label(...) // optional
                    ->source(...)
                    ->sourceModal(...) // optional
                    ->modify(...) // optional
                    ->target(...)
...
#Source
The source accpets a Closure and defines the request text that is send to the AI integration. The Closure is evaluated like everything in Filament so you can use "Get", "Set", etc..
#Predefined text
->source(fn() => 'Tell me a joke about PHP')
#Based on another field
->source(fn(Get $get) => $get('source_field'))
#Modal
Maybe you just want to generate a text on the fly without having any source text or field. There comes the "sourceModal" method in handy.
->sourceModal()
With this you get a modal with a textarea where you can enter your request text.
You can also combine it with the "source" method to get a prefilled modal form.
->source(fn() => 'Prefilled Text')
->sourceModal()
#Modify
Modify also accepts a Closure as parameter. Here you have the possibility to manipulate the request text before it is send to the integration.
You get string $sourceText as param in your Closure.
This is for example useful when you want to work with placeholders in your request text.
Let's assume you have a form with a title and want to write a text with a predefined specification:
->source(fn() => 'Write a text about "#title#" in 10 words')
->sourceModal()
->modify(
    fn(Get $get, string $sourceText) => str_replace('#title#', $get('title'), $sourceText)
)
#Target
At last there is the target. Here you decide what you want to do with the generated text. Here you also work with a Closure. As Closure parameter you get a response data object.
/** @var \Mvenghaus\FilamentPluginAIWriter\Data\Response $reponse */
$response->text // string - the generated text
$response->information // array - additional information from the integration response
Writing the text to a field would look like this:
->source(fn(Get $get) => $get('source_field'))
->target(fn(Set $set, Response $response) => $set('target_field', $response->text))
#Examples
With this flexible structure you can do a lot of awesome things. Let's dive into some examples.
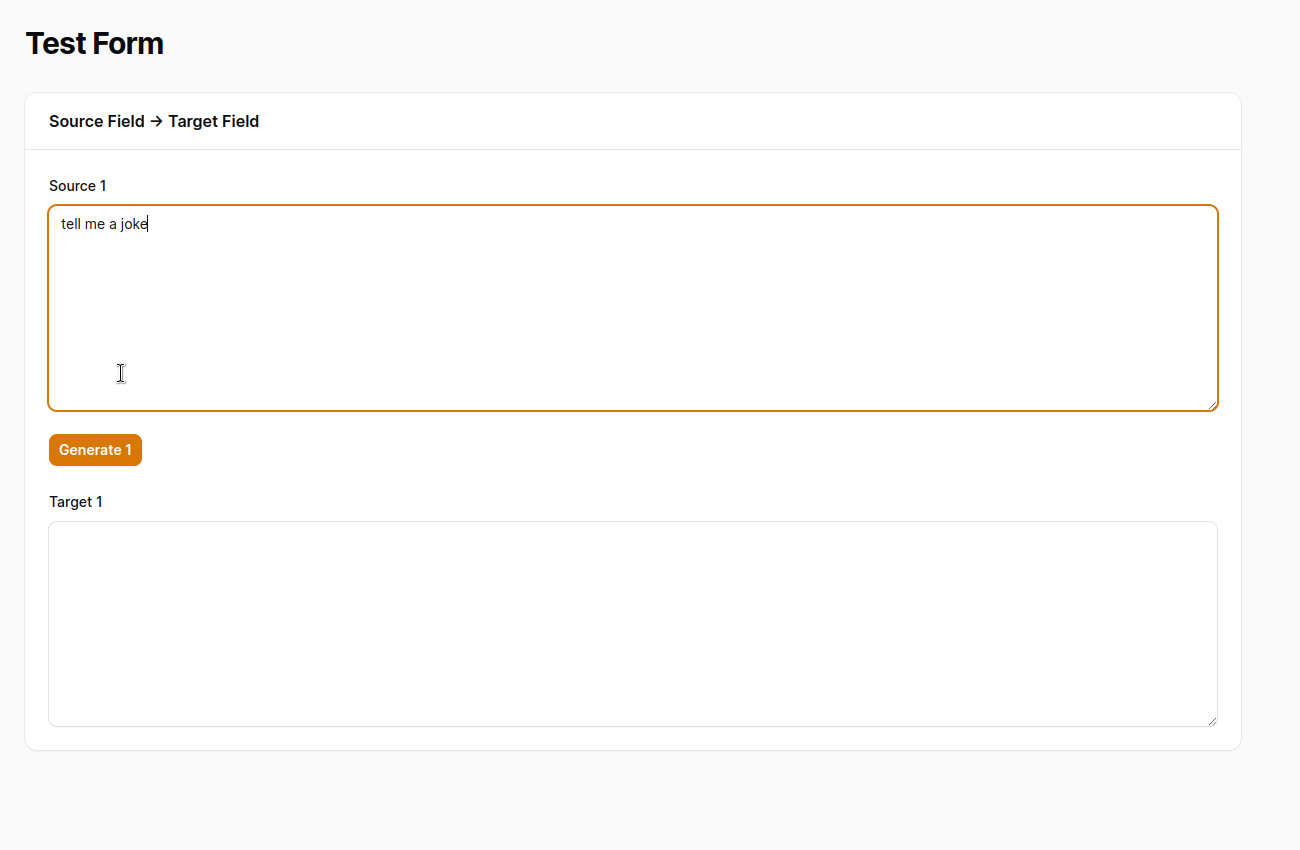
#Source Field -> Target Field
Code
AIWriterButton::make('generate')
    ->source(fn(Get $get) => $get('source_field'))
    ->target(fn(Set $set, Response $response) => $set('target_field', $response->text))
Demo
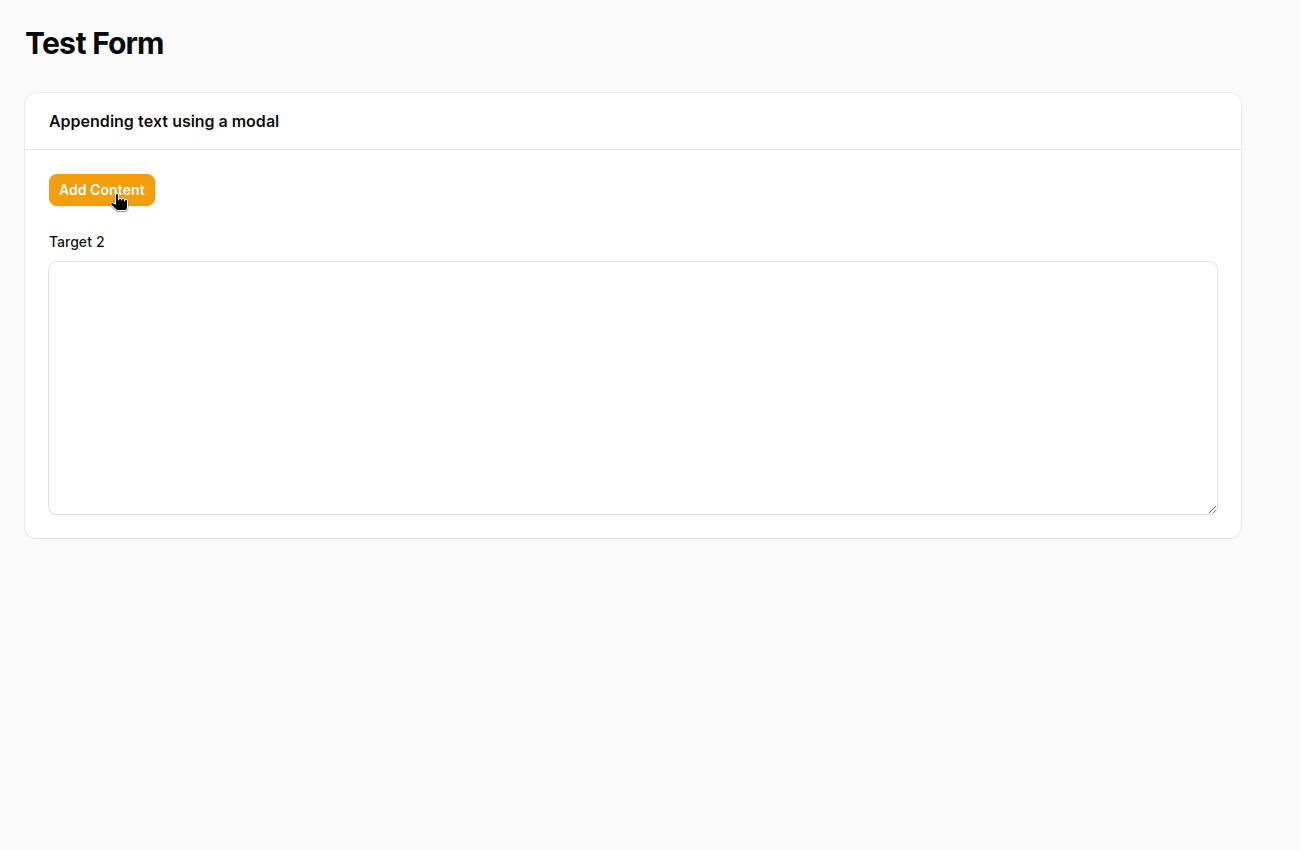
#Appending text using modal
Code
AIWriterButton::make('generate')
    ->label('Add Content')
    ->sourceModal()
    ->target(function(Get $get, Set $set, Response $response) {
        $set(
            'target_field',
            trim(sprintf("%s\n\n%s", $get('target_field'), $response->text))
        );
    }),
Demo
#Translate field
Code
AIWriterButton::make('translate')
    ->source(fn(Get $get) => 'translate in german: '. $get('description')))
    ->target(fn(Set $set, Response $response) => $set('description', $response->text))
Demo
![]()
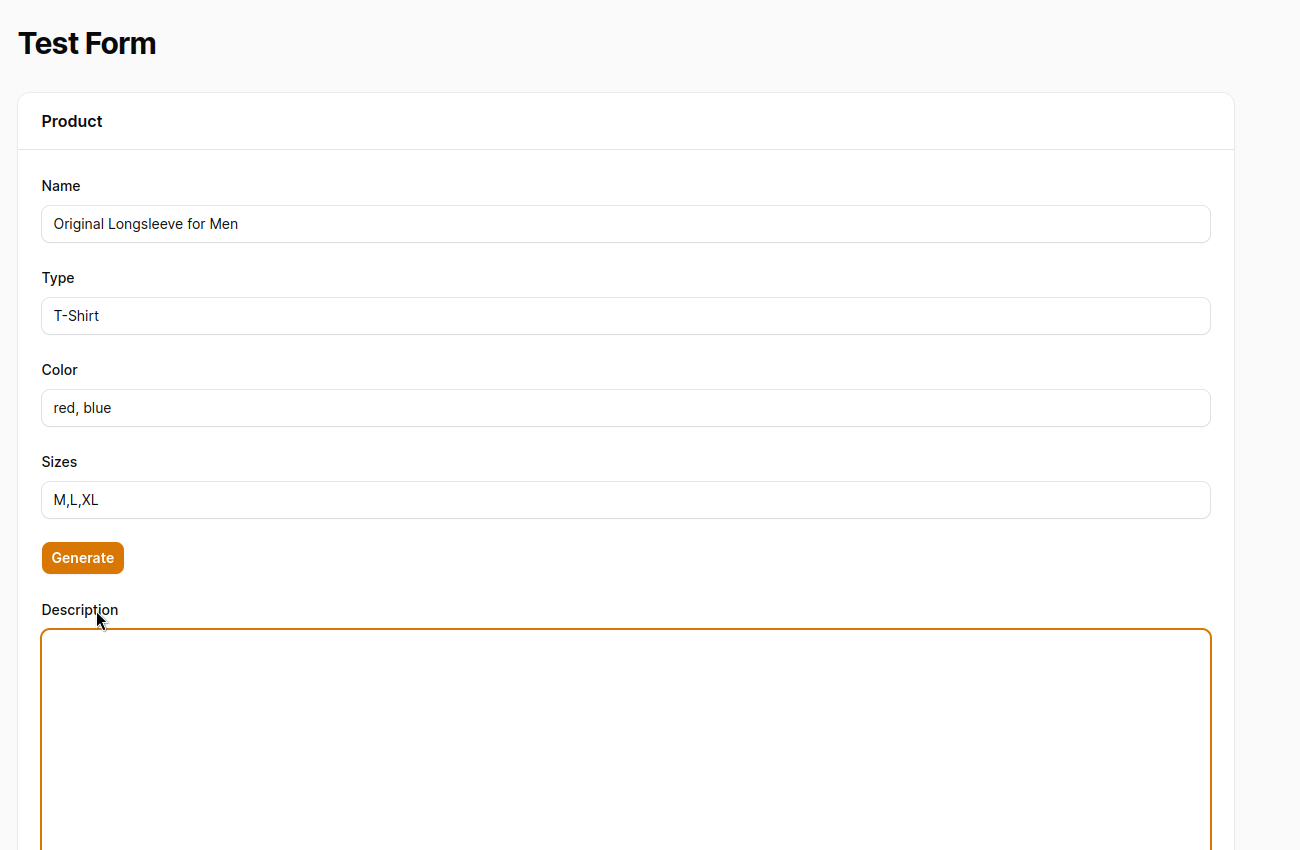
#Product Description
Code
AIWriterButton::make('generate')
    ->source(function(Get $get) {
        return implode("\n", [
            'write a product description:',
            'Name: ' . $get('name'),
            'Type: ' . $get('type'),
            'Color: ' . $get('color'),
            'Sizes: ' . $get('sizes'),
        ]);
    })
    ->target(fn(Set $set, Response $response) => $set('description', $response->text)),
Demo
#Usage without a form
You can also use the integration without the form component.
<?php

use Mvenghaus\FilamentPluginAIWriter\Integrations\OpenAI;
use Mvenghaus\FilamentPluginAIWriter\Integrations\OpenAI\Models\Gpt4;

$integration = OpenAI::make('YOUR_TOKEN', Gpt4::make());

$response = $integration->request('Tell me a joke');

echo $response->text;
#Writing your own AI Integration
Currently only Open AI is supported. But you can easily write your own integration. To achive this you simply have to implement the "Integration" contract.
<?php

use Mvenghaus\FilamentPluginAIWriter\Contracts\Integration;
use Mvenghaus\FilamentPluginAIWriter\Data\Response;

class MyIntegration implements Integration
{
    public function request(string $text): Response
    {
        // call your ai provider
        $result = (...);

        return new Response(
            content: $result
        );
    }
}
And then pass your Integration in the admin panel provider:
use Mvenghaus\FilamentPluginAIWriter\FilamentPlugin;

...

class AdminPanelProvider extends PanelProvider
{
    public function panel(Panel $panel): Panel
    {
        return $panel
            ...
            ->plugin(
                FilamentPlugin::make(new MyIntegration())
            )
        }
    }

...
#Contact
If you any questions or you find a bug, please let me now at Github or reach out on Discord.
The author
From the same author
Translatable Inline
Addon for Spatie Translatable Plugin to edit translations directly below the field
Author:
Marcus Venghaus
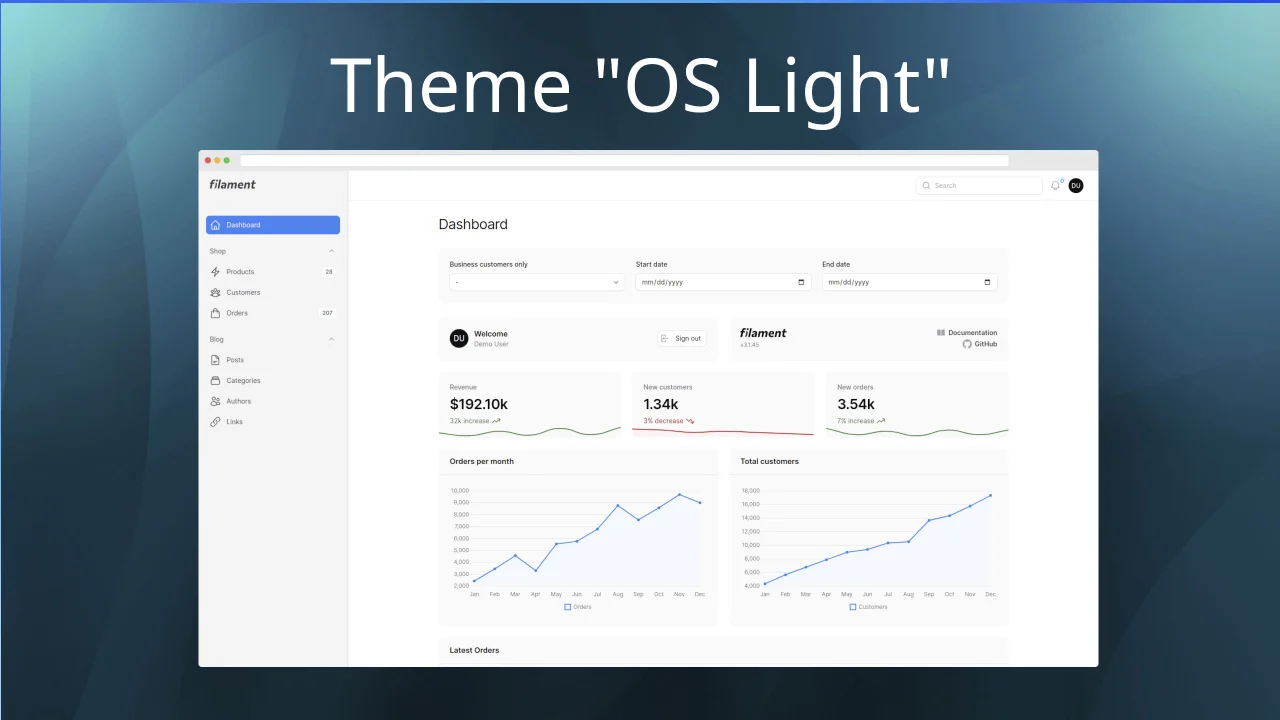
OS Light Theme
This theme makes your system look more like a web app.
Author:
Marcus Venghaus
Schedule Monitor
Display the data from spatie/laravel-schedule-monitor in your Filament panel.
Author:
Marcus Venghaus
Featured Plugins
A selection of plugins curated by the Filament team
Blueprint
Filament Blueprint is a premium Laravel Boost extension that helps AI agents produce accurate, detailed implementation plans and security reports for Filament apps.
 Filament
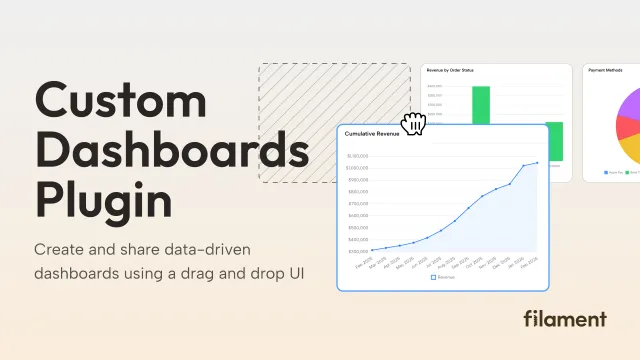
Custom Dashboards
Let your users build and share their own dashboards with a drag-and-drop interface. Define your data sources in PHP and let them do the rest.
Filament
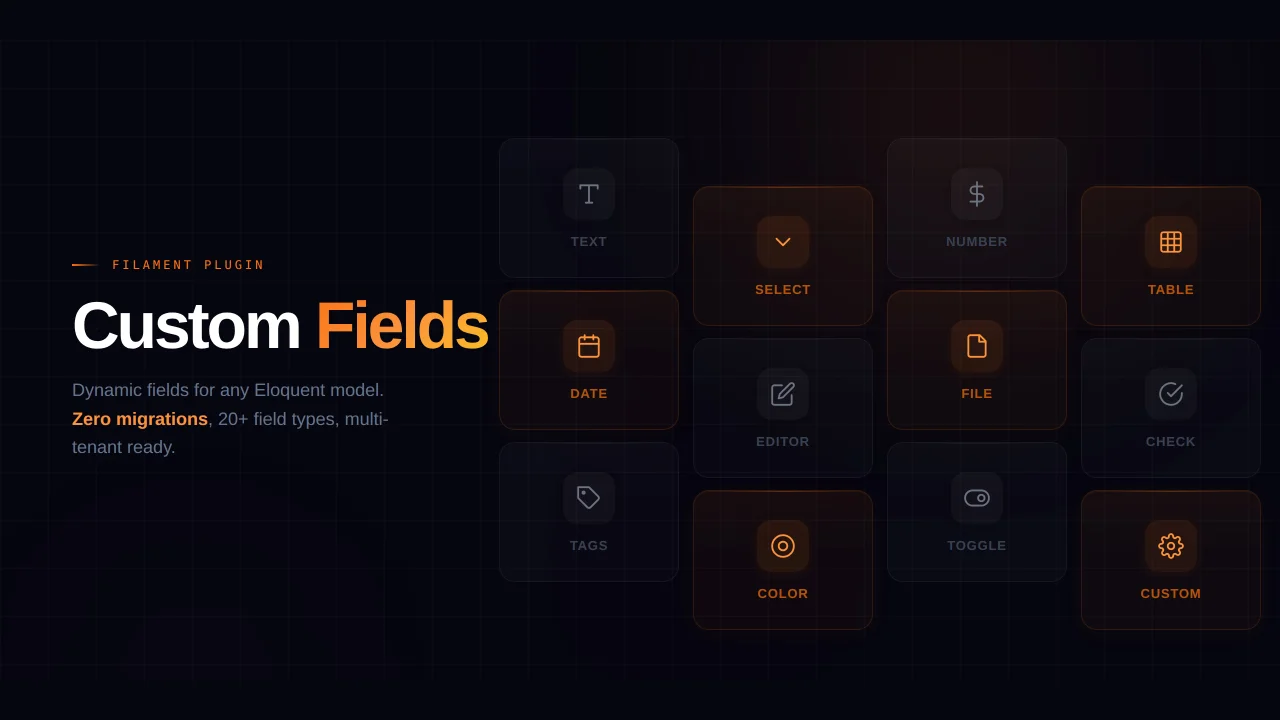
Custom Fields
Eliminate custom field migrations forever. Let your users create and manage form fields directly in Filament admin panels with 20+ built-in field types, validation, and zero database changes.
 Relaticle