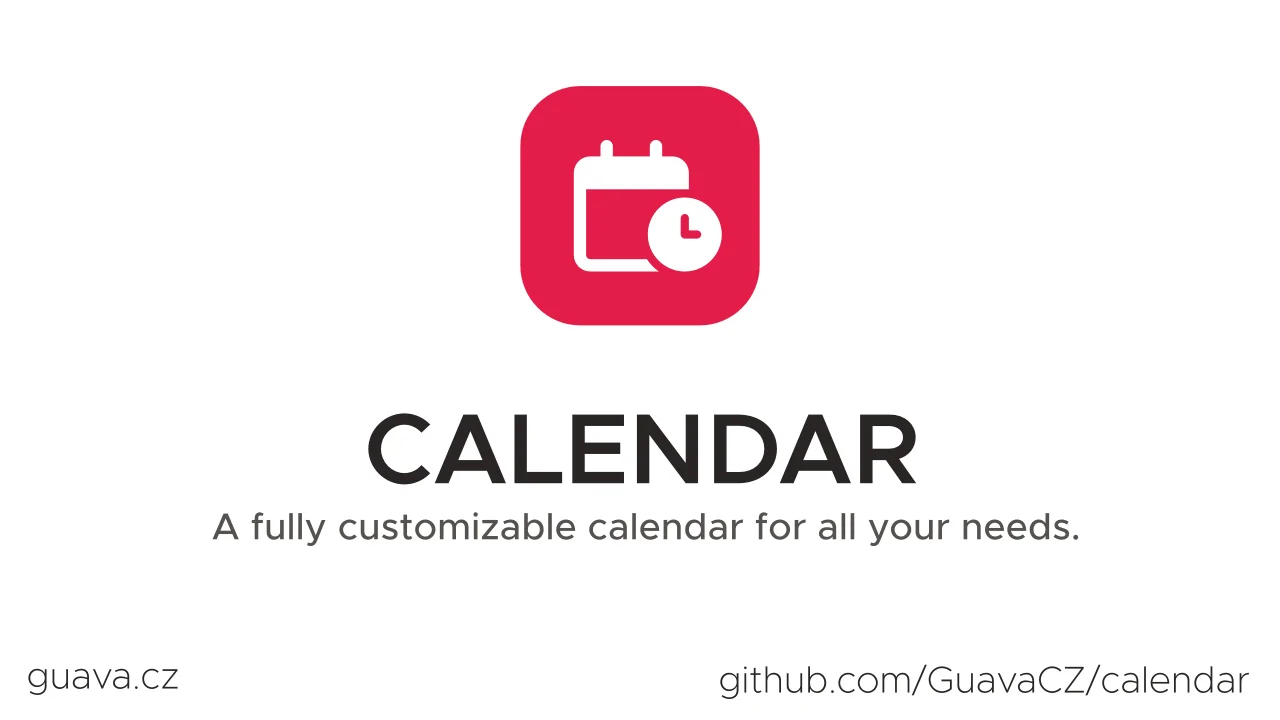
Calendar
CommunityAdds a fully customizable calendar to your filament panels.
 Author:
Guava
Author:
Guava
Package health
BetaAutomated checks of this plugin's Composer package
13 checks
-
Passed:
Current Laravel version supported
—
Package dependencies resolve together with current Laravel
13.0. -
Passed:
Current PHP version supported
—
Constraint
^8.2supports current PHP8.5. - Skipped: Current Symfony version supported
- Passed: Abandoned or archived — No consulted source marks the package abandoned (packagist, github).
- Passed: Commit and release recency — Active: last commit 0 days ago; last release 123 days ago.
-
Passed:
composer.lock not committed by library
—
composer.lockis absent from the released dist archive. - Passed: Dist archive is lean
- Failed: GitHub Actions pinned to SHA — View details on Plumb
- Passed: Open security advisories
- Passed: Dependabot PR responsiveness — No open Dependabot PRs.
- Failed: Dependabot or Renovate configured — No dependency updater configuration found. View details on Plumb
- Skipped: Dependency update cooldown configured
- Passed: Provides a security policy
filament/
namespace. Review the source and install at your own risk. Found
malware or an unresolved security issue the author won't
address?
Report it
.
Documentation
- Version compatibility
- Showcase
- Support us
- Installation
- Usage
- Customizing the calendar view
- Adding events
- Calendar events
- Configuration
- Adding Resources
- Calendar Resources
- Available Methods
- Customization
- Interactivity
- Custom Event Content
- Custom Resource Label Content
- Authorization
- Utility Classes
- Troubleshooting
- Security measures
- Testing
- Changelog
- Contributing
- Security Vulnerabilities
- Credits
- License


This package adds support for vkurko/calendar (free, open-source alternative to FullCalendar) to your FilamentPHP panels.
It allows you to create a widget with a calendar with support for multiple models and even resources you can group your events into. For example, you could have lessons (events) that are held in different rooms (resources).
#Version compatibility
| Filament version | Plugin version | Min. PHP version |
|---|---|---|
| 3.x | 1.x | 8.1 |
| 4.x | 2.x | 8.1 |
| 5.x | 3.x | 8.2 |
#Showcase


#Support us
Your support is key to the continual advancement of our plugin. We appreciate every user who has contributed to our journey so far.
While our plugin is available for all to use, if you are utilizing it for commercial purposes and believe it adds significant value to your business, we kindly ask you to consider supporting us through GitHub Sponsors. This sponsorship will assist us in continuous development and maintenance to keep our plugin robust and up-to-date. Any amount you contribute will greatly help towards reaching our goals. Join us in making this plugin even better and driving further innovation.
#Installation
You can install the package via composer:
composer require guava/calendar
Make sure to publish the package assets using:
php artisan filament:assets
Finally, make sure you have a custom filament theme (read here how to create one) and add the following to your theme.css file:
This ensures that the CSS is properly built:
@source '../../../../vendor/guava/calendar/resources/**/*';
This is optional but highly recommended as it will apply styles to better fit with the (default) filament theme:
@import '../../../../vendor/guava/calendar/resources/css/theme.css';
The paths might be a little bit different if your theme.css is located in a non-standard path. Adjust accordingly.
#Usage
First you need to create a custom widget and extend the CalendarWidget class. Make sure to remove the view property from the generated widget class!
Either use the artisan command or simply create an empty class and extend CalendarWidget:
php artisan make:filament-widget
The widget class should look like this:
use \Guava\Calendar\Filament\CalendarWidget;

class MyCalendarWidget extends CalendarWidget
{
}
Add the widget like a regular widget to any filament page you like, such as your Dashboard.
Congrats! You now have a working calendar in filament!
#Customizing the calendar view
By default, we show the DayGridMonth view. You can customize the view by overriding the calendarView property on the widget class:
use Guava\Calendar\Enums\CalendarViewType;

protected CalendarViewType $calendarView = CalendarViewType::ResourceTimeGridWeek;
The CalendarViewType enum contains all available views that you can use.
#Adding events
You have probably noticed that your calendar is still empty.
To add events, override the getEvents method, described in more detail below.
protected function getEvents(FetchInfo $info): Collection | array | Builder {}
FetchInfo is a ValueObject we provide which type hints all parameters that are made available to you. This helps you scope the query to only retrieve models which are visible in the view.
To learn more about FetchInfo and other Value Objects, please refer to the Value Object documentation.
There are two distinct ways on how to provide Events to the calendar. Which way you use depends on your personal preference and the source of your events.
#1. From Eloquent
[!IMPORTANT] Make sure that the Model class implements
Eventable. Without it we are not able to map your model into a calendar event.For more information, please refer to the Calendar Events section.
In the majority of cases, you will most likely want to display your eloquent models as events inside the calendar.
The easiest way to do that is to just return your Eloquent Query, and we will handle the rest.
use Illuminate\Database\Eloquent\Builder;
use Illuminate\Support\Collection;
use Guava\Calendar\ValueObjects\FetchInfo;

protected function getEvents(FetchInfo $info): Collection | array | Builder
{
    // The simplest way:
    return Foo::query();

    // You probably want to query only visible events:
    return Foo::query()
        ->whereDate('ends_at', '>=', $info->start)
        ->whereDate('starts_at', '<=', $info->end);

   // If you need to display multiple types of models,
   // you will need to combine the results of each
   // query builder manually:
   return collect()
       ->push(...Foo::query()->get())
       ->push(...Bar::query()->get())
   ;
}
#2. From Array/Collection
Sometimes, however, you might want to display events from an API or an array.
To do that, you can return an array or collection of CalendarEvent objects directly.
use Illuminate\Database\Eloquent\Builder;
use Illuminate\Support\Collection;
use Guava\Calendar\ValueObjects\CalendarEvent;
use Guava\Calendar\ValueObjects\FetchInfo;

protected function getEvents(FetchInfo $info): Collection | array | Builder
{
    return [
        CalendarEvent::make()
            ->title('My first calendar')
            ->start(now())
            ->end(now()->addHours(2)),
    ];
}
#Calendar events
As seen above, the calendar expects CalendarEvent objects, which are configurable ValueObjects that help you build the required calendar object.
For this purpose, we have an Eventable interface which you can add to any class that you want to be able to display as an event in your calendars.
In most cases, you will add this interface to your eloquent models, but you are not limited to it. Feel free to add it to any class you want.
Here is an example:
use Guava\Calendar\Contracts\Eventable;
use Guava\Calendar\ValueObjects\CalendarEvent;

class Foo extends Model implements Eventable
{
    // ...

    // This is where you map your model into a calendar object
    public function toCalendarEvent(): CalendarEvent
    {
        // For eloquent models, make sure to pass the model to the constructor
        return CalendarEvent::make($this)
            ->title($this->name)
            ->start($this->starts_at)
            ->end($this->ends_at);
    }
}
Notice that the model instance is passed to the Event constructor in the make method. This sets the key and model properties to the calendar object, so it can be used to trigger actions.
This is a crucial step, if you forget to add this, we will not be able to identify the model when the event is interacted with (for example, when clicked).
#Configuration
The CalendarEvent takes all available options like the underlying calendar package, for more info read here.
Below is a list of available methods on the calendar object:
#Setting the title
Sets the title of the event that is rendered in the calendar.
CalendarEvent::make()->title('My event');
To output Html in the title pass in a HtmlString or other class that implements Htmlable :
CalendarEvent::make()
->title(new HtmlString('<b>My Event</b>'));
#Customizing the start/end date
Sets the start or end date (and time) of the calendar in the calendar.
CalendarEvent::make()
    ->start(today())
    ->end(today()->addDays(3));
#Making the calendar all-day
Sets whether the calendar is an all-day calendar or not.
CalendarEvent::make()->allDay();
#Customizing the background / text color
Sets the background color of the calendar (by default, it is the primary color of your filament panel).
CalendarEvent::make()
->backgroundColor('#ff0000')
->textColor('#ffffff');
#Customizing Event Styles
You can add custom styles to your calendar elements by using the styles method. This method accepts an array where each entry can be a CSS style declaration. The styles will be directly applied to the calendar element in the view. You can define styles in three ways:
- As a key-value pair where the key is the CSS property and value is the condition under which the style should apply.
- As a key-value pair where the key is the CSS property and the value is directly the CSS value.
- As a single string for static styles that always apply.
Here's how you can use it:
CalendarEvent::make()->styles([
    'color: red' => true,            // Applies the style if the condition (true) is met
    'background-color' => '#ffff00', // Directly applies the background color
    'font-size: 12px'                // Always applies this font size
]);
#Usage Notes:
-
The first format ('color: red' => true) is useful for conditional styling based on dynamic conditions. For instance, changing the text color based on an calendar's type or status.
-
The second format ('background-color' => '#ffff00') is straightforward for applying styles where the values do not depend on conditions.
-
The third format ('font-size: 12px') is used when the style does not require any condition and is always applied to the calendar. This flexibility allows you to easily customize the appearance of events based on dynamic conditions or predefined settings.
#Customizing Event Classes
Following the same pattern as with the styles property, it is possible to inject custom classes into the Event element using the classNames or classes property.
Here's how you can use it:
CalendarEvent::make()->classNames([
    'class-1',
    'class-2' => true  // Applies the class if the condition (true) is met
]);
#Usage Notes:
- The second format ('class-2' => true) is useful for conditional classes based on dynamic conditions.
#Customizing the display
By default, events are rendered as blocks. This is when the display is set to auto, which it is by default. You can also change the calendar to be rendered as a background calendar, which then fills the whole date cell. To do so, you can set display to background on the calendar:
This doesn't always work though, it only works on all day events and in specific views. If the background calendar is unsupported, the calendar will not be rendered at all.
CalendarEvent::make()
->display('background') // or 'auto'
->displayAuto() // short-hand for ->display('auto')
->displayBackground(); // short-hand for ->display('background')
#Setting the action on click
This sets the action that should be mounted when the calendar is clicked. It can be any name of a filament action you defined in your widget, such as edit or view.
By default, all CalendarWidget classes already include a view and edit action.
CalendarEvent::make()->action('edit');
#Set the model and record key
To mount the action with the correct record, we need to pass the model type and primary key of the record.
The model is also required if you want to display multiple types of events and have each be rendered differently (see customizing calendar content).
$record = MyModel::find(1);
// 1. variant
CalendarEvent::make($record);

// 2. variant
CalendarEvent::make()
    ->model($record::class)
    ->key($record->getKey());
#Linking to resources
If you use resources in your calendar, you need to tell your events which resource(s) they belong to.
To do this, pass an array of resource IDs to the event:
use Guava\Calendar\ValueObjects\CalendarEvent;
CalendarEvent::make()
    ->resourceId('foo') // Pass a single resource ID, you can repeat this call multiple times
    ->resourceIds(['bar', 'baz']); // Pass multiple resource IDs at once
#Passing custom data
You can pass any custom data to the event that you wish:
CalendarEvent::make()
->extendedProp('foo', 'bar')
// or
->extendedProps(['baz' => 'qux', 'quux' => 'corge']);
#Adding Resources
If you configure your calendar to use a resource view, you will need to also define which resources to display in the calendar.
Similarly to events, There are two distinct ways on how to provide Resources to the calendar.
#1. From Eloquent
[!IMPORTANT] Make sure that the Model class implements
Resourceable. Without it, we are not able to map your model into a calendar resource.For more information, please refer to the Calendar Resources section.
In the majority of cases, you will most likely want to display your eloquent models as resources inside the calendar.
The easiest way to do that is to just return your Eloquent Query, and we will handle the rest.
use Illuminate\Database\Eloquent\Builder;
use Illuminate\Support\Collection;

public function getResources(): Collection | array| Builder
{
    return [
        Bar::query()
    ];
}
#2. From Array/Collection
Sometimes, however, you might want to display resources from an API or an array.
To do that, you can return an array or collection of CalendarResource objects directly.
use Illuminate\Database\Eloquent\Builder;
use Illuminate\Support\Collection;
use Guava\Calendar\ValueObjects\CalendarResource;
use Guava\Calendar\ValueObjects\FetchInfo;

protected function getResources(): Collection | array | Builder
{
    return [
        CalendarResource::make('baz') // This has to be unique ID
            ->title('My resource'),
    ];
}
#Link events to resources
Now we successfully display resources in the calendar, but we still need to add the events to their corresponding resource.
To do this, update your CalendarEvent objects (either directly in the getEvents method or in your classes implementing Eventable, depending on which approach you chose) and include the resource IDs it belongs to.
Please refer to the Calendar Event: linking to resources section to learn how to do it.
#Calendar Resources
As seen above, the calendar expects CalendarResource objects, which are configurable ValueObjects that help you build the required calendar object.
For this purpose, we have a Resourceable interface which you can add to any class that you want to be able to display as a resource in your calendars.
In most cases, you will add this interface to your eloquent models, but you are not limited to it. Feel free to add it to any class you want.
Here is an example:
use Guava\Calendar\Contracts\Resourceable;
use Guava\Calendar\ValueObjects\CalendarResource;

class Bar extends Model implements Resourceable
{
    // ...

    // This is where you map your model into a calendar resource object
    public function toCalendarResource(): CalendarResource
    {
        return CalendarResource::make('my-unique-id')
            ->title($this->name);
    }
}
#Configuration
The CalendarResource takes all available options like the underlying calendar package, for more info read here.
Below is a list of available methods on the calendar object:
#Setting the title
Sets the title of the resource that is rendered in the calendar.
CalendarResource::make()->title('My resource');
#Setting the event background color
Sets the default background color of the resource's events
CalendarResource::make()->eventBackgroundColor('#FF0000');
#Setting the event text color
Sets the default text color of the resource's events
CalendarResource::make()->eventTextColor('#FFFFFF');
#Passing custom data
You can pass any custom data to the resource that you wish:
CalendarResource::make()
    ->extendedProp('foo', 'bar')
    // or
    ->extendedProps(['baz' => 'qux', 'quux' => 'corge']);
#Available Methods
The calendar widget class itself contains a few useful methods.
#Refresh events
If you need to trigger a refresh of the events in the calendar, you can call refreshRecords() on the widget.
$this->refreshRecords();
#Refresh resources
If you need to trigger a refresh of the resources in the calendar, you can call refreshResources() on the widget.
$this->refreshResources();
#Set Option
To change any calendar option during runtime, you can use the setOption() method on the widget.
For example, to programmatically change the date, you can use:
$this->setOption('date', today()->addDay()->toIso8601String());
#Customization
Now that we know how to create a working calendar widget, we can learn how to customize the calendar to our liking.
The calendar widget contains a bunch of properties and methods that you can override in order to customize the widget.
In this section we will go through each of these options.
#Calendar view
The calendar comes with a variety of views. You can the calendar view per widget by overriding the calendarView property:
use Guava\Calendar\Enums\CalendarViewType;

protected CalendarViewType $calendarView = CalendarViewType::ListWeek;
Check the CalendarViewType enum for a list of available views.
#Locale
By default, the calendar will use your app's locale.
The underlying calendar package doesn't support locales as a combination of language and region/country code, so locales such as fr_CA or en_US become invalid.
We attempt to resolve this by only using the first language part of the locale. If you still run into any issues with the localization, you can override the calendar's locale manually using the locale property:
protected ?string $locale = 'en';
#First Day
By default, the calendar will use Monday as the first day.
You can customize this by overriding the firstDay property:
use Carbon\WeekDay;

protected WeekDay $firstDay = WeekDay::Sunday;
#Day Max Events
Determines the maximum number of stacked event levels for a given day in the dayGrid view.
If there are too many events, a link like +2 more is displayed.
Currently, only a boolean value is supported. When set to true, it limits the number of events to the height of the day cell. When set to false (default) there is no limit.
protected bool $dayMaxEvents = true;
#Use Filament Timezone
[!CAUTION] While we still recommend setting this property to true, it does come with some potential side effects that you need to keep in mind. Keep reading to learn more.
The underlying Event Calendar does not support working with timezones. Thus, everything the user sees in their calendar is rendered in their local browser time.
This can cause confusion when adding interactivity to your calendar (such as editing events or creating events using filament modals), because filament will display the time not in the user's local browser time, but in the app's timezone (as configured in config/app.php).
However, as of Filament v4, a FilamentTimezone can be configured which will make Filament automatically convert between the Apps timezone setting and your filament timezone. This allows you to store users preferred timezone and convert it back and forth when displaying it to the user, for example via a DatePicker.
To learn more about the FilamentTimezone setting, please refer to the Filament documentation.
If you want your calendar to use the same timezone as configured via FilamentTimezone, you can use the useFilamentTimezone property to do so:
protected bool $useFilamentTimezone = true;
To achieve this, we intercept dates sent from / to the calendar and override the timezone with the filament's timezone.
However, please keep in mind that this currently comes with a few side effects, as we are not able to override all dates / times used internally by the calendar.
For example, if you enable the now indicator, it will still use the user's local browser time. We are trying to find a solution to fix this.
#Heading
By default, the Heading displays the content of the translations.heading key (by default, it just says Calendar).
You can customize the heading of your calendar widget by overriding the $heading property or getHeading method:
// Setting to null will disable the heading completely
protected string | HtmlString | bool | null $heading = null;

// Or to render HTML, you can override the method directly and return a HtmlString
public function getHeading(): string|HtmlString
{
    return  new HtmlString('<div>some html</div>');
}
#Interactivity
By now you should have a perfectly fine and working calendar. However, it is still very static - you can view your events, but there is no way to interact with them.
The calendar supports many ways to interact with, which will be described below individually.
#Actions
[!CAUTION] Actions have no default authorization. This means, anyone can use any action.
Please check the Authorization section to learn how to authorize actions.
Before you read about the different ways to add interactions to your calendar, you need to understand how actions in the calendar work.
Actions used within the Calendar context need the CalendarAction trait to work properly.
We provide a few drop-in replacements of the regular Filament actions that already implement everything necessary:
- CreateAction
- ViewAction
- EditAction
- DeleteAction
Whenever you want to use one of these actions, make sure you use the actions from our package. All they do is extend the regular filament action and add a few important setUp calls.
So, instead of using Filament\Actions\CreateAction you would use Guava\Calendar\Filament\Actions\CreateAction.
#Defining actions
Every action you use in the calendar should be defined as a public method in the widget class, just as usual when adding an Action to a Livewire component in filament.
View, Edit and Delete actions are already present for you. You do not need to add them anymore.
For create actions, you still need to create them, since for each model a different create action needs to be added. There is a helper method available for you to help with this.
For example, to add a createFooAction (where Foo is a model in your app), you would add this method:
use Guava\Calendar\Filament\Actions\CreateAction;

public function createFooAction(): CreateAction
{
    // You can use our helper method
    return $this->createAction(Foo::class);

    // Or you can add it manually, both variants are equivalent:
    return CreateAction::make('createFoo')
        ->model(Foo::class);
}
Both variants are equal, and it's just up to your personal preference which one you want to use.
#Mounting actions
whenever you want to mount an action programmatically within a calendar context, such as in the onDateClick method (more on this later), you can use the mountAction method.
protected function onDateClick(DateClickInfo $info): void {
    $this->mountAction('createFoo');
}
In the background, we pass a few more arguments to the mount method. Thanks to that, you can type hint the contextual info in your actions:
use Guava\Calendar\Enums\Context;
use Guava\Calendar\Contracts\ContextualInfo;
use Guava\Calendar\ValueObjects\DateClickInfo;
use Guava\Calendar\ValueObjects\DateSelectInfo;

public function createFooAction(): CreateAction
{
    return $this->createAction(Foo::class)
        ->mountUsing(function (?ContextualInfo $info) {
            // You can now access contextual info from the calendar using the $info argument
            if ($info instanceof DateClickInfo) {
                // do something on date click
            }

            // Both comparison checks are equal, but instanceof is better for IDE help
            if ($info->getContext() === Context::DateSelect) {
                // do something on date select
            }
        })
        // You could also type hint each contextual info directly:
        ->mountUsing(fn(?DateClickInfo $dateClick, ?DateSelectInfo $dateSelect))
    ;
}
#Accessing context information
As seen above, we provide various contextual information for you when using calendar actions:
| Parameter | Description |
|---|---|
| Context | The current context enum or null if not in calendar context |
| DateClickInfo | If in the DateClick context, it will contain the DateClickInfo, otherwise null |
| DateSelectInfo | If in the DateSelect context, it will contain the DateSelectInfo, otherwise null |
| EventClickInfo | If in the EventClick context, it will contain the EventClickInfo, otherwise null |
| NoEventsClickInfo | If in the NoEventsClick context, it will contain the NoEventsClickInfo, otherwise null |
You simply need to type hint the parameter correctly and it will be injected for you if available.
These are not only limited to mountUsing, almost all action methods will have access to these.
For example, to conditionally hide an action in the DateClick context:
use Guava\Calendar\Enums\Context;

$this->createAction(Foo::class)
    ->hidden(function (?ContextualInfo $info) {
        return $info->getContext() === Context::DateClick;
    });
#Schemas
The create, view and edit actions should work out of the box and use the correct schemas.
We attempt to guess your Resource and reuse the appropriate schema: Create and Edit actions will use your Form Schema, while View actions will reuse your Infolist Schema or fall-back to the Form Schema if no Infolist is present.
But sometimes, you might want to customize the Schema that will be used in your Calendar Modals.
You have a few options available:
- Stick to auto discovery, in which case you are ready to go :-),
- if your calendar works with a single model only or you reuse the same schema for multiple models, you can implement the
schemaordefaultSchemamethod, - or you can implement a schema per model
#Implementing a default schema
If you only work with a single model, or you want to share the same schema across multiple models, you can implement the schema or defaultSchema method (both are equivalent) in your calendar widget:
public function defaultSchema(Schema $schema): Schema
{
    return $schema->components([
        // ...
    ]);
}
#Implementing a schema for a specific model
If you need to set a specific schema for a model, you have two options:
- Define a method with any name you want and add the
#[CalendarSchema()]attribute, - or define a method in the format
camelCaseModelNameSchema, such asfooBarSchema
// Variant 1
public function fooBarSchema(Schema $schema): Schema
{
    return $schema->components([
        // ...
    ]);
}

// Variant 2
use Guava\Calendar\Attributes\CalendarSchema;

#[CalendarSchema(FooBar::class)]
public function baz(Schema $schema): Schema
{
    return $schema->components([
        // ...
    ]);
}
#Date Click
A date click event is triggered when a date cell is clicked in the calendar.
To handle date clicks, first enable them by overriding the dateClickEnabled property:
protected bool $dateClickEnabled = true;
Now date clicks are enabled and a request will be sent to livewire each time a date cell is clicked.
But by default, nothing happens, and each date click will be silently ignored.
You can now choose to either:
- implement your own logic
- or use our context menu feature
#Implementing your own logic
If you want to take full control over what happens when a date cell is clicked, override the onDateClick method and implement your own custom logic:
use Guava\Calendar\ValueObjects\DateClickInfo;

protected function onDateClick(DateClickInfo $info): void
{
    // Validate the data and handle the event
    // For example, you might want to mount a create action
    $this->mountAction('createFoo');
}
#Using the context menu feature
Another option is to use our context menu feature. When enabled, a context menu will be rendered at your mouse cursor when you click a date cell, which you can populate with actions.
To use the context menu feature, all you need to do is implement the getDateClickContextMenuActions method:
protected function getDateClickContextMenuActions(): array
{
    return [
        $this->createFooAction(),
        $this->createBarAction(),
        // Any other action you want
    ];
}
The context menu has a higher priority, so if it returns a non-empty array, it will always take precedence over your custom handler.
#Date Select
Similarly, a date select event is triggered when a date cell is dragged to create a selection in the calendar.
To handle date selects, first enable them by overriding the dateSelectEnabled property:
protected bool $dateSelectEnabled = true;
Now date selects are enabled and a request will be sent to livewire each time a date selection is made.
But by default, nothing happens, and each date select will be silently ignored.
You can now choose to either:
- implement your own logic
- or use our context menu feature
#Implementing your own logic
If you want to take full control over what happens when a date selection is made, override the onDateSelect method and implement your own custom logic:
use Guava\Calendar\ValueObjects\DateSelectInfo;

protected function onDateSelect(DateSelectInfo $info): void
{
    // Validate the data and handle the event
    // For example, you might want to mount a create action
    $this->mountAction('createFoo');
}
#Using the context menu feature
Another option is to use our context menu feature. When enabled, a context menu will be rendered at your mouse cursor when you complete your date selection, which you can populate with actions.
To use the context menu feature, all you need to do is implement the getDateSelectContextMenuActions method:
protected function getDateSelectContextMenuActions(): array
{
    return [
        $this->createFooAction(),
        $this->createBarAction(),
        // Any other action you want
    ];
}
The context menu has a higher priority, so if it returns a non-empty array, it will always take precedence over your custom handler.
#Event Click
An event click event is triggered when an event is clicked in the calendar.
To handle event clicks, first enable them by overriding the eventClickEnabled property:
protected bool $eventClickEnabled = true;
Now event clicks are enabled and a request will be sent to livewire each time an event is clicked.
By default, a view action will be mounted with prefilled information about the event.
You can set the default click action by overriding the defaultEventClickAction property of the widget. This simply needs to be the name of an action that you can freely define in your widget, like regular Filament actions:
protected ?string $defaultEventClickAction = 'edit'; // view and edit actions are provided by us, but you can choose any action you want, even your own custom ones
You can now choose to either:
- keep the default behavior,
- implement your own logic
- or use our context menu feature
#Implementing your own logic
If you want to take full control over what happens when an event is clicked, override the onEventClick method and implement your own custom logic:
use Illuminate\Database\Eloquent\Model;
use Guava\Calendar\ValueObjects\EventClickInfo;

protected function onEventClick(EventClickInfo $info, Model $event, ?string $action = null): void
{
    // Validate the data and handle the event click
    // $event contains the clicked event record
    // you can also access it via $info->record
}
#Using the context menu feature
Another option is to use our context menu feature. When enabled, a context menu will be rendered at your mouse cursor when you click an event, which you can populate with actions.
To use the context menu feature, all you need to do is implement the getEventClickContextMenuActions method:
protected function getEventClickContextMenuActions(): array
{
    return [
        $this->viewAction(),
        $this->editAction(),
        $this->deleteAction(),
    ];
}
The context menu has a higher priority, so if it returns a non-empty array, it will always take precedence over your custom handler.
#No Events Click
[!NOTE]
This has affect only in list views.
A no events click event is triggered when a list view has no events to display and the calendar content was clicked.
To handle no events clicks, first enable them by overriding the noEventsClickEnabled property:
protected bool $noEventsClickEnabled = true;
Now no events clicks are enabled and a request will be sent to livewire each time a click is made.
But by default, nothing happens, and each click will be silently ignored.
You can now choose to either:
- implement your own logic
- or use our context menu feature
#Implementing your own logic
If you want to take full control over what happens when a click is made, override the onNoEventsClick method and implement your own custom logic:
use Guava\Calendar\ValueObjects\NoEventsClickInfo;

protected function onNoEventsClick(NoEventsClickInfo $info): void
{
    // Validate the data and handle the event
    // For example, you might want to mount a create action
    $this->mountAction('createFoo');
}
#Using the context menu feature
Another option is to use our context menu feature. When enabled, a context menu will be rendered at your mouse cursor when you click, which you can populate with actions.
To use the context menu feature, all you need to do is implement the getNoEventsClickContextMenuActions method:
protected function getNoEventsClickContextMenuActions(): array
{
    return [
        $this->createFooAction(),
        $this->createBarAction(),
        // Any other action you want
    ];
}
The context menu has a higher priority, so if it returns a non-empty array, it will always take precedence over your custom handler.
#Event Resize
Callback function that is triggered when you finish resizing an event in your calendar.
To handle the callback, first enable it by overriding the eventResizeEnabled property:
protected bool $eventResizeEnabled = true;
Now it is enabled and a request will be sent to livewire after you complete the resize of an event.
#Implementing your own logic
[!IMPORTANT]
Notice that unlike the other callbacks, this callback returns a boolean value.This is used to control whether the event resize should be reverted visually on the frontend or not.
To handle the callback, override the onEventResize method and implement your own custom logic:
use Illuminate\Database\Eloquent\Model;
use Guava\Calendar\ValueObjects\EventResizeInfo;

protected function onEventResize(EventResizeInfo $info, Model $event): bool
{
    // Validate the data and handle the event
    // Most likely you will want to update the event with the new start /end dates to persist the resize in the database

    return true;
}
#Event Drag & Drop
Callback function that is triggered when you finish dragging and drop an event to a date cell in your calendar.
To handle the callback, first enable it by overriding the eventDragEnabled property:
protected bool $eventDragEnabled = true;
Now it is enabled and a request will be sent to livewire after you drop the event to a date cell in the calendar.
#Implementing your own logic
[!IMPORTANT]
Notice that unlike the other callbacks, this callback returns a boolean value.This is used to control whether the event should be reverted visually to it's original position on the frontend or not.
To handle the callback, override the onEventDrop method and implement your own custom logic:
use Illuminate\Database\Eloquent\Model;
use Guava\Calendar\ValueObjects\EventDropInfo;

protected function onEventDrop(EventDropInfo $info, Model $event): bool
{
     // Access the updated dates using getter methods
    $newStart = $info->event->getStart();
    $newEnd = $info->event->getEnd();
      // Update the event with the new start/end dates to persist the drag & drop
    $event->update([
        'start_time' => $newStart,
        'end_time' => $newEnd,
    ]);
     // Return true to accept the drop and keep the event in the new position
    return true;

}
#Dates Set
When the date range of the calendar was originally set or changed by clicking the previous/next buttons, changing the view, manipulating the current date via the API, etc. a Dates Set event is triggered.
To handle the Dates Set callback, first enable it by overriding the datesSetEnabled property:
protected bool $datesSetEnabled = true;
Now it is enabled and a request will be sent to livewire each time the calendar date range is changed (or initially set).
#Implementing your own logic
To handle the callback, override the onDatesSet method and implement your own custom logic:
use Guava\Calendar\ValueObjects\DatesSetInfo;

protected function onDatesSet(DatesSetInfo $info): void
{
    // Validate the data and handle the event
    // For example, you might want to store the date range in a cookie or session
    // to remember the date range across page refreshes
}
#View Did Mount
Callback function that is triggered right after the view has been added to the DOM.
To handle the callback, first enable it by overriding the viewDidMountEnabled property:
protected bool $viewDidMountEnabled = true;
Now it is enabled and a request will be sent to livewire right after the calendar view has been added to the DOM.
#Implementing your own logic
To handle the callback, override the onViewDidMount method and implement your own custom logic:
use Guava\Calendar\ValueObjects\ViewDidMountInfo;

protected function onViewDidMount(ViewDidMountInfo $info): void
{
    // Validate the data and handle the event
    // For example, you might want to store the date range in a cookie or session
    // to remember the date range across page refreshes
}
#Custom Event Content
By default, we use the default view from the calendar package. However, you are able to use your own content.
To keep things performant, the blade view is rendered once on the server and then re-used for every event. Thus, you cannot access the calendar event data from the server side via Blade or Laravel, or do any server-side operations.
However, each event is wrapped in an alpine component, which exposes the event data that you can freely use using AlpineJS.
If you only have one type of events or events that render the same way, you can simply return a view or a HtmlString from the defaultEventContent or eventContent method:
use Illuminate\Support\HtmlString;

protected function eventContent(): HtmlString|string
{
    // return a blade view
    return view('calendar.event');

    // return a HtmlString
    return new HtmlString('<div>My event</div>');
}
Example of the calendar.event view blade file:
<div class="flex flex-col items-start">
    <span x-text="event.title"></span>
    <template x-for="user in event.extendedProps.users">
        <span x-text="user.name"></span>
    </template>
</div>
If you want to render events differently based on their model type, you can implement an Event Content method for each model, by using the CalendarEventContent attribute or by using a specific naming convention for the method - camelCaseModelNameEventContent such as fooEventContent (where Foo is your model):
use Illuminate\Support\HtmlString;
use Guava\Calendar\Attributes\CalendarEventContent;

// Variant 1.
#[CalendarEventContent(Foo::class)]
protected function eventContentForFoo(): HtmlString|string
{
    return view('calendar.foo-model-event');
}

// Variant 2.
protected function barEventContent(): HtmlString|string
{
    return view('calendar.bar-model-event');
}
Both variants are equal, it's up to your personal preference which one you want to use.
#Custom Resource Label Content
By default, we use the default view from the calendar package. However, you are able to use your own content.
To keep things performant, the blade view is rendered once on the server and then re-used for every resource. Thus, you cannot access the calendar resource data from the server side via Blade or Laravel, or do any server-side operations.
However, each resource is wrapped in an alpine component, which exposes the resource data that you can freely use using AlpineJS.
If you only have one type of resources or resources that render the same way, you can simply return a view or a HtmlString from the defaultResourceLabelContent or resourceLabelContent method:
use Illuminate\Support\HtmlString;

protected function resourceLabelContent(): HtmlString|string
{
    // return a blade view
    return view('calendar.resource');

    // return a HtmlString
    return new HtmlString('<div>My resource</div>');
}
Example of the calendar.resource view blade file:
<div class="flex flex-col items-start">
    <span x-text="resource.title"></span>
</div>
If you want to render resources differently based on their model type, you can implement a Resource Label Content method for each model, by using the CalendarResourceLabelContent attribute or by using a specific naming convention for the method - camelCaseModelNameResourceLabelContent such as fooResourceLabelContent (where Foo is your model):
use Illuminate\Support\HtmlString;
use Guava\Calendar\Attributes\CalendarResourceLabelContent;

// Variant 1.
#[CalendarResourceLabel(Foo::class)]
protected function resourceLabelContentForFoo(): HtmlString|string
{
    return view('calendar.foo-model-resource');
}

// Variant 2.
protected function barResourceLabelContent(): HtmlString|string
{
    return view('calendar.bar-model-resource');
}
Both variants are equal, it's up to your personal preference which one you want to use.
#Authorization
By default, everyone can use all actions! The package does not handle authorization, this is your responsibility.
Since we use regular filament actions, adding authorizations is a breeze.
For example to add authorization to the createTaskAction:
use Guava\Calendar\Filament\Actions\CreateAction;

public function createFooAction(): CreateAction
{
    return $this->createAction(Foo::class)
        ->authorize('create', Foo::class)
        // At this point, it will authorize against the FooPolicy
        //
        // However, you might want to give the user some feedback:
        ->authorizationNotification()
        // Now it will send a notification with the response message from your policy
        //
        // For context menu actions, you can instead use:
        ->authorizationTooltip()
        // which will disable the action and show a tooltip with the response message
    ;
}
For detailed information, please follow the default filament documentation on how to add authorization to actions.
#Utility Classes
We provide various helper and utility classes to provide you with type hints for various arguments that are being passed from the calendar to your widget.
#CalendarViewType
This enum contains all available calendar views that you can use in your calendar widget.
#FetchInfo
When the calendar retrieves events, it provides you with a FetchInfo object which contains information about the current calendar view.
Use this to query only models that are visible in the current view.
| Property | Description |
|---|---|
| start | Start date of the range the calendar needs events for. Events before this date are not visible in the calendar. |
| end | End date of the range the calendar needs events for. Events after this date are not visible in the calendar. |
#Troubleshooting
#Context menu actions don't work
If you encounter issues with the context menu, make sure that the name of the action is unique across the whole widget. If there is another action with the same name, it might be mounted instead of the one you want.
#Record vs Event record
When working with resource widgets, $record is the record of the currently opened resource record, whereas $eventRecord is the record of the calendar event (during calendar actions, context menus, etc.).
#Security measures
Keep in mind that a lot of the data in this package comes from the client side JavaScript and could be tampered with. Always validate the data on the server side and never trust the data from the client side.
#Testing
composer test
#Changelog
Please see CHANGELOG for more information on what has changed recently.
#Contributing
Please see CONTRIBUTING for details.
#Security Vulnerabilities
Please review our security policy on how to report security vulnerabilities.
#Credits
- Lukas Frey
- All Contributors
- Spatie - Our package skeleton is a modified version of Spatie's Package Skeleton
- vkurko/calendar - free, open-source alternative to FullCalendar
- saade/filament-fullcalendar - heavy inspiration for this package
#License
The MIT License (MIT). Please see License File for more information.
The author
From the same author

Modal Relation Managers
Allows you to embed relation managers inside filament modals.
Author:
Guava
Icon Picker
Adds an icon picker field and column for your filament panel and form builder.
Author:
Guava
Icons
Install and use any blade icon pack and generate enum classes for any icon sets.
Author:
Guava
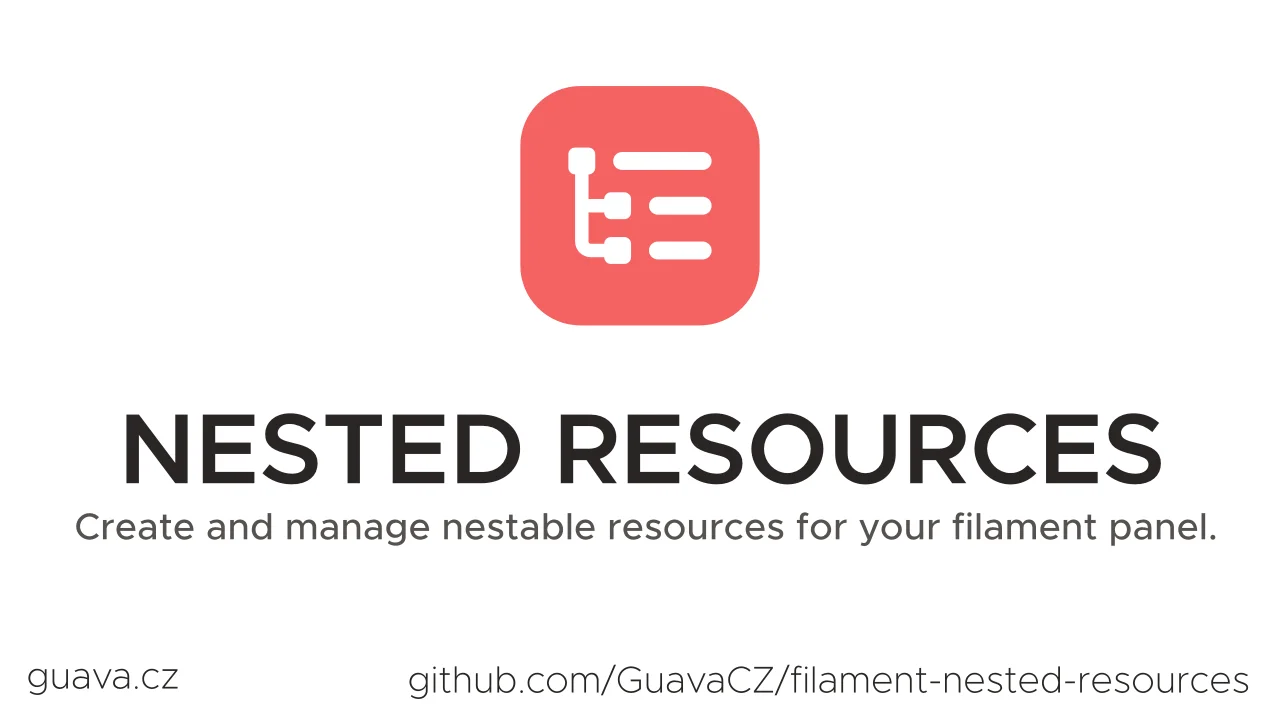
Nested Resources
Adds support for nested resources
Author:
Guava
Featured Plugins
A selection of plugins curated by the Filament team
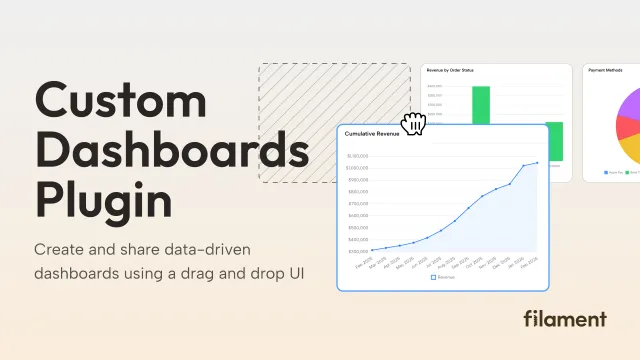
Custom Dashboards
Let your users build and share their own dashboards with a drag-and-drop interface. Define your data sources in PHP and let them do the rest.
 Filament
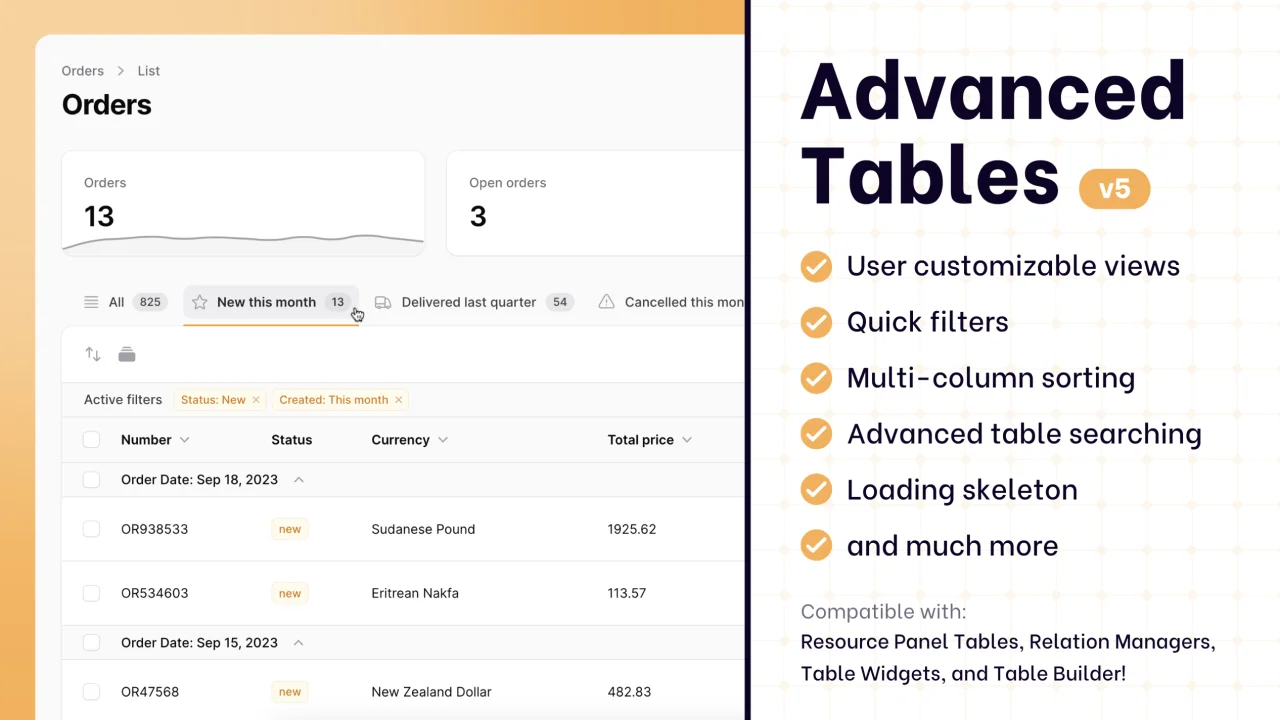
Advanced Tables (formerly Filter Sets)
Supercharge your tables with powerful features like user-customizable views, quick filters, multi-column sorting, advanced table searching, convenient view management, and more. Compatible with Resource Panel Tables, Relation Managers, Table Widgets, and Table Builder!
 Kenneth Sese

Blueprint
Filament Blueprint is a premium Laravel Boost extension that helps AI agents produce accurate, detailed implementation plans and security reports for Filament apps.
Filament