Fabricator
CommunityBlock-Based Page Builder Skeleton for your Filament Apps
 Author:
ZedoX
Author:
ZedoX
Package health
BetaAutomated checks of this plugin's Composer package
13 checks
-
Passed:
Current Laravel version supported
—
Package dependencies resolve together with current Laravel
13.0. -
Passed:
Current PHP version supported
—
Constraint
^8.3supports current PHP8.5. - Skipped: Current Symfony version supported
- Passed: Abandoned or archived — No consulted source marks the package abandoned (packagist, github).
- Passed: Commit and release recency — Active: last commit 17 days ago; last release 72 days ago.
-
Passed:
composer.lock not committed by library
—
composer.lockis absent from the released dist archive. - Passed: Dist archive is lean
- Failed: GitHub Actions pinned to SHA — View details on Plumb
- Passed: Open security advisories
- Warning: Dependabot PR responsiveness — Stale Dependabot PRs: oldest general PR is 87 days old.
- Passed: Dependabot or Renovate configured
-
Failed:
Dependency update cooldown configured
—
No cooldown configured in
.github/dependabot.yml. View details on Plumb - Passed: Provides a security policy
filament/
namespace. Review the source and install at your own risk. Found
malware or an unresolved security issue the author won't
address?
Report it
.
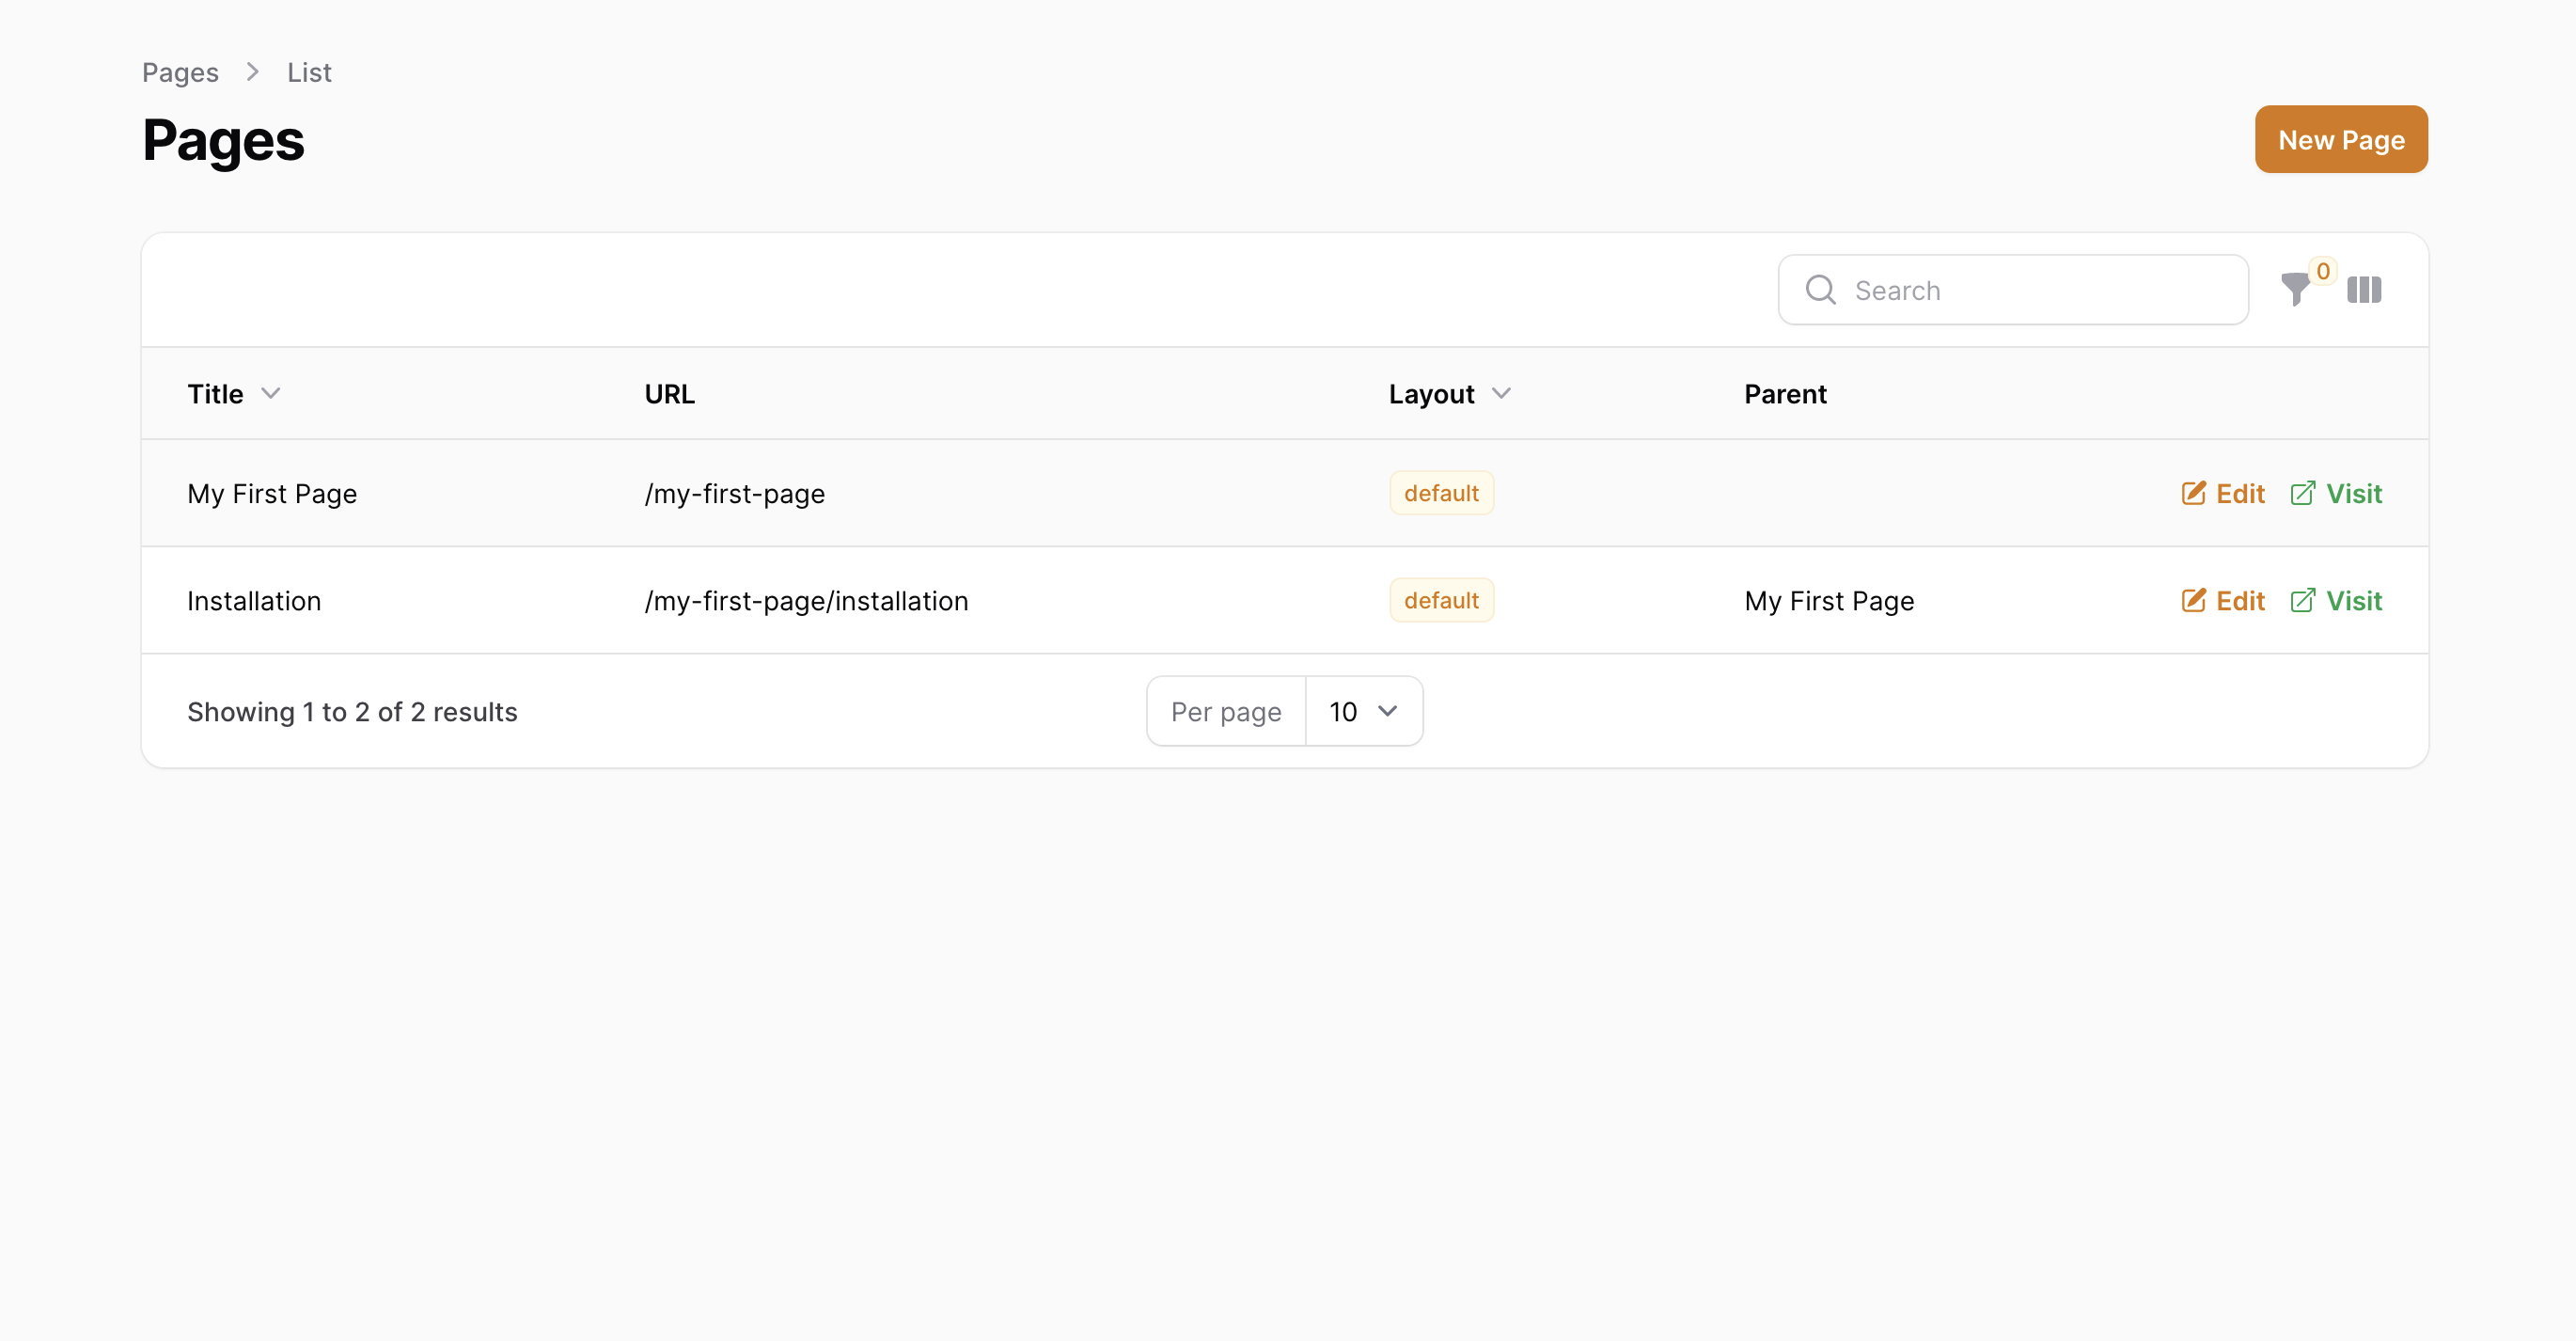
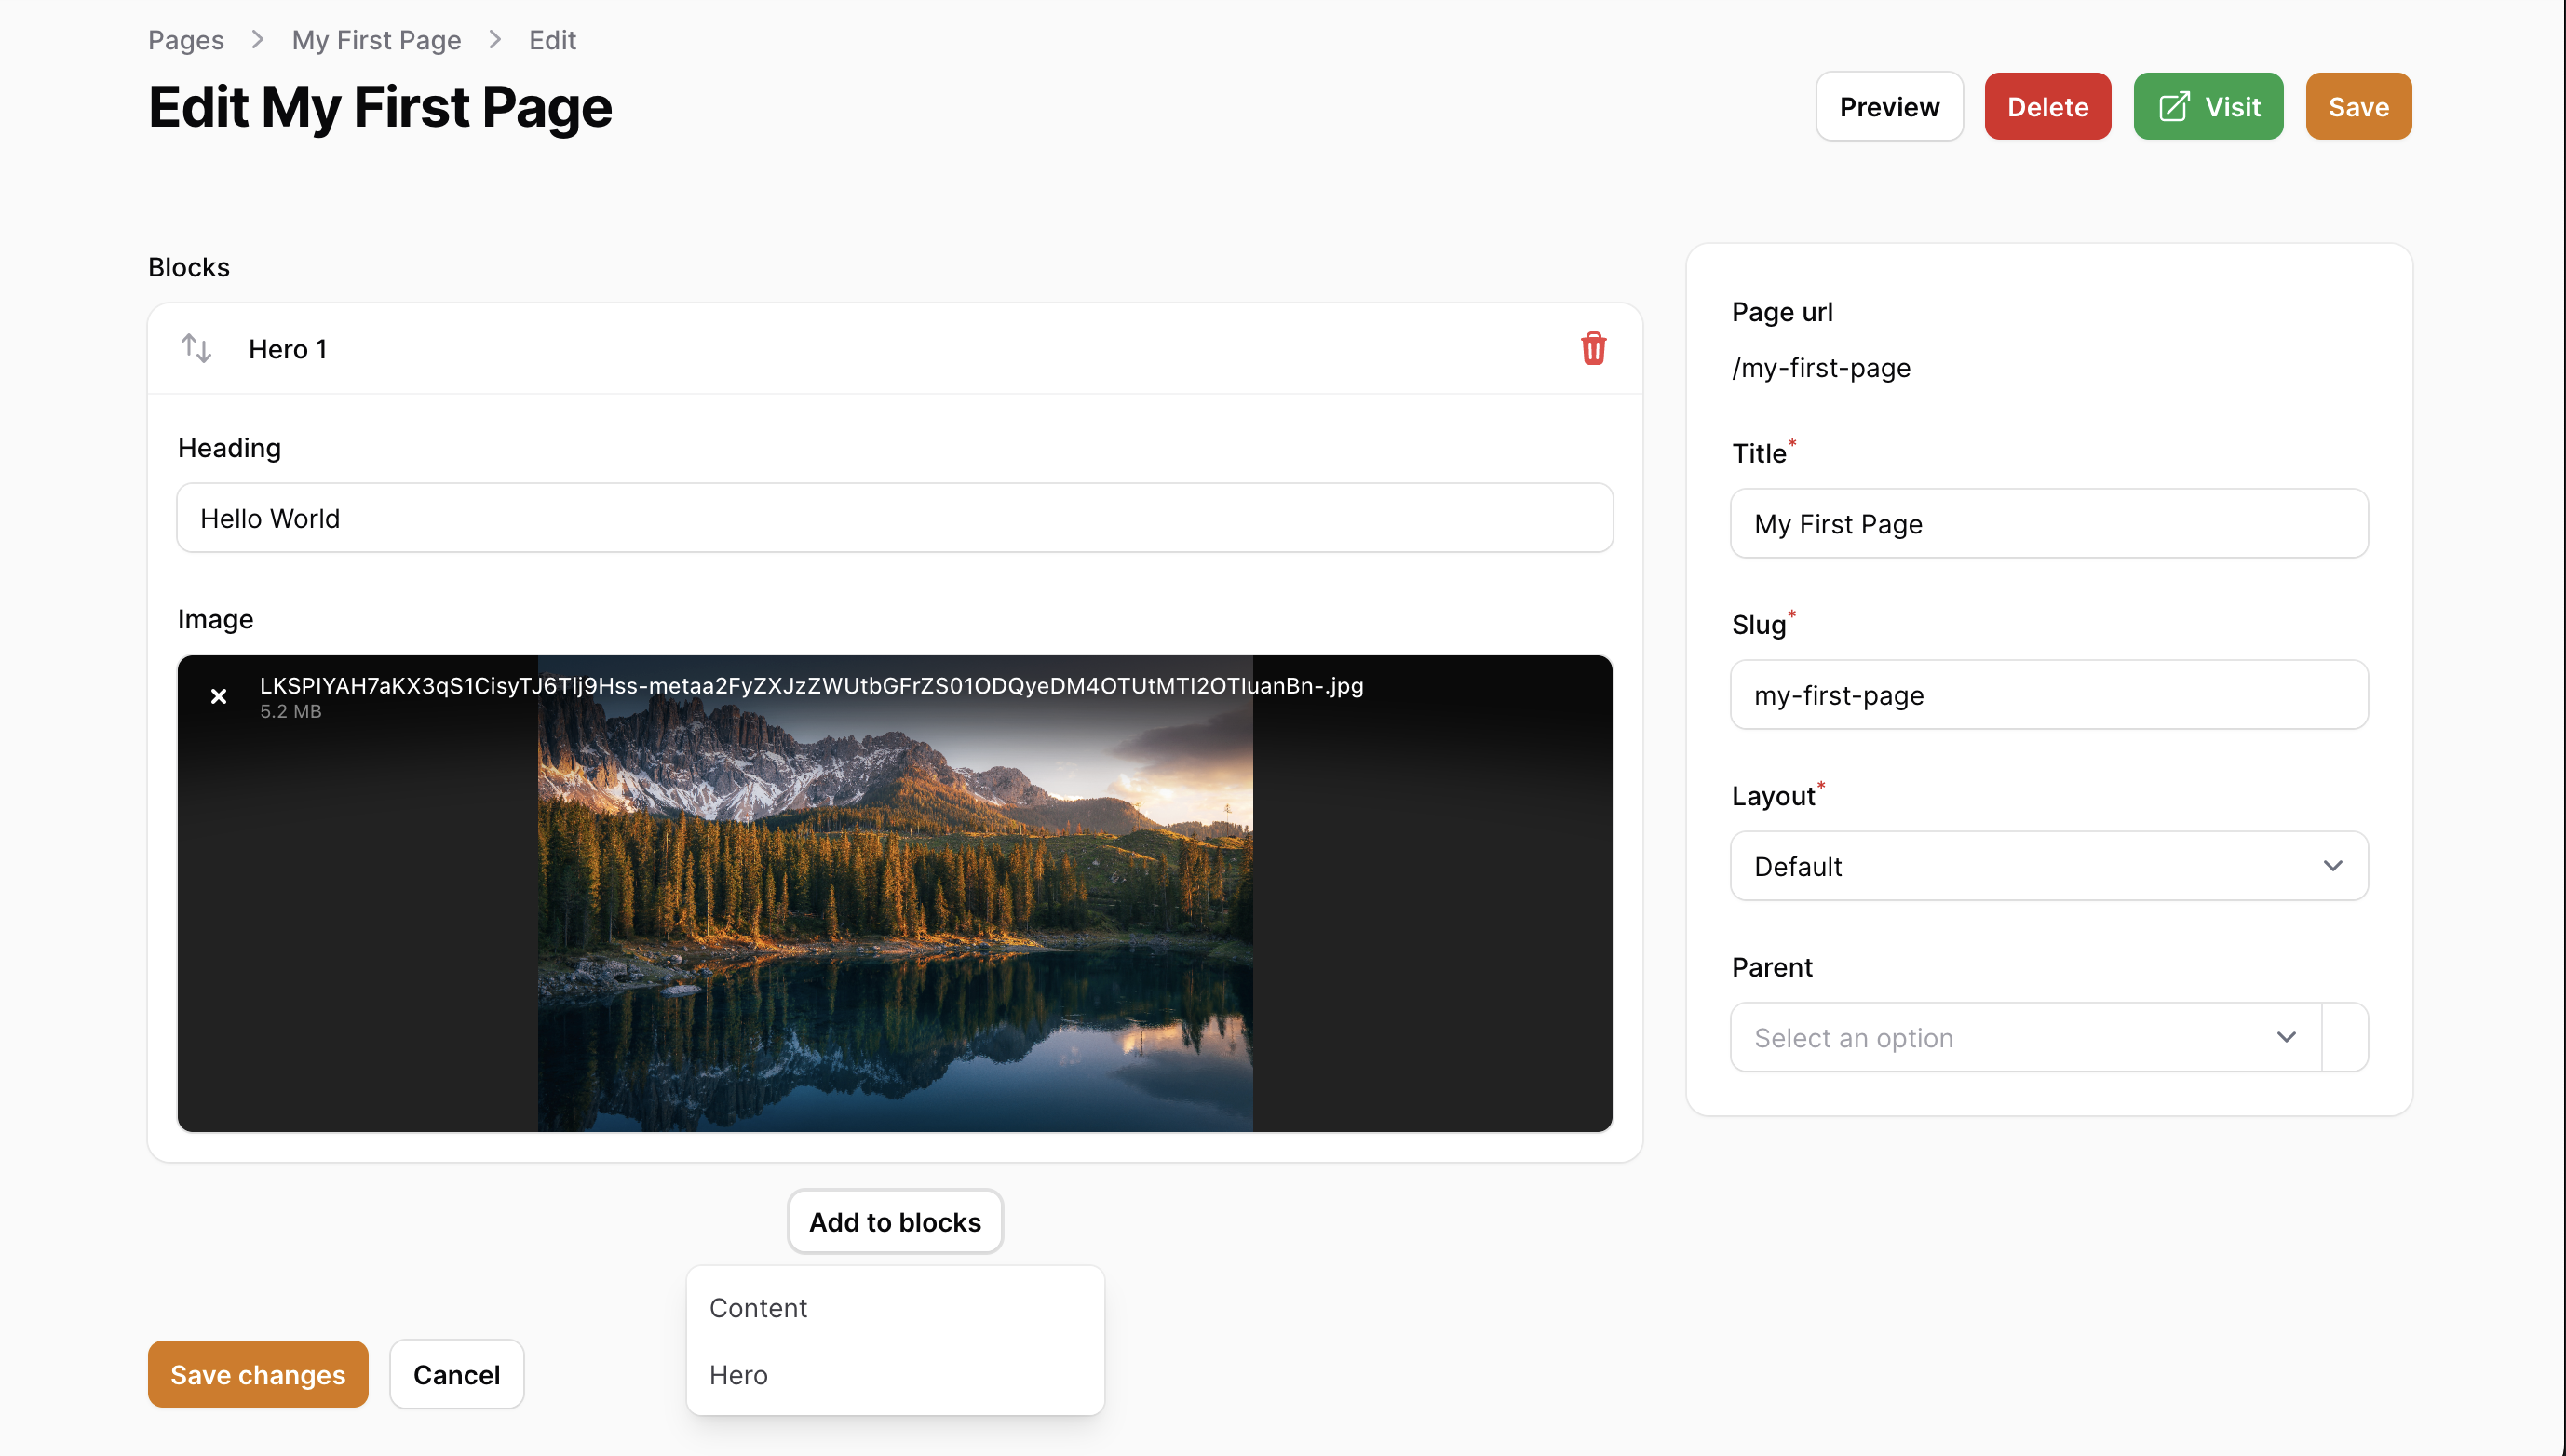
Documentation
- Introduction
- Screenshots
- Installation
- Layouts
- Page Blocks
- Page Builder
- Page Resource
- Caching
- Configuration
- Compatibility
#Introduction
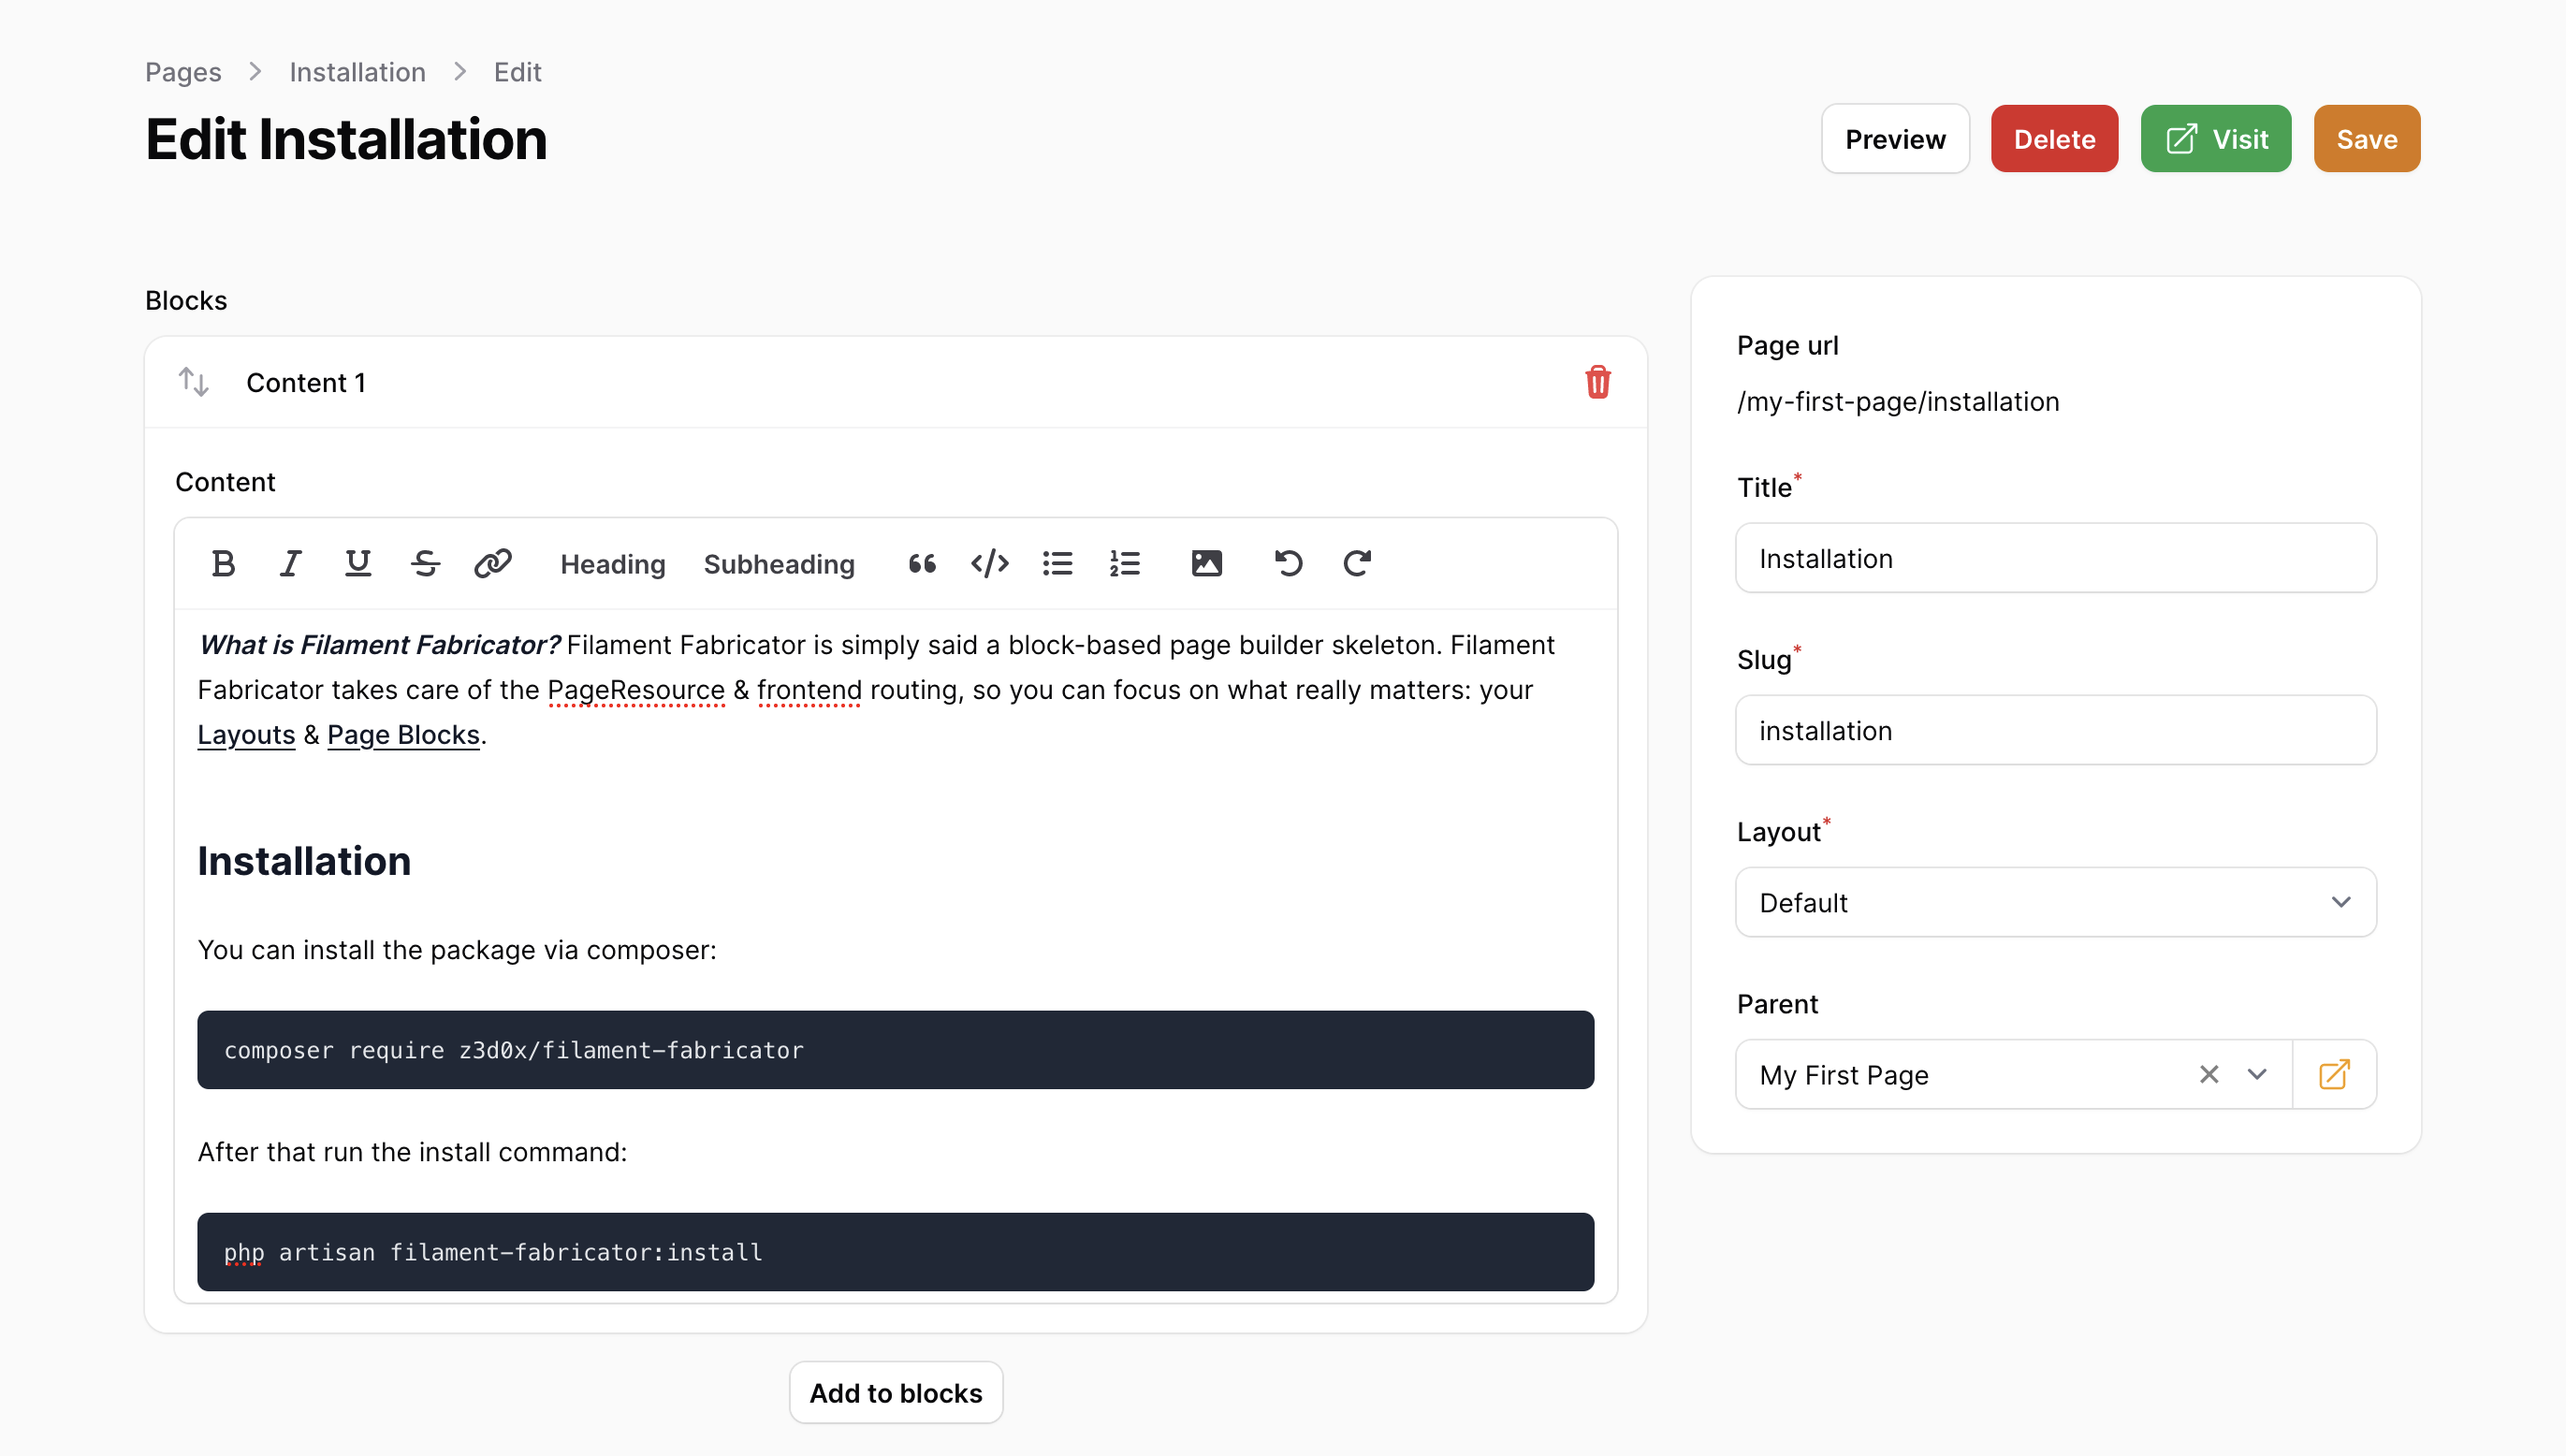
What is Filament Fabricator? Filament Fabricator is simply said a block-based page builder skeleton. Filament Fabricator takes care of the PageResource & frontend routing, so you can focus on what really matters: your Layouts & Page Blocks.
#Screenshots
#Installation
Once you have Filament Panels configured. You can install this package via composer:
composer require z3d0x/filament-fabricator
After that run the install command: (this will publish the config & migrations)
php artisan filament-fabricator:install
Register a FilamentFabricatorPlugin instance in your Panel provider:
use Z3d0X\FilamentFabricator\FilamentFabricatorPlugin;

//..

public function panel(Panel $panel): Panel
{
    return $panel
        // ...
        ->plugins([
            FilamentFabricatorPlugin::make(),
        ]);
}
Then, publish the registered plugin assets:
php artisan filament:assets
To get started create a Layout and then Page Blocks
#Layouts
#Creating a Layout
Use the following command to create a new Layout:
php artisan filament-fabricator:layout DefaultLayout
This will create the following Layout class:
use Z3d0X\FilamentFabricator\Layouts\Layout;

class DefaultLayout extends Layout
{
    protected static ?string $name = 'default';
}
and its corresponding blade component:
@props(['page'])
<x-filament-fabricator::layouts.base :title="$page->title">
    {{-- Header Here --}}

    <x-filament-fabricator::page-blocks :blocks="$page->blocks" />

     {{-- Footer Here --}}
</x-filament-fabricator::layouts.base>
You may edit this layout blade file however you want, as long as you are using the filament-fabricator::page-blocks to show the page blocks
Pro Tip 💡: Use the
$pageinstance to build your layout
#Base Layouts
You may noticed that layouts created are wrapped in a filament-fabricator::layouts.base component. This is the Base Layout. You can use the following, in the boot() of a ServiceProvider, to inject additional data to the base layout:
use Z3d0X\FilamentFabricator\Facades\FilamentFabricator;
use Illuminate\Foundation\Vite;

//Add custom tags (like `<meta>` & `<link>`)
FilamentFabricator::pushMeta([
    new HtmlString('<link rel="manifest" href="/site.webmanifest" />'),
]);

//Register scripts
FilamentFabricator::registerScripts([
    'https://unpkg.com/browse/tippy.js@6.3.7/dist/tippy.esm.js', //external url
    mix('js/app.js'), //laravel-mix
    app(Vite::class)('resources/css/app.js'), //vite
    asset('js/app.js'), // asset from public folder
]);

//Register styles
FilamentFabricator::registerStyles([
    'https://unpkg.com/tippy.js@6/dist/tippy.css', //external url
    mix('css/app.css'), //laravel-mix
    app(Vite::class)('resources/css/app.css'), //vite
    asset('css/app.css'), // asset from public folder
]);

FilamentFabricator::favicon(asset('favicon.ico'));
Apart from these this plugin also adds the following Filament's Render Hooks to the base layout:
filament-fabricator::head.start- after<head>filament-fabricator::head.end- before</head>filament-fabricator::body.start- after<body>filament-fabricator::body.end- before</body>filament-fabricator::scripts.start- before scripts are definedfilament-fabricator::scripts.end- after scripts are defined
Pro Tip 💡: Using a base layout is completely optional, if you don't need it you may just remove it from the generated layout blade file. If you prefer, You may also use your own base layout.
Pro Tip 💡: You might prefer using the corresponding constants defined in
\Z3d0X\FilamentFabricator\View\LayoutRenderHookinstead of hard-coded strings.
#Page Blocks
#Creating a Page Block
Use the following command to create a new Page Block:
php artisan filament-fabricator:block MyBlock
This will create the following Page Block class (& its corresponding blade component view):
use Filament\Forms\Components\Builder\Block;
use Z3d0X\FilamentFabricator\PageBlocks\PageBlock;

class MyBlock extends PageBlock
{
    public static function getBlockSchema(): Block
    {
        return Block::make('my-block')
            ->schema([
                //
            ]);
    }

    public static function mutateData(array $data): array
    {
        return $data;
    }
}
Pro Tip 💡: You can access the
$pageinstance in the block, by using the@awareblade directive{{-- `my-block.blade.php` --}} @aware(['page']) // make sure this line exists, in order to access `$page` @dump($page)
#Page Block Schema
Define you block schema in this method:
public static function getBlockSchema(): Block
You may use any Fields to make up your schema.
Pro Tip 💡: You can conditionally allow blocks based on a layout using:
Block::make('foo')
    ->visible(fn ($get) => $get('../layout') == 'special')
#Mutate Data
By default, your blade component will receive raw data from all the fields as props
Example:
//Given the following schema
public static function getBlockSchema(): Block
{
    return Block::make('my-block')
        ->schema([
            TextInput::make('name'),
        ]);
}
{{-- Your blade component would receive the following props --}}
@dump($name)
However you may customize this behavior using:
//`$data` is the raw block data.
public static function mutateData(array $data): array
The array keys from this would be your blade component props.
Example:
// `MyBlock.php`
public static function mutateData(array $data): array
{
    return ['foo' => 'bar'];
}
{{--- `my-block.blade.php` --}}
@dump($foo) // 'bar'
#Preload data
In some cases, you might want to preload some data for your blocks before mutating the data and then rendering it.
This is something you can do on a block type/class level:
/**
 * Hook used to mass-preload related data to reduce the number of DB queries.
 * For instance, to load model objects/data from their IDs
 *
 * @param  (array{
 *     type: string,
 *     data: array,
 * })[]  $blocks  - The array of blocks' data for the given page and the given block type
 */
public static function preloadRelatedData(Page $page, array &$blocks): void
Note that your preload logic is run once per block type/class. It helps avoid N+1 query problems.
You get a mutable reference to an array of block render data that you can mutate with the data you preloaded. That being said, do keep in mind that you're working with references, you will need to throw a few & around to properly change your data.
It can be useful, for instance, when you want to preload related models based on an array of IDs.
For instance:
use App\Models\SomeModel;
use Z3d0X\FilamentFabricator\Helpers;

// [...]

/**
 * @param  (array{
 *     type: string,
 *     data: array{
 *          title: string,
 *          items: array{
 *              title: string,
 *              ref: int,
 *          }[]
 *     },
 * })[]  $blocks  - The array of blocks' data for the given page and the given block type
 */
#[\Override]
public static function preloadRelatedData(Page $page, array &$blocks): void {
    Helpers::preloadRelatedModels(
        blocks: $blocks,
        property: 'items',
        subProperty: 'ref',
        modelClass: SomeModel::class,
    );

    // now $blocks[0]['data']['items'][0]['ref'] is the related instance of SomeModel
}
#Page Builder
Underneath the hood PageBuilder is just a Filament's Builder field. Like other filament fields this field also has methods that can be used to modify it. You may configure it like this:
use Z3d0X\FilamentFabricator\Forms\Components\PageBuilder;

PageBuilder::configureUsing(function (PageBuilder $builder) {
    $builder->collapsible(); //You can use any method supported by the Builder field
});
#Block Picker Styles
In addition to customizations available in Filament's Builder PageBuilder, also includes a new method blockPickerStyle().
Currently there are two styles available:
BlockPickerStyle::Dropdown(default)BlockPickerStyle::Modal
use Z3d0X\FilamentFabricator\Enums\BlockPickerStyle;
use Z3d0X\FilamentFabricator\Forms\Components\PageBuilder;

PageBuilder::configureUsing(function (PageBuilder $builder) {
    $builder->blockPickerStyle(BlockPickerStyle::Modal);
});
an alternative one-liner way of changing block picker style is using blockPickerStyle() method when registering the FilamentFabricatorPlugin in your Panel provider:
use Z3d0X\FilamentFabricator\Enums\BlockPickerStyle;
use Z3d0X\FilamentFabricator\FilamentFabricatorPlugin;

//..

public function panel(Panel $panel): Panel
{
    return $panel
        // ...
        ->plugins([
            FilamentFabricatorPlugin::make()
                ->blockPickerStyle(BlockPickerStyle::Modal),
        ]);
}
Pro Tip 💡:
BlockPickerStyle::Modalworks best when icons are assigned to blocks. https://filamentphp.com/docs/3.x/forms/fields/builder#setting-a-blocks-icon
#Page Resource
#Customize Navigation
You may use the following methods in the boot() of a ServiceProvider to customize the navigation item of PageResource
use Z3d0X\FilamentFabricator\Resources\PageResource;

PageResource::navigationGroup('Blog');
PageResource::navigationSort(1);
PageResource::navigationIcon('heroicon-o-cube');
#Authorization
To enforce policies, after generating a policy, you would need to register \Z3d0X\FilamentFabricator\Models\Page to use that policy in the AuthServiceProvider.
<?php

namespace App\Providers;

use App\Policies\PagePolicy;
use Illuminate\Foundation\Support\Providers\AuthServiceProvider as ServiceProvider;
use Z3d0X\FilamentFabricator\Models\Page;

class AuthServiceProvider extends ServiceProvider
{
    protected $policies = [
        Page::class => PagePolicy::class,
    ];
    //...
}
If you are using Shield just register the
PagePolicygenerated by it
#Caching
By default, routes will be cached in a lazy manner. That means that a page needs to be hit before it's cached.
If you so choose, you can also force all pages to be cached by running the following command:
php artisan filament-fabricator:clear-routes-cache
By running the following command instead, you'll ensure the data is fresh before it's cached:
php artisan filament-fabricator:clear-routes-cache --refresh
#Configuration
#Auto-routing
By default, your pages' routing will be done automatically for you so you don't have to worry about it.
To do that the package registers a fallback route which, when hit, will render your page.
If you want manual control over how your pages are rendered, you can disable this by setting the routing.enabled config option in your config file to false.
#Route prefix
If you so desire, you can add a prefix to be used in all your pages' routes. This is used in conjunction with auto-routing.
For instance: If a page has a slug page-1, and the prefix is set to /pages, then you'll access that page at the URL /pages/page-1.
Warning: When changing the route prefix in the config, you'll want to run the
php artisan filament-fabricator:clear-routes-cache --refreshcommand
#Hooking the route cache into Laravel's lifecycle
By default routes are properly cached, cleared, and refreshed whenever you would expect it to.
This is achieved by hooking into the following core commands:
cache:clear-> clear routes cacheconfig:cache-> refresh routes cacheconfig:clear-> clear routes cacheoptimize-> refresh routes cacheoptimize:clear-> clear routes cacheroute:clear-> clear routes cache
If you don't want this behavior, you can opt out of it by setting the hook-to-commands config option to false in your config file.
#Compatibility
| Fabricator | Filament | PHP |
|---|---|---|
| 1.x | ^2.0 | ^8.0 |
| 2.x | ^3.0 | ^8.1 |
| 3.x | ^4.0 | ^8.2 |
The author
ZedoX is full-stack web developer from Maldives. He embarked on his journey in late 2020, specializing in TALL stack (Tailwind, Alpine.js, Laravel, Livewire). Additionally, he engages in occasional contributions to open-source projects and actively participates in the Filament Community.
From the same author
Featured Plugins
A selection of plugins curated by the Filament team
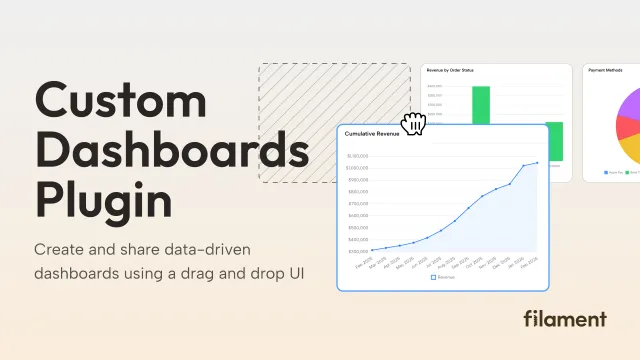
Custom Dashboards
Let your users build and share their own dashboards with a drag-and-drop interface. Define your data sources in PHP and let them do the rest.
 Filament
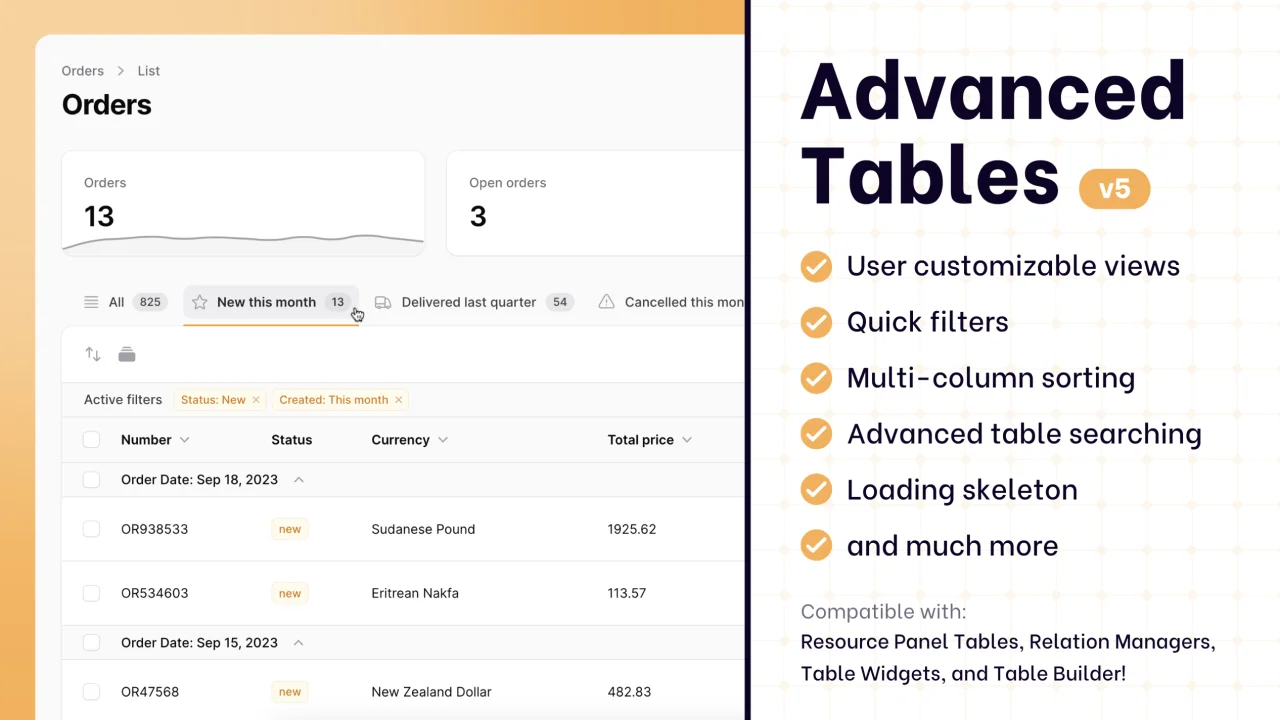
Advanced Tables (formerly Filter Sets)
Supercharge your tables with powerful features like user-customizable views, quick filters, multi-column sorting, advanced table searching, convenient view management, and more. Compatible with Resource Panel Tables, Relation Managers, Table Widgets, and Table Builder!
 Kenneth Sese

Blueprint
Filament Blueprint is a premium Laravel Boost extension that helps AI agents produce accurate, detailed implementation plans and security reports for Filament apps.
Filament