Menu Manager
CommunityEmpower your users to effortlessly manage their navigation menus right from the front-end interface, enhancing user interaction and simplifying site navigation.
filament/
namespace. Review the source and install at your own risk. Found
malware or an unresolved security issue the author won't
address?
Report it
.
 Author:
Yusuf Kaya
Author:
Yusuf Kaya
Documentation
- Introduction
- Installation
- How it Works
- Setting up the plugin
- Rendering Navigation
- Caching
- Extend Link Data Transfer Object
- Support
#Introduction
The Menu Manager package is a paid package developed for Filament, helping you manage the menu space for your site as you wish. With the features this plugin offers, you can create a menu space in any location, add menu groups as you like, display your existing data in the menu, and you can do this either by drag and drop or using navigation buttons.
Managing menus might be challenging, but with this plugin, you will be able to do it in a user-friendly manner, making your work easier. This package is fully customizable for your convenience.
#Features
-
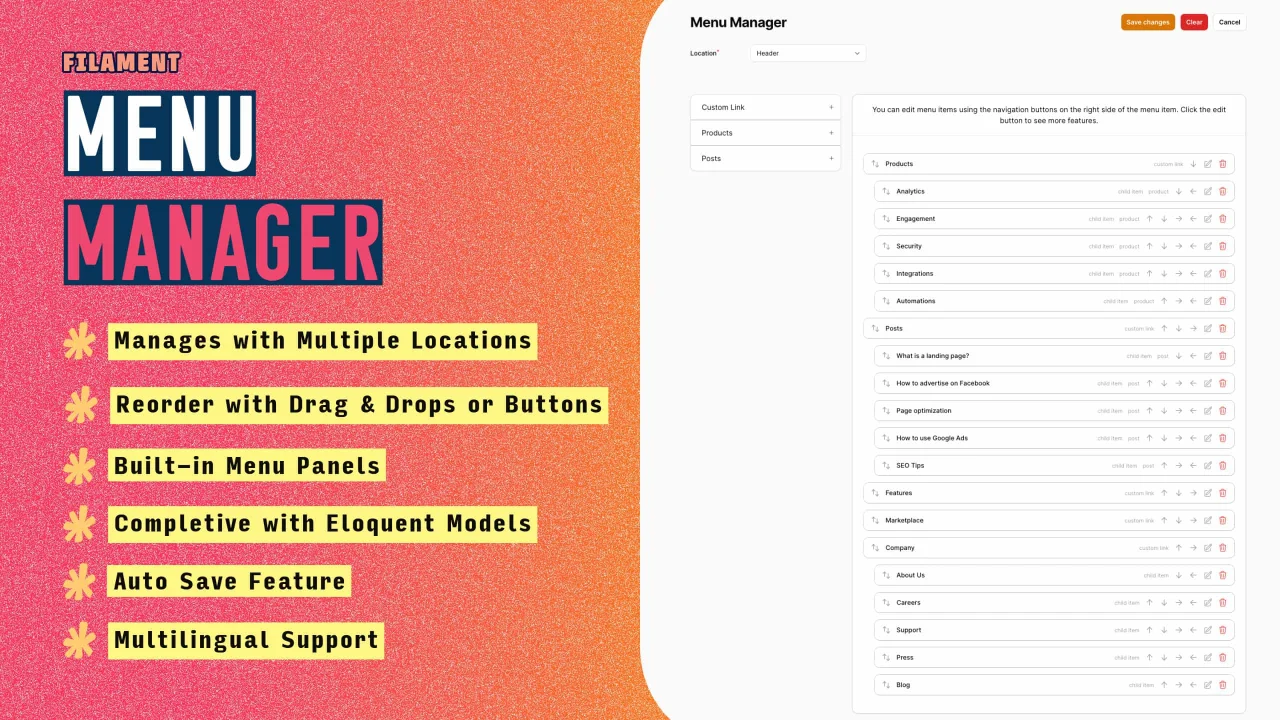
Effortlessly Manage Menus Across Multiple Locations 🚩 - Seamlessly manage your navigation menus across various locations within your application, ensuring consistent user experiences.
-
Intuitive Drag-and-Drop Menu Reordering 🖱️ - Easily rearrange your menu items to suit your site's structure and user navigation patterns with a simple drag-and-drop interface.
-
Reorder Menu Items with Precision Using Buttons 🔼🔽 - Fine-tune the order of your menu items for perfect alignment using straightforward up and down buttons.
-
Limit Menu Depth Based on Location 📏 - Customize the maximum depth of your menus for each location, keeping your navigation clean and user-friendly.
-
Design Custom Links for Your Menus 🔗 - Create and add bespoke links to your menus, directing users exactly where you want them to go.
-
Incorporate Fixed Links into Menu Items 📌 - Add permanent links to your menu items, ensuring essential pages are always one click away.
-
Enrich Menus with Existing Data and URLs 📂 - Dynamically add existing data to your menus, presenting them as navigable items with their URLs.
-
Craft Custom Menu Panels for Enhanced Navigation 🎨 - Design unique menu panels that reflect your brand and improve site navigation.
-
Translate Menu Texts for Global Accessibility 🌐 - Make your menus accessible to a global audience by translating texts into multiple languages.
-
Incorporate Location-Based Form Components 📍 - Enhance forms with components that adjust based on the user's location, improving relevance and user experience.
-
Utilize Panel-Based Form Components for Structured Data Collection 📋 - Collect information more efficiently with forms organized into logical, panel-based components.
-
Customize Default Form Components to Fit Your Needs ✏️ - Tailor the default form components to better suit your application's requirements and user expectations.
-
Secure Menu Actions with Authorization 🔒 - Ensure that only authorized users can modify or interact with menu items, protecting your site's integrity.
-
Auto-Save Feature for Instant Menu Updates 💾 - Changes to your menus are saved instantly with auto-save mode, ensuring no update is ever lost.
-
Seamlessly Display Menus on the Front End with Blade Directive 🖥️ - Use a special directive created for Blade to effortlessly integrate your menus into the front-end of your site.
-
Customize Your Menu Model 🛠️ - Replace the default menu model with your own to gain greater control over menu structure and functionality.
-
Personalize the Menu Manager Interface 🎚️ - Customize the look and functionality of the Menu Manager page to match your workflow and preferences.
-
Make Menu Items Multilingual 🌍 - Extend the reach of your menus with multilingual items, accommodating users from different linguistic backgrounds.
#Screenshots
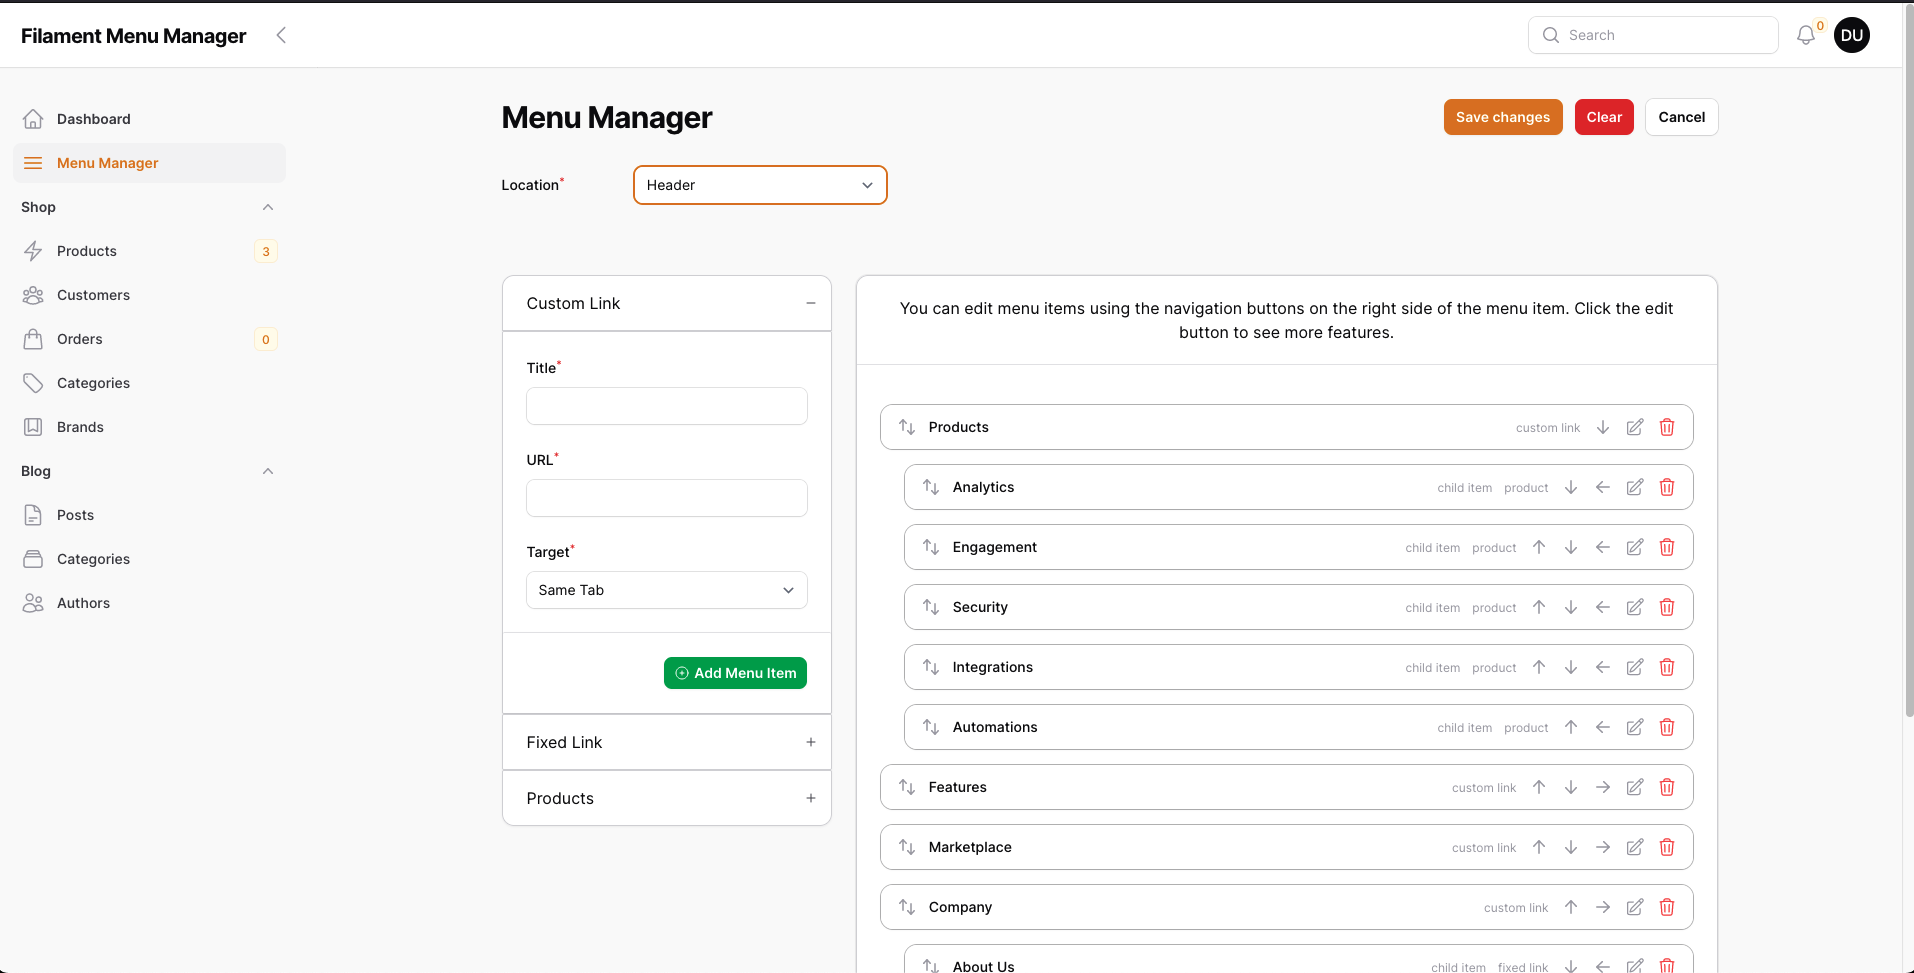
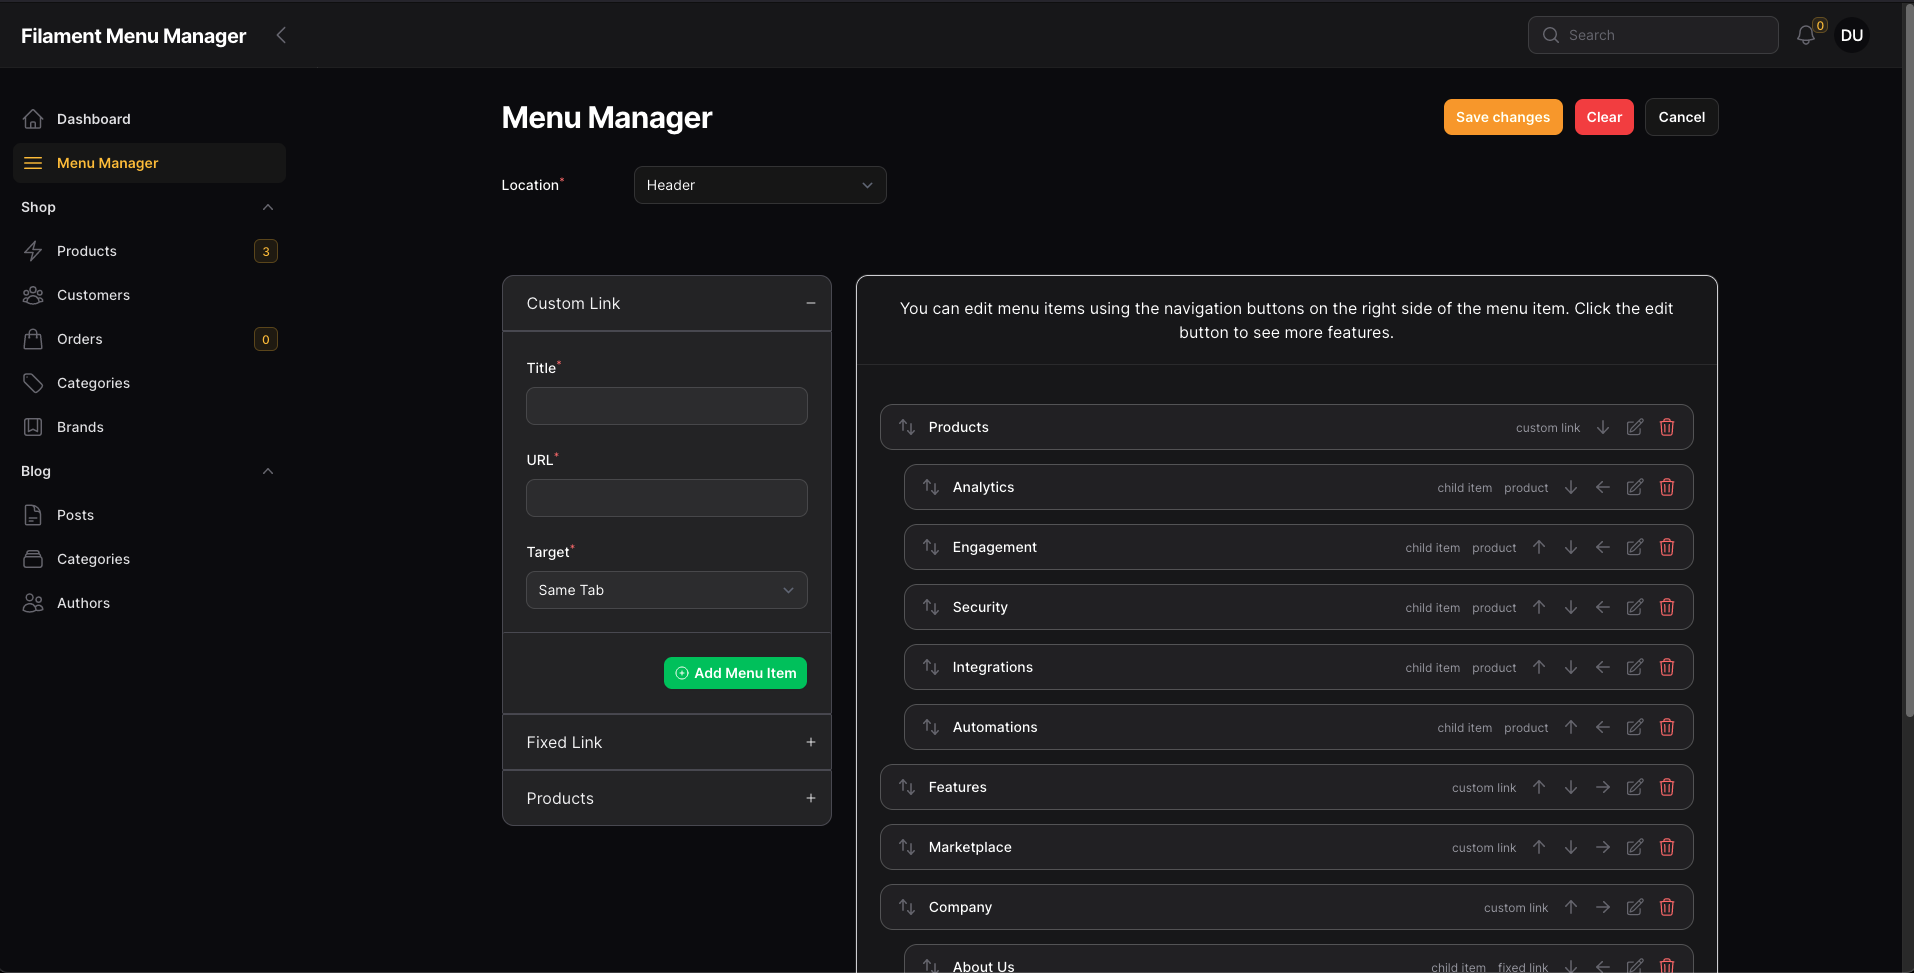
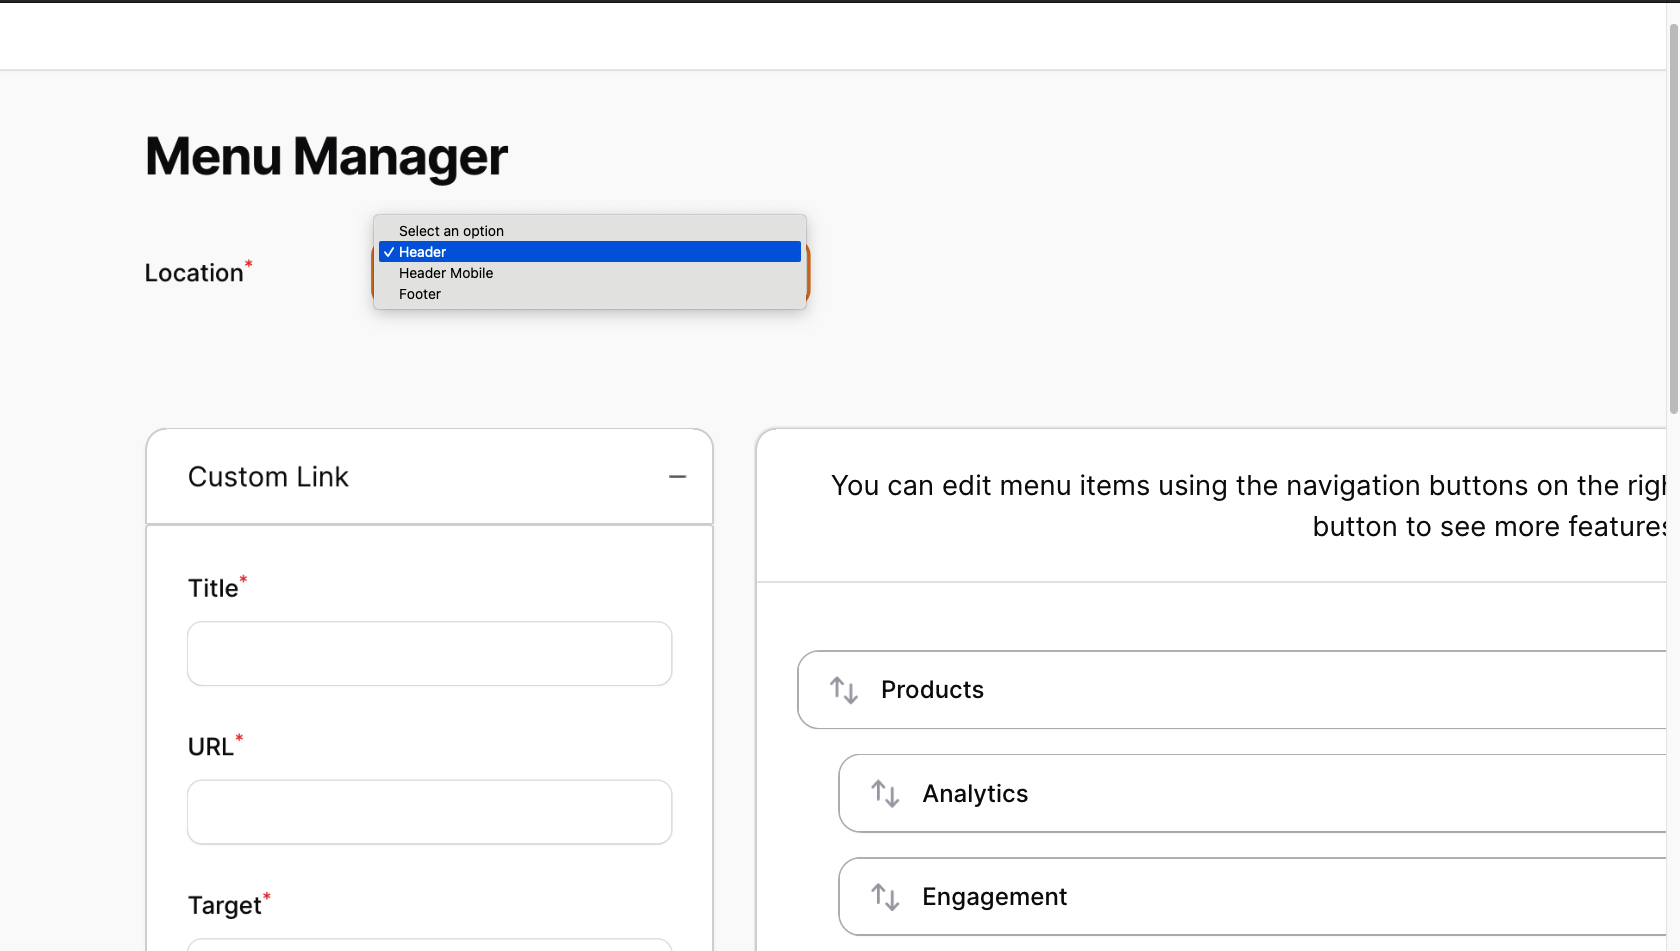
#Menu Manager Page (Light and Dark Theme)
The menu manager page lists menu items based on location. The menu panels you add are also displayed here.

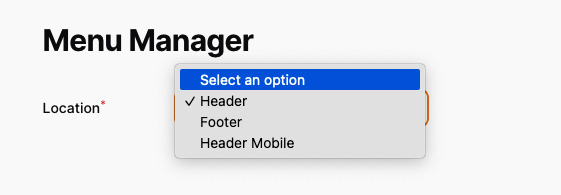
#Location Selector
You can add any locations you like and create items. Changing the default location is possible.
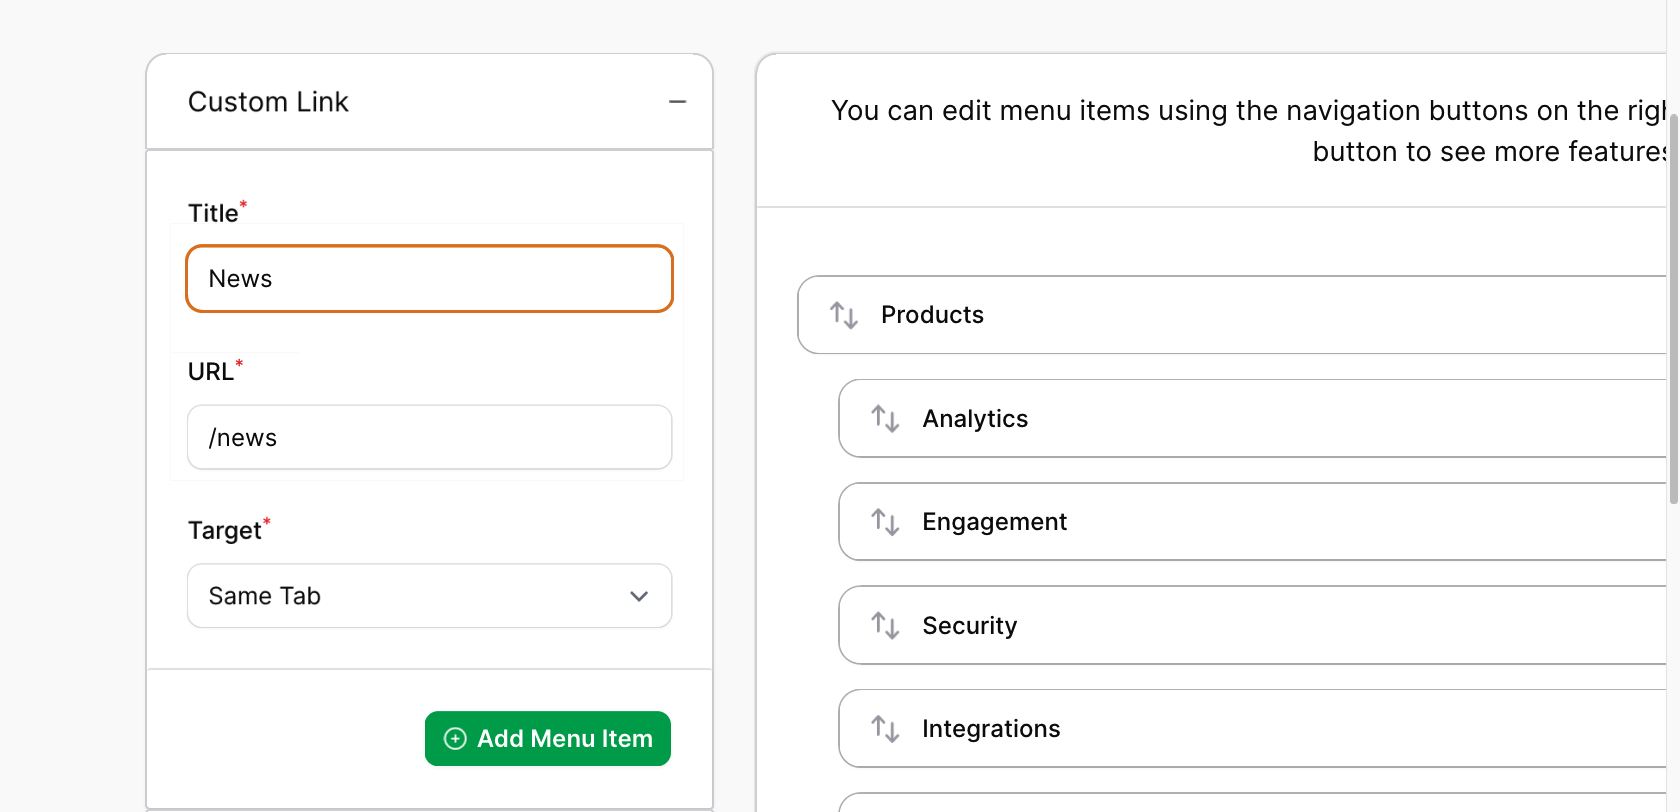
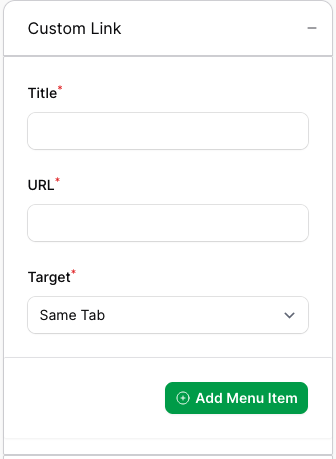
#Custom Link Panel
You can add any link you want as an item using this panel.
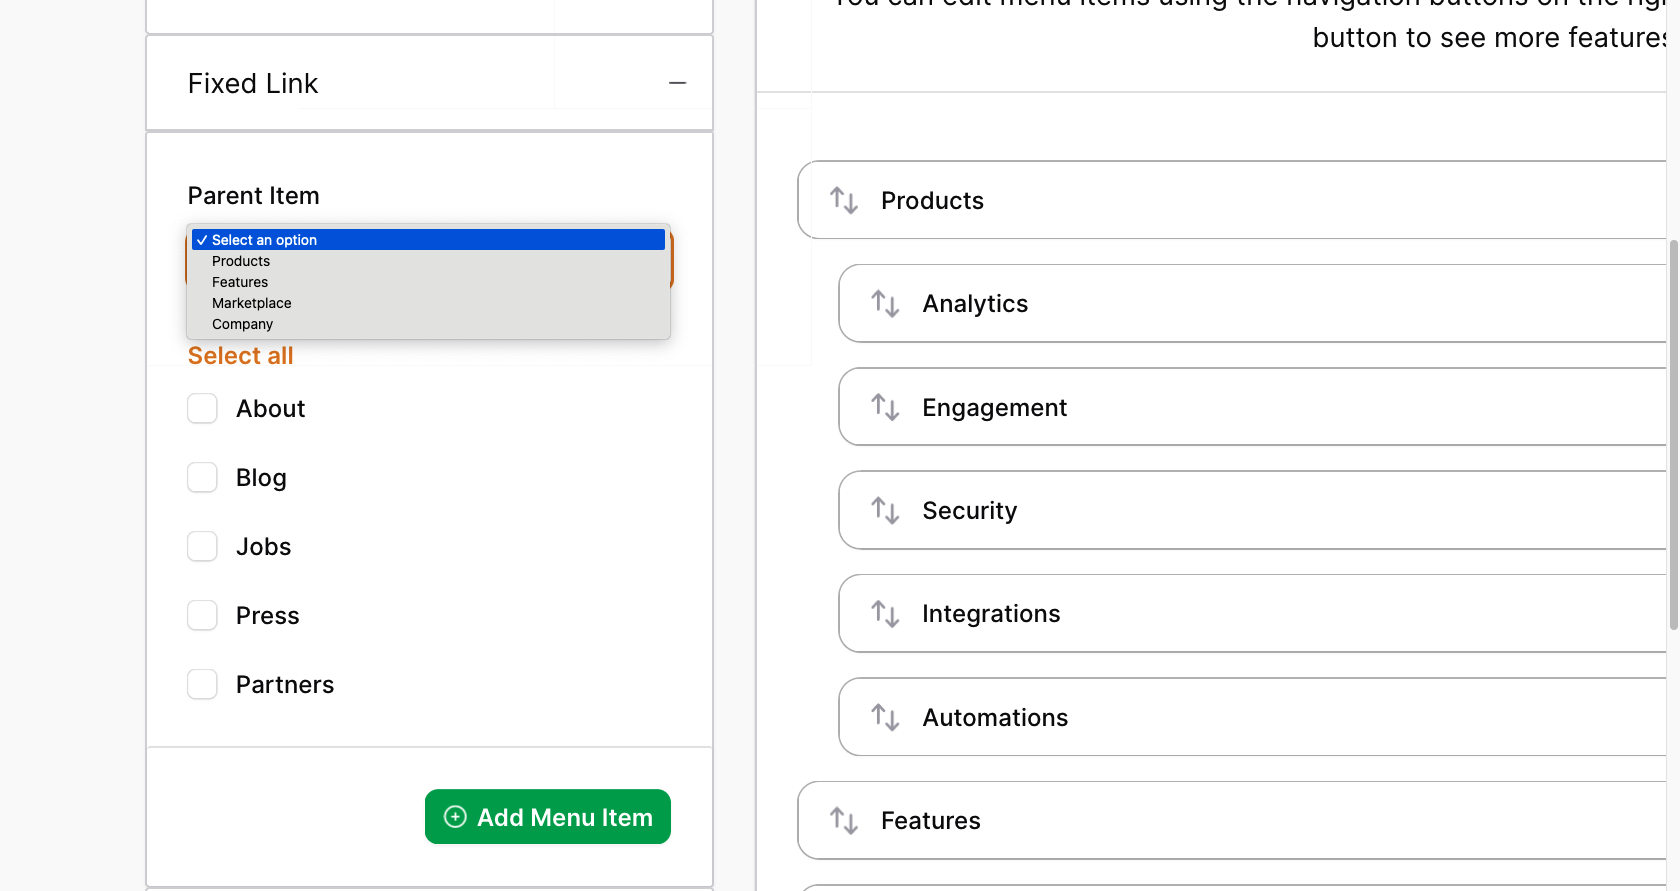
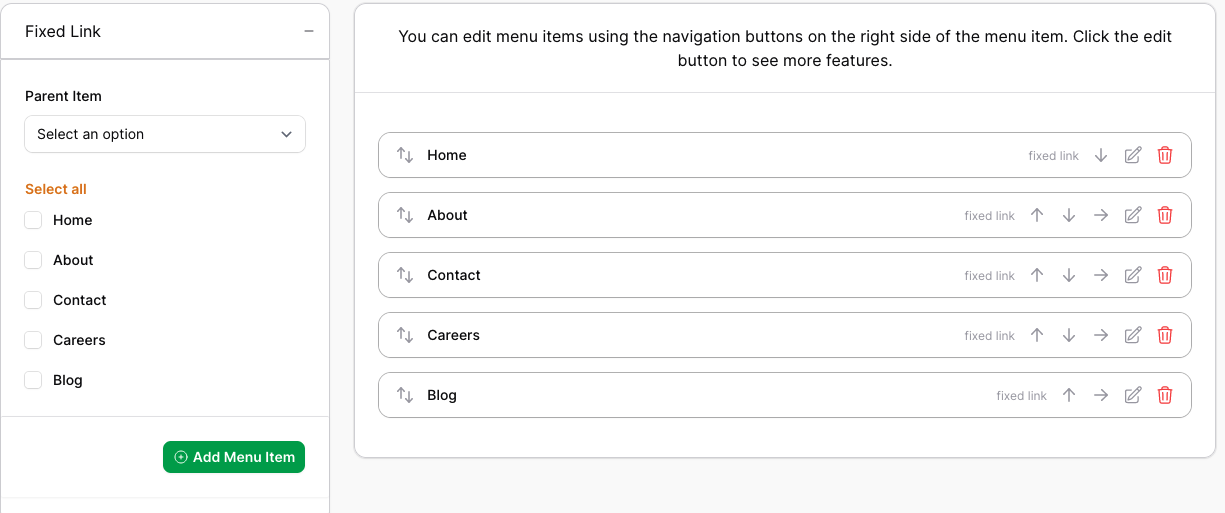
#Fixed Link Panel
Using this panel, you can add the fixed links you specify as items.
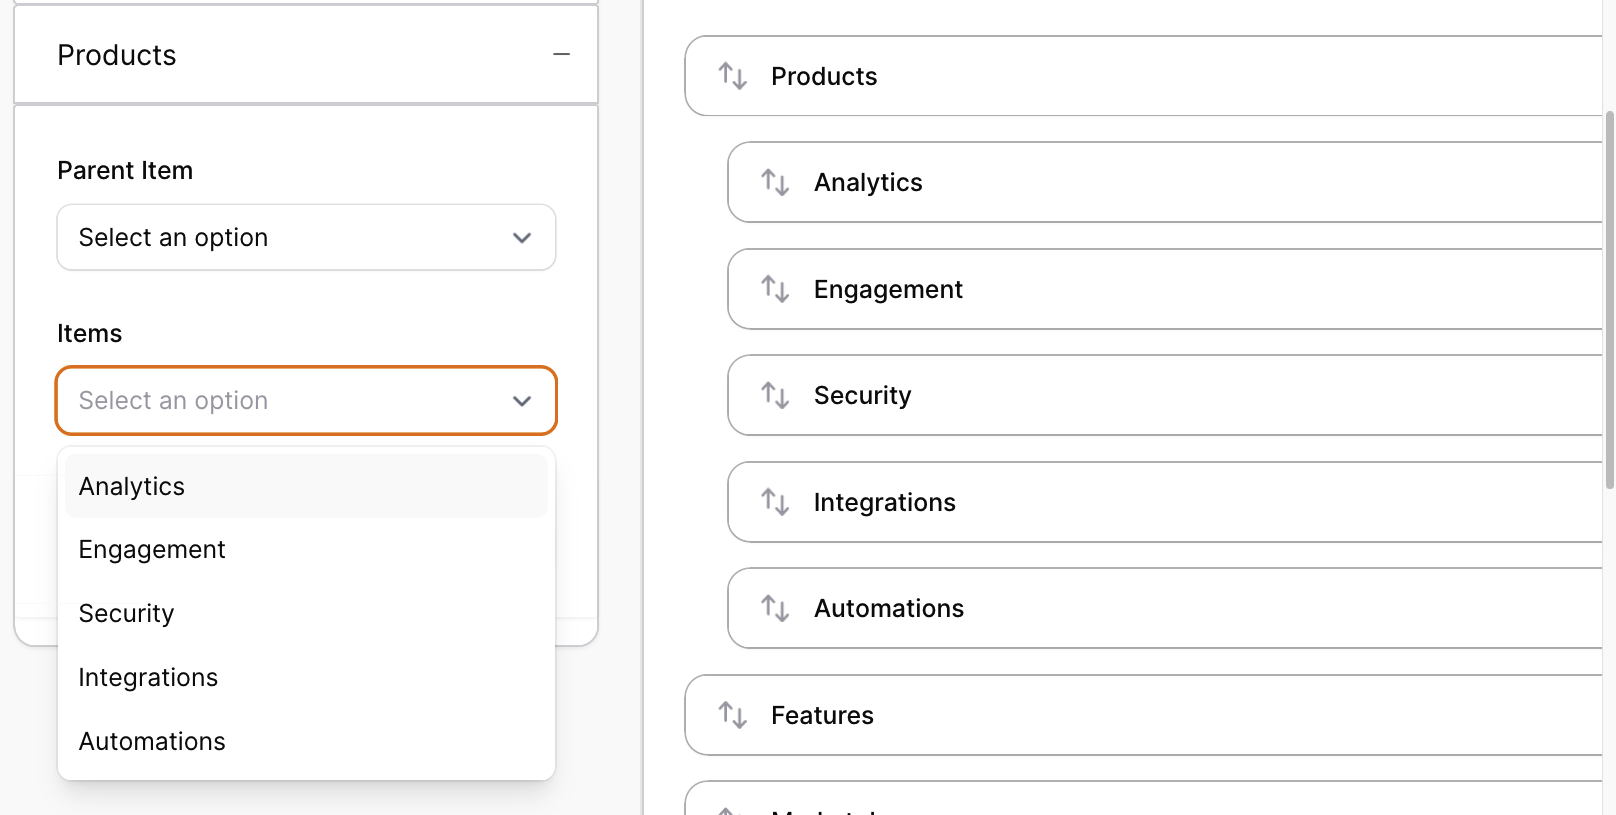
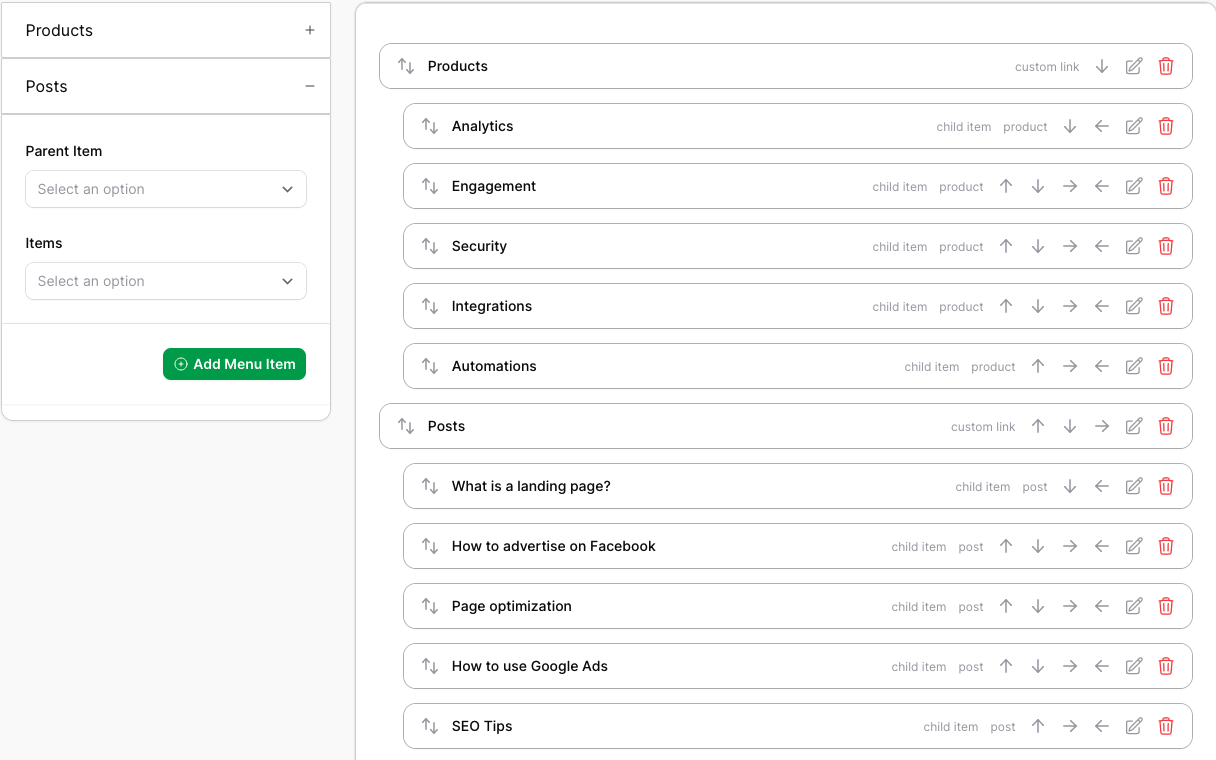
#Model Panel
Using this panel, you can show the models you set to use menu items as a panel. The example below shows the Product model as the menu is set to be available.
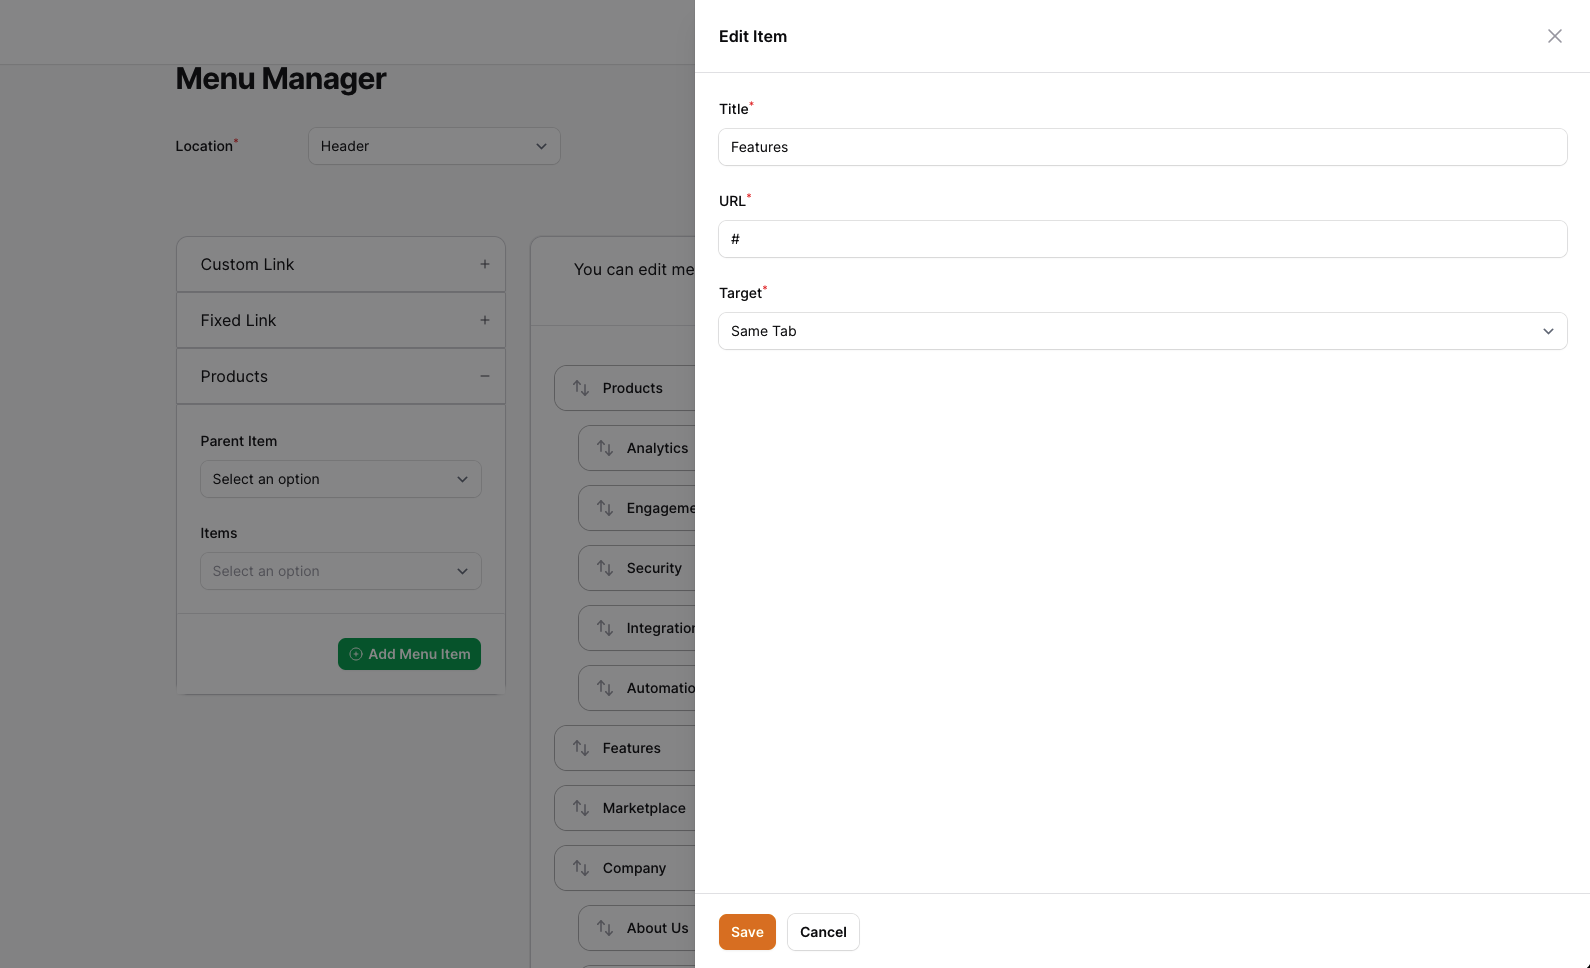
#Quick Edit
#Drag and Drop
#Reordering with Buttons
#Installation
Thank you for purchasing Menu Manager!
Below you will see the installation steps on how to install the menu manager. Of course, if you have any questions, find a bug, need support, or have a feature request, please don't hesitate to reach out to me at Discord or filamentmenumanager@gmail.com
#Requirements
- PHP: 8.2+
- MySQL: 5.7.24+ or Postgres
- Filament: 4.0+
- Laravel: 11.0+
#Installing with Composer
To install Menu Manager you'll need to add the package to your composer.json file:
{
    "repositories": [
        {
            "type": "composer",
            "url": "https://filament-menu-manager.composer.sh"
        }
    ],
}
Once the repository has been added to your composer.json file, you can install Menu Manager like any other composer package using the composer require command:
composer require ysfkaya/filament-menu-manager
Next, you will be prompted to provide your username and password.
Loading composer repositories with package information
Authentication required (filament-menu-manager.composer.sh):
Username: [licensee-email]
Password: [license-key]
Your username will be your email address and the password will is your license key, followed by a colon (:), followed by the domain you are activating. For example, let's say we have the following email and license activation:
- Contact email: email@gmail.com
- License key: 8c21df8f-6273-4932-b4ba-8bcc723ef500
- Activation fingerprint: fingerprint
You will need to enter the above information as follows when prompted for your credentials:
Loading composer repositories with package information
Authentication required (filament-menu-manager.composer.sh):
Username: my_email@gmail.com
Password: 8c21df8f-6273-4932-b4ba-8bcc723ef500:my_domain.com
The license key and fingerprint should be separated by a colon (:).
Tip: If you get a
402 error, most likely you forgot to add the colon and fingerprint.
#Setting up Menu Manager in Filament Panels
-
Publish and run the migrations
php artisan vendor:publish --tag="filament-menu-manager-migrations" php artisan migrate -
Publish the language files
Optionally, you may publish the language files:
php artisan vendor:publish --tag="filament-menu-manager-translations" -
Add Menu Manager to your Filament Panel
Add Menu Manager to a panel by instantiating the plugin class and passing it to the
plugins()method of the configuration:use Ysfkaya\Menu\MenuPlugin; public function panel(Panel $panel): Panel { return $panel ->default() ->plugins([ MenuPlugin::make() ]) } -
Publish Config (Optional)
If you want to change the default settings of the plugin, you can publish the config file.
php artisan vendor:publish --tag="filament-menu-manager-config" -
Publish Assets
After adding the plugin to your default panel, you need to publish the assets to see the style files used by the plugin.
php artisan filament:assets -
Add the views path to the your theme.css
If you are using a custom theme, you need to add the views path of the plugin to your
theme.cssfile (TailwindCss 4+)@source '../../../../vendor/ysfkaya/filament-menu-manager/resources/views/**/*';
#How it Works
The Menu Manager's database is based on nested sets and uses the Nested Set library for Laravel.
The purpose of the library is as stated in the documentation:
Nested sets or Nested Set Model is a way to effectively store hierarchical data in a relational table.
For more information, see the related library documentation.
In this plugin, the Menu Manager page, which is prepared using form components specially prepared for Filament, provides data update operations and saves them to the database. The menu tree is listed according to the location you select. Suppose you have performed relocation operations on the header location and even if you switch to the footer location without saving these changes, the changes you made in the header location will not be lost.
Menu panels are custom groups of menu items that you specify on the plugin page. With these panels you can add new items to your menu tree. The custom listener registered in MenuCard runs the special event that is dispatched on the panel and processes it in MenuCard.
During the saving process, it saves the data to the database in nested data logic by using the feature of the related library.
#Setting up the plugin
Once installed, you will see a new page called "Menu Manager" in your sidebar. On this page your users can change the location of the menu, add menu item, reorder, edit the added item via menu panels.
#Adding Locations
Locations refer to the areas in the front-end unit. You can use the locations to position each menu tree in different places.
use Ysfkaya\Menu\MenuPlugin;

public function panel(Panel $panel): Panel
{
    return $panel
        ->plugins([
            MenuPlugin::make()
                ->addLocation(name: 'header', label: 'Header', depth: 3)
                ->addLocation(name: 'footer', label: 'Footer', depth: 2)
                ->addLocation(name: 'header_mobile', label: 'Header Mobile', depth: 3),
        ])
}
When you set locations as in the example above, you will see Header and Footer titles in the location selector options on the Menu Manager page.
Since header location is set by default, when you first visit the plugin page, it will be set as selected and you will see the menu tree for the header location.
Note: If the default location is not set, the first location you add will be used by default.
#Configure Location Depth
The Depth parameter determines the maximum depth of the menu tree for the location you added.
If we take the example below, let's say your header menu will have menu items with a maximum depth of 3. Then the menu items you can add in the menu manager will be limited in this direction.
use Ysfkaya\Menu\MenuPlugin;

public function panel(Panel $panel): Panel
{
    return $panel
        ->plugins([
            MenuPlugin::make()
                ->addLocation(name: 'header', label: 'Header', depth: 3)
        ])
}
The maximum depth will be as follows.
header
├── Features
├── Products
│ ├── Analytics
│ ├── Engagement
│ └── Security
├── Marketplace
├── Company
│ ├── About Us
│ ├── Services
│ │ ├── Service 1
│ │ ├── Service 2
│ │ │ ├── Sub Service ---> This will not be displayed. Because its current level is 4.
└── Contact
#Setting up Menu Panels
Menu panels are used to add new items to your menu tree. You can do it quickly using the CustomMenuPanel, ModelMenuPanel and FixedMenuPanel panels built into this plugin.
In this topic, you will learn how to change the default menu panels and how to create custom menu panels that you can create according to your needs.
#CustomMenuPanel
This menu panel is a panel that you can use to add custom items to the menu tree. It used by default.
use Ysfkaya\Menu\MenuPlugin;
use Ysfkaya\Menu\Panels\CustomMenuPanel;

public function panel(Panel $panel): Panel
{
    return $panel
        ->plugins([
            MenuPlugin::make()
                ->addMenuPanel(fn() => CustomMenuPanel::make()),
        ])
}
You can change the default menu panel by using the defaultMenuPanel method.
use Ysfkaya\Menu\MenuPlugin;
use App\Menu\Panels\MyCustomMenuPanel;

public function panel(Panel $panel): Panel
{
    return $panel
        ->plugins([
            MenuPlugin::make()
                ->defaultMenuPanel(fn() => MyCustomMenuPanel::make()),
        ])
}
If you want to hide the menu panel based on a location or a condition, you can use the visible or hidden method.
use Ysfkaya\Menu\MenuPlugin;
use Ysfkaya\Menu\Panels\CustomMenuPanel;

public function panel(Panel $panel): Panel
{
    return $panel
        ->plugins([
            MenuPlugin::make()
                ->addLocation(name: 'header', label: 'Header', depth: 3)
                ->addLocation(name: 'footer', label: 'Footer', depth: 2)
                ->addMenuPanel(fn() => CustomMenuPanel::make()->visible(fn($location) => $location === 'header')),
        ])
}
#ModelMenuPanel
This menu panel is available for eloquent models. Once you have set up your model accordingly, you will be able to see your model in the menu panels section and you will be able to add related items to the panel using selectbox.
use Ysfkaya\Menu\MenuPlugin;
use Ysfkaya\Menu\Panels\ModelMenuPanel;

public function panel(Panel $panel): Panel
{
    return $panel
        ->plugins([
            MenuPlugin::make()
                ->addMenuPanel(fn() => ModelMenuPanel::make()),
        ])
}
After setting up the plugin, you need to add the HasMenu interfaces and the InteractsWithMenu trait to your model, as shown in the example below.
A Product model:
namespace App\Models\Shop;

// ...
use Ysfkaya\Menu\Concerns\InteractsWithMenu;
use Ysfkaya\Menu\Contracts\HasMenu;

class Product extends Model implements HasMenu
{
    use InteractsWithMenu;

    // ...

    public function getMenuLabel(): string;

    public function getMenuPanelSort(): int;

    public function getMenuPanelVisibility(): ?callable;

    public function getMenuSingularLabel(): string;

    public function getMenuTitleColumn(): string;

    public function getMenuUrlResolver(): callable;

    public function getMenuModifyQueryCallback(): ?callable;
}
A Post model:
namespace App\Models\Blog;

// ...
use Ysfkaya\Menu\Concerns\InteractsWithMenu;
use Ysfkaya\Menu\Contracts\HasMenu;

class Post extends Model implements HasMenu
{
    use InteractsWithMenu;

    // ...

    public function getMenuPanelSort(): int
    {
        return 2;
    }

    public function getMenuUrlResolver(): callable
    {
        return function (Post $model) {
            return route('post', ['slug' => $model->slug]);
        };
    }

    public function getMenuTitleColumn(): string
    {
        return 'title';
    }

    public function getMenuPanelVisibility(): ?callable
    {
        return function ($location) {
            return $location === 'header';
        };
    }
}
The ModelMenuPanel class automatically discovers all your models with the App\Models namespace in the app/Models path. If you want to add a 3rd party model to this panel, you can directly call the addModel function. You can also use the discoverModelsIn method to automatically save your models if they are in a different location.
Please note that the 3rd party model you will use must also have the
HasMenuinterface.
use Ysfkaya\Menu\MenuPlugin;
use Ysfkaya\Menu\Panels\ModelMenuPanel;

public function panel(Panel $panel): Panel
{
    return $panel
        ->plugins([
            MenuPlugin::make()
                ->addMenuPanel(
                    fn() => ModelMenuPanel::make()
                            ->addModel(ModelName::class)
                            ->discoverModelsIn(
                                path: app_path('Domain/Models'),
                                namespace: 'App\\Domain\\Models'
                            )
                ),
        ])
}
#FixedMenuPanel
If you have fixed url addresses on your site and want to show them in the menu panel, FixedMenuPanel will meet your needs.
use Ysfkaya\Menu\MenuPlugin;
use Ysfkaya\Menu\Panels\FixedMenuPanel;

public function panel(Panel $panel): Panel
{
    return $panel
        ->plugins([
            MenuPlugin::make()
                ->addMenuPanel(fn() =>
                    FixedMenuPanel::make()
                        ->addLink('Home', '/')
                        ->addLink('About', '/about')
                        ->addLink('Contact', '/contact')
                        // You can also add links with a single method
                        ->links([
                            [
                                'title' => 'Careers',
                                'url' => '/careers'
                            ],
                            [
                                'title' => 'Blog',
                                'url' => '/blog'
                            ],
                        ])
                ),
        ])
}
#Creating Your Own Menu Panel
Apart from the menu panels built into this plugin, you can create your own custom menu panels for your needs.
First, create a new menu panel class.
<?php

namespace App\Menu\Panels;

use App\Models\Blog\Category;
use Filament\Forms\Components\CheckboxList;
use Ysfkaya\Menu\Panels\MenuPanel;

class CategoriesMenuPanel extends MenuPanel
{
    protected ?string $name = 'category';

    protected function setUp(): void
    {
        parent::setUp();

        $this->label('Post Categories');
    }

    public function getSchema(): array
    {
        return [
            CheckboxList::make('categories')
                ->required()
                ->hiddenLabel()
                ->bulkToggleable()
                ->options(fn () => Category::pluck('name', 'id')),
        ];
    }

    /**
     * This method will be called when the panel item is added to the menu.
     *
     * IMPORTANT: Each value must be an array of items.
     *
     * @Example:
     *  [
     *    [
     *      'title' => 'Category 1',
     *      'url' => 'http://example.com/category-1',
     *      'target' => '_blank',
     *      'rel' => 'nofollow' // This value stored in the `data` column of the menu table.
     *    ]
     *  ]
     *
     * @param  array  $state  The state of the panel from components.
     *
     * @return array|null
     */
    public function added($state)
    {
        $categories = $state['categories'] ?? [];

        if (blank($categories)) {
            return [];
        }

        return Category::find($categories)->map(fn ($category) => [
            'title' => $category->name,
            'url' => url("/blog/categories/{$category->slug}")
        ])->toArray();
    }
}
After making the necessary adjustments, you need to add the plugin to your newly created menu panel.
use Ysfkaya\Menu\MenuPlugin;
use App\Menu\Panels\CategoriesMenuPanel;

public function panel(Panel $panel): Panel
{
    return $panel
        ->default()
        ->plugins([
            MenuPlugin::make()
                ->addLocation(name: 'header', label: 'Header', depth: 3)
                ->addMenuPanel(fn() => CategoriesMenuPanel::make())
        ])
}
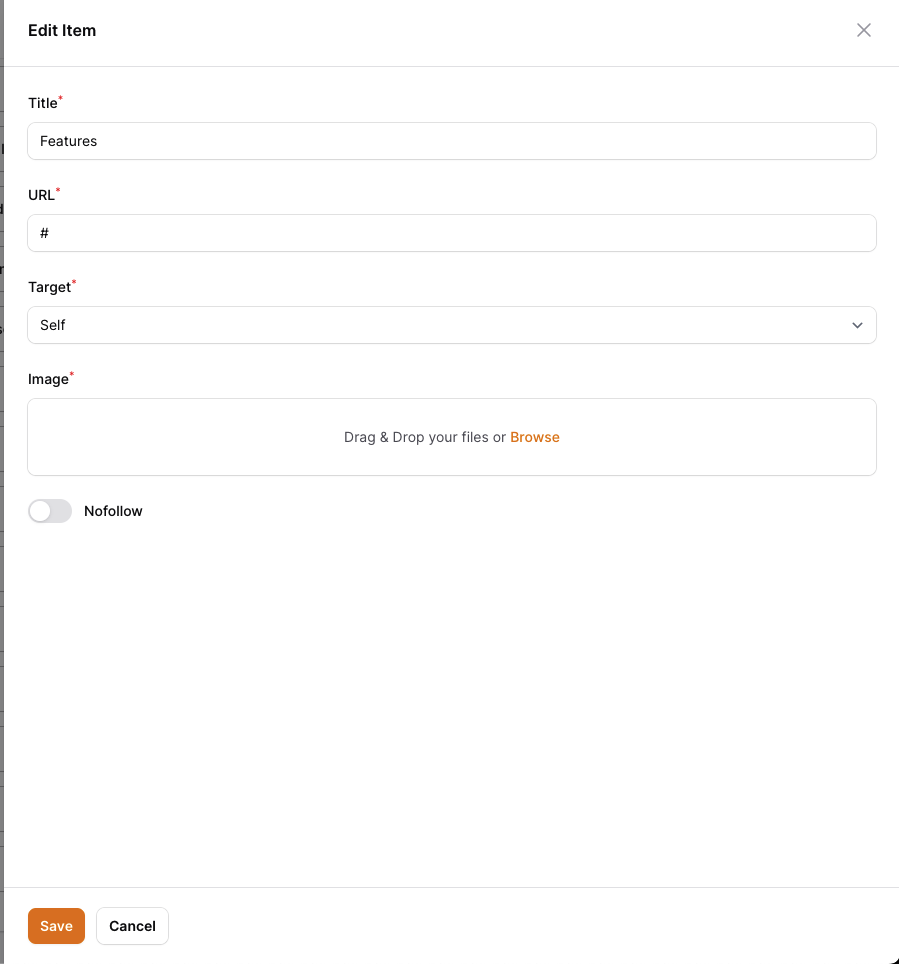
#Menu Item Form Components
When you add an item to the menu, you can edit it with the form components prepared using Filament's form builder.
You can edit the default form components, the form components of the item belonging to the added menu panel or the form components used according to the location.
#Changing Default Form Components
The default form components are currently as follows.
[
    Forms\Components\TextInput::make('title')
        ->label('Title')
        ->required(),

    Forms\Components\TextInput::make('url')
        ->label('Url')
        ->validationAttribute('url')
        ->required(),

    Forms\Components\Select::make('target')
        ->label('Target')
        ->default('_self')
        ->options([
            '_self' => 'Same Tab',
            '_blank' => 'New Tab',
        ])->required()
]
These components are the form elements you will see when you want to edit the menu item. You can use the following method to change them.
use Ysfkaya\Menu\MenuPlugin;
use Filament\Forms;

public function panel(Panel $panel): Panel
{
    return $panel
        ->default()
        ->plugins([
            MenuPlugin::make()
                ->formComponents([
                       Forms\Components\TextInput::make('title')
                            ->label('Title')
                            ->autofocus()
                            ->required(),

                        Forms\Components\TextInput::make('url')
                            ->label('URL')
                            ->required(),

                        Forms\Components\Select::make('target')
                            ->label('Target')
                            ->options([
                                '_self' => 'Self',
                                '_blank' => 'Blank',
                                '_top' => 'Top',
                                '_parent' => 'Parent',
                            ])
                            ->default('_self')
                            ->required(),

                        Forms\Components\FileUpload::make('image')
                            ->label('Image')
                            ->image()
                            ->required(),

                        Forms\Components\Toggle::make('nofollow')
                                ->label('Nofollow'),
                ]),
        ])
}
This plugin has some fixture data columns in the database table.
| related_id | related_type | _lft | _rgt | parent_id | title | url | target | location | locale | item | data |
|---|
Any attribute added outside the above columns will be automatically stored in the
datacolumn
#Form Components by Location
If you want to add a location based form component, you can use the following method.
use Ysfkaya\Menu\MenuPlugin;
use Filament\Forms;

public function panel(Panel $panel): Panel
{
    return $panel
        ->default()
        ->plugins([
            MenuPlugin::make()
                ->addLocation(name: 'header', label: __('Header'), depth: 3)
                ->addLocation(name: 'footer', label: __('Footer'), depth: 2)
                ->formComponentsLocationFor('header', [
                    Forms\Components\FileUpload::make('image')
                        ->label('Image')
                        ->image()
                        ->visible(fn ($get) => (int) $get('level') >= 2) // Only visible for level 2 and up
                        ->required(),
                ]),
        ])
}
When you use this method, it will add FileUpload component after the default form components. This means that every component you add will be used with the default form components.
If you don't want to use the header form components with the default ones, just set the merge parameter to false.
use Ysfkaya\Menu\MenuPlugin;
use Filament\Forms;

public function panel(Panel $panel): Panel
{
    return $panel
        ->default()
        ->plugins([
            MenuPlugin::make()
                ->addLocation(name: 'header', label: __('Header'), depth: 3)
                ->addLocation(name: 'footer', label: __('Footer'), depth: 2)
                ->formComponentsLocationFor('header', [
                    // ...rest form components

                    Forms\Components\FileUpload::make('image')
                        ->label('Image')
                        ->image()
                        ->visible(fn ($get) => (int) $get('level') >= 2) // Only visible for level 2 and up
                        ->required(),
                ], merge: false),
        ])
}
#Form Components by Menu Panel
You can also check the example below to add form components for menu panels.
use Ysfkaya\Menu\MenuPlugin;
use Filament\Forms;
use Ysfkaya\Menu\Panels\CustomMenuPanel;

public function panel(Panel $panel): Panel
{
    return $panel
        ->default()
        ->plugins([
            MenuPlugin::make()
                ->formComponentsItemFor(CustomMenuPanel::class, [
                    Forms\Components\FileUpload::make('image')
                        ->label('Image')
                        ->image()
                        ->required(),
                ]),
        ])
}
When you use this way, form components will only appear in menu items that belong to CustomMenuModel.
In the example, it was used with the class name, but you can also use it based on the panel name.
MenuPlugin::make()
    ->formComponentsItemFor('custom_link', [
        // ...
    ], merge: false), // set merge parameter to false to use it without default form components
If your menu items have any item used from the eloquent model, you can add it to the form components using the model class name or customize it completely from that model.
use Ysfkaya\Menu\MenuPlugin;
use Filament\Forms;
use Ysfkaya\Menu\Panels\CustomMenuPanel;
use App\Models\Blog\Post;
use App\Models\Shop\Product;

public function panel(Panel $panel): Panel
{
    return $panel
        ->default()
        ->plugins([
            MenuPlugin::make()
                ->addMenuPanel(fn () => ModelMenuPanel::make())
                ->formComponentsItemFor(Post::class, [
                    // ...
                ])
                ->formComponentsItemFor(Product::class, [
                    // ...
                ], merge: false), // to use it without default form components
        ])
}
#Enabling Auto Save Mode
If you want to save the changes you make to the menu tree instantly, you can use the autoSave() method.
use Ysfkaya\Menu\MenuPlugin;

public function panel(Panel $panel): Panel
{
    return $panel
        ->default()
        ->plugins([
            MenuPlugin::make()
                ->autoSave(
                    condition: bool | callable, // default: true
                    showAutoSaveEnabledInformation: bool | callable, // default: false
                )
        ])
}
When you activate the autosave feature, it will automatically save to the database when a new item is added to your menu tree, when the sorting is changed or when a new item is added. If you want to activate this feature for specific action types, you can use the following method.
use Ysfkaya\Menu\MenuPlugin;
use Ysfkaya\Menu\Enums\ActionType;

public function panel(Panel $panel): Panel
{
    return $panel
        ->default()
        ->plugins([
            MenuPlugin::make()
                ->autoSave(
                    condition: function(string $location, ?ActionType $actionType = null){
                        // Disable autosave for adding new item
                        if($actionType === ActionType::ADD){
                            return false;
                        }

                        return true;
                    }
                )
        ])
}
For more action types, see the ActionType enum.
ActionType::INIT only works when the initial state of the component is hydrate. So you don't need to set a constraint for it.
If you want to show the user that the auto save feature is active, you can use the showAutoSaveEnabledInformation parameter.
use Ysfkaya\Menu\MenuPlugin;

public function panel(Panel $panel): Panel
{
    return $panel
        ->default()
        ->plugins([
            MenuPlugin::make()
                ->autoSave(
                    showAutoSaveEnabledInformation: true
                )
        ])
}
#Translatable
If your website supports multiple languages, you may want to display menu items according to the language of the site. For this, you can simply activate the translatable feature using the functions you see below in this plugin.
Please note: This is not compatible with
Spatie's Translatable. This plugin's multilingual support is built on its own database structure.
use Ysfkaya\Menu\MenuPlugin;

public function panel(Panel $panel): Panel
{
    return $panel
        ->default()
        ->plugins([
            MenuPlugin::make()
                ->translatable(
                    condition: bool | \Closure,
                    locales: array | \Closure | default: null,
                    duplicateNodesAfterLocaleChange: bool | \Closure | default: false,
                    fillEmptyTranslatableNodes: bool | \Closure | default: false
                )
                ->translatableLocales(locales: array)
                ->duplicateNodesAfterLocaleChange(condition: bool | \Closure)
                ->fillEmptyTranslatableNodes(condition: bool | \Closure)
                ->getLocaleLabelUsing(callback: \Closure),
        ])
}

You can pass a set of locales to the plugin method using the translatable or the translatableLocales to set locales that can be used to translate the menu tree:
use Ysfkaya\Menu\MenuPlugin;

public function panel(Panel $panel): Panel
{
    return $panel
        ->default()
        ->plugins([
            MenuPlugin::make()
                ->translatable(locales: ['en', 'tr', 'es'])
                // or
                ->translatableLocales(['en', 'tr', 'es'])
        ])
}
By default, when changing the language, the menu tree is reset and shows the data for the selected language. Therefore, if there is no data in the selected language, you can duplicate the menu tree of the previous language to the new menu tree.
use Ysfkaya\Menu\MenuPlugin;

public function panel(Panel $panel): Panel
{
    return $panel
        ->default()
        ->plugins([
            MenuPlugin::make()
                ->translatable(duplicateNodesAfterLocaleChange: true)
                // or
                ->duplicateNodesAfterLocaleChange()
        ])
}
Since this feature was added to the plugin later, if you have data saved in a previous version and want to apply a translation, you may find that your previous data will not be reflected in the menu tree. For this, you can use the following method to make your menu items with locale value null language compatible.
use Ysfkaya\Menu\MenuPlugin;

public function panel(Panel $panel): Panel
{
    return $panel
        ->default()
        ->plugins([
            MenuPlugin::make()
                ->translatable(fillEmptyTranslatableNodes: true)
                // or
                ->fillEmptyTranslatableNodes()
        ])
}
Of course, this feature can also be used when you add a language feature to your application later.
#Authorization
Using the authorization methods in the plugin, you can perform the actions you want to hide depending on the situation.
use Ysfkaya\Menu\MenuPlugin;

public function panel(Panel $panel): Panel
{
    return $panel
        ->default()
        ->plugins([
            MenuPlugin::make()
                ->authorizePage(bool | \Closure $condition = true)
                ->deletable(bool | \Closure $condition = true)
                ->editable(bool | \Closure $condition = true)
                ->cloneable(bool | \Closure $condition = false)
                ->reorderWithDragAndDrop(bool | \Closure $condition = true)
                ->reorderWithButtons(bool | \Closure $condition = true)
                ->cancelActionEnabled(bool | \Closure $condition = true)
                ->clearActionEnabled(bool | \Closure $condition = true)
                ->saveActionEnabled(bool | \Closure $condition = true)
                ->showChildItemHint(bool | \Closure $condition = true)
        ])
}
You can access some item values within deletable, editable, cloneable, reorderWithDragAndDrop, reorderWithButtons, showChildItemHint methods.
use Ysfkaya\Menu\MenuPlugin;

public function panel(Panel $panel): Panel
{
    return $panel
        ->default()
        ->plugins([
            MenuPlugin::make()
                ->editable(fn ($location, $itemState, $level, $path) => data_get($itemState, 'title') !== 'Home')
        ])
}
Table below shows the expected values for each method.
| Parameter | Description | Type | Example |
|---|---|---|---|
$location |
The location of the menu tree. | string | header |
$itemState |
The state of the item. | array | ['title' => 'Home', 'url' => '/', 'target' => '_self'] |
$level |
The level of the item. | int | 1 |
$path |
The state path of the item. | string | 743209aa-6493-4a94-8097-e61072cc361b.080e3bd5-3830-4f59-ba2f-baff1adfe20a |
#Customizing page navigation details
If you want to customize the navigation details of the Menu Manager page, you can configure it using the dedicated methods on the plugin when configuring it:
use Ysfkaya\Menu\MenuPlugin;

public function panel(Panel $panel): Panel
{
    return $panel
        ->default()
        ->plugins([
            MenuPlugin::make()
                ->navigationGroup('CMS')
                ->navigationSort(1)
                ->navigationLabel('Menu Manager')
                ->navigationIcon('heroicon-o-rectangle-group')
                ->activeNavigationIcon('heroicon-o-rectangle-group')
                ->pageTitle('Menu Manager')
                ->slug('menu-manager')
        ])
}
#Customizing the page
If you want to customise or override other aspects of the page, you can create a new class in your project that extends the Ysfkaya\Menu\Pages\MenuManager page. In this class you can override everything you want to customize, like the title, navigation label or navigatin group.
Finally, you should register the new page in Filament by using the usingPage() method on the MenuPlugin:
use Ysfkaya\Menu\MenuPlugin;
use App\Pages\MenuManager;

public function panel(Panel $panel): Panel
{
    return $panel
        ->default()
        ->plugins([
            MenuPlugin::make()
                ->usingPage(MenuManager::class)
        ])
}
#Adding hooks to actions
After the actions in the plugin (add, edit, delete, clone, reorder, moveUp, moveDown, indent, dedent) are triggered, you may want to do some processing.
It is possible to perform these operations with reference to the following methods
use Ysfkaya\Menu\MenuPlugin;
use Ysfkaya\Menu\Forms\MenuPanelItem;
use Filament\Forms\ComponentContainer;
use Filament\Forms\Components\Actions\Action;
use Illuminate\Database\Eloquent\Model;

public function panel(Panel $panel): Panel
{
    return $panel
        ->default()
        ->plugins([
            MenuPlugin::make()
                ->afterAddAction(function (string $panel, array $data, array $formData, MenuPanelItem $menuItem, ComponentContainer $container) {
                    // Do something after the add action
                })
                ->afterEditAction(function (Action $action, array $data, array $arguments, ?int $recordId = null, ?Model $record = null) {
                    // Do something after the edit action
                })
                ->afterDeleteAction(function (Action $action, array $arguments) {
                    // Do something after the delete action
                })
                ->afterCloneAction(function (Action $action, array $arguments, array $items) {
                    // Do something after the clone action
                })
                ->afterReorderAction(function (Action $action, array $arguments, array $items) {
                    // Do something after the reorder action
                })
                ->afterMoveUpAction(function (Action $action, array $arguments, array $items) {
                    // Do something after the move up action
                })
                ->afterMoveDownAction(function (Action $action, array $arguments, array $items) {
                    // Do something after the move down action
                })
                ->afterIndentAction(function (Action $action, array $arguments, array $items) {
                    // Do something after the indent action
                })
                ->afterDedentAction(function (Action $action, array $arguments, array $items) {
                    // Do something after the dedent action
                })
        ])
}
#Rendering Navigation
After all the adjustments, you are now ready to show the menu you will create in the frontend section. In this section we will see how to render your saved menu tree.
Menu rendering will currently be shown through Laravel's Blade template engine. With this plugin, a directive prepared for Blade will help you with rendering.
@menu(string $location, string $view, string $dataKey = 'tree', array $viewData = [])
$locationis the location you want to render.$viewis the view you want to render.$dataKeyis the key of the data you want to send to the view.$viewDatais the data you want to send to the view.$localeif the translatable feature is active, you can pass the locale you want to render otherwise it will use the current locale.
#Examples
This example is based on a layout prepared on TailwindCSS. You can implement this example with reference to your own template using the structure you want.
#Plugin Config
use Ysfkaya\Menu\MenuPlugin;

public function panel(Panel $panel): Panel
{
    return $panel
        ->default()
        ->plugins([
            MenuPlugin::make()
                ->addLocation(name: 'header', label: 'Header', depth: 2)
                ->addLocation(name: 'footer', label: 'Footer', depth: 2)
                ->formComponentsLocationFor('header', [
                    Forms\Components\FileUpload::make('icon')->label('Icon')->image()
                ])
        ])
}
#Layout
{{-- views/components/layouts/app.blade.php --}}

<!DOCTYPE html>
<html lang="{{ str_replace('_', '-', app()->getLocale()) }}">
    <head>
        <meta charset="utf-8" />

        <meta name="application-name" content="{{ config('app.name') }}" />
        <meta name="csrf-token" content="{{ csrf_token() }}" />
        <meta name="viewport" content="width=device-width, initial-scale=1" />

        <title>{{ config('app.name') }}</title>

        <style>
            [x-cloak] {
                display: none !important;
            }
        </style>

        @vite(['resources/css/app.css', 'resources/css/app.js'])
    </head>

    <body class="antialiased">
        @menu('header', 'components.layouts.header')

        {{ $slot }}

        @menu('footer', 'components.layouts.footer')
    </body>
</html>
#Header
{{-- views/components/layouts/header.blade.php --}}

<nav class="bg-white border-gray-200 dark:bg-gray-900">
    <div class="flex flex-wrap items-center justify-between max-w-screen-xl mx-auto p-4">
        <a href="#" class="flex items-center space-x-3 rtl:space-x-reverse">
            <img src="logo-url" class="h-8" />
            <span class="self-center text-2xl font-semibold whitespace-nowrap dark:text-white">Brand Name</span>
        </a>
        <div class="flex items-center md:order-2 space-x-1 md:space-x-2 rtl:space-x-reverse">
            <a href="#" class="text-gray-800 dark:text-white hover:bg-gray-50 focus:ring-4 focus:ring-gray-300 font-medium rounded-lg text-sm px-4 py-2 md:px-5 md:py-2.5 dark:hover:bg-gray-700 focus:outline-none dark:focus:ring-gray-800">Login</a>
            <a href="#" class="text-white bg-blue-700 hover:bg-blue-800 focus:ring-4 focus:ring-blue-300 font-medium rounded-lg text-sm px-4 py-2 md:px-5 md:py-2.5 dark:bg-blue-600 dark:hover:bg-blue-700 focus:outline-none dark:focus:ring-blue-800">Sign up</a>
            <button data-collapse-toggle="mega-menu-icons" type="button" class="inline-flex items-center p-2 w-10 h-10 justify-center text-sm text-gray-500 rounded-lg md:hidden hover:bg-gray-100 focus:outline-none focus:ring-2 focus:ring-gray-200 dark:text-gray-400 dark:hover:bg-gray-700 dark:focus:ring-gray-600" aria-controls="mega-menu-icons" aria-expanded="false">
                <span class="sr-only">Open main menu</span>
                <svg class="w-5 h-5" aria-hidden="true" xmlns="http://www.w3.org/2000/svg" fill="none" viewBox="0 0 17 14">
                    <path stroke="currentColor" stroke-linecap="round" stroke-linejoin="round" stroke-width="2" d="M1 1h15M1 7h15M1 13h15"/>
                </svg>
            </button>
        </div>
        <div id="mega-menu-icons" class="items-center justify-between hidden w-full md:flex md:w-auto md:order-1">
            <ul class="flex flex-col mt-4 font-medium md:flex-row md:mt-0 md:space-x-8 rtl:space-x-reverse">
                @foreach ($tree as $item)

                    @if (! $item->hasChildren())
                        <li>
                            <a href="{{ $item->url }}" target="{{ $item->target }}" class="block py-2 px-3 text-blue-600 border-b border-gray-100 hover:bg-gray-50 md:hover:bg-transparent md:border-0 md:hover:text-blue-600 md:p-0 dark:text-blue-500 md:dark:hover:text-blue-500 dark:hover:bg-gray-700 dark:hover:text-blue-500 md:dark:hover:bg-transparent dark:border-gray-700" aria-current="page">
                                {{ $item->title }}
                            </a>
                        </li>
                    @else
                        <li>
                            <button id="mega-menu-icons-dropdown-button" data-dropdown-toggle="mega-menu-icons-dropdown" class="flex items-center justify-between w-full py-2 px-3 font-medium text-gray-900 border-b border-gray-100 md:w-auto hover:bg-gray-50 md:hover:bg-transparent md:border-0 md:hover:text-blue-600 md:p-0 dark:text-white md:dark:hover:text-blue-500 dark:hover:bg-gray-700 dark:hover:text-blue-500 md:dark:hover:bg-transparent dark:border-gray-700">
                                {{ $item->title }}
                                <svg class="w-2.5 h-2.5 ms-3" aria-hidden="true" xmlns="http://www.w3.org/2000/svg" fill="none" viewBox="0 0 10 6">
                                    <path stroke="currentColor" stroke-linecap="round" stroke-linejoin="round" stroke-width="2" d="m1 1 4 4 4-4"/>
                                </svg>
                            </button>
                            <div id="mega-menu-icons-dropdown" class="absolute z-10 grid hidden w-auto grid-cols-2 text-sm bg-white border border-gray-100 rounded-lg shadow-md dark:border-gray-700 md:grid-cols-3 dark:bg-gray-700">
                                @foreach ($item->children->toCollection()->chunk(4) as $children)
                                    <div class="p-4 pb-0 text-gray-900 md:pb-4 dark:text-white">
                                        <ul class="space-y-4" aria-labelledby="mega-menu-icons-dropdown-button">
                                            @foreach ($children as $childItem)
                                                <li>
                                                    <a href="{{ $childItem->url }}" target="{{ $childItem->target }}" class="flex items-center text-gray-500 dark:text-gray-400 hover:text-blue-600 dark:hover:text-blue-500 group">
                                                        @if ($childItem->icon)
                                                            <img src="{{ Storage::url($item->icon) }}" class="w-4 h-4 me-2" />
                                                        @endif

                                                        {{ $childItem->title }}
                                                    </a>
                                                </li>
                                            @endforeach
                                        </ul>
                                    </div>
                                @endforeach
                            </div>
                        </li>
                    @endif

                @endforeach
            </ul>
        </div>
    </div>
</nav>
#Footer
{{-- views/components/layouts/footer.blade.php --}}

<footer class="bg-white dark:bg-gray-900">
    <div class="mx-auto w-full max-w-screen-xl">
      <div class="grid grid-cols-2 gap-8 px-4 py-6 lg:py-8 md:grid-cols-4">
        @foreach ($tree as $item)
            <div>
                <h2 class="mb-6 text-sm font-semibold text-gray-900 uppercase dark:text-white">
                    {{ $item->title }}
                </h2>
                <ul class="text-gray-500 dark:text-gray-400 font-medium">
                    @foreach ($item->children as $childItem)
                        <li class="mb-4">
                            <a href="{{ $childItem->url }}" target="{{ $childItem->target }}" class="hover:underline">
                                {{ $childItem->title }}
                            </a>
                        </li>
                    @endforeach
                </ul>
            </div>
        @endforeach
    </div>
</footer>
#Using Prebuilt Views
If you want to use pre-built views, you can use the following methods. However, it should be noted that the images presented in this plugin are purely examples and will help you decide how you want to integrate your own view in the frontend. It will be your decision whether to use it on the production side or not.
[!WARNING]
All views are prepared with TailwindCSS and Alpine.js. So that you should add these libraries to your project.
You can publish the views to your project using the following command.
php artisan vendor:publish --tag="menu-manager-views"
// tailwind.config.js

//...
export default {
  content: [
    // ...
    "./vendor/ysfkaya/filament-menu-manager/resources/views/tailwind/**/*.blade.php",
  ],
};
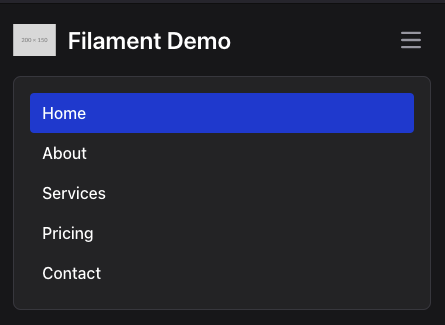
#Simple Navbar
@menu('header', 'menu-manager::tailwind.navbar.simple', viewData: [
    'logo' => 'https://via.placeholder.com/150',
    'brand' => 'Brand Name',
])

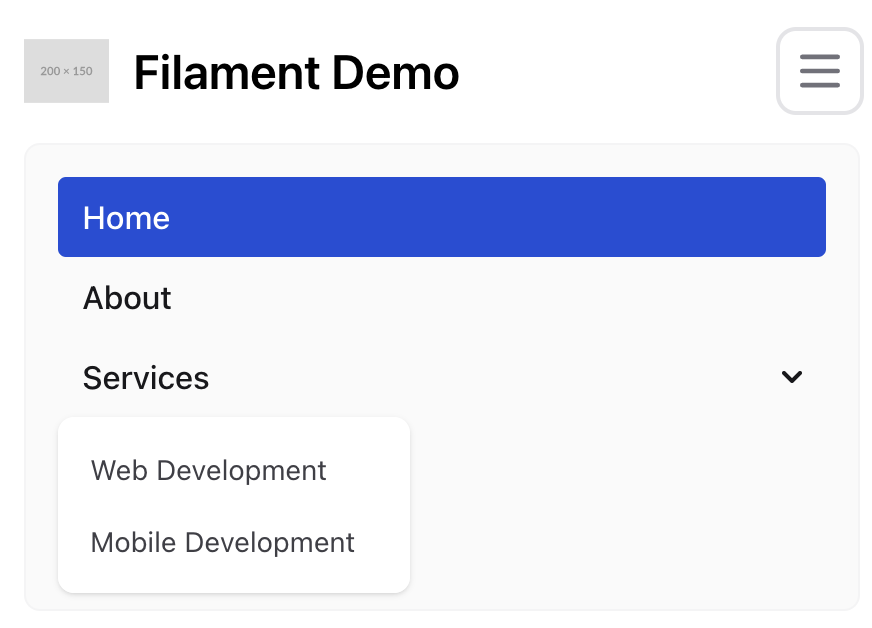
#Navbar with Dropdown (Requires Popper.js)
@menu('header', 'menu-manager::tailwind.navbar.dropdown', viewData: [
    'logo' => 'https://via.placeholder.com/150',
    'brand' => 'Brand Name',
])

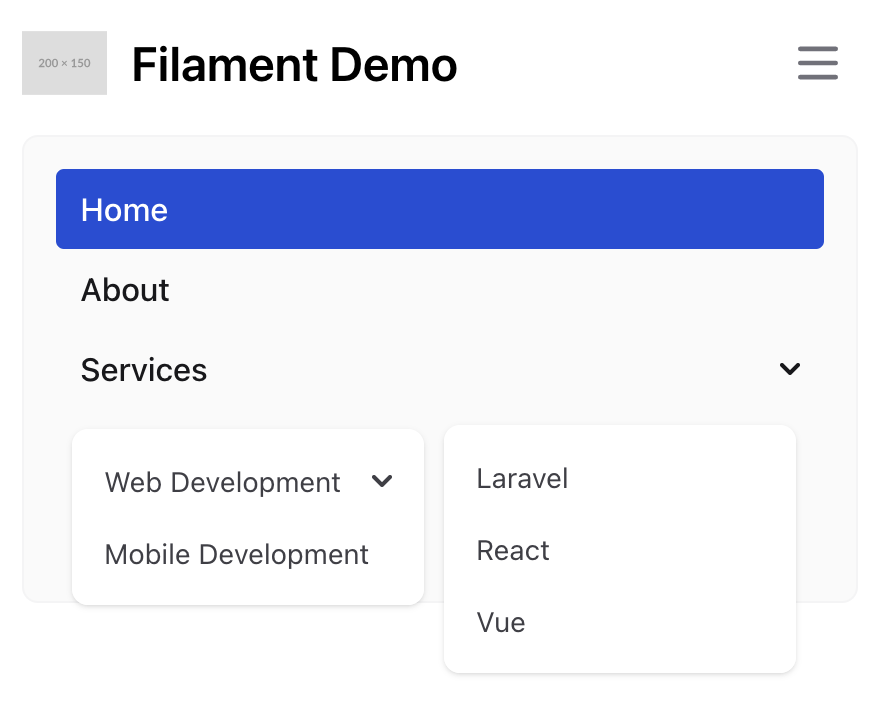
#Multi Level Navbar (Requires Popper.js)
@menu('header', 'menu-manager::tailwind.navbar.multi-level')

#Advanced Rendering
The menu tree items in each menu directive return the Ysfkaya\Menu\Data\Link object. This object contains some methods that will help you during rendering.
In the example above, the icon parameter in the header section comes from the data column in the menu table. Each custom form component you add is registered in this column and the Link object renders it dynamically
In the light of this information, you can perform your menu rendering operations for your needs.
#Caching
To enable caching, first publish the plugin's config file in your project.
php artisan vendor:publish --tag="filament-menu-manager-config"
You can then set the enabled parameter you see in the config file to true.
If you wish, you can set
MENU_CACHE_ENABLED=trueonly in the.envfile.
After these instructions, Laravel's cache mechanism will work automatically when your menus are used on the frontend side.
The cache will be cleared with every menu update.
Highly recommended use
TaggableStorecache driver. For example:redis,memcachedetc.
#Extend Link Data Transfer Object
Link DTO is used in the menu model and you can control your menu item with the properties in this DTO when you want to render the navigation.
If you don't want to change the menu model just for this class, you can specify the class you want to use the Link DTO in the config setting.
use App\Data\ExtendedLink;

return [
    // ...

    /*
    |--------------------------------------------------------------------------
    | DTO
    |--------------------------------------------------------------------------
    |
    | If you want to use your own DTO, you can
    | change the link option. Your DTO must implement the MenuLink interface.
    |
    */
    'link' => ExtendedLink::class,
];
The ExtendedLink must implement the MenuLink interface.
<?php

namespace App\Data;

use Ysfkaya\Menu\Contracts\MenuLink;

class ExtendedLink extends MenuLink
{
    public function __construct(
        public string $title,
        public string $url,
        public string $target = '_self',
        public string $icon = null,
        public bool $nofollow = false,
        public array $data = [],
    ) {}
}
#Support
If you have a question, bug or feature request, please e-mail me at filamentmenumanager@gmail.com or join us #ysfkaya-menu-manager on Discord. I'd love to hear from you.
The author
Yusuf is a Laravel engineer and has developed products for customers at Penta Yazılım for many years. In his spare time, he develops free and premium packages for Filament.
From the same author
Featured Plugins
A selection of plugins curated by the Filament team

Blueprint
Filament Blueprint is a premium Laravel Boost extension that helps AI agents produce accurate, detailed implementation plans and security reports for Filament apps.
 Filament
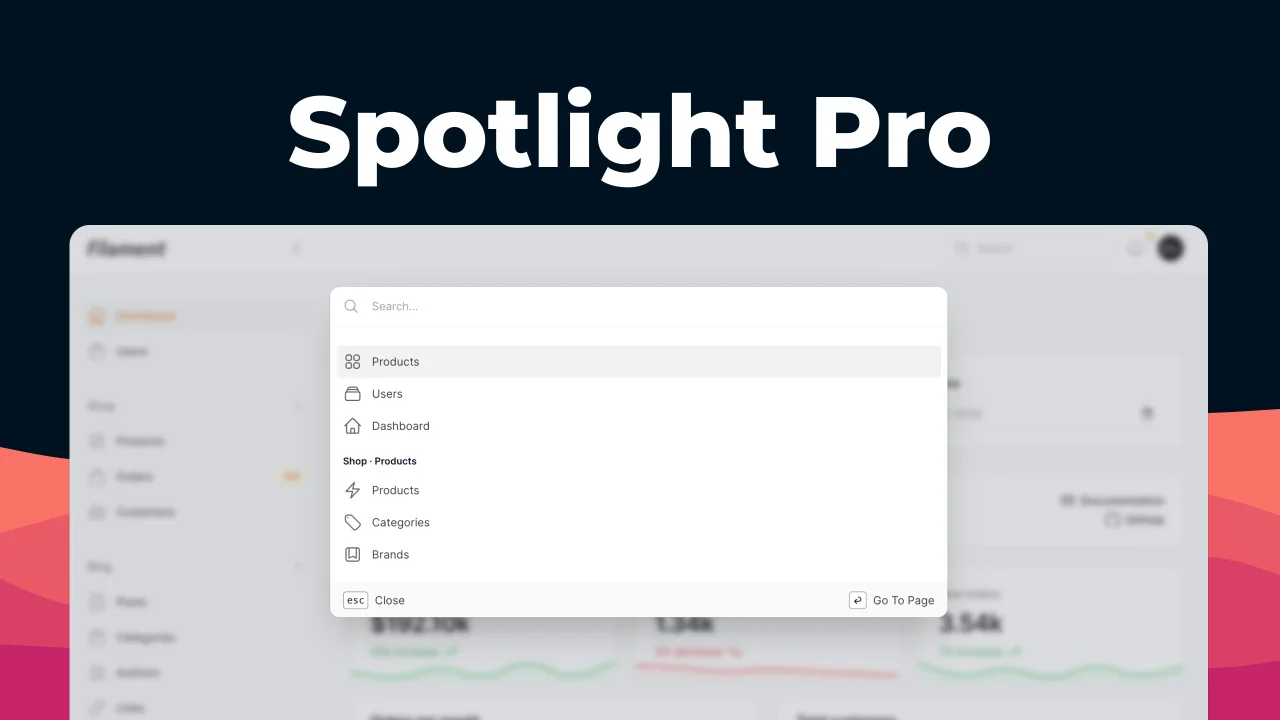
Spotlight Pro
Browse your Filament Panel with ease. Filament Spotlight Pro adds a Spotlight/Raycast like Command Palette to your Filament Panel.
 Dennis Koch
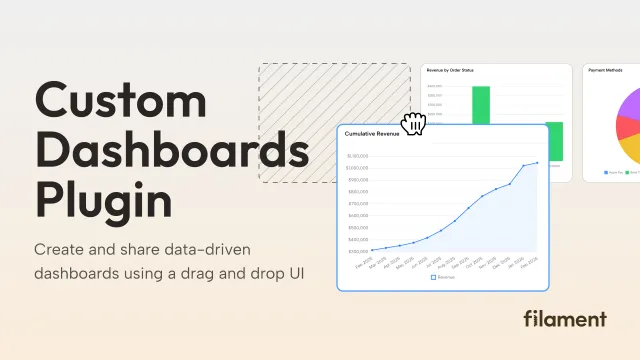
Custom Dashboards
Let your users build and share their own dashboards with a drag-and-drop interface. Define your data sources in PHP and let them do the rest.
Filament