
Excel Import
CommunityThis package adds a new action to your filament resource table, allowing you to easily import data to your model from excel files.
 Author:
Eighty Nine
Author:
Eighty Nine
Package health
BetaAutomated checks of this plugin's Composer package
13 checks
- Skipped: GitHub Actions pinned to SHA
- Passed: Open security advisories
- Passed: Dependabot PR responsiveness — No open Dependabot PRs.
- Skipped: Dependabot or Renovate configured
- Skipped: Dependency update cooldown configured
- Failed: Provides a security policy — View details on Plumb
- Passed: Abandoned or archived — No consulted source marks the package abandoned (packagist).
- Warning: Commit and release recency — Low activity: no commit date available; last release 327 days ago.
-
Passed:
composer.lock not committed by library
—
composer.lockis absent from the released dist archive. - Passed: Dist archive is lean
-
Warning:
Current Laravel version supported
—
Package does not co-install with current Laravel
13.0; the newest co-installable line is12.0, which still receives active support but is not the current stable. -
Passed:
Current PHP version supported
—
Constraint
^8.2supports current PHP8.5. - Skipped: Current Symfony version supported
filament/
namespace. Review the source and install at your own risk. Found
malware or an unresolved security issue the author won't
address?
Report it
.
Documentation
- 🛠️ Be Part of the Journey
- Installation
- Usage
- Changelog
- Contributing
- Security Vulnerabilities
- Credits
- License
- CSS Styling and Theme Integration
- Troubleshooting


This package adds a new feature to your filament resource, allowing you to easily import data to your model
This package brings the maatwebsite/laravel-excel functionalities to filament. You can use all the maatwebsite/laravel-excel features in your laravel project
#🛠️ Be Part of the Journey
Hi, I'm Eighty Nine. I created excel import plugin to solve real problems I faced as a developer. Your sponsorship will allow me to dedicate more time to enhancing these tools and helping more people. Become a sponsor and join me in making a positive impact on the developer community.
#Installation
You can install the package via composer:
composer require eightynine/filament-excel-import
#Usage
Before using this action, make sure to allow Mass Assignment for your model. If you are doing a custom import, this is not necessary.
<?php

namespace App\Models;

use Illuminate\Database\Eloquent\Model;

class Client extends Model
{
    /**
     * The attributes that are mass assignable.
     *
     * @var array
     */
    protected $fillable = ['name', 'phone', 'email'];
}
For example, if you have a ClientResource in your project, integrate the action into ListClients class as demonstrated below:
namespace App\Filament\Resources\ClientResource\Pages;

use App\Filament\Resources\ClientResource;
use Filament\Actions;
use Filament\Resources\Pages\ListRecords;

class ListClients extends ListRecords
{
    protected static string $resource = ClientResource::class;

    protected function getHeaderActions(): array
    {
        return [
            \EightyNine\ExcelImport\ExcelImportAction::make()
                ->color("primary"),
            Actions\CreateAction::make(),
        ];
    }
}
#Customise Import Process
#Using a closure
You can use a closure to process the collection after it has been imported.
    protected function getHeaderActions(): array
    {
        return [
            \EightyNine\ExcelImport\ExcelImportAction::make()
                ->processCollectionUsing(function (string $modelClass, Collection $collection) {
                    // Do some stuff with the collection
                    return $collection;
                }),
            Actions\CreateAction::make(),
        ];
    }
#Using your own Import class
If you wish to use your own import class to change the import procedure, you can create your own Import class.
php artisan make:import MyClientImport
Then in your action use your client import class
    protected function getHeaderActions(): array
    {
        return [
            \EightyNine\ExcelImport\ExcelImportAction::make()
                ->slideOver()
                ->color("primary")
                ->use(App\Imports\MyClientImport::class),
            Actions\CreateAction::make(),
        ];
    }
#Form Customisation
You can customise the form by using the beforeUploadField and afterUploadField methods. These methods accept an array of fields that will be added to the form before and after the upload field. You can also use the uploadField method to customise the upload field.
    protected function getHeaderActions(): array
    {
        return [
            \EightyNine\ExcelImport\ExcelImportAction::make()
                ->slideOver()
                ->color("primary")
                ->use(App\Imports\MyClientImport::class)
                // Add fields before the upload field
                ->beforeUploadField([
                    TextInput::make('default_password'),
                    TextInput::make('default_status'),
                ])
                // Or add fields after the upload field
                ->afterUploadField([
                    TextInput::make('default_password'),
                    TextInput::make('default_status'),
                ])
                // Or customise the upload field
                ->uploadField(
                    fn ($upload) => $upload
                    ->label("Some other label")
                )
                // Use the additional form fields data
                ->beforeImport(function (array $data, $livewire, $excelImportAction) {
                    $defaultStatus = $data['default_status'];
                    $defaultPassword = $data['default_password'];

                    // When adding the additional data, the data will be merged with
                    // the row data when inserting into the database
                    $excelImportAction->additionalData([
                        'password' => $defaultPassword,
                        'status' => $defaultStatus
                    ]);

                    // When adding the custom import data, the data will be available in
                    // the custom import as $this->customImport data, when the custom import extends the
                    // Default import.
                    $excelImportAction->customImportData([
                        'other_details' => [ 1, 2, 3, 4],
                        'age' => 5
                    ]);

                    // Do some other stuff with the data before importing
                })
                ,
            Actions\CreateAction::make(),
        ];
    }
#Custom Upload Disk
To use a custom upload disk, you can publish the config file and customise the upload_disk config.
php artisan vendor:publish --tag=excel-import-config
Then in your config file, you can customise the upload_disk config.
return [
    /**
     * File upload path
     *
     * Customise the path where the file will be uploaded to,
     * if left empty, config('filesystems.default') will be used
     */
    'upload_disk' => 's3',
];
#Performing Actions Before and After Import
You can perform actions before and after import by using the beforeImport and afterImport closures.
$data is the data that is submitted via the form, meaning the file upload is also available in $data['upload'], and $livewire is the Livewire instance that the action is being performed on (in this case, the ListClients class).
    protected function getHeaderActions(): array
    {
        return [
            \EightyNine\ExcelImport\ExcelImportAction::make()
                ->slideOver()
                ->color("primary")
                ->use(App\Imports\MyClientImport::class)
                ->beforeImport(function ($data, $livewire, $excelImportAction) {
                    // Perform actions before import
                })
                ->afterImport(function ($data, $livewire, $excelImportAction) {
                    // Perform actions after import
                }),
            Actions\CreateAction::make(),
        ];
    }
#Data Validation
You can validate the data before importing by using the validateUsing method. This method accepts an array of rules that will be used to validate the data. You can use all the rules from the Laravel validation system.
    protected function getHeaderActions(): array
    {
        return [
            \EightyNine\ExcelImport\ExcelImportAction::make()
                ->validateUsing([
                    'name' => 'required',
                    'email' => 'required|email',
                    'phone' => ['required','numeric'],
                ]),
            Actions\CreateAction::make(),
        ];
    }
#Mutating data before and after validation
In some cases you may want to mutate the data before or after validation, in order to achieve this, you can use mutateBeforeValidationUsing and mutateAfterValidationUsing functions methods.
    \EightyNine\ExcelImport\ExcelImportAction::make()
        ->mutateBeforeValidationUsing(function(array $data): array{
            $data['date'] = Carbon::make((string) str($value)->replace('.', '-'));
            return $data;
        })
        ->validateUsing([
            'name' => 'required',
            'email' => 'required|email',
            'phone' => ['required','numeric'],
        ])
        ->mutateAfterValidationUsing(
            closure: function(array $data): array{
                $data['date'] = $data['date']->format('Y-m-d');
                return $data;
            },
            shouldRetainBeforeValidationMutation: true // if this is set, the mutations will be retained after validation (avoids repetition in/of afterValidation)
        ),
#Sample Excel File
You can allow users to download a sample excel file by using the sampleExcel method. This method accepts an array of data, a file name, an export class and a sample button label.
use Filament\Forms\Components\Actions\Action;

protected function getHeaderActions(): array
{
    return [
        \EightyNine\ExcelImport\ExcelImportAction::make()
            ->sampleExcel(
                sampleData: [
                    ['name' => 'John Doe', 'email' => 'john@doe.com', 'phone' => '123456789'],
                    ['name' => 'Jane Doe', 'email' => 'jane@doe.com', 'phone' => '987654321'],
                ],
                fileName: 'sample.xlsx',
                exportClass: App\Exports\SampleExport::class,
                sampleButtonLabel: 'Download Sample',
                customiseActionUsing: fn(Action $action) => $action->color('secondary')
                    ->icon('heroicon-m-clipboard')
                    ->requiresConfirmation(),
            ),
        // OR
        \EightyNine\ExcelImport\ExcelImportAction::make()
            ->sampleFileExcel(
                url: url('excel/users.xlsx'),
                sampleButtonLabel: 'Download Sample',
                customiseActionUsing: fn(Action $action) => $action->color('secondary')
                    ->icon('heroicon-m-clipboard')
                    ->requiresConfirmation(),
            ),
        Actions\CreateAction::make(),
    ];
}
#Using import action to import relationships
The import action can also be used to import relationships. This is done by using the DefaultRelationshipImport class in your relation manager.
use EightyNine\ExcelImport\Tables\ExcelImportRelationshipAction;


class PostsRelationManager extends RelationManager
{
    protected static string $relationship = 'posts';

    public function table(Table $table): Table
    {
        return $table
            ->recordTitleAttribute('title')
            ->columns([
                Tables\Columns\TextColumn::make('title'),
            ])
            ->filters([
                //
            ])
            ->headerActions([
                ExcelImportRelationshipAction::make()
                    ->slideOver()
                    ->color('primary')
                    ->validateUsing([
                        'title' => 'required',
                        'body' => 'required',
                    ]),
            ]);
    }
}
#Stopping Imports and Returning Messages
New in v3.1.5+: You can now stop the import process from within your custom import class and return messages to the frontend. This is useful for:
- Header validation to ensure the file format is correct
- Business logic validation that might require stopping the entire import
- Custom validation that depends on form data or external conditions
#Using Enhanced Import Classes
The package now provides EnhancedDefaultImport and EnhancedDefaultRelationshipImport classes that include methods to stop imports:
use EightyNine\ExcelImport\EnhancedDefaultImport;
use Illuminate\Support\Collection;

class CustomUserImport extends EnhancedDefaultImport
{
    protected function beforeCollection(Collection $collection): void
    {
        // Validate required headers
        $requiredHeaders = ['name', 'email', 'phone'];
        $this->validateHeaders($requiredHeaders, $collection);

        // Custom business logic validation
        if ($collection->count() > 1000) {
            $this->stopImportWithError('Too many rows. Maximum 1000 allowed.');
        }

        // Access custom data from the form
        $formData = $this->customImportData;
        if (isset($formData['department_id'])) {
            $departmentExists = Department::where('id', $formData['department_id'])->exists();
            $this->validateCustomCondition(
                $departmentExists,
                'Selected department does not exist.'
            );
        }
    }

    protected function beforeCreateRecord(array $data, $row): void
    {
        // Row-level validation
        if (User::where('email', $data['email'])->exists()) {
            $this->stopImportWithWarning(
                "User with email {$data['email']} already exists."
            );
        }
    }

    protected function afterCollection(Collection $collection): void
    {
        // Show success message with statistics
        $count = $collection->count();
        $this->stopImportWithSuccess("Successfully imported {$count} users!");
    }
}
#Available Methods
Stop Import Methods:
stopImportWithError(string $message)- Shows red error notificationstopImportWithWarning(string $message)- Shows orange warning notificationstopImportWithInfo(string $message)- Shows blue info notificationstopImportWithSuccess(string $message)- Shows green success notification
Validation Helpers:
validateHeaders(array $expectedHeaders, Collection $collection)- Validates required headersvalidateCustomCondition(bool $condition, string $errorMessage)- Custom validation
Hook Methods (override in your class):
beforeCollection(Collection $collection)- Called before processing startsbeforeCreateRecord(array $data, $row)- Called before each record creationafterCreateRecord(array $data, $row, $record)- Called after each record creationafterCollection(Collection $collection)- Called after processing completes
#Using with Form Data
You can access custom form data in your import class for validation:
protected function getHeaderActions(): array
{
    return [
        \EightyNine\ExcelImport\ExcelImportAction::make()
            ->use(CustomUserImport::class)
            ->beforeUploadField([
                Select::make('department_id')
                    ->label('Department')
                    ->options(Department::pluck('name', 'id'))
                    ->required(),
            ])
            ->beforeImport(function (array $data, $livewire, $excelImportAction) {
                $excelImportAction->customImportData([
                    'department_id' => $data['department_id'],
                    'imported_by' => auth()->id(),
                ]);
            }),
    ];
}
#Using with Existing Import Classes
If you have existing import classes, you can add stopping capabilities by throwing the ImportStoppedException:
use EightyNine\ExcelImport\Exceptions\ImportStoppedException;

class MyExistingImport implements ToCollection, WithHeadingRow
{
    public function collection(Collection $collection)
    {
        // Your existing validation logic
        if ($someCondition) {
            throw new ImportStoppedException('Custom error message', 'error');
        }

        // Continue with normal processing...
    }
}
The exception constructor accepts:
$message(string) - The message to show to the user$type(string) - The notification type: 'error', 'warning', 'info', or 'success' (default: 'error')
composer test
#Changelog
Please see CHANGELOG for more information on what has changed recently.
#Contributing
Please see CONTRIBUTING for details.
#Security Vulnerabilities
Please review our security policy on how to report security vulnerabilities.
#Credits
#License
The MIT License (MIT). Please see License File for more information.
#CSS Styling and Theme Integration
#Avoiding CSS Conflicts
By default, this package loads minimal CSS to avoid conflicts with your application's existing button styles and theme. The stylesheet loading is disabled by default to prevent issues with [type="button"] selectors and other global styles.
If you need to enable the custom stylesheet, you can publish the config file and set load_stylesheet to true:
php artisan vendor:publish --tag=excel-import-config
Then in your config/excel-import.php file:
return [
    // ...other config options

    /**
     * Load custom stylesheet
     *
     * Set to true to enable loading the custom CSS.
     * Set to false to disable loading to prevent conflicts
     * with existing button styles in your application
     */
    'load_stylesheet' => true,
];
#Theme Integration
The Excel Import action inherits the styling from your Filament theme automatically. If you're experiencing styling conflicts, ensure that:
- Your Filament theme is properly configured
- The
load_stylesheetconfig option is set tofalse(default) - Your application's CSS doesn't have overly broad selectors that might conflict
#Custom Styling
If you need custom styling for the Excel Import components, you can:
- Add CSS targeting the specific modal and form components
- Use Filament's theming system to customize the appearance
- Override specific component classes in your application's CSS
#Troubleshooting
#CSS Conflicts with [type="button"] selectors
If you're experiencing CSS conflicts where the Excel Import package is overriding your application's button styles, this is because the package was previously loading the full Filament theme CSS.
This has been resolved in the latest version by:
- Minimal CSS Loading: The package now loads only minimal CSS by default
- Configurable Stylesheet: You can enable/disable stylesheet loading via config
- Theme Integration: The package relies on your existing Filament theme
If you're still experiencing issues:
- Ensure you're using the latest version of the package
- Verify that
load_stylesheetis set tofalsein your config (this is the default) - Clear your browser cache and rebuild your assets
#Migration from Previous Versions
If you're upgrading from a previous version that had CSS conflicts:
- Publish the config file:
php artisan vendor:publish --tag=excel-import-config - Ensure
load_stylesheetis set tofalse - Rebuild your assets:
npm run build
The author
Eighty Nine is a software developer who loves to create plugins and packages for the Laravel ecosystem. He is passionate about sharing his knowledge and experience with other developers through medium and social media. He believes in pouring all the love and effort in his work.
From the same author
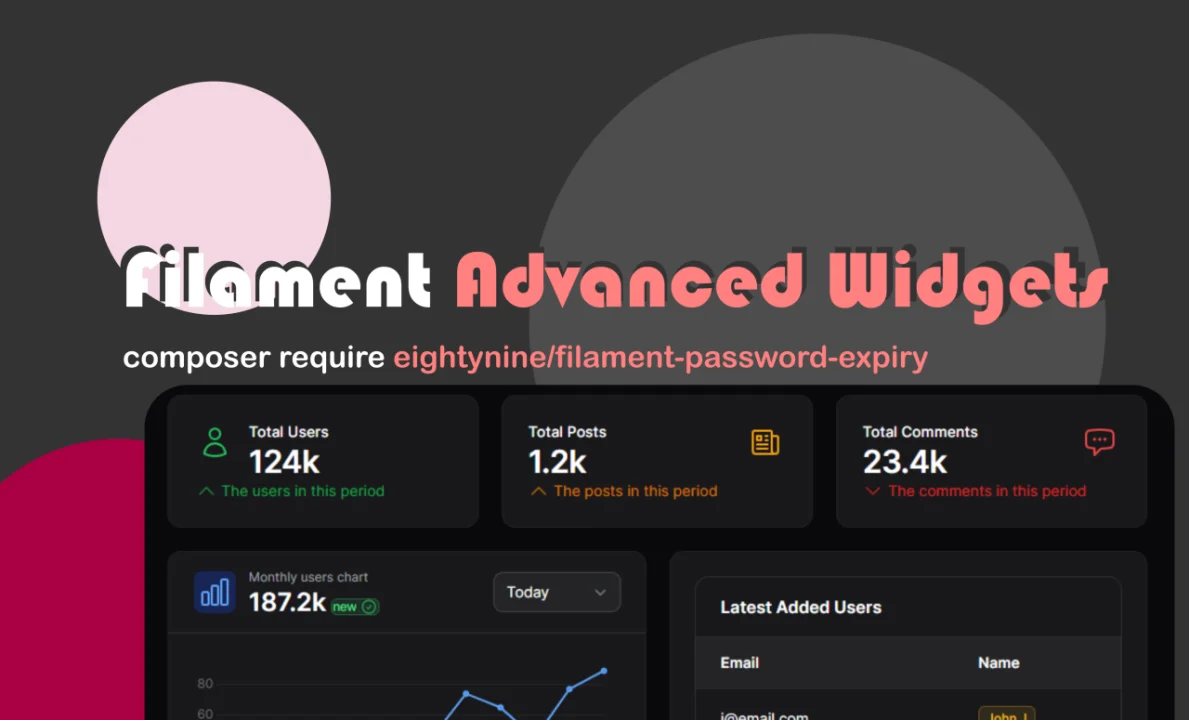
Advanced Widgets
A collection of advanced widgets for the Panel Builder plugin.
Author:
Eighty Nine

Docs
A Filament plugin for creating elegant documentation pages within your admin panel.
Author:
Eighty Nine

Approvals
This package allows you to easily implement approval flows in your Laravel Filament application.
Author:
Eighty Nine

Page Alerts
This package allows you to easily add alerts to your application's pages.
Author:
Eighty Nine
Featured Plugins
A selection of plugins curated by the Filament team

Blueprint
Filament Blueprint is a premium Laravel Boost extension that helps AI agents produce accurate, detailed implementation plans and security reports for Filament apps.
 Filament
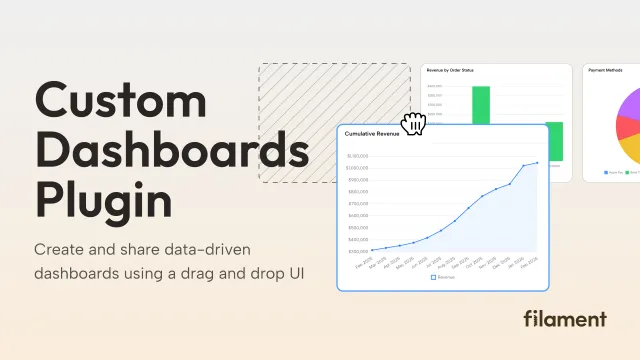
Custom Dashboards
Let your users build and share their own dashboards with a drag-and-drop interface. Define your data sources in PHP and let them do the rest.
Filament
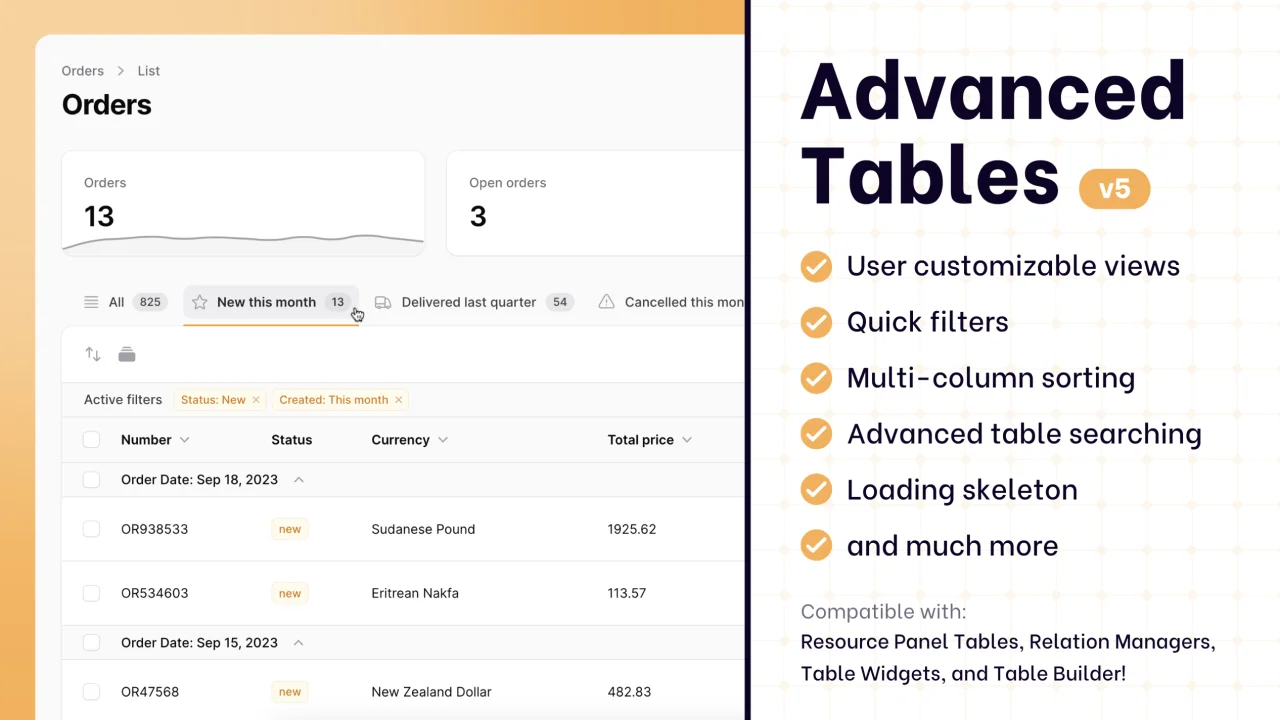
Advanced Tables (formerly Filter Sets)
Supercharge your tables with powerful features like user-customizable views, quick filters, multi-column sorting, advanced table searching, convenient view management, and more. Compatible with Resource Panel Tables, Relation Managers, Table Widgets, and Table Builder!
 Kenneth Sese