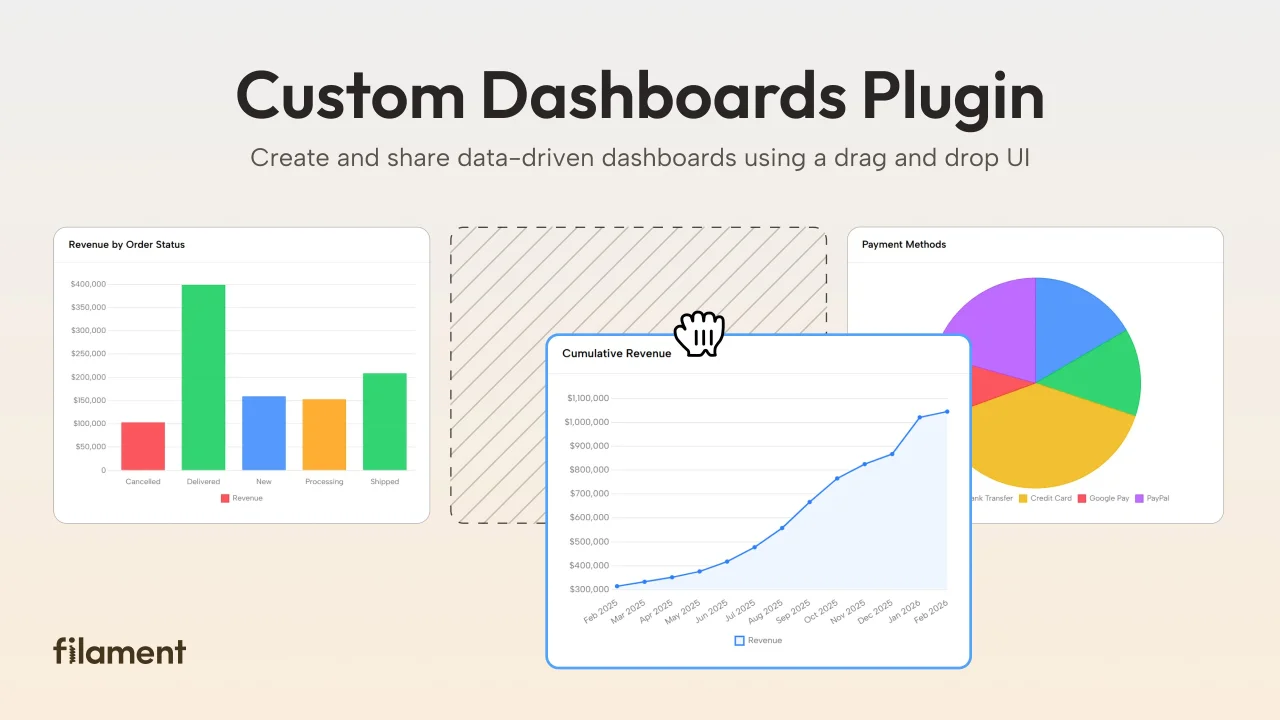
Custom Dashboards
Featured OfficialLet your users build and share their own dashboards with a drag-and-drop interface. Define your data sources in PHP and let them do the rest.
 Author:
Filament
Author:
Filament
Documentation
- Demo
- Introduction
- Installation
- Understanding widget data sources
- Configuration
- Getting started
- Features
- Creating widget data sources
- Attribute types
- Accessing related attributes
- Authorization
- Sharing dashboards
- Supported widget types
- Advanced features
- Example: Complete widget data source
- Migrations
- Migrating data sources
- Reference
- Support
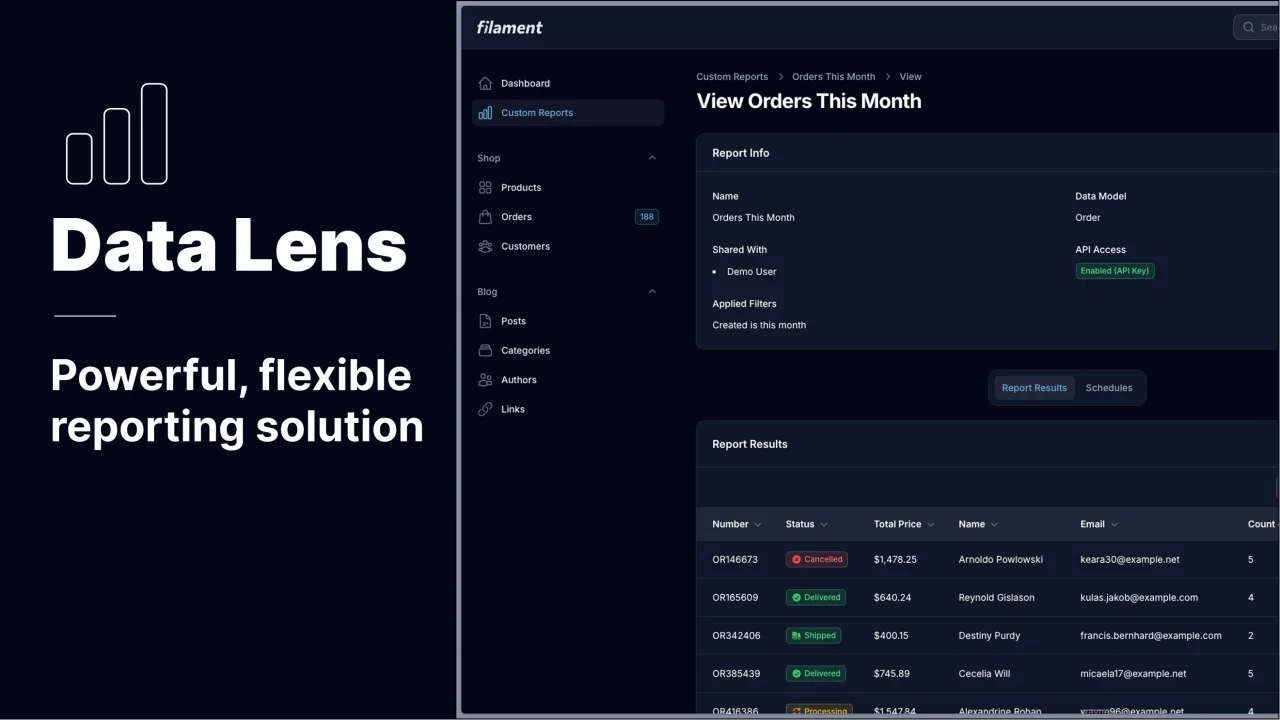
#Demo
See custom dashboards in action and build your own at cd-demo.filamentphp.com.
#Introduction
The Custom Dashboards Plugin allows you to create data-driven dashboards without writing custom widget code. Instead of creating separate widget classes for each chart or metric, you define widget data sources that describe your data, and the plugin provides configurable widgets (charts, stats, tables) that users can customize through a user interface.
This approach is ideal when:
- You want to give users control over their own dashboards without writing widget code for each variation
- You need multiple views of the same data without duplicating code
- You want to provide flexible analytics and reporting capabilities to your users
#Installation
First, install the Custom Dashboards Plugin using Composer:
Once you have purchased a license for the Custom Dashboards Plugin, install it via Composer:
composer config repositories.filament composer https://packages.filamentphp.com/composer
composer config --auth http-basic.packages.filamentphp.com "YOUR_EMAIL_ADDRESS" "YOUR_LICENSE_KEY"
composer require filament/custom-dashboards-plugin
Then run the install command:
php artisan filament-cd:install
The install command will guide you through the setup process:
- Publish and run migrations - Creates the necessary database tables
- Create a theme - If your panel doesn't have a theme, offers to create one using
php artisan make:filament-theme - Add CSS import - Adds the plugin's stylesheet import to your theme
- Rebuild assets - Compiles the theme with the new styles
- Register the plugin - Adds the plugin to your panel provider
- Generate data sources - Optionally creates widget data sources from your existing resources
If you have multiple panels, specify which panel to install to:
php artisan filament-cd:install --panel=admin
Note: To access your purchased license, sign in to Filament Packages with the email address used to purchase your Custom Dashboards Plugin license.
#Manual installation
If you prefer to install manually or need to customize the setup, follow these steps:
#1. Publish and run migrations
php artisan filament-cd:publish-migrations
php artisan migrate
#2. Add the CSS import to your theme
Add the following @import to your Filament theme CSS file (for example, resources/css/filament/admin/theme.css):
@import '../../../../vendor/filament/custom-dashboards-plugin/resources/css/index.css';
If you don't have a theme yet, create one first:
php artisan make:filament-theme
Then rebuild your assets:
npm run build
#3. Register the plugin
Add the plugin to your panel provider:
use Filament\CustomDashboardsPlugin\CustomDashboardsPlugin;
use Filament\Panel;

public function panel(Panel $panel): Panel
{
    return $panel
        // ...
        ->plugins([
            CustomDashboardsPlugin::make()
                ->discoverDataSources(
                    in: app_path('Filament/Widgets/DataSources'),
                    for: 'App\\Filament\\Widgets\\DataSources'
                ),
        ]);
}
See the Configuration section below for additional options.
Important: After each plugin update, you should publish and run any new migrations. The plugin tracks migrations semantically, so this is always safe to run: it will skip anything already published or executed. See the Migrations section for details and how to automate this with Composer.
#Understanding widget data sources
Widget data sources are PHP classes that provide data to dashboard widgets. They act as intermediaries between your application's data (typically Eloquent models) and the various chart and widget types.
Each widget data source defines:
- Model: The Eloquent model that provides the data
- Attributes: The fields available for charting and display
- Authorization: Who can access the data
Widget data sources extend the EloquentWidgetDataSource class and implement methods that describe your data structure. The plugin uses this information to provide configuration options to users and to query the appropriate data.
#Configuration
To register the plugin, add it to your panel configuration:
use Filament\CustomDashboardsPlugin\CustomDashboardsPlugin;
use Filament\Panel;

public function panel(Panel $panel): Panel
{
    return $panel
        // ...
        ->plugin(
            CustomDashboardsPlugin::make()
        );
}
#Registering widget data sources
You may register widget data sources manually:
use App\Filament\Widgets\DataSources\CustomerWidgetDataSource;
use App\Filament\Widgets\DataSources\OrderWidgetDataSource;
use Filament\CustomDashboardsPlugin\CustomDashboardsPlugin;

CustomDashboardsPlugin::make()
    ->widgetDataSources([
        OrderWidgetDataSource::class,
        CustomerWidgetDataSource::class,
    ])
Alternatively, you may discover widget data sources automatically:
use Filament\CustomDashboardsPlugin\CustomDashboardsPlugin;

CustomDashboardsPlugin::make()
    ->discoverDataSources(
        in: app_path('Filament/Widgets/DataSources'),
        for: 'App\\Filament\\Widgets\\DataSources'
    )
#Registering custom widgets
In addition to the configurable widgets provided by the plugin (charts, stats, tables), you may create and register your own custom widgets. These are widgets with fixed data and behavior defined in code that users can add to their dashboards.
You may register custom widgets manually:
use App\Filament\Widgets\RecentOrdersWidget;
use App\Filament\Widgets\TopCustomersWidget;
use Filament\CustomDashboardsPlugin\CustomDashboardsPlugin;

CustomDashboardsPlugin::make()
    ->widgets([
        RecentOrdersWidget::class,
        TopCustomersWidget::class,
    ])
Alternatively, you may discover custom widgets automatically:
use Filament\CustomDashboardsPlugin\CustomDashboardsPlugin;

CustomDashboardsPlugin::make()
    ->discoverWidgets(
        in: app_path('Filament/Widgets'),
        for: 'App\\Filament\\Widgets'
    )
#Grouping custom widgets under multiple headings
By default, all custom widgets registered via widgets() or discoverWidgets() appear in a single "Quick widgets" carousel in the widget picker. If you have a lot of custom widgets, you can split them across multiple headings using widget groups.
Each widget group has its own heading, optional description, and layout:
WidgetGroupLayout::Carousel(default) — a horizontally-scrollable strip with next/previous controlsWidgetGroupLayout::Expanded— a full grid with every widget visible at once
Register widget groups via widgetGroups():
use App\Filament\Widgets\OrdersOverviewWidget;
use App\Filament\Widgets\QueueHealthWidget;
use App\Filament\Widgets\RevenueWidget;
use Filament\CustomDashboardsPlugin\CustomDashboardsPlugin;
use Filament\CustomDashboardsPlugin\Enums\WidgetGroupLayout;
use Filament\CustomDashboardsPlugin\WidgetGroup;

CustomDashboardsPlugin::make()
    ->widgetGroups([
        WidgetGroup::make('sales')
            ->label('Sales metrics')
            ->description('Revenue, orders, and conversions at a glance.')
            ->layout(WidgetGroupLayout::Carousel)
            ->widgets([
                RevenueWidget::class,
                OrdersOverviewWidget::class,
            ]),
        WidgetGroup::make('ops')
            ->label('Operations')
            ->layout(WidgetGroupLayout::Expanded)
            ->widgets([
                QueueHealthWidget::class,
            ]),
    ])
Widgets registered inside a group do not need to be listed again in widgets() — the plugin registers them for you. Any widgets registered via widgets() (or discoverWidgets()) that are not assigned to a group continue to appear in the default "Quick widgets" carousel, so you can mix the two styles freely.
#Navigation groups
If your panel uses a UnitEnum for navigation groups, you should pass the enum class to the plugin so that dashboard navigation items are grouped correctly alongside your other resources:
use App\Enums\NavigationGroup;
use Filament\CustomDashboardsPlugin\CustomDashboardsPlugin;

CustomDashboardsPlugin::make()
    ->navigationGroups(NavigationGroup::class)
When configured, the plugin will resolve dashboard navigation groups to the matching enum case. The enum labels will also be used as suggestions in the navigation group field when creating or editing dashboards. If a dashboard's navigation group doesn't match any enum case, it will still be used as a custom string group.
#Getting started
To create your first widget data source, use the Artisan command with the --generate flag to automatically create attributes from your database schema:
php artisan make:filament-cd-widget-data-source Order --generate
This will create a widget data source class in app/Filament/Widgets/DataSources/OrderWidgetDataSource.php with attributes automatically generated from your Order model's database schema.
Users can now create dashboards and add widgets based on your Order data through the dashboard UI. Users with appropriate permissions can:
- Create and customize their own dashboards
- Add charts, stats, and tables using your widget data sources
- Configure filters and aggregations without writing code
#Features
The Custom Dashboards Plugin provides:
- User-created dashboards: Users can create and customize their own dashboards through the UI with drag-and-drop editing
- Role-based access: Control dashboard access with read, write, and owner permissions, plus sharing capabilities
- Flexible widgets: Charts (line, bar, pie, doughnut, polar, scatter), stats, and tables configured through widget data sources
- Powerful filtering: Query builder integration for complex data filtering on any widget
#Creating widget data sources
#Using the command
You may create a widget data source using the make:filament-cd-widget-data-source command:
php artisan make:filament-cd-widget-data-source Order
This will create a new widget data source class in app/Filament/Widgets/DataSources/OrderWidgetDataSource.php.
If you wish to automatically generate attributes from your database schema, use the --generate or -G flag:
php artisan make:filament-cd-widget-data-source Order --generate
#Creating data sources from resources
If you have existing Filament resources, you may generate widget data sources for all of them at once:
php artisan make:filament-cd-resource-widget-data-sources --generate
This command will create a widget data source for each resource in your panel, automatically detecting the model and generating appropriate attributes. It will also automatically set the $group and $sort properties based on the resource's getNavigationGroup() and getNavigationSort() methods, ensuring your widget data sources are organized the same way as your resources in the navigation.
#Defining attributes
Each widget data source must define a getAttributes() method that returns an array of attributes:
use App\Models\Order;
use Filament\CustomDashboardsPlugin\Widgets\DataSources\EloquentWidgetDataSource;
use Filament\CustomDashboardsPlugin\Widgets\DataSources\Attributes\NumberAttribute;
use Filament\CustomDashboardsPlugin\Widgets\DataSources\Attributes\DateAttribute;
use Filament\CustomDashboardsPlugin\Widgets\DataSources\Attributes\TextAttribute;

class OrderWidgetDataSource extends EloquentWidgetDataSource
{
    protected ?string $model = Order::class;

    public function getAttributes(): array
    {
        return [
            NumberAttribute::make('amount'),
            NumberAttribute::make('quantity'),
            DateAttribute::make('created_at'),
            TextAttribute::make('status'),
        ];
    }
}
#Grouping and sorting widget data sources
You may organize widget data sources in the data source select dropdown using groups and sort order. This is helpful when you have many data sources and want to categorize them or control their display order.
When generating widget data sources from resources using the make:filament-cd-resource-widget-data-sources command, the $group and $sort properties are automatically set based on the resource's navigation settings.
#Grouping data sources
Use the $group property to group related data sources together in the select dropdown:
use App\Models\Order;
use Filament\CustomDashboardsPlugin\Widgets\DataSources\EloquentWidgetDataSource;

class OrderWidgetDataSource extends EloquentWidgetDataSource
{
    protected ?string $model = Order::class;

    protected ?string $group = 'Sales';

    // ...
}
You may also use an enum that implements a getLabel() method, similar to navigation groups:
use App\Enums\DataSourceGroup;
use App\Models\Order;
use Filament\CustomDashboardsPlugin\Widgets\DataSources\EloquentWidgetDataSource;

class OrderWidgetDataSource extends EloquentWidgetDataSource
{
    protected ?string $model = Order::class;

    protected string | UnitEnum | null $group = DataSourceGroup::Sales;

    // ...
}
<?php

namespace App\Enums;

enum DataSourceGroup: string
{
    case Sales = 'sales';
    case Analytics = 'analytics';
    case Reports = 'reports';

    public function getLabel(): string
    {
        return match ($this) {
            self::Sales => 'Sales',
            self::Analytics => 'Analytics',
            self::Reports => 'Reports',
        };
    }
}
#Sorting data sources
Use the $sort property to control the order of data sources within their group (or globally if ungrouped):
use App\Models\Order;
use Filament\CustomDashboardsPlugin\Widgets\DataSources\EloquentWidgetDataSource;

class OrderWidgetDataSource extends EloquentWidgetDataSource
{
    protected ?string $model = Order::class;

    protected ?string $group = 'Sales';

    protected ?int $sort = 10;

    // ...
}
Data sources are sorted by their $sort value in ascending order. Lower values appear first. Data sources without an explicit sort value (null) appear at the end. The sort order also determines which group appears first in the dropdown - the lowest sort value across all data sources in a group determines that group's position.
#Attribute types
The plugin provides several attribute types for different kinds of data:
#Number attribute
NumberAttribute is used for numeric fields such as integers, decimals, and floats:
use Filament\CustomDashboardsPlugin\Widgets\DataSources\Attributes\NumberAttribute;

NumberAttribute::make('price')
    ->label('Price')
#Formatting as money
You may format a number attribute as money using the money() method:
NumberAttribute::make('price')
    ->money('usd')
The first parameter is the currency code. You may also customize the divisor, locale, and decimal places:
NumberAttribute::make('price')
    ->money(
        currency: 'usd',
        divideBy: 100, // Convert cents to dollars
        locale: 'en_US',
        decimalPlaces: 2,
    )
#Customizing decimal formatting
You may customize how decimals are formatted:
NumberAttribute::make('rating')
    ->decimalPlaces(2)
    ->decimalSeparator(',')
    ->thousandsSeparator('.')
Alternatively, you may set a maximum number of decimal places to show:
NumberAttribute::make('rating')
    ->maxDecimalPlaces(2)
#Setting the locale
You may set the locale for number formatting:
NumberAttribute::make('amount')
    ->locale('de_DE')
#Enabling grouping in segment charts
By default, number attributes cannot be used as the "Group by" dimension in segment charts (bar, pie, doughnut, polar area). Grouping by a raw numeric value often produces an unbounded number of groups (for example, grouping orders by price), which makes charts unreadable.
To make a number attribute groupable, opt in explicitly with groupableByValue(). Only use this for low-cardinality numeric fields such as ratings, statuses stored as integers, or fixed-size categories:
NumberAttribute::make('rating')
    ->groupableByValue()
If the attribute is also nullable(), users will additionally be able to group records by whether the value is present, producing a simple "Yes / No" breakdown. Either option on its own is enough to make the attribute appear in the "Group by" dropdown:
NumberAttribute::make('discount')
    ->nullable() // Enables the "One group for 'yes', one for 'no'" mode
#Date attribute
DateAttribute is used for date, datetime, and timestamp fields:
use Filament\CustomDashboardsPlugin\Widgets\DataSources\Attributes\DateAttribute;

DateAttribute::make('created_at')
    ->label('Created at')
#Including time
By default, date attributes do not include a time component. You may enable this for timestamp fields:
DateAttribute::make('created_at')
    ->time()
#Allowing past and future dates
By default, date attributes allow past dates but not future dates. You may customize this:
DateAttribute::make('scheduled_at')
    ->past(false)
    ->future(true)
#Text attribute
TextAttribute is used for string and text fields:
use Filament\CustomDashboardsPlugin\Widgets\DataSources\Attributes\TextAttribute;

TextAttribute::make('name')
    ->label('Name')
#Using enums
You may associate a text attribute with a PHP enum:
use App\Enums\OrderStatus;

TextAttribute::make('status')
    ->enum(OrderStatus::class)
This will provide better filtering options and display the enum's label in widgets.
#Using options
If your text attribute has a fixed set of values but doesn't use a PHP enum, you can use the options() method. This makes the attribute available for chart grouping (pie, bar, doughnut, polar area), just like enums:
TextAttribute::make('status')
    ->options([
        'paid' => 'Paid',
        'shipped' => 'Shipped',
        'cancelled' => 'Cancelled',
    ])
You may also pass a simple list of values (the value will be used as the label):
TextAttribute::make('status')
    ->options(['paid', 'shipped', 'cancelled'])
Or use a closure for dynamic options:
TextAttribute::make('state')
    ->options(fn () => State::pluck('label', 'name')->all())
#Enabling grouping for free-text values
Text attributes with an enum or options list are automatically available for grouping. Free-text attributes (no enum, no options) are not, because grouping by arbitrary text usually produces far too many categories for a chart to render meaningfully.
If you know a free-text column has low cardinality (for example, a handful of distinct tags), opt in explicitly with groupableByValue():
TextAttribute::make('channel')
    ->groupableByValue()
If the attribute is also nullable(), users will additionally be able to group records by whether the value is present, producing a "Yes / No" breakdown. Either option on its own is enough to make the attribute appear in the "Group by" dropdown:
TextAttribute::make('notes')
    ->nullable() // Enables the "One group for 'yes', one for 'no'" mode
#Boolean attribute
BooleanAttribute is used for boolean fields:
use Filament\CustomDashboardsPlugin\Widgets\DataSources\Attributes\BooleanAttribute;

BooleanAttribute::make('is_active')
    ->label('Active')
#Relationship attribute
RelationshipAttribute is used for Eloquent relationships:
use Filament\CustomDashboardsPlugin\Widgets\DataSources\Attributes\RelationshipAttribute;

RelationshipAttribute::make('customer')
    ->label('Customer')
    ->titleAttribute('name')
The titleAttribute() method specifies which attribute of the related model should be used for display.
#Multiple relationships
For HasMany or BelongsToMany relationships, use the multiple() method:
RelationshipAttribute::make('tags')
    ->multiple()
    ->titleAttribute('name')
#Optional relationships
For relationships that may not exist, use the emptyable() method:
RelationshipAttribute::make('manager')
    ->emptyable()
    ->titleAttribute('name')
#Enabling grouping by related items
Setting titleAttribute() is not, on its own, enough to let users group a chart by the related record (for example, "orders by customer"). Grouping by title runs a GROUP BY on the related table's title column, which could produce thousands of groups for a high-cardinality relationship.
To make the title mode available, opt in explicitly with groupableByTitleAttributeValue():
RelationshipAttribute::make('customer')
    ->titleAttribute('name')
    ->groupableByTitleAttributeValue()
This enables the "One group per related item" grouping mode in segment charts (bar, pie, doughnut, polar area).
#Enabling grouping by count
For multiple() relationships, the "One group per number of related items" mode groups records by how many related records they have (0, 1, 2, 3, ...). This is also unbounded for high-cardinality relationships, so it must be opted into with groupableByCount():
RelationshipAttribute::make('orders')
    ->multiple()
    ->groupableByCount()
#Summary of relationship grouping modes
The available display modes in segment charts depend on how you configure the attribute:
| Mode | Requires |
|---|---|
One group per related item (title) |
titleAttribute() + groupableByTitleAttributeValue() |
One group per number of related items (count) |
multiple() + groupableByCount() |
One group for "yes", one for "no" (existence) |
Singular relationship + emptyable() |
If a relationship has none of these configured, it will not appear in the "Group by" dropdown of segment charts. The table widget has its own, less restrictive rules — see the table widget section.
#Using relationships as a line or scatter chart X-axis
multiple() relationship attributes can also be used as the X-axis of a line or scatter chart — the plugin counts each parent record's related items and plots one data point per distinct count. No additional opt-in is required (unlike groupableByCount() for segment charts), because a time-series chart tolerates higher-cardinality axes than a bar or pie chart.
Singular relationships are not supported as the X-axis of a line or scatter chart.
#Customizing labels
You may customize the label of any attribute:
NumberAttribute::make('total_amount')
    ->label('Total amount')
#Making attributes nullable
All attribute types support nullable values:
NumberAttribute::make('discount')
    ->nullable()
#Custom value formatting
You may format attribute values using a closure:
NumberAttribute::make('price')
    ->formatValueUsing(fn ($value) => '$' . number_format($value, 2))
#Custom filter constraints
You may customize how an attribute is filtered in widgets using the queryBuilderConstraint() method:
use Filament\CustomDashboardsPlugin\Widgets\DataSources\Attributes\NumberAttribute;
use Filament\QueryBuilder\Constraints\TextConstraint;
use Filament\QueryBuilder\Constraints\Operators\IsFilledOperator;

NumberAttribute::make('amount')
    ->queryBuilderConstraint(
        fn () => TextConstraint::make('amount')
            ->operators([
                IsFilledOperator::make()
                    ->label('Has a value'),
                IsFilledOperator::make()
                    ->label('Does not have a value')
                    ->inverse(),
            ])
    )
#Accessing related attributes
You may access attributes from related models using dot notation:
use Filament\CustomDashboardsPlugin\Widgets\DataSources\Attributes\NumberAttribute;
use Filament\CustomDashboardsPlugin\Widgets\DataSources\Attributes\TextAttribute;

public function getAttributes(): array
{
    return [
        TextAttribute::make('customer.name')
            ->label('Customer name'),
        NumberAttribute::make('customer.credit_limit')
            ->label('Customer credit limit'),
    ];
}
This allows you to display and filter by related model attributes in your widgets.
#Authorization
Widget data sources can control who has access to the data. By default, the plugin checks the model policy's viewAny method:
public function canAccess(): bool
{
    return get_authorization_response('viewAny', $this->getModel())->allowed();
}
You may override the canAccess() method to implement custom authorization logic:
public function canAccess(): bool
{
    return auth()->user()?->can('viewOrderAnalytics');
}
If you wish to skip authorization entirely, override the shouldSkipAuthorization() method:
public function shouldSkipAuthorization(): bool
{
    return true;
}
#Sharing dashboards
By default, dashboards can be shared with individual users. The plugin supports three access roles:
- Owner: Full control including editing, sharing, and deleting the dashboard
- Write: Can edit widgets and configuration but cannot share or delete
- Read: Can only view the dashboard
#User sharing
#Disabling user sharing
You may disable user sharing using the userSharing() method:
use Filament\CustomDashboardsPlugin\CustomDashboardsPlugin;

CustomDashboardsPlugin::make()
    ->userSharing(false)
When user sharing is disabled and no custom shareable models are registered, the share button will be hidden entirely.
#Disabling default role
By default, dashboard owners can set a default role that grants all users access to a dashboard. In a multi-tenant or SaaS context, you may want to prevent users from changing this. Use the defaultRole() method:
use Filament\CustomDashboardsPlugin\CustomDashboardsPlugin;

CustomDashboardsPlugin::make()
    ->defaultRole(false)
This hides the default role field from the create and settings forms. Dashboards that already have a default role set (e.g. via seeding or migration) will continue to honor it — this setting only controls the UI, not the underlying behavior.
You may also pass a closure to resolve the condition at runtime, for example based on the current user:
use Filament\CustomDashboardsPlugin\CustomDashboardsPlugin;
use Filament\Facades\Filament;

CustomDashboardsPlugin::make()
    ->defaultRole(fn () => Filament::auth()->user()?->is_admin)
#Scoping shareable users
By default, all users are available in the share dropdown. You may restrict which users can be selected by providing a scope closure using the scopeUserSharingUsing() method. The closure receives the query builder and the currently authenticated user:
use Filament\CustomDashboardsPlugin\CustomDashboardsPlugin;
use Illuminate\Database\Eloquent\Builder;

CustomDashboardsPlugin::make()
    ->scopeUserSharingUsing(
        fn (Builder $query, $user) => $query->where('team_id', $user->team_id)
    )
This scope only affects the share dropdown in the UI. If a user has already been shared with and no longer matches the scope, they will still appear in their own dropdown row so their role can be changed or they can be removed. Once removed and saved, they will no longer be available for re-selection.
#Customizing the user title attribute
The share dropdown displays and searches users by their name column by default. If your user model uses a different column (for example full_name or email), you may configure it using the userTitleAttribute() method:
use Filament\CustomDashboardsPlugin\CustomDashboardsPlugin;

CustomDashboardsPlugin::make()
    ->userTitleAttribute('email')
You may also pass a closure to resolve the attribute at runtime:
use Filament\CustomDashboardsPlugin\CustomDashboardsPlugin;

CustomDashboardsPlugin::make()
    ->userTitleAttribute(fn (): string => 'full_name')
#Teams and organizations
You may extend the sharing system to support teams, organizations, or any other model. This allows users to share dashboards with entire groups rather than individual users.
#Step 1: Implement the interface
Add the CanReceiveSharedDashboards interface to your model:
<?php

namespace App\Models;

use Filament\CustomDashboardsPlugin\Contracts\CanReceiveSharedDashboards;
use Illuminate\Contracts\Auth\Authenticatable;
use Illuminate\Database\Eloquent\Builder;
use Illuminate\Database\Eloquent\Model;
use Illuminate\Database\Eloquent\Relations\BelongsToMany;
use Illuminate\Database\Eloquent\Relations\Relation;

class Team extends Model implements CanReceiveSharedDashboards
{
    public static function getDashboardShareableLabel(): string
    {
        return 'Team';
    }

    public static function getDashboardShareableTitleAttribute(): string
    {
        return 'name';
    }

    public static function resolveDashboardShareablesForUser(Authenticatable $user): ?Relation
    {
        return $user->teams();
    }

    public static function getDashboardShareableOptionsQuery(Authenticatable $user): Builder
    {
        return $user->teams()->getQuery();
    }
}
The interface requires four methods:
getDashboardShareableLabel()- The label shown in the share UI (e.g., "Team", "Organization")getDashboardShareableTitleAttribute()- The attribute used for display in dropdowns (e.g., "name")resolveDashboardShareablesForUser()- Returns a relation to determine which of this model the user belongs to. Used for efficient access checks via subqueries. Returnnullif the user has no access to any.getDashboardShareableOptionsQuery()- Returns a query builder for loading options in the share dropdown. The first 50 results are shown initially, with search available for more.
#Step 2: Register the model
Register your shareable models in the plugin configuration:
use App\Models\Team;
use App\Models\Organization;
use Filament\CustomDashboardsPlugin\CustomDashboardsPlugin;

CustomDashboardsPlugin::make()
    ->shareableModels([
        Team::class,
        Organization::class,
    ])
#Customizing share options
The getDashboardShareableOptionsQuery() method controls which options appear in the share dropdown. You may customize this based on your application's requirements:
// Only show teams the user owns
public static function getDashboardShareableOptionsQuery(Authenticatable $user): Builder
{
    return static::query()->where('owner_id', $user->getKey());
}

// Show all teams (for admins)
public static function getDashboardShareableOptionsQuery(Authenticatable $user): Builder
{
    return static::query();
}

// Show teams from the user's organization
public static function getDashboardShareableOptionsQuery(Authenticatable $user): Builder
{
    return static::query()->where('organization_id', $user->organization_id);
}
#Access resolution
When a user accesses a dashboard, the plugin checks all possible access routes:
- Direct user assignment
- Assignment via any registered shareable model (teams, organizations, etc.)
- Default role (if configured on the dashboard)
If the user has access through multiple routes (e.g., directly and via a team), the highest role is used.
#Supported widget types
The plugin provides several configurable widget types. Each widget type supports different attribute types depending on its purpose.
#Stats widget
The stats widget displays one or more statistic cards with aggregated data.
Configuration options:
- Metric: Select the aggregation method (count, sum, average, min, max)
- Value field: Choose which attribute to aggregate (only shown when the metric requires it)
- Supports: Number attributes and relationship attributes (must be multiple or emptyable)
- Filters: Apply filters to the data using query builder
When using the count metric, you do not need to select a value field.
#Line chart widget
The line chart widget displays data over time or across continuous values.
Configuration options:
- Time & Grouping > Show data over: Choose the dimension to display on the horizontal axis
- Date attributes — bucketed into time units (second, minute, hour, day, month, quarter, year, or decade) based on the selected range
- Number attributes — each distinct value becomes a point on the line
multiple()relationship attributes — parent records are grouped by their count of related items (0, 1, 2, 3, …), and each distinct count becomes a point on the line- Singular relationships and non-numeric attributes (text, boolean) are not supported as the horizontal axis — use a segment chart instead
- Time & Grouping > Date range type: For date attributes, choose between rolling window or specific dates
- Time & Grouping > Time period: For date attributes, select a preset range or define a custom period
- Measurement > Metric: Select the aggregation method (count, sum, average, min, max)
- Measurement > Value field: Choose which attribute to measure (only shown when the metric requires it, label changes based on selected metric)
- Supports: Number attributes and relationship attributes (must be multiple or emptyable)
- Measurement > Show as running total: Enable cumulative mode to display running totals, where each data point shows the sum of all previous values plus the current value (only shown when the metric is count or sum)
- Filters: Apply filters to the data using query builder
#Bar chart widget
The bar chart widget displays categorical data as vertical bars.
Configuration options:
- Grouping > Group by: Choose the dimension to display as categories
- Boolean attributes (always available)
- Text attributes with an enum,
options(),groupableByValue(), ornullable() - Number attributes with
groupableByValue()ornullable() - Relationship attributes configured with
groupableByTitleAttributeValue(),groupableByCount()(multiple only), or singular +emptyable() - Date attributes are not supported as a grouping dimension for segment charts — see the date attribute section
- Grouping > Display mode: The available modes depend on the selected attribute
- For text and number attributes: "One group per distinct value" (a bucket for each distinct value) and/or "One group for 'yes', one for 'no'" (two buckets — whether the value is filled)
- For relationship attributes: "One group per related item", "One group per number of related items", or "One group for 'yes', one for 'no'" — see the summary table in the relationship attribute section above
- Measurement > Metric: Select the aggregation method (count, sum, average, min, max)
- Measurement > Value field: Choose which attribute to measure (only shown when the metric requires it, label changes based on selected metric)
- Supports: Number attributes only
- Filters: Apply filters to the data using query builder
Understanding relationship display modes:
The Display mode field appears when you select a relationship attribute. The available modes depend on your relationship configuration and what you have opted into:
- For multiple relationships (
HasMany,BelongsToMany):- With
titleAttribute()+groupableByTitleAttributeValue(): "One group per related item" mode is available - With
groupableByCount(): "One group per number of related items" mode is available - Both opt-ins can be combined to offer users both modes
- With
- For singular relationships (
HasOne,BelongsTo):- With
titleAttribute()+groupableByTitleAttributeValue(): "One group per related item" mode is available - With
emptyable(): "One group for 'yes', one for 'no'" mode is available - Both opt-ins can be combined to offer users both modes
- With
The "One group for 'yes', one for 'no'" mode produces two buckets — one labelled "Yes" (records where the relationship exists) and one labelled "No" (records where it doesn't).
#Pie chart widget
The pie chart widget displays proportional data as slices of a circle.
Configuration options:
- Grouping > Group by: Choose which attribute to use for the pie slices
- Boolean attributes (always available)
- Text attributes with an enum,
options(),groupableByValue(), ornullable() - Number attributes with
groupableByValue()ornullable() - Relationship attributes configured with
groupableByTitleAttributeValue(),groupableByCount()(multiple only), or singular +emptyable() - Date attributes are not supported as a grouping dimension
- Grouping > Display mode: The available modes depend on the selected attribute — see the bar chart widget section for the full list
- Measurement > Metric: Select the aggregation method (count, sum, average, min, max)
- Measurement > Value field: Choose which attribute to measure (only shown when the metric requires it, label changes based on selected metric)
- Supports: Number attributes only
- Filters: Apply filters to the data using query builder
The Display mode field works the same way as described in the bar chart widget section. When using the "One group for 'yes', one for 'no'" mode with emptyable relationships, pie slices will be labelled "Yes" and "No".
#Doughnut chart widget
The doughnut chart widget is similar to the pie chart but with a hole in the center. It has the same configuration options and relationship display modes as the pie chart widget.
#Polar area chart widget
The polar area chart widget displays data in a circular layout with varying segment sizes. It has the same configuration options and relationship display modes as the pie chart widget.
#Scatter chart widget
The scatter chart widget displays data points on an X-Y axis, useful for showing correlations between two attributes.
Configuration options:
- Time & Grouping > X-axis field: Choose the dimension to display on the horizontal axis
- Date attributes — bucketed into time units when a metric is selected, or plotted as raw timestamps when no metric is selected
- Number attributes — used as the raw X value of each point (or bucketed by distinct value when aggregated)
multiple()relationship attributes — parent records are grouped by their count of related items; only supported when a metric is selected- Singular relationships and non-numeric attributes (text, boolean) are not supported as the horizontal axis
- Time & Grouping > Date range type: For date attributes, choose between rolling window or specific dates
- Time & Grouping > Time period: For date attributes, select a preset range or define a custom period
- Measurement > Metric: Select the aggregation method (count, sum, average, min, max), or leave empty to display individual points
- Measurement > Y-axis field: Choose which attribute to measure (only shown when the metric requires it)
- Supports: Number attributes and relationship attributes (must be multiple or emptyable)
- Filters: Apply filters to the data using query builder
When the metric is left empty, the scatter chart will display individual data points without aggregation. A multi-relationship X-axis requires a metric — leaving it empty produces no data.
#Table widget
The table widget displays data in a tabular format.
Configuration options:
- Attribute: Choose which attributes to display as columns
- Supports: All attribute types (including relationship attributes with a title attribute)
- Display mode: For relationship attributes, select how the relationship renders in the cell
- Related item's title: Display the related item's title (e.g., "Customer A")
- Number of related items: Show the count of related items (for multiple relationships only, e.g., "3")
- Yes or no: Show whether the relationship exists as a checkmark or dash (for emptyable singular relationships)
- Filters: Apply filters to the data using query builder
Users can add multiple columns to the table, each with its own attribute and configuration.
Understanding relationship display modes in tables:
The Display mode field is shown when a relationship attribute is selected. Available modes depend on the relationship's configuration — the same titleAttribute(), multiple(), and emptyable() rules as in charts. In table cells:
- Related item's title: Displays the value of the title attribute from the related item
- Number of related items: Displays the count of related items as an integer
- Yes or no: Shows a visual indicator (checkmark for "Yes", dash for "No") rather than the text "Yes"/"No"
Unlike segment-chart grouping, table columns do not require any groupable* opt-in — each row renders its own related record, so cardinality is bounded by the table's own row count.
#Advanced features
#Automatic attribute generation
When using the --generate flag, the plugin automatically:
- Detects foreign keys and creates relationship attributes
- Identifies enum casts and applies them to text attributes
- Recognizes money/price fields and applies money formatting
- Sets appropriate decimal places for decimal columns
- Skips password, token, and auto-increment fields
#Embedding dashboards in panel pages
You can embed dashboards directly into any Filament panel page, allowing users to add widgets above and below the page content. This is useful for customizing pages like resource List pages with contextual dashboards.
To enable embedded dashboards on a page, add the HasEmbeddedDashboards interface and the InteractsWithEmbeddedDashboards trait to your page class, then add EditEmbeddedDashboardsAction::make() to the header actions:
use App\Filament\Resources\Orders\OrderResource;
use Filament\Actions\CreateAction;
use Filament\CustomDashboardsPlugin\Actions\EditEmbeddedDashboardsAction;
use Filament\CustomDashboardsPlugin\Concerns\InteractsWithEmbeddedDashboards;
use Filament\CustomDashboardsPlugin\Contracts\HasEmbeddedDashboards;
use Filament\Resources\Pages\ListRecords;

class ListOrders extends ListRecords implements HasEmbeddedDashboards
{
    use InteractsWithEmbeddedDashboards;

    protected static string $resource = OrderResource::class;

    protected function getHeaderActions(): array
    {
        return [
            EditEmbeddedDashboardsAction::make(),
            CreateAction::make(),
        ];
    }
}
Once configured, users can click the "Edit embedded dashboards" action to enter edit mode and add widgets above and below the page content. The widgets are saved per-page and persist across sessions.
#Customizing the embedded dashboards' component identifier
By default, the plugin uses the page's fully-qualified class name (FQN) to identify which page the embedded dashboard belongs to. If you prefer not to store PHP class names in your database, you may override the getEmbeddedDashboardComponent() method to return a custom identifier of your choice:
public function getEmbeddedDashboardComponent(): string
{
    return 'orders.list';
}
#Customizing query builder constraints
By default, the plugin generates query builder constraints from your widget data source's attributes. Each attribute is automatically converted to an appropriate constraint based on its type.
You may override the getQueryBuilderConstraints() method to define completely custom constraints:
use Filament\QueryBuilder\Constraints\DateConstraint;
use Filament\QueryBuilder\Constraints\NumberConstraint;
use Filament\QueryBuilder\Constraints\NumberConstraint\Operators\IsMinOperator;
use Filament\QueryBuilder\Constraints\NumberConstraint\Operators\IsMaxOperator;
use Filament\QueryBuilder\Constraints\TextConstraint;

public function getQueryBuilderConstraints(): array
{
    return [
        TextConstraint::make('status')
            ->label('Order status'),
        NumberConstraint::make('amount')
            ->label('Order amount')
            ->operators([
                IsMinOperator::make(),
                IsMaxOperator::make(),
            ]),
        DateConstraint::make('created_at')
            ->label('Created at'),
    ];
}
This allows you to:
- Define custom constraint labels
- Limit which operators are available for specific constraints
- Exclude certain attributes from filtering
- Add constraints that don't correspond to attributes
- Control the order in which constraints appear
If you have a large number of constraints, you may also customize the constraint picker columns by overriding the getQueryBuilderConstraintPickerColumns() method:
public function getQueryBuilderConstraintPickerColumns(): array | int
{
    return 3; // Display constraints in 3 columns
}
By default, the plugin displays constraints in 1 column for up to 10 constraints, 2 columns for 11-20 constraints, and 3 columns for more than 20 constraints.
#Relationship display modes
Relationship attributes support multiple display modes when used in widgets. The available modes depend on whether the relationship is multiple (HasMany, BelongsToMany) or singular (HasOne, BelongsTo), and whether it is emptyable. For detailed information about how relationship display modes work in each widget type, see the individual widget sections above.
#Creating custom widgets
Custom widgets allow you to create widgets that users can add to their dashboards without needing to configure a widget data source. These widgets have their data and behavior defined in code, making them perfect for specific use cases like "Recent Orders" or "Top Customers".
To create a custom widget, extend any Filament widget class and use the InteractsWithCustomDashboards trait:
<?php

namespace App\Filament\Widgets;

use App\Models\Order;
use Filament\CustomDashboardsPlugin\Widgets\Concerns\InteractsWithCustomDashboards;
use Filament\Widgets\StatsOverviewWidget;
use Filament\Widgets\StatsOverviewWidget\Stat;

class RecentOrdersWidget extends StatsOverviewWidget
{
    use InteractsWithCustomDashboards;

    protected function getStats(): array
    {
        return [
            Stat::make('Total Orders', Order::query()->count()),
            Stat::make('Pending Orders', Order::query()->where('status', 'pending')->count()),
            Stat::make('Revenue', '$' . number_format(Order::query()->sum('total'), 2)),
        ];
    }

    public static function getCustomDashboardLabel(): string
    {
        return 'Recent Orders';
    }

    public static function getCustomDashboardDescription(): ?string
    {
        return 'Overview of recent order statistics';
    }
}
The InteractsWithCustomDashboards trait provides the following methods you can customize:
getCustomDashboardId()- The identifier stored in the database (defaults to the widget's fully-qualified class name). You may want to override this to avoid storing PHP class names in your database.getCustomDashboardLabel()- The display name shown to users when selecting widgets.getCustomDashboardDescription()- Optional description displayed in the widget picker.canAccess()- Authorization logic to control who can use the widget.
#Adding configuration to custom widgets
Custom widgets can include a configuration form that allows users to customize the widget when they add it to their dashboard. To add configuration, you need to:
- Create a configuration model to store the settings
- Create a migration for the configuration table
- Define the configuration form
- Use the configuration in your widget
Step 1: Create the configuration model
Create a model to store the widget configuration:
<?php

namespace App\Models;

use Illuminate\Database\Eloquent\Model;

class RecentOrdersWidgetConfiguration extends Model
{
    protected $guarded = [];

    protected $table = 'recent_orders_widget_configs';

    protected $casts = [
        'show_pending' => 'boolean',
        'show_completed' => 'boolean',
    ];
}
Step 2: Create the migration
Create a migration to store the configuration:
php artisan make:migration create_recent_orders_widget_configs_table
<?php

use Illuminate\Database\Migrations\Migration;
use Illuminate\Database\Schema\Blueprint;
use Illuminate\Support\Facades\Schema;

return new class extends Migration
{
    public function up(): void
    {
        Schema::create('recent_orders_widget_configs', function (Blueprint $table): void {
            $table->id();
            $table->boolean('show_pending')->default(true);
            $table->boolean('show_completed')->default(true);
            $table->timestamps();
        });
    }

    public function down(): void
    {
        Schema::dropIfExists('recent_orders_widget_configs');
    }
};
Step 3: Define the configuration form and model
Update your widget to include the configuration form:
<?php

namespace App\Filament\Widgets;

use App\Models\Order;
use App\Models\RecentOrdersWidgetConfiguration;
use Filament\CustomDashboardsPlugin\Widgets\Concerns\InteractsWithCustomDashboards;
use Filament\Forms\Components\Checkbox;
use Filament\Schemas\Schema;
use Filament\Widgets\StatsOverviewWidget;
use Illuminate\Database\Eloquent\Model;

class RecentOrdersWidget extends StatsOverviewWidget
{
    use InteractsWithCustomDashboards;

    public static function configureCustomDashboardConfigurationForm(Schema $schema): Schema
    {
        return $schema->components([
            Checkbox::make('show_pending')
                ->label('Show pending orders')
                ->default(true),
            Checkbox::make('show_completed')
                ->label('Show completed orders')
                ->default(true),
        ]);
    }

    public static function getCustomDashboardConfigurationModel(): ?string
    {
        return RecentOrdersWidgetConfiguration::class;
    }

    // ...
}
When users add this widget to their dashboard, they will be prompted to configure the time period and which statistics to display. The configuration is automatically saved to the database and loaded when the widget is rendered.
Step 4: Accessing the configuration
Within your widget, access the configuration through $this->dashboardWidget->configuration:
use App\Models\Order;
use App\Models\RecentOrdersWidgetConfiguration;
use Filament\Widgets\StatsOverviewWidget\Stat;

protected function getStats(): array
{
    $configuration = $this->dashboardWidget->configuration;
    assert($configuration instanceof RecentOrdersWidgetConfiguration);

    $stats = [];

    $stats[] = Stat::make('Total Orders', Order::query()->count());

    if ($configuration->show_pending) {
        $stats[] = Stat::make('Pending Orders', Order::query()->where('status', 'pending')->count());
    }

    if ($configuration->show_completed) {
        $stats[] = Stat::make('Completed Orders', Order::query()->where('status', 'completed')->count());
    }

    return $stats;
}
The configuration is automatically saved to the model when the user submits the form, and loaded when the widget is displayed.
#Registering custom configurable widgets
Custom widgets with configuration can also be registered to appear in the "New widget" grid alongside the built-in configurable widgets (charts, stats, tables), rather than in the quick-add carousel. To do this, use the configurableWidgets() method:
use App\Filament\Widgets\CustomerGrowthChartWidget;
use Filament\CustomDashboardsPlugin\CustomDashboardsPlugin;

CustomDashboardsPlugin::make()
    ->configurableWidgets([
        CustomerGrowthChartWidget::class,
    ])
Widgets registered via configurableWidgets() will appear in the configurable widgets grid with a "Configure" button. They must implement getCustomDashboardConfigurationModel() and configureCustomDashboardConfigurationForm() as described above.
#Custom widget thumbnail images
By default, the plugin assigns a thumbnail image to each widget based on its type (chart, stats, table, etc.) using the WidgetThumbnailImage enum. You can customize the thumbnail by overriding the getCustomDashboardThumbnailImage() method.
Using a built-in thumbnail enum:
use Filament\CustomDashboardsPlugin\Enums\WidgetThumbnailImage;

public static function getCustomDashboardThumbnailImage(): WidgetThumbnailImage | string
{
    return WidgetThumbnailImage::BarChart;
}
Using an image URL:
public static function getCustomDashboardThumbnailImage(): WidgetThumbnailImage | string
{
    return 'https://example.com/my-widget-thumbnail.png';
}
#Customizing the resource navigation item
You may customize the resource navigation item (the "Custom Dashboards" link in the sidebar) using the navigationItem() method. The closure receives the default NavigationItem and should return the modified item:
use Filament\CustomDashboardsPlugin\CustomDashboardsPlugin;
use Filament\Navigation\NavigationItem;

CustomDashboardsPlugin::make()
    ->navigationItem(fn (NavigationItem $item) => $item
        ->sort(3)
        ->group('Tools')
    )
Any properties you don't modify will keep their defaults. For example, the URL and active-state detection are always preserved unless you explicitly override them.
#Adding the resource to a cluster
If you use Filament Clusters to organize your panel, you may assign the Custom Dashboards resource to a cluster using the cluster() method:
use App\Filament\Clusters\Analytics;
use Filament\CustomDashboardsPlugin\CustomDashboardsPlugin;

CustomDashboardsPlugin::make()
    ->cluster(Analytics::class)
#Extending the resource
If you need full control over the resource (e.g. custom authorization, table columns, or page behavior), you may extend the built-in resource and register your subclass:
use Filament\CustomDashboardsPlugin\CustomDashboardsPlugin;

CustomDashboardsPlugin::make()
    ->resource(MyDashboardResource::class)
Your custom resource should extend the built-in DashboardResource:
use Filament\CustomDashboardsPlugin\Resources\Dashboards\DashboardResource;

class MyDashboardResource extends DashboardResource
{
    // ...
}
The built-in pages automatically resolve the resource from the plugin configuration, so you don't need to override them unless you want custom page behavior.
#Replacing models with custom subclasses
All plugin models are resolved through the Laravel service container, so you can replace any model with your own subclass. This is useful when you need to add custom behavior, accessors, scopes, or relationships to the plugin's models.
Step 1: Create a custom model
Create a model that extends the plugin model you want to replace:
<?php

namespace App\Models;

use Filament\CustomDashboardsPlugin\Models\Dashboard;

class CustomDashboard extends Dashboard
{
    // Add custom behavior, scopes, accessors, etc.

    public function getDisplayNameAttribute(): string
    {
        return strtoupper($this->name);
    }
}
Step 2: Bind the custom model in a service provider
In your AppServiceProvider (or any service provider), bind the plugin model to your custom subclass:
use App\Models\CustomDashboard;
use Filament\CustomDashboardsPlugin\Models\Dashboard;

public function register(): void
{
    $this->app->bind(Dashboard::class, CustomDashboard::class);
}
The plugin will now use CustomDashboard everywhere it would normally use Dashboard — in queries, relationships, instantiation, and polymorphic type resolution.
You can replace any of the plugin's models using this approach:
| Model | Purpose |
|---|---|
Dashboard |
The main dashboard model |
DashboardWidget |
A widget placed on a dashboard |
DashboardShareable |
A sharing/role assignment for a dashboard |
DashboardLineChartWidgetConfiguration |
Line chart widget configuration |
DashboardBarChartWidgetConfiguration |
Bar chart widget configuration |
DashboardPieChartWidgetConfiguration |
Pie chart widget configuration |
DashboardDoughnutChartWidgetConfiguration |
Doughnut chart widget configuration |
DashboardScatterChartWidgetConfiguration |
Scatter chart widget configuration |
DashboardPolarAreaChartWidgetConfiguration |
Polar area chart widget configuration |
DashboardStatsOverviewWidgetConfiguration |
Stats overview widget configuration |
DashboardStatsOverviewWidgetStatConfiguration |
Individual stat configuration |
DashboardTableWidgetConfiguration |
Table widget configuration |
DashboardTableWidgetColumnConfiguration |
Table column configuration |
DashboardLineChartWidgetEloquentDataSourceConfiguration |
Line chart Eloquent data source configuration |
DashboardBarChartWidgetEloquentDataSourceConfiguration |
Bar chart Eloquent data source configuration |
DashboardPieChartWidgetEloquentDataSourceConfiguration |
Pie chart Eloquent data source configuration |
DashboardDoughnutChartWidgetEloquentDataSourceConfiguration |
Doughnut chart Eloquent data source configuration |
DashboardScatterChartWidgetEloquentDataSourceConfiguration |
Scatter chart Eloquent data source configuration |
DashboardPolarAreaChartWidgetEloquentDataSourceConfiguration |
Polar area chart Eloquent data source configuration |
DashboardStatsOverviewWidgetStatEloquentDataSourceConfiguration |
Stats overview Eloquent data source configuration |
DashboardTableWidgetEloquentDataSourceConfiguration |
Table Eloquent data source configuration |
DashboardTableWidgetColumnEloquentDataSourceConfiguration |
Table column Eloquent data source configuration |
Note: Your custom model must extend the original plugin model. The plugin uses the original class name as the container key, so
app(Dashboard::class)will resolve to your custom subclass. Polymorphic relationships (morph maps) are also updated automatically.
#Example: Complete widget data source
Here is a complete example of a widget data source for an order model:
<?php

namespace App\Filament\Widgets\DataSources;

use App\Enums\OrderPriority;
use App\Enums\OrderStatus;
use App\Models\Order;
use Filament\CustomDashboardsPlugin\Widgets\DataSources\EloquentWidgetDataSource;
use Filament\CustomDashboardsPlugin\Widgets\DataSources\Attributes\DateAttribute;
use Filament\CustomDashboardsPlugin\Widgets\DataSources\Attributes\NumberAttribute;
use Filament\CustomDashboardsPlugin\Widgets\DataSources\Attributes\RelationshipAttribute;
use Filament\CustomDashboardsPlugin\Widgets\DataSources\Attributes\TextAttribute;

class OrderWidgetDataSource extends EloquentWidgetDataSource
{
    protected ?string $model = Order::class;

    public function getAttributes(): array
    {
        return [
            NumberAttribute::make('amount')
                ->label('Amount')
                ->money('usd', divideBy: 100),
            NumberAttribute::make('quantity')
                ->label('Quantity'),
            DateAttribute::make('created_at')
                ->label('Created at'),
            DateAttribute::make('completed_at')
                ->label('Completed at')
                ->nullable(),
            TextAttribute::make('status')
                ->label('Status')
                ->enum(OrderStatus::class),
            TextAttribute::make('priority')
                ->label('Priority')
                ->enum(OrderPriority::class),
            RelationshipAttribute::make('customer')
                ->label('Customer')
                ->emptyable()
                ->titleAttribute('name')
                ->groupableByTitleAttributeValue(),
            TextAttribute::make('customer.name')
                ->label('Customer name'),
            NumberAttribute::make('customer.credit_limit')
                ->label('Customer credit limit')
                ->money('usd', divideBy: 100),
        ];
    }
}
This widget data source provides:
- Monetary attributes with proper formatting
- Date attributes with nullable support
- Enum-based text attributes for status and priority
- A relationship to the customer model, opted into "One group per related item" grouping via
groupableByTitleAttributeValue() - Access to related customer attributes
Users can now create charts, stats, and tables using this data source without writing any additional code.
#Migrations
#How the migration system works
The plugin uses a semantic migration tracking system rather than relying on filenames. Each plugin migration is tagged with an internal identifier (e.g. create_filament_cd_dashboards_table), and the first time you publish migrations, an extra filament_cd column is added to your migrations table to store these identifiers.
This means:
- Renaming migration files is safe. Tracking is based on the semantic identifier, not the filename. You can rename published migration files without confusing the system.
- Re-publishing after updates is safe. The publish command checks the
filament_cdcolumn to determine which migrations have already run and skips them automatically, even if the filenames have changed between versions. - Minor and patch upgrades won't break your app if you forget to publish new migrations right away. The plugin checks whether a migration has actually been executed before depending on the tables or columns it creates, so missing a publish step won't cause runtime errors: it will simply mean new features that rely on those migrations won't be available until you publish and run them.
#Publishing migrations after updates
Every time you update the plugin to a new version, you should publish any new migrations:
php artisan filament-cd:publish-migrations
php artisan migrate
The filament-cd:publish-migrations command will:
- Scan the plugin's migrations
- Skip any that have already been published or run
- Copy only the new migrations into your
database/migrationsdirectory with fresh timestamps - Optionally run
php artisan migratefor you
You can also use the --force flag to republish all migrations, which is useful if you need to reset a migration file to its original state:
php artisan filament-cd:publish-migrations --force
#Automating migration publishing with Composer
To avoid forgetting this step, you can add the publish command to your Composer post-update-cmd scripts so that new migrations are published every time you run composer update:
{
    "scripts": {
        "post-update-cmd": [
            "@php artisan filament-cd:publish-migrations --no-interaction"
        ]
    }
}
If you already have other post-update-cmd scripts, just append this lines to the existing array. The publish command is safe to run repeatedly: it will skip any migrations that have already been published or run.
#Migrating data sources
Widgets store the data source ID and attribute references as plain strings in the database. When you rename or remove a data source, or rename or remove one of its attributes, every stats card, table column, chart, and saved filter rule that references the old name will break — tables fail to render a column, stats produce empty values, charts lose their dimension or measure, and filters silently skip unknown constraints.
The plugin ships four Laravel-migration helpers that let you resolve these changes in one place:
renameCustomDashboardAttribute()— rename an attribute within a given data source, including every filter reference to it.deleteCustomDashboardAttribute()— remove every widget or component that references an attribute.renameCustomDashboardDataSource()— rename the data source ID itself.deleteCustomDashboardDataSource()— remove every widget bound to the data source.
All four live on the MigratesCustomDashboardAttributes trait, which is intended to be used inside a standard Laravel migration. You can also apply the trait to an Artisan command, a job, or any other class if you'd rather trigger the change from somewhere other than a migration — the trait has no dependency on the migration lifecycle.
#Writing a data source migration
Generate a migration as you normally would and add the trait to the returned migration class:
php artisan make:migration rename_orders_amount_attribute
<?php

use Filament\CustomDashboardsPlugin\Support\Migrations\MigratesCustomDashboardAttributes;
use Illuminate\Database\Migrations\Migration;

return new class extends Migration
{
    use MigratesCustomDashboardAttributes;

    public function up(): void
    {
        $this->renameCustomDashboardAttribute(
            dataSource: 'orders',
            from: 'amount',
            to: 'total_amount',
        );
    }
};
The dataSource argument is the ID returned by your widget data source's getId() method. For Eloquent widget data sources, this defaults to the model's table name (e.g. orders). Pass the same value that your data source already resolves to — if you haven't overridden getId() or the $id property, it's the table name.
Each helper call is wrapped in a database transaction, so partial failures won't leave your dashboards in a half-migrated state.
#Renaming an attribute
Use renameCustomDashboardAttribute() when you've renamed an attribute on your data source (for example, amount became total_amount). The helper walks every widget configuration belonging to the given data source and rewrites the reference everywhere it appears:
- Stats cards (the
attributeused as the measure) - Table columns (the
attributedisplayed in each column) - Chart widgets (both the
dimension_attributeandmeasure_attributeon line, bar, pie, doughnut, scatter, and polar area charts) - Filter rules saved on any of the above — including rules nested inside OR blocks
$this->renameCustomDashboardAttribute(
    dataSource: 'orders',
    from: 'amount',
    to: 'total_amount',
);
#Renaming when the filter constraint name differs
By default, the helper assumes the filter constraint name matches the attribute name. If you've customised the constraint name with queryBuilderConstraint() (see Custom filter constraints), or if you're only renaming the attribute without changing the constraint — or vice versa — pass the filter names explicitly:
$this->renameCustomDashboardAttribute(
    dataSource: 'orders',
    from: 'amount',
    to: 'total_amount',
    filterConstraintFrom: 'legacy_amount_filter',
    filterConstraintTo: 'amount_filter',
);
If you omit filterConstraintFrom or filterConstraintTo, they fall back to $from and $to respectively.
#Deleting an attribute
Use deleteCustomDashboardAttribute() when you've removed an attribute from your data source. The helper removes every reference to the attribute:
- Stats cards that use the attribute as their measure are deleted. If the stats overview widget has no stat cards left afterwards, the widget itself is deleted.
- Table columns that use the attribute are deleted. If the table widget has no columns left afterwards, the widget itself is deleted.
- Chart widgets that use the attribute as their dimension or measure are deleted entirely, since a chart is built around exactly one dimension and one measure.
$this->deleteCustomDashboardAttribute(
    dataSource: 'orders',
    attribute: 'amount',
);
Parent widgets and configurations are soft-deleted through the same mechanism the plugin uses internally, so they can still be restored from the database if you need to recover them.
#Handling filter references
An attribute may still appear in a widget's filter rules even after you've removed it from the widget's main configuration. The helper treats these the same way as a primary reference — the containing widget or component is deleted, not just the individual filter rule:
- If a stat card's filter references the removed attribute, the stat card is deleted (and its parent widget, if empty).
- If a table widget's filter references the removed attribute, the entire table widget is deleted.
- If a chart widget's filter references the removed attribute, the entire chart widget is deleted.
Filter rules nested inside OR blocks are detected too.
The reason the helper deletes the whole widget rather than stripping a single filter rule is that silently removing part of a filter can change the meaning of the widget's data — a dashboard that was showing "orders over $100" would suddenly show every order. Deleting the widget forces it to be recreated with the new attribute set in mind, which is safer than quietly altering its contents.
#Deleting when the filter constraint name differs
Just like the rename helper, you can pass a custom filter constraint name if it differs from the attribute name:
$this->deleteCustomDashboardAttribute(
    dataSource: 'orders',
    attribute: 'amount',
    filterConstraint: 'legacy_amount_filter',
);
If you omit filterConstraint, it falls back to $attribute.
#Renaming a data source
Use renameCustomDashboardDataSource() when you've changed a data source's ID — for example, you overrode getId() on the class, changed the $id property, or renamed the Eloquent model's underlying table that the default ID derives from. The helper rewrites the data_source identifier stored on every widget that currently resolves against the old ID:
$this->renameCustomDashboardDataSource(
    from: 'orders',
    to: 'sales_orders',
);
The helper updates the data source ID on:
- Every stat card (each stat card carries its own
data_sourceidentifier) - Every table widget
- Every chart widget (line, bar, pie, doughnut, scatter, and polar area)
Attribute references, filter rules, and other configuration on the affected widgets are left untouched — they'll resolve against the renamed data source after the migration runs, so long as the data source's attributes still match.
If a stats overview widget contains cards from multiple data sources, only the cards belonging to the renamed data source are updated. Cards bound to a different data source on the same widget are left alone.
#Deleting a data source
Use deleteCustomDashboardDataSource() when you've removed a data source entirely. The helper removes every widget that was bound to it:
$this->deleteCustomDashboardDataSource('orders');
Specifically:
- Stat cards whose
data_sourcematches are deleted. The parent stats overview widget is also deleted if it has no remaining cards. Stats overview widgets that still contain cards from other data sources are preserved, since each card carries its own data source reference. - Table widgets bound to the data source are deleted outright, along with all of their column configurations.
- Chart widgets bound to the data source are deleted outright.
As with the other helpers, widgets are soft-deleted so they can be restored from the database if you need to recover them.
#What isn't covered
The helpers operate on the data stored by the plugin. A few situations still need your attention separately:
- Widgets that use the attribute or data source in custom code. If you've built a custom widget (see Creating custom widgets) that references the attribute or data source directly, you'll need to update or remove that code yourself.
- Changing the type of an attribute (e.g. text → number). The helpers rename or remove references; they don't reinterpret saved filter values, which may become invalid if the attribute's type changes. If you're replacing one attribute with a semantically different one, consider using
deleteCustomDashboardAttribute()rather thanrenameCustomDashboardAttribute()so users are prompted to reconfigure. - Collisions with other data sources. The attribute helpers scope their work to the specified
dataSourceID, so the same attribute name on a different data source is left alone. The data source helpers scope by the data source ID you pass in.
#Reference
#Metric options
When configuring charts and stats, users can select from several metric types:
- Count: Count the number of records (does not require a value field)
- Sum: Sum the values of a numeric attribute
- Average: Calculate the average of a numeric attribute
- Min: Find the minimum value of a numeric attribute
- Max: Find the maximum value of a numeric attribute
Only the count and sum metrics support "Show as running total" mode in line charts. When enabled, this mode displays running totals, where each data point shows the accumulated sum of all previous values plus the current value. For example, if your data points are 5, 3, 7, the cumulative chart would show 5, 8 (5+3), 15 (5+3+7).
#Date grouping and ranges
For widgets with date dimensions, users can group data by various time units:
- Second, Minute, Hour, Day, Month, Quarter, Year, Decade
The plugin provides convenient date range presets:
- Past: past minute, past hour, past week, past 2 weeks, past month, past quarter, past 6 months, past year, past 2 years, past 5 years, past decade
- Present: this minute, this hour, today, this month, this quarter, this year, this decade
- Future: next minute, next hour, next week, next 2 weeks, next month, next quarter, next 6 months, next year, next 2 years, next 5 years, next decade
Users may also select a custom absolute date range.
#Filtering
All widgets support filtering through Filament's QueryBuilder component. Filters are automatically generated from the widget data source's attributes and saved with the widget configuration.
The type of filter constraints available depends on the attribute type:
- Text attributes: equals, contains, starts with, ends with, is filled, is not filled
- Number attributes: equals, not equals, greater than, less than, between, is filled, is not filled
- Date attributes: equals, before, after, between, is filled, is not filled
- Boolean attributes: is true, is false, is filled, is not filled
- Relationship attributes: equals, contains (for multiple), is filled, is not filled
#Support
If you encounter any issues or have suggestions for improving Custom Dashboards, please open an issue or discussion on the Custom Dashboards Issues GitHub repository. You can get an invite to this repository by adding your GitHub username to your customer dashboard at packages.filamentphp.com. If you have account, purchase, or license-related questions, please email support@filamentphp.com.
The author
Filament is a powerful open source UI framework for Laravel, built with Livewire to help you ship apps & admin panels fast.
It includes a collection of beautifully designed, fully extensible components that handle the hard parts, so you can focus on what matters.
From the same author
Spatie Media Library
Filament support for Spatie's Laravel Media Library package.
Author:
Filament
Spatie Settings
Filament support for Spatie's Laravel Settings package.
Author:
Filament
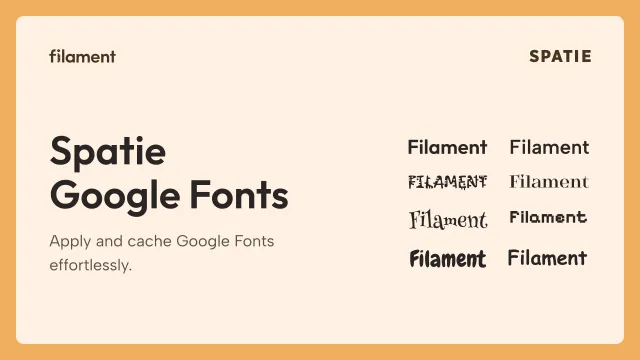
Spatie Google Fonts
Filament support for Spatie's Laravel Google Fonts package.
Author:
Filament

Blueprint
Filament Blueprint is a premium Laravel Boost extension that helps AI agents produce accurate, detailed implementation plans and security reports for Filament apps.
Author:
Filament
Featured Plugins
A selection of plugins curated by the Filament team
Blueprint
Filament Blueprint is a premium Laravel Boost extension that helps AI agents produce accurate, detailed implementation plans and security reports for Filament apps.
Filament
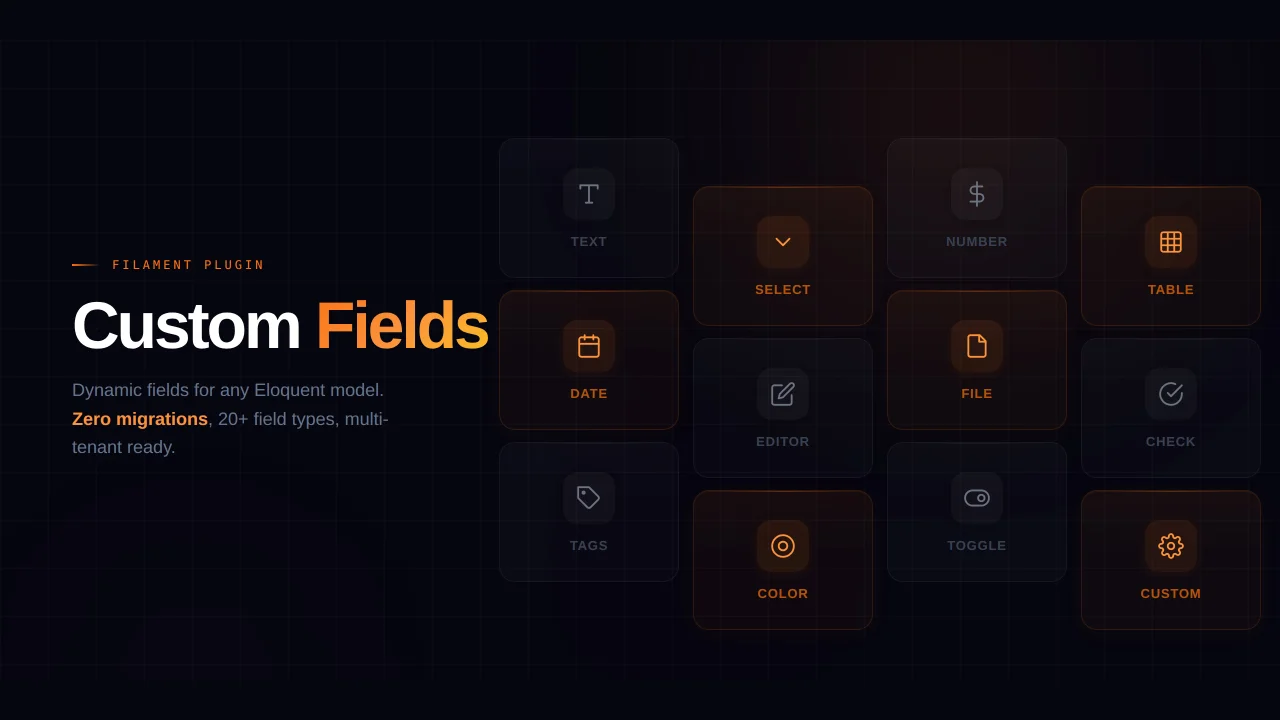
Custom Fields
Eliminate custom field migrations forever. Let your users create and manage form fields directly in Filament admin panels with 20+ built-in field types, validation, and zero database changes.
 Relaticle
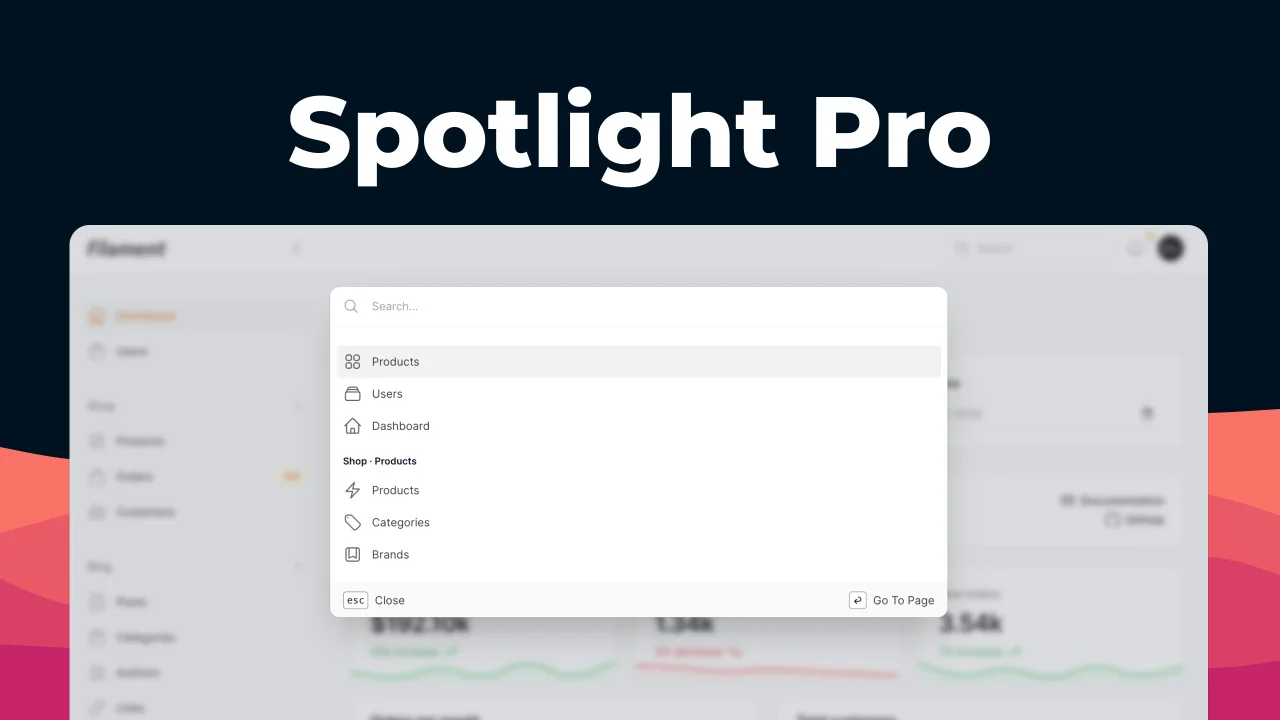
Spotlight Pro
Browse your Filament Panel with ease. Filament Spotlight Pro adds a Spotlight/Raycast like Command Palette to your Filament Panel.
 Dennis Koch