Documentation
#Resoure Lock


Filament Resource Lock is a Filament plugin that adds resource locking functionality to your site. When a
user begins editing a resource, Filament Resource Lock automatically locks the resource to prevent other users from
editing it at the same time. The resource will be automatically unlocked after a set period of time, or when the user
saves or discards their changes.
#Installation
You can install the package via composer:
composer require kenepa/resource-lock
You can run the installation command to publish config files, migrations and run migrations (optional)
php artisan resource-lock:install
#Usage
The Filament Resource Lock package enables you to lock a resource and prevent other users from editing it at the same
time. Currently, this package only locks
the EditRecord page and the edit modal when editing
a simple modal resource.
Follow the steps below to add locks to your resources.
#Add Locks to your model
The first step is to add the HasLocks trait to the model of your resource. The HasLocks trait enables the locking
functionality on your model.
// Post.php
use Kenepa\ResourceLock\Models\Concerns\HasLocks;
class Post extends Model
{
use HasFactory;
use HasLocks;
protected $table = 'posts';
protected $guarded = [];
}
#Add Locks to your EditRecord Page
The second step is to add the UsesResourceLock trait to your EditRecord page. The UsesResourceLock trait enables the
locking function on your edit page.
// EditPost.php
use Kenepa\ResourceLock\Resources\Pages\Concerns\UsesResourceLock;
class EditPost extends EditRecord
{
use UsesResourceLock;
protected static string $resource = PostResource::class;
}
#Simple modal Resource
If your resource is
a simple modal resource,
you'll need to use the UsesSimpleResourceLock trait instead.
// ManagePosts.php
use Kenepa\ResourceLock\Resources\Pages\Concerns\UsesSimpleResourceLock;
class ManagePosts extends ManageRecords
{
use UsesSimpleResourceLock;
protected static string $resource = PostResource::class;
}
And that's it! Your resource is now able to be locked. Refer to the documentation below for more information on how to
configure the locking functionality.
#Resource Lock manager
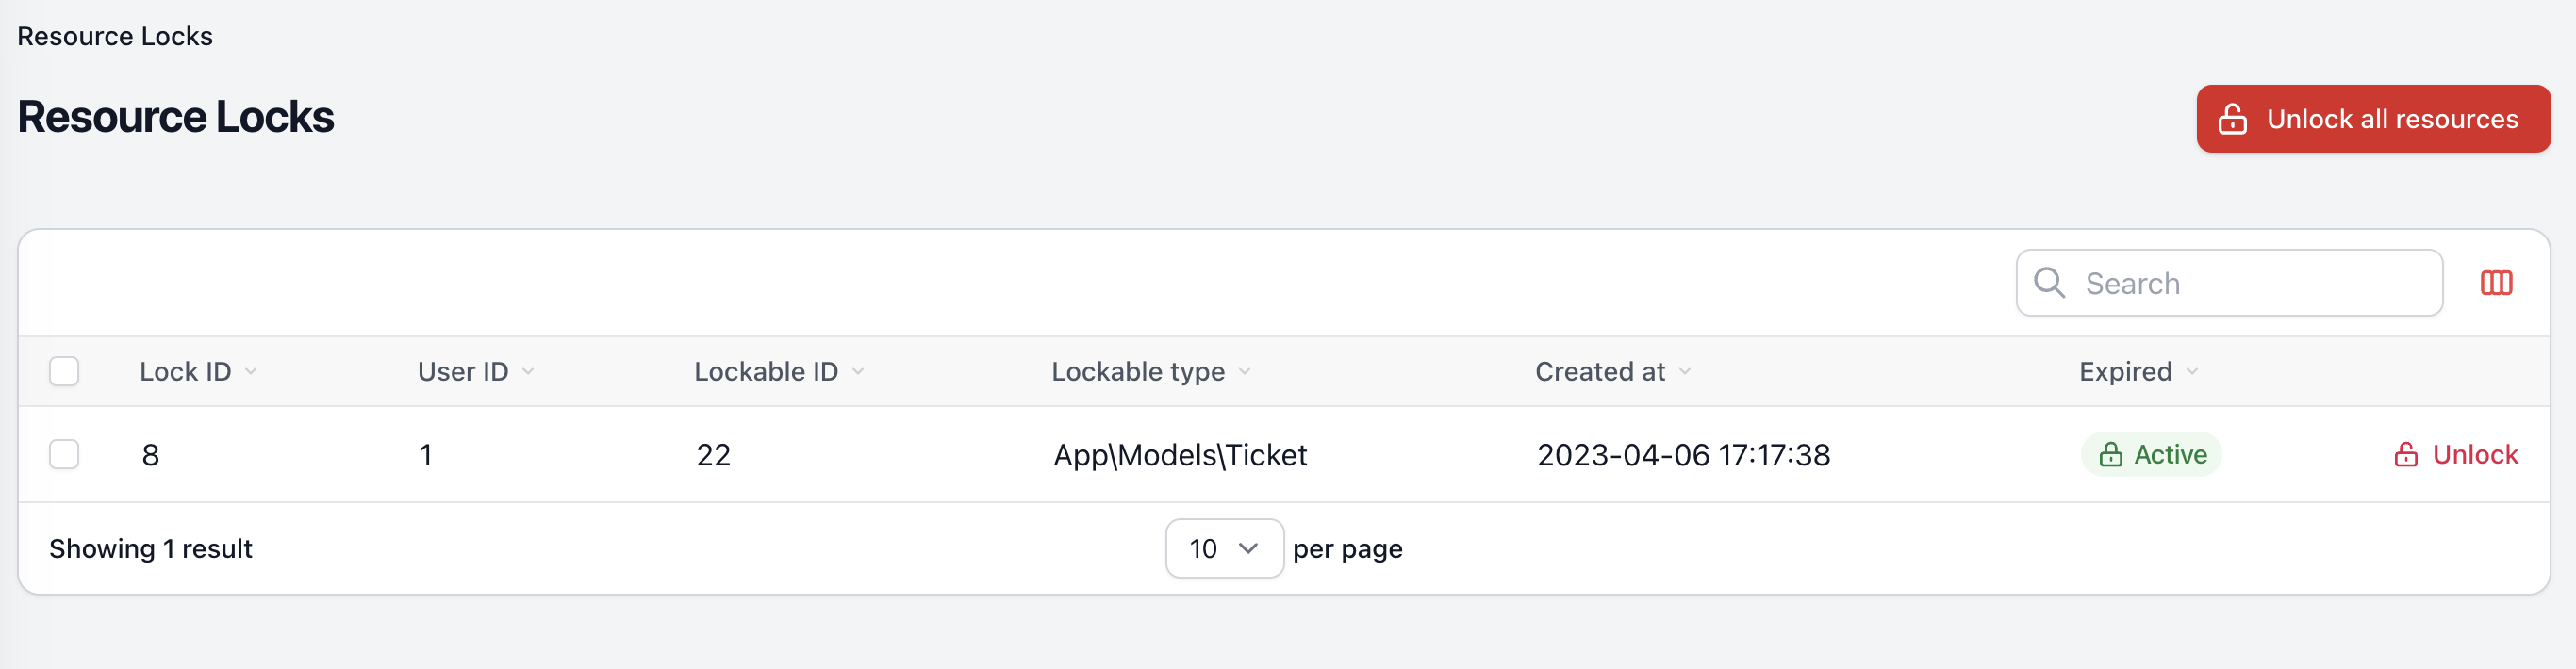
The package also provides a simple way to manage and view all your active and expired locks within your app. And it also
provides a way to quickly unlock all resources or specific locks.
#Configuration
#Access
You can restrict the access to the Unlock button or to the resource manager by adjusting the access variable.
Enabling the "limited" key and
setting it to true allows you to specify either a Laravel Gate class or a permission name from
the Spatie Permissions package.
// resource-lock.php
/*
|--------------------------------------------------------------------------
| Resource Unlocker
|--------------------------------------------------------------------------
|
| The unlocker configuration specifies whether limited access is enabled for
| the resource lock feature. If limited access is enabled, only specific
| users or roles will be able to unlock locked resources.
|
*/
'unlocker' => [
'limited_access' => true,
'gate' => 'unlock-resource'
],
Example
// Example using gates
Gate::define('unlock-resource', function (User $user, Post $post) {
return $user->email === 'admin@mail.com';
});
// Example using spatie permission package
Permission::create(['name' => 'unlock-resource']);
#Using custom models
Sometimes, you may have a customized implementation for the User model in your application, or you may want to use a
custom class for the ResourceLock functionality. In such cases, you can update the configuration file to specify the new
class you want to use. This will ensure that the ResourceLock functionality works as expected with the new
implementation.
// resource-lock.php
/*
|--------------------------------------------------------------------------
| Models
|--------------------------------------------------------------------------
|
| The models configuration specifies the classes that represent your application's
| data objects. This configuration is used by the framework to interact with
| the application's data models. You can even implement your own ResourceLock model.
|
*/
'models' => [
'User' => \App\Models\CustomUser::class,
'ResourceLock' => \App\Models\CustomResourceLock::class,
],
#Displaying the user who has locked the resource
Use the display_resource_lock_owner within the resource-lock.php config to control whether or not the locked
resource owner is
displayed in the modal. Set the option to true to show the owner's username or other identifying information. The
modal
can be triggered by a button click or automatically when the resource is accessed.
By default, the package displays the name of the user: $userModel->name. However, if your user model doesn't have
a name or you want to display a different identifier, you can create a custom action to overwrite the default behavior.
This package uses actions which allows you to implement your own custom logic. An action class is nothing more than a
simple class with a method that executes some
logic. Learn more about actions
To create a custom action, first create a file within your project and name
it CustomGetResourceLockOwnerAction.php, for
example. In this file, create a new class that extends the GetResourceLockOwnerAction class and override the
execute
method to return the desired identifier. For example:
// CustomGetResourceLockOwnerAction.php
namespace App\Actions;
use Kenepa\ResourceLock\Actions\GetResourceLockOwnerAction;
class CustomResourceLockOwnerAction extends GetResourceLockOwnerAction
{
public function execute($userModel): string|null
{
return $userModel->email;
}
}
Next, register your custom action within the resource-lock.config file. Replace the default
get_resource_lock_owner_action value with your custom action's class name. For example:
// resource-lock.php
'actions' => [
- 'get_resource_lock_owner_action' => \Kenepa\ResourceLock\Actions\GetResourceLockOwnerAction::class
+ 'get_resource_lock_owner_action' => \Kenepa\ResourceLock\Actions\CustomGetResourceLockOwnerAction::class
],
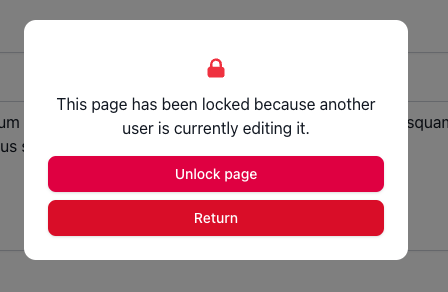
#Overriding default functionality
If you need some custom functionality beyond what the traits provide, you can override the functions that they use. For
example, if you want to change the URL that the "Return" button redirects to, you can override the
resourceLockReturnUrl() function. By default, this button takes you to the index page of the resource, but you can
change it to whatever URL you want by adding your custom implementation in the resourceLockReturnUrl() function.
For instance, if you want the "Return" button to redirect to https://laracasts.com, you can override the function as
follows:
public function resourceLockReturnUrl(): string
{
return 'https://laracasts.com';
}
Now the return url will redirect to laracasts.com
This will change the behavior of the "Return" button to redirect to the provided URL.
#Publishing migrations, configuration and view
php artisan vendor:publish --tag="resource-lock-migrations"
php artisan migrate
You can publish and run the migrations with:
php artisan vendor:publish --tag="resource-lock-migrations"
php artisan migrate
You can publish the config file with:
php artisan vendor:publish --tag="resource-lock-config"
Optionally, you can publish the views using
Note: Publishing Blade views can introduce breaking changes into your app. If you're interested in how to stay
safe, see this article by Dan Harrin.
php artisan vendor:publish --tag="resource-lock-views"
#Coming soon
- Locked status indicator for table rows
- Polling
- Optimistic Locking
#Changelog
Please see CHANGELOG for more information on what has changed recently.
#Contributing
Please see CONTRIBUTING for details.
#License
The MIT License (MIT). Please see License File for more information.


